Weaving 101

Heather of Poppy Haus is with us today to share a DIY on a wonderful weaving project for kids and grown-ups… I can’t wait to try it!
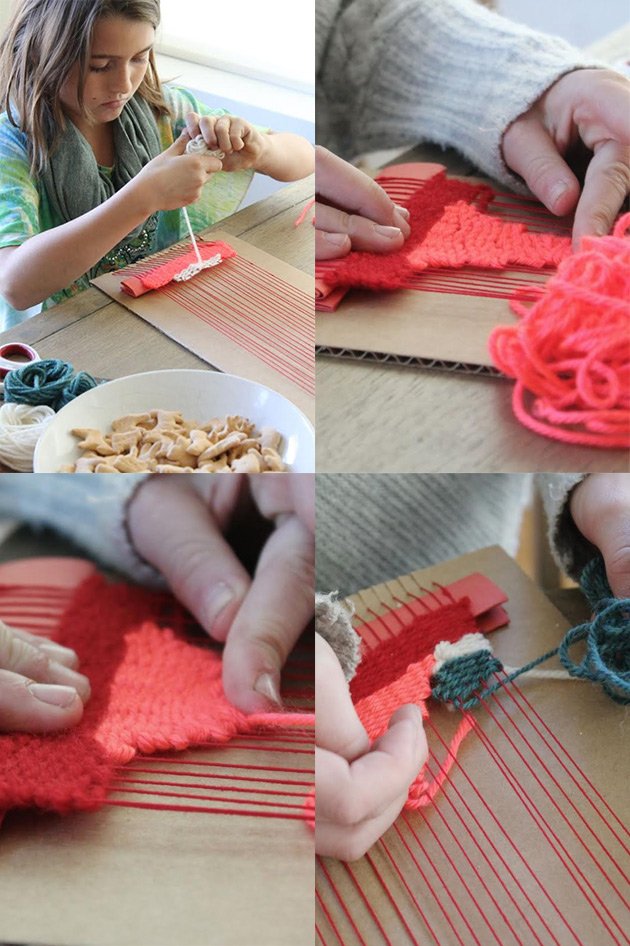
In addition to being a mom and a DIY blogger, I am also an Interior Design student. Earlier this year I took a textiles class where I learned about fibers, fabrics, printing techniques, and weaves. One of our final assignments had us building simple looms from a piece of cardboard and string to create a wool tapestry using a variety of weaving techniques. For this post, I sat down with a couple of crafty 10 year olds, Ella and Amelia, and following the same steps, they built their own looms and tapestries. This is my favorite kind of project; the kind where math and art combine, and composition and craftsmanship influence the end result. I think they did a beautiful job! Here’s the tutorial in full. Follow along with the photos and it won’t feel all that complicated, I promise.
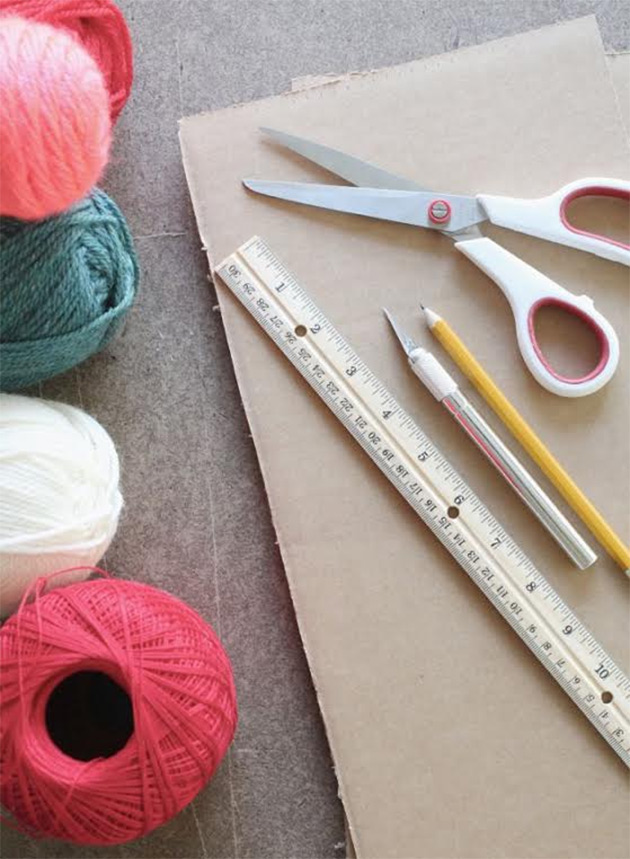
Materials:
- 1 piece of cardboard, at least 8 inches wide, and 15 inches long
- Embroidery thread, or thin string, about 14 yards
- 1 piece of construction paper or cardstock
- Pencil
- Ruler
- Scissors
- Yarn (multiple colors)
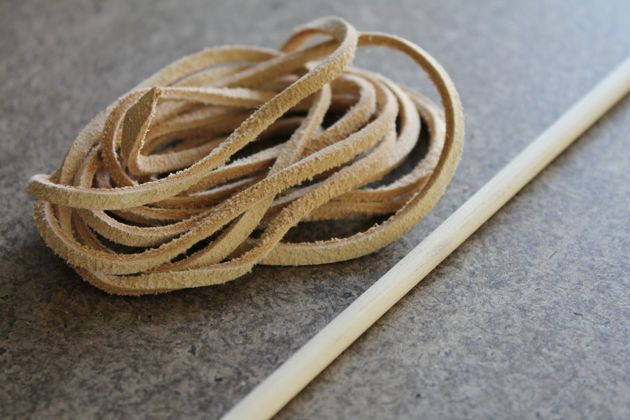
- Wooden dowel or stick, cut to about 8”
- Leather or twine for hanging
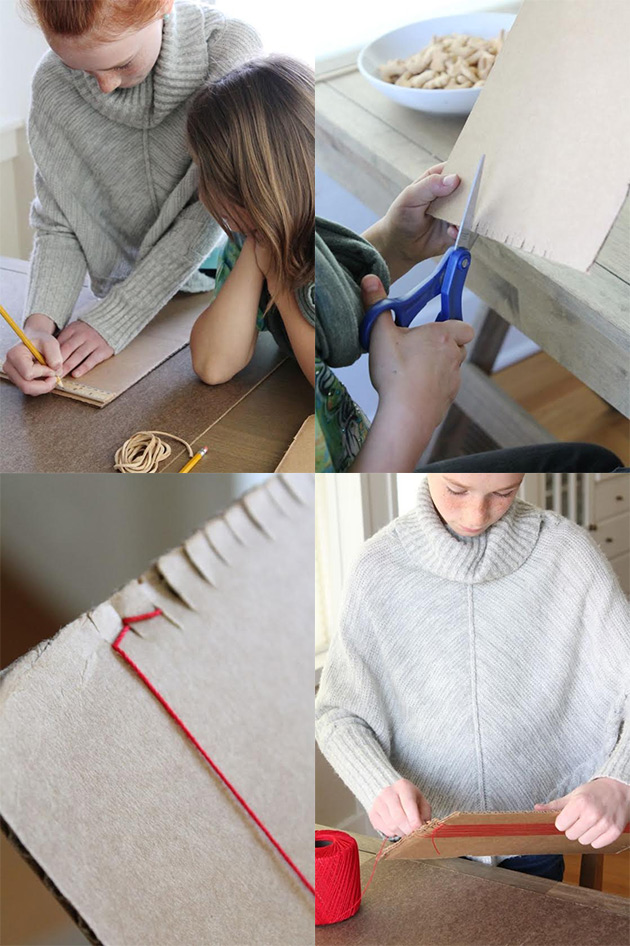
Step 1: Making the loom
-
Using a ruler, mark the center point of the width, and mark ¼” segments 10 each side of center, a total of 21. Repeat on the other end. Cut the segments ¼” deep with a pair of scissors.
-
Wrap the end of the thread around the outermost cut, winding in one or two spaces, then back to the outer cut to secure the thread.
-
Wind around, lengthwise, end to end, with decent tension (do not warp cardboard) until you reach the last cut on the other side, secure in the same way, by wrapping back in and out, and trim the end. You have made the warp! And you are ready to weave in the yarn, crosswise, this is called the weft.
-
Fold a piece of construction paper in half lengthwise, then fold until it is about ½”x 8”, insert under the strings on one end. This lifts them for weaving.
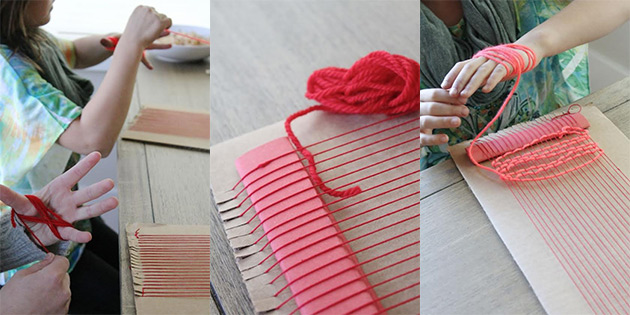
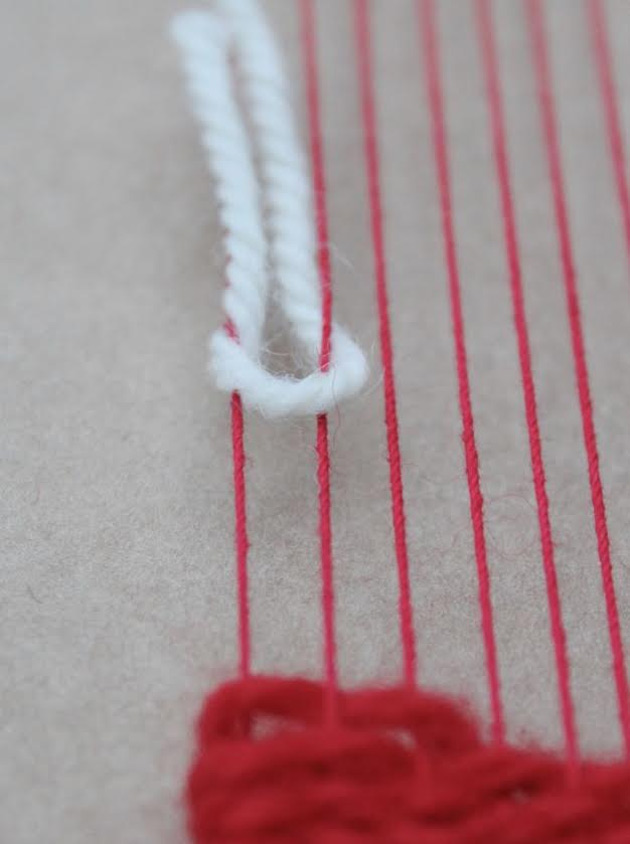
Step 2: Plain Weave (Tabby Weave)
-
To start weaving, wrap a few feet of yarn around your pinky and thumb to form a skein.
-
Starting from the left side, with the loom in front of you, lengthwise, paper side closest to you, insert the end of the skein in and out the first few warp strings, tuck the end down toward the paper.
-
Starting from left to right, weave over and under each warp thread, back and forth either side. keep it really LOOSE, if you make it too tight, it’ll pull the warp threads together and the tapestry won’t be straight. Do about 10 rows to make a full inch. Push it down to compact and make the weave tight.
Step 3: Sloping
-
After an inch or so of tabby, starting 4 warp strings in, anchor your yarn as you did with the plain weave, and work back and forth, plain weave, to the other side, 4 places in. Do this for 5 rows, the drop a warp thread each side, repeat for another 5 rows, drop another each side, repeat, until you get to just two warp threads, winding around 5 rows, cut off and tuck under. You now have a big triangle.
-
To fill in the sides of the triangle, tabby back and forth in different colors, varying the width of each row, to create a gradual sloping effect.
-
Follow with another inch (10 rows) of plain weave.
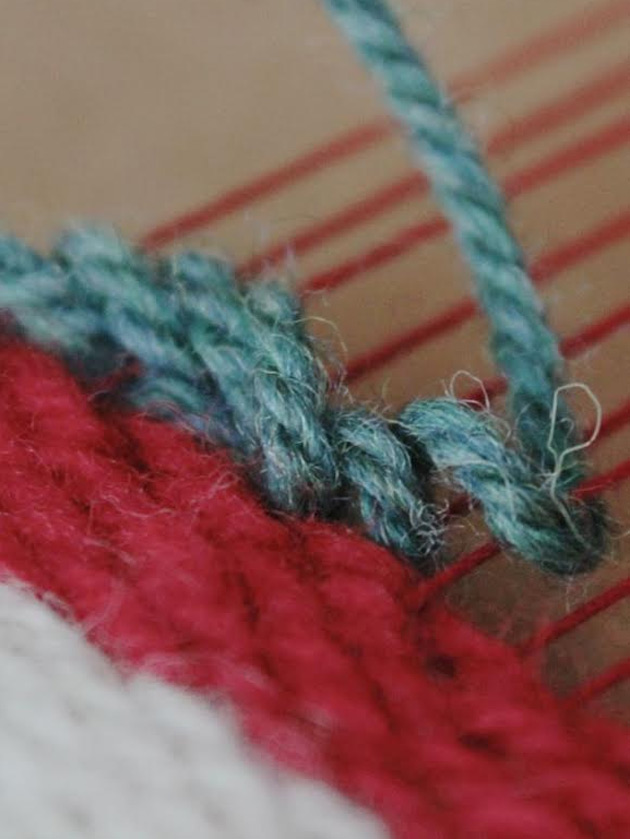
Step 4: The Swedish Braid
-
Anchor your yarn, and go over 2 warp threads, looping under the 2nd thread, repeat all the way across.
-
Go back and forth at least 4 times to create an inch of braid.
-
Follow with another inch of plain weave
Step 5: Dovetail
-
Working with three different skeins of yarn, create color block by interlocking weaves as they meet on warp yarns. To do this divide the loom into three sections, of 7 warp threads each. Tabby across, when, where they meet, twist the yarns around one another and turn back, the middle row will interlock on both sides, or one of the outer blocks can not connect, leaving a slot.
-
Follow with another inch of plain weave.
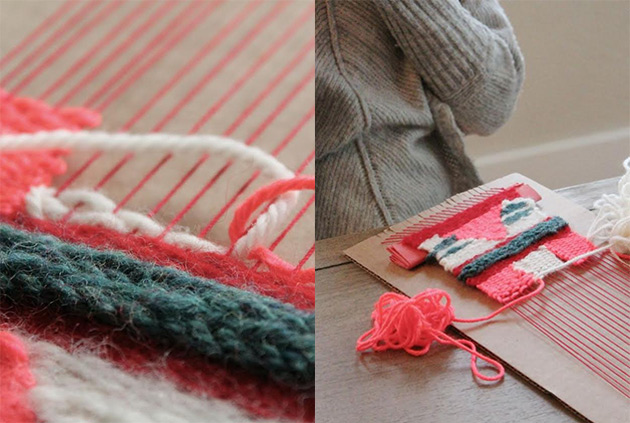
Step 7: RYA Weave (the fringe weave)
-
This one is fun! Cut yarn several (40-60) 1 ½ inch pieces of yarn.
-
Center the yarn over two warp threads and pull ends up through the warp. Go across one row.
-
On the return (right to left) drop the first warp thread so that your knot will offset from the first row. Repeat for 3-4 rows.
-
Follow with an inch of plain weave.
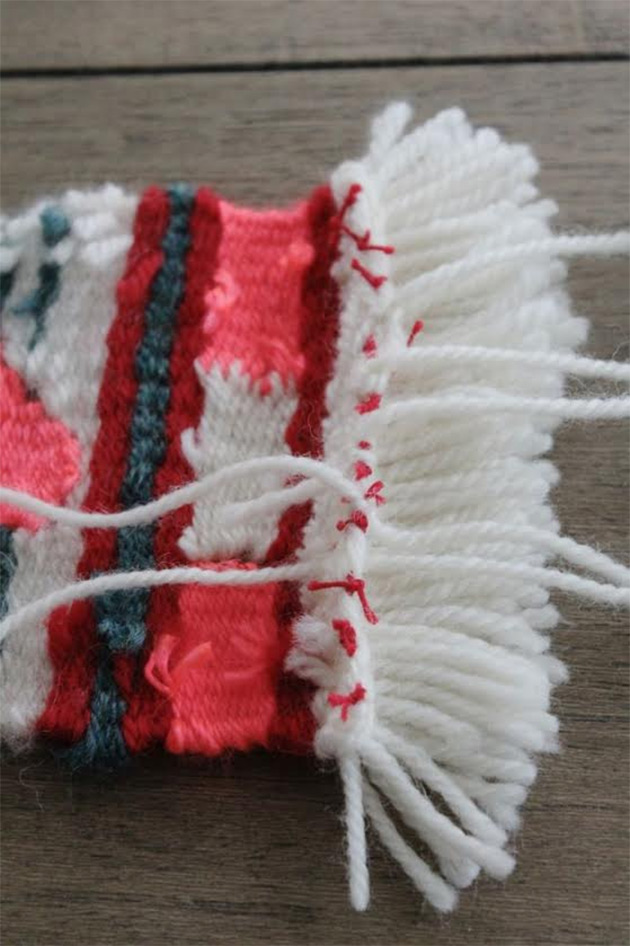
Step 8: Tie it Off
-
Pull the paper guide out of the loom, and compress the weave, it will be about 5”x5”.
-
Cut the warp threads (leaving 5 inches of thread on either side to tie off.
-
Use a square knot to tie 2 threads together at a time, trim flush with the tapestry.
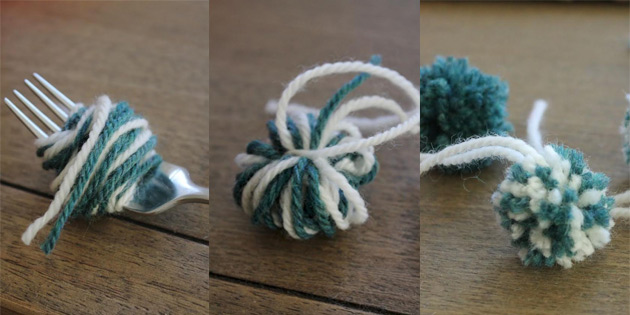
Step 9: Tassels!
-
I made pom-pom tassels for the girls to hang off their tapestries. To do this just wrap yarn around the tines of a fork, about 50 revolutions.
-
Remove the looped yarn, tying around the middle with another piece of yarn.
-
Cut the loops and even out to make a perfect ball
-
Attach to the back side of the tapestry with a piece of yarn, just by knotting through some of the weave under the RYA tufting.
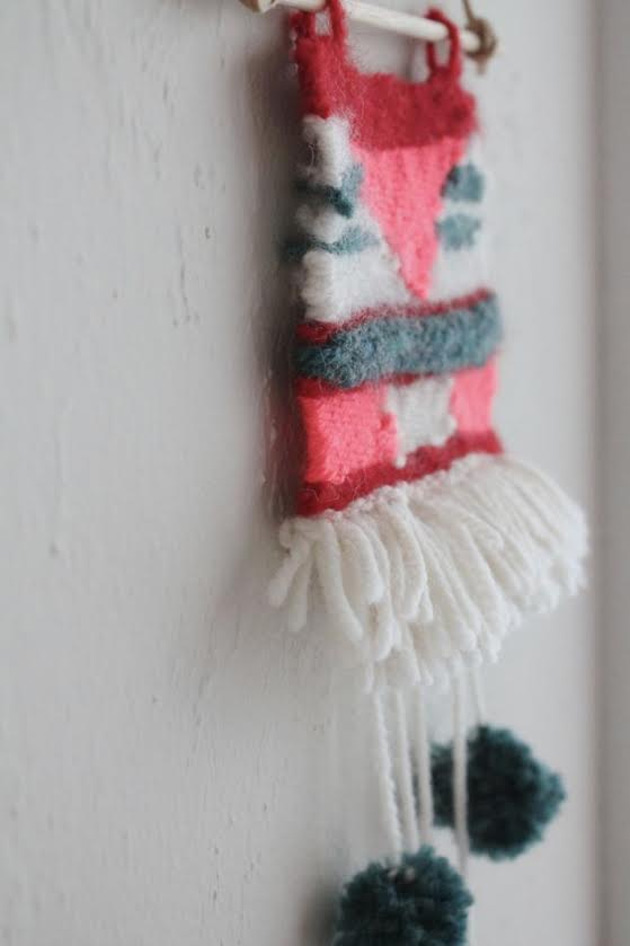
Step 10: Hang and Enjoy!
-
I attached the tapestry to the dowel by looping pieces of yarn through the weave, tying it off, trimming and inserting the dowel.
-
Knot a piece of leather cord around either end of the dowel and you are finished!