Playful Geometry: Turning Circles into Triangles
Years ago I picked up the book A Beginners Guide to Constructing the Universe by Michael Schneider. It was exactly what I had been looking for to enhance my children’s geometry lessons. Today I am sharing one of the first lessons from the book and one of my children’s favorite – making triangles from circles.
You will need:
- Graph paper
- A ruler or other straight edge tool
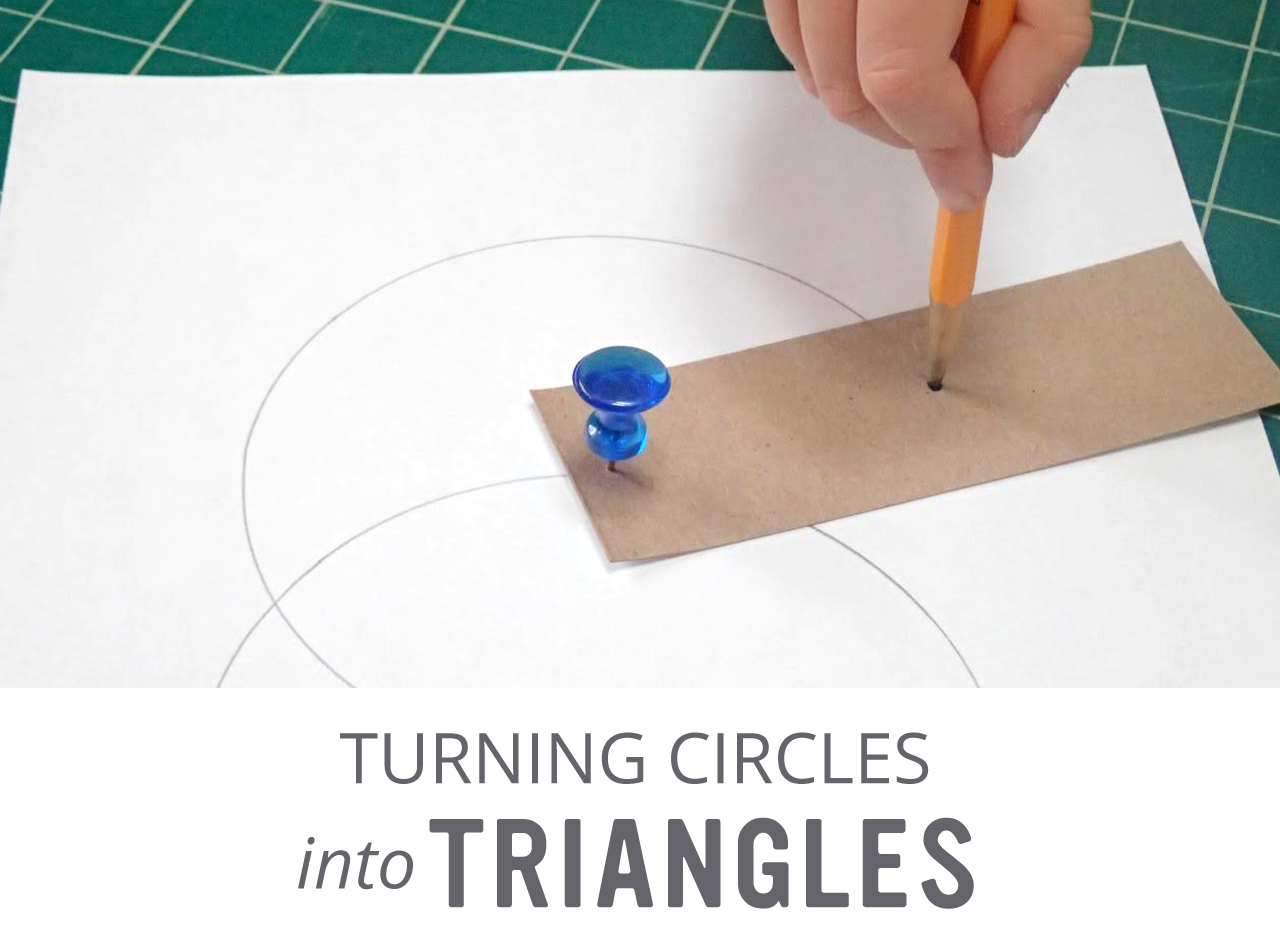
- A compass with a sharpened pencil. Note – If manipulating a compass is a challenge for your child, circles can also be made using a strip of cardboard, a pushpin, and a pencil or pen as demonstrated in the photo above.
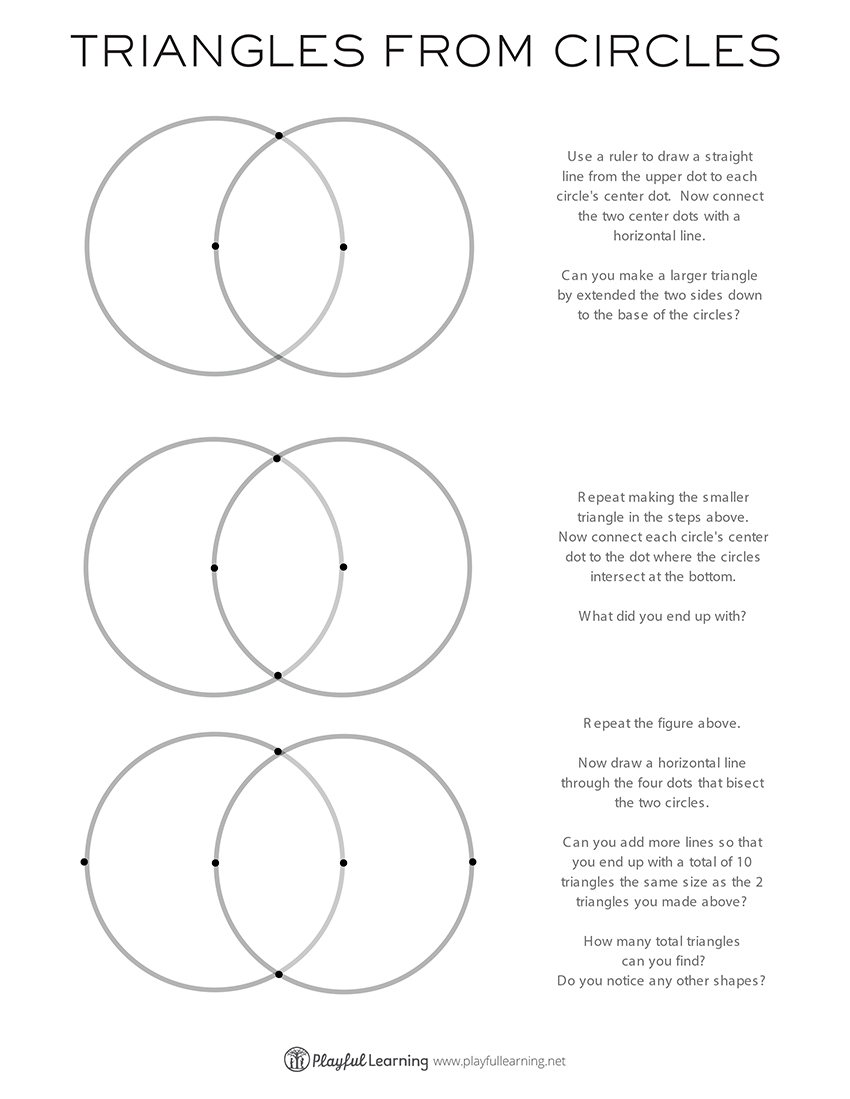
The lesson begins with your child drawing a circle around a center point (created by the compass point). A point on the graph paper is the perfect place to start. Having the center of the circle marked is important for this activity. You will see why shortly. Once the circle is drawn I like to make a pencil dot on the center point to it can easily be seen.
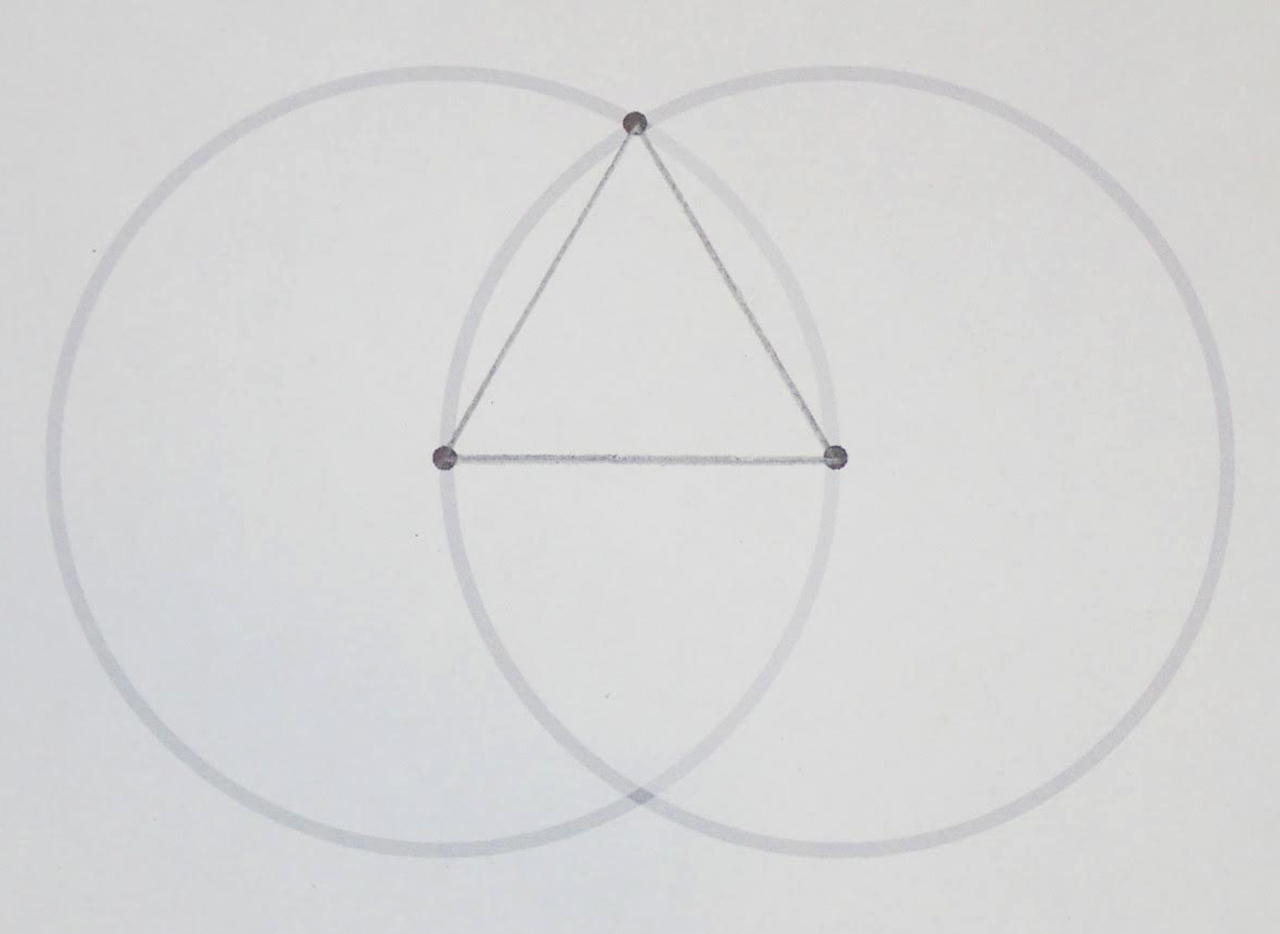
Now place the point of the compass (or pin on the cardboard strip) on the circumference of the circle horizontally from the center point of the circle. You can follow the line on the graph paper. Draw a second circle and again darken the center point. Each circle should cross through the center of the other.
Make a dot where the circles intersect at the top. Using the ruler, draw a straight line from the top dot to each center point. Then connect each center dot with a horizontal line. This is the birth of the triangle! How neat is that?
It doesn’t end there though. This is a great time to ask “I wonder” questions and explore deeper by adding more points to connect. Our printable will help get you started.
After completing the printable, you will see that all the triangles created are equilateral triangles. If you connect other points does a different type of triangle emerge? Do you notice other shapes?
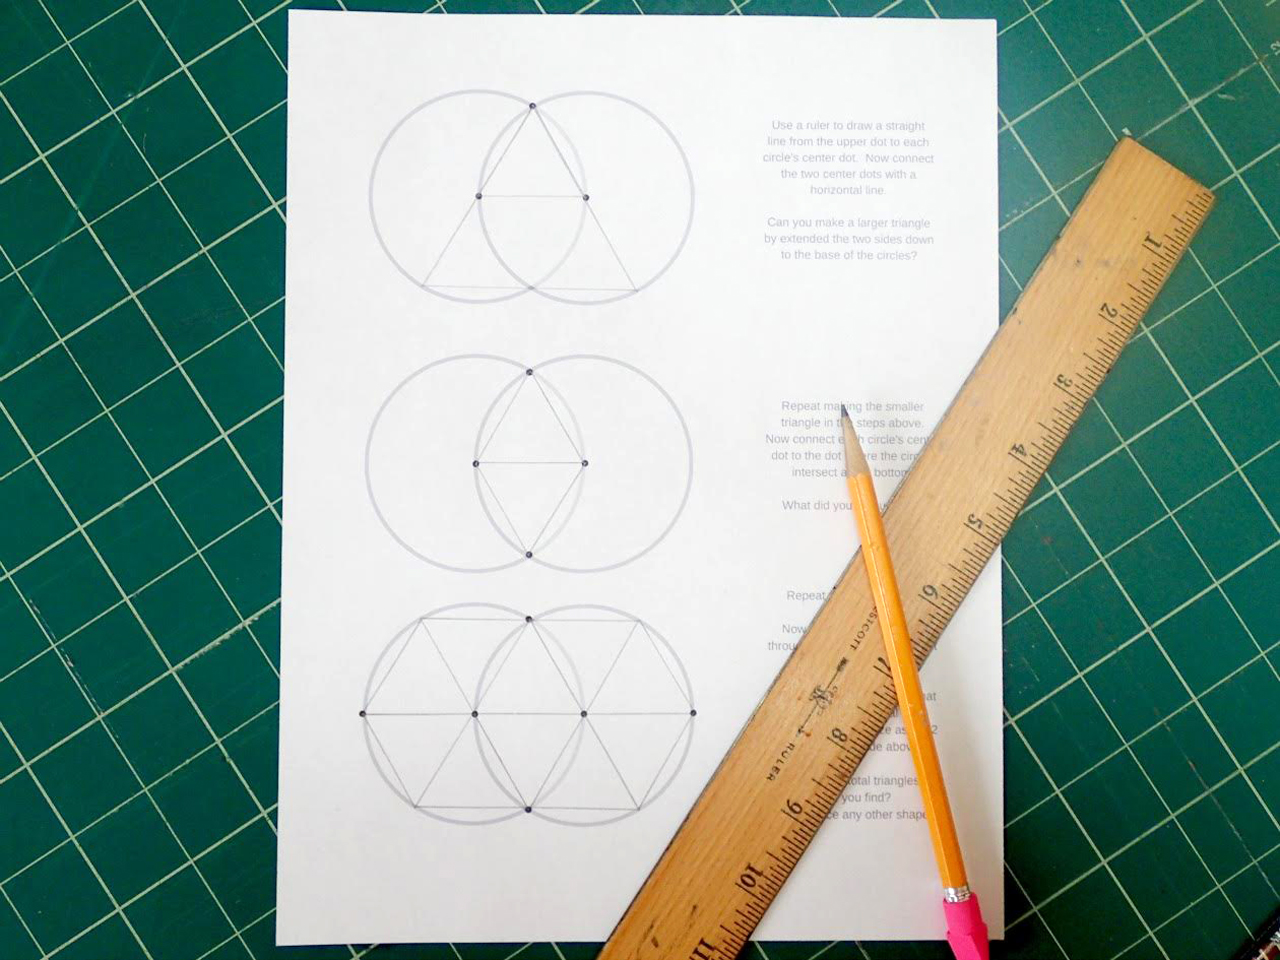
Have fun and don’t be afraid to experiment or add your own flair!