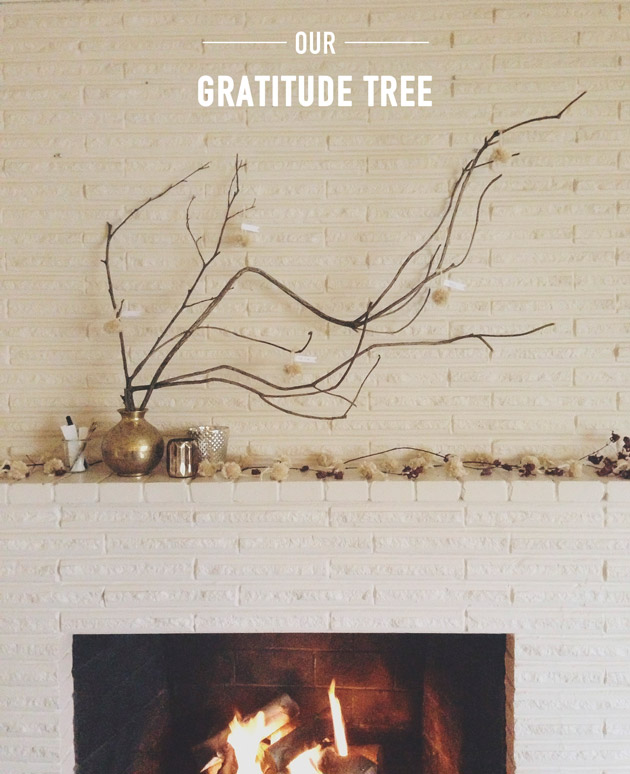
Category: Seasonal


Our Gratitude Tree

By Mariah Bruehl,

Our Gratitude Tree

“Gratitude unlocks the fullness of life. It turns what we have into enough, and more. It turns denial into acceptance, chaos to order, confusion to clarity. It can a meal into a feast, a house into a home, a stranger into a friend.” -Melody Beattie


With family gatherings to plan and Christmas lists looming, it’s easy to let the meaning of Thanksgiving get lost or watered down. Ideally we would live in a constant state of gratitude, but I like the subtle reminder that Thanksgiving brings us each year. An excuse to stop and take pause-be thankful for all things, both big and small. I especially think it’s wonderful to teach this to our children in a world obsessed with having more. Last year we took an afternoon and composed a gratitude list, it was both endearing and eye-opening to see the things my children thought of. This year we decided to expand on that idea and take a moment each day to add at least one thing to a month-long gratitude list in the form of a gratitude tree.

Our Gratitude Tree

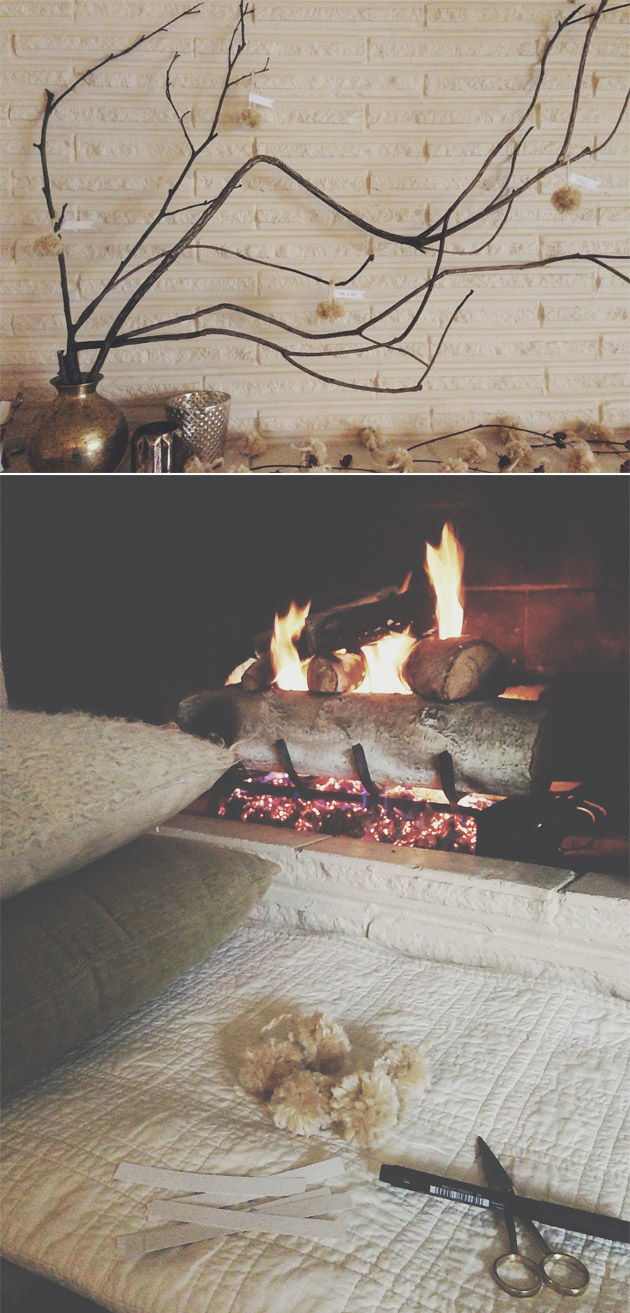
When a quiet moment arises each day, my girls and I sit by the fire, write down something we’re thankful for, and then attach it to our tree. I love the idea of something tangible and beautiful to represent these thoughts we are focusing on this month. We decided to make fuzzy pom-poms from yarn and hang them from our tree with the pieces of our growing list attached to each one.

Our Gratitude Tree

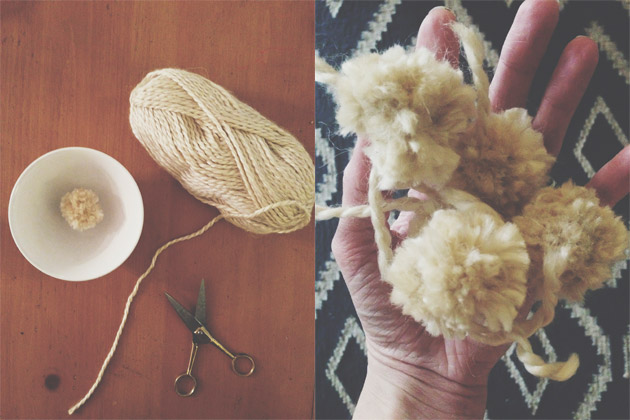
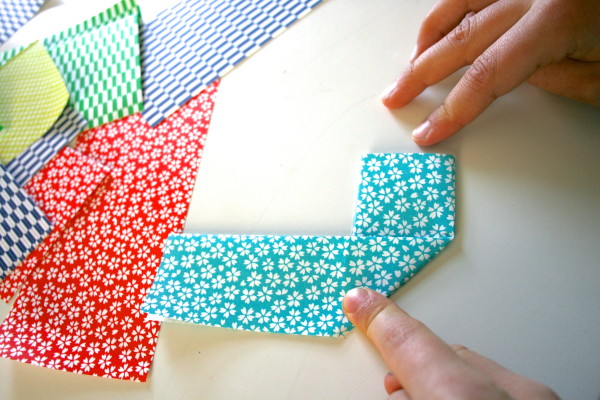
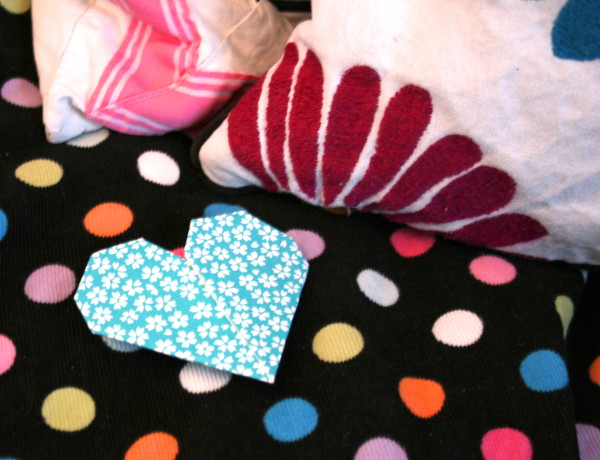
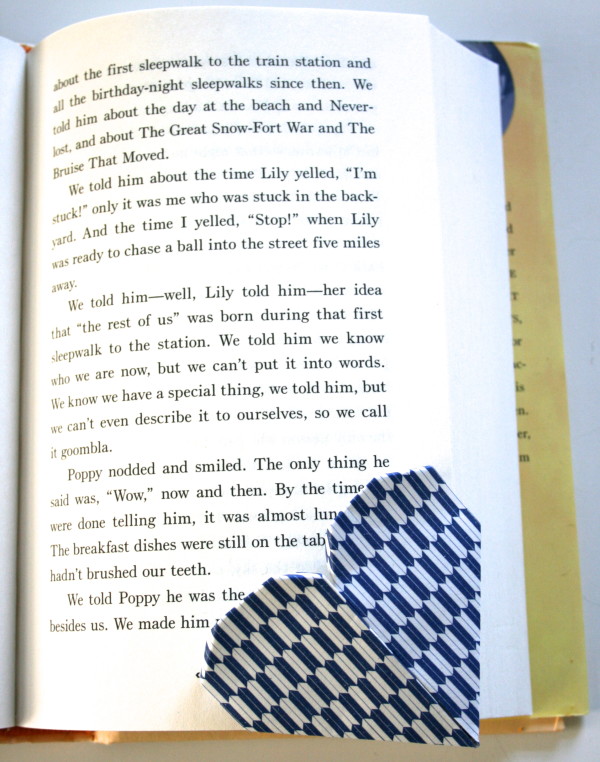
All you need to make a tree of your own is a few gathered branches, a vessel to hold them, and some slips of paper. Adding an extra object like our pom-poms into the mix isn’t necessary, but adds to the fun! You could choose anything you want, from acorns to leaves. You could also choose to cut your paper into fun shapes instead, like stars or feathers.

Our Gratitude Tree

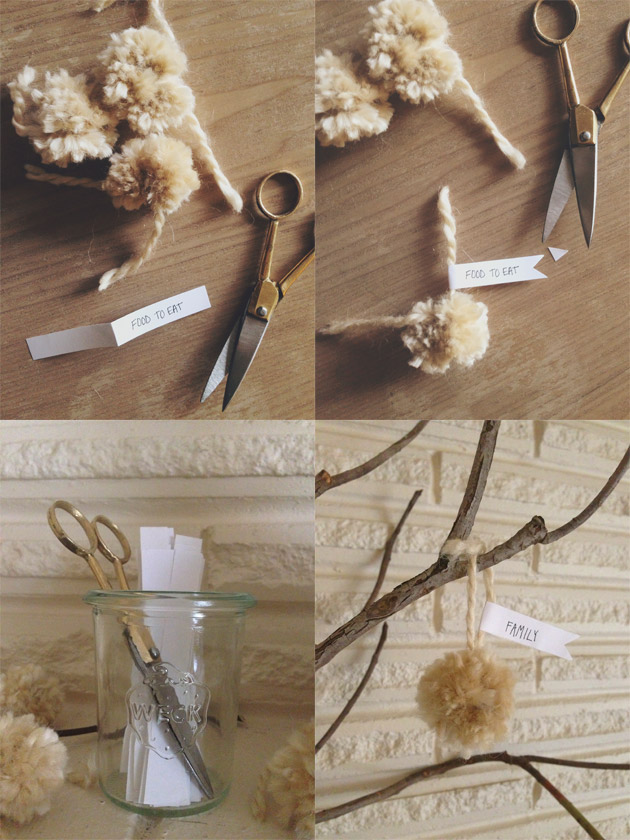
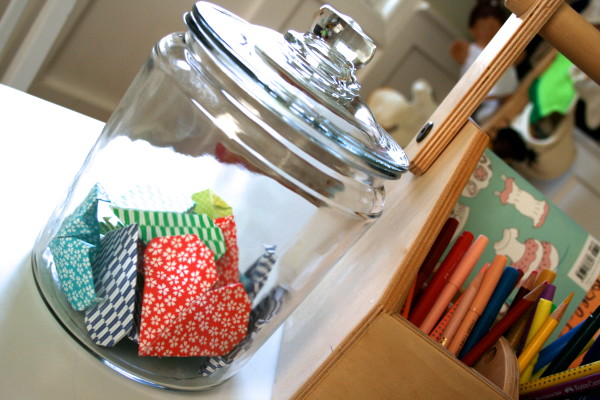
To make things easy, we used full sheet label paper to make our strips. Simply fold each strip in half, write your thought, pull the backing off and attach to your pom-pom or other object. The most important thing is to make things fun and accessible for the little ones. My girls love seeing all of the pom-poms on display and enjoy taking turns picking out the one we will use. Our strips, scissors, and pen are stored in a jar right next to the tree.

Whatever you choose to do, I hope you are able to pause for a moment with the ones you love and reflect on all that you are grateful for this month. It’s not too late to create a special moment with your little ones!

Gardening for Kids: Germinating Seeds

By Mariah Bruehl,

Gardening with Kids: Germinating Seeds

I love seeing all of the signs of spring popping up around the web from our friends in Australia! Kate from An Everyday Story is here to share some great tips on germinating seeds with the little gardeners in our lives.

It’s spring here in Australia. All around us the plants and trees are awakening from their winter slumber. The yellow wattle trees are in full bloom and the neighborhood is bursting with blossom trees in all shades of pink, white and brilliant red.

We’ve been spending a lot of time in the garden this last week; tending to our neglected little vegetable plot. Not much beats turning over soil, pulling weeds and spending time in the warm sun.

Gardening with Kids: Germinating Seeds germination3

My son Jack (4yrs) has been curious about how plants grow, he wanted to germinate some seeds.

So with a tiny greenhouse from the hardware store and mix of seeds left over from last season, Jack and Sarah (2yrs) planted their seeds. We planted corn, snow peas and sunflowers.

Gardening with Kids: Germinating Seeds

We talked about what seeds need to grow, why the roots grow down and the plant grows up. We also planted one snow pea seed in a glass jar with some wet cotton wool and placed them on the windowsill.

Everyday Jack checks his seed to see how it is growing. Having the seed in the glass jar means Jack and Sarah can see what is happening underneath the soil in their tiny greenhouse.

Gardening with Kids: Germinating Seeds

First we noticed the seed swelling, then a small dot appeared on the seed. The following day a tiny root appeared. Soon a little green plant emerged from the seed.

If you’re heading out into the garden to plant some seeds with your little ones, I really recommend germinating a couple of seeds in a glass jar. While the seeds sit hidden in the soil, the glass jar gives the child a little window into what is happening, maintaining their interest in the project for longer.

Gardening with Kids: Germinating Seeds

We are looking forward to when our seedlings pop through the soil and transplanting them into the vegetable garden. I do really love gardening with children; plants, especially vegetables, require long term care while providing wonderful hands-on learning experiences along the way.

And at the end of all that hard work and care, they will have some delicious vegetables to harvest and eat. That is always the most exciting part.


Healthy Frozen Treats: Probiotic Popsicles

By Mariah Bruehl,

Peaceable Home....Healthy Frozen Treats: Probiotic PopsiclesEmma from 95 Acres of Sky is with us today with a delicious recipe for probiotic popsicles—a wonderful way to give your children a special treat that we as parents can feel good about.

During the busy, sometimes hectic and overheated, days of summer getting motivated to cook can be hard.  I often find my food mojo goes on vacation as the temperatures rise (and rise).  As my creativity and enthusiasm take a dip so does the family appetite, the children don’t want to sit for large meals when they could be running, swimming or playing with friends.

Rather than fight this phenomenon I prefer to go with a few ‘light days’, providing healthy snack type meals that are packed full of goodness but light on the stomach.  These often revolve around tapas type meals with little bits of meat, cheese, salad, hummus, crackers and fruits that are easy to assemble and are handily portable if we find ourselves heading out for yet another round of summer fun.

But when the temperatures really soar I turn to a summer staple, fruit popsicles and homemade energy bars.  These frozen treats are a hit with my boys, cooling them down and giving them a good dose of energy without the table time struggles of a full meal. They can function as a snack or a summer ‘mini meal’, just before we head out to the pool or a play date.

Peaceable Home....Healthy Frozen Treats: Probiotic Popsicles

This year I’ve been more conscious than ever of trying to pack as much nutrition into every bite as possible.  My growing lads are so full of energy, but liable to crash hard when their tummies feel suddenly empty.  With increasingly busy schedules it is even more important for them to be eating nutritionally dense foods that support their growth and development.

Of course that doesn’t mean boring!  The more delicious a food is the more likely they are to want to eat it, so good flavor is key. I’m also conscious of taking any opportunity I can to introduce probiotics and key nutrients into their systems; despite the massive range of foods available to us in these modern times, we are often consuming empty calories filled with sugar and additives, those foods marketed to children are particularly guilty.

So instead of reaching for the freezer section at my local store I reach for my blender and whip up a batch of probiotic popsicles, chased down with an energy bar packed with natural sweetness and a good dose of omegas.  If making popsicles is a bit of a fuss these recipes make delicious smoothies too.

Probiotic Strawberry Popsicles

  •  2 cups of chopped strawberries (a great way to use some softer or imperfect fruits)
  • ½ cup of milk kefir (a probiotic drink thinner than yogurt)
  • 1 tablespoon of raw honey

Blend all of the ingredients together and pour into molds or straight into a glass.  The kefir helps build gut flora which builds immunity and health in the body.  It has a tart taste so a little raw honey (which helps protect against seasonal allergies) is a great addition.

Peaceable Home: Healthy Frozen Treats

Fruits of the Forest Popsicles with  Vanilla Yogurt

  • 2 cups of mixed berries (blackberries, blueberries, raspberries etc)
  • ½ cup of spinach
  • 1 tablespoon of raw honey or 2 medjool dates

For yogurt topping:

  • ½ cup of plain yogurt
  • ½ – 1 teaspoon of pure vanilla extract

Blend the popsicle ingredients together and set aside.  Mix the yoghurt and vanilla in a bowl and then add in layers with the fruit smoothie to your popsicle molds.  This gives a visual interest as well as a delicious layer of probiotics to soothe and cool hot tummies.  Alternatively serve as a smoothie with a delicious yogurt dollop on top.

I hope that you give these recipes a try, enjoy and stay cool!


Summer Science: Alka-Seltzer Rockets

By Mariah Bruehl,

Alka-Seltzer Rockets

Originally published as a part of the first annual Alphabet Glue Summer Science Special, this project has gotten great feedback from families looking for some simple and science-centric summer fun. Alka-Seltzer rockets might very well be the classic science experiment.  Incredibly easy to put together and launch, these diminutive rockets are good entertainment with tons of potential for the type of trial and error experimentation that makes an excellent first foray into the field of physics.

This link will take you to a downloadable PDF file with experiment instructions, printable templates for rocket decorations, and a leveled book list filled with great titles for reading up on all things rockets.

Alka-Seltzer Rockets

A quick note about materials:
In the era of digital everything, film canisters like the type used here are increasingly difficult to find. For this reason, science supply and teacher supply shops will often sell canisters just for this type of experiment.  We got ours from Steve Spangler Science (www.stevespangler.com).


Making Quick Pickles: A Summertime Adventure

By Mariah Bruehl,

Making Quick Pickles

We are a family that loves pickles and there is nothing like having them homemade and  fresh from the garden! Heather of Poppy Haus is with us today to share a lovely recipe for making a quick batch…

We are lucky to live in a part of California where the farmlands meet the ocean, and you can lose yourself in the rolling hills peppered with wild dill.  On a recent  sunny summer day, we took a drive down a winding back road near the town of Tomales, and found a little creek with blackberry bushes and a wild dill grove.  My boys worked together to clip some blooms to bring back home for a day of pickling cucumbers.

Making Quick Pickles

I have the apparatus to do home canning, but with young kids, I prefer refrigerator pickling, which takes little time or skill, and yields a nice, crunchy pickle slice.  You just have to make small batches, and eat them within a few weeks, which is is no problem for my family.  If you can’t find wild dill growing in your area, it’s in season now and readily available at most grocery stores and farmer’s markets. Here’s the recipe:

Making Quick Pickles

 Quick Dill Sandwich Pickles

  • 3 pounds small pickler cucumbers (Kirby or Liberty)
  • 3 cups white distilled vinegar
  • 3 cups water
  • ¼ cup pickling salt (fine)
  • 3 tablespoons pickling spice (a blend of bay leaf, allspice, mustard seed)
  • 4 fresh dill heads
  • 4 garlic cloves, peeled (1 per jar)
  • 1 teaspoon dill seed per jar (4 teaspoons total)

1. Hot wash and dry 4 pint sized wide mouth jars and lids

(I use Ball’s plastic storage caps for refrigerator pickles)

Making Quick Pickles

 2. Wash and slice the cucumbers to about .5cm thick.

3. Put the pickling spice in a layer of cheese cloth, and tie into a pouch with bakers twine.

 4. In a large pot, combine vinegar, water, salt, and spice pouch. Bring to a simmer.

Making Quick Pickles

 5. Arrange jars on counter and place dill heads, garlic, and dill seeds to each.

 6. Pack the cucumber slices firmly into the jars.

Making Quick Pickles

 7. Pour the brine into the jar, leaving approximately ½ inch head space.

 8. Tap jars gently on countertop to dislodge any trapped air bubbles.

 9. Apply caps and let jars cool.

 10. When they’ve returned to room temperature, place jars in refrigerator. Let them sit for a day before eating.

Making Quick Pickles

10 Ways to Beat Summer Boredom

By Mariah Bruehl,

Ten Ways to Beat Summer Boredom

Randi from Swoon is with us today with a lovely list of activities that we can share with our children during these precious summer months…

Having the children at home during the summer is a special treat, but I think we can all admit that certain days are more challenging than others. When boredom hits and the children start to complain, or worse yet, begin to get into trouble, it’s a great idea to have a list of new activities up your sleeve. We’ve been out of school for about a month now here and I’m starting the hear the familiar proclamations of “there’s nothing to do!” and “can I just watch more TV?” I came up with a list of new to us activities recently that I can’t wait to try. I thought I would share them here, because chances are you’ve hit the same point in your house. All of these activities can be done by toddlers and involve things you probably have in your house right now. Super easy, right?

10 Ways to Beat Summer Boredom

1. Paint with Water. Yes, you read that right. Send them outside with containers of water and an assortment of brushes and let them have at it!  Paint on the porch, the sidewalk, and the outdoor toys.This can also be done on a chalkboard. {Photo credit}

2. Pencil Eraser Stamping. Press the bottom of a pencil eraser into a stamp pad and use to make all sorts of art. You can make animals shapes, greeting cards or your own wrapping paper. {Photo credit}

3. Play with your food. Make lunch or snack time fun by making faces, animals, or shapes out of your food. {Photo credit}

4. Mr. Printables. Got a printer and some paper? Visit the Mr. Printables website and browse all of the amazing and free printable projects, like these clever bird finger puppets.

5. Make some Land Art. Gather natural materials from your yard or on a family walk. Use them to make fun designs on the ground. Find this photo and more inspiration here.

10 Ways to Beat Summer Boredom

6. Set up a Miniature Scene. Grab a box or container and a few of your child’s favorite animals or small toys and set up a little scene. Make icebergs by freezing bowls of water and adding rocks for a North Pole scene. Or, use dried beans to make an interactive Construction Site scene.

7. Raid the Recycling Bin. A quick internet search will yield hundreds of ideas for cardboard and other things in your recycle bin. I love the simplicity of these hilarious monster feet-such a genius idea!

10 Ways to Beat Summer Boredom

8. Grape and Toothpick Sculptures. How fun! You could also try using wooden skewers instead of toothpicks to make larger structures. The perfect just-before-snack activity.

9. Paint Rocks. Set up a workstation with newspaper, a pile of rocks, and some acrylic paint and painting supplies.

10. Practice Your Letters. Make your own simple letter activity using a shallow tray or box and salt. Find the instructions here.

Fairy Garden in a Box

By Mariah Bruehl,

title3.jpg

Have you heard about the lovely little fairy gardens people are making lately? The concept is for children to make a little garden space where fairies would be comfortable, should they decide to show up. Since my children have recently fallen in love with the magic of gardens and all the living things within, I knew they would be enchanted with this idea.

There are a lot of talented people who have spent a lot of time making amazing, elaborate fairy gardens (you can see a few here and here). When you’re just getting started, the sheer amount of ideas out there can seem overwhelming. I’ve found, however, that you really only need a few simple things. I love the idea of placing the items in a box, tying it with string, and presenting it to a little one in your life. The rest is up to them!

Fairy Garden in a Box

Gather a simple box and fill it with:

1. A few plants and flowers. These can be store bought, or from your own garden.

2. Dried moss. This can be found at craft and garden stores. It makes for a pretty addition and the children will love the fact that they can move it around the garden as much as they would like. The moss won’t actually grow, but it will stay in good shape with regular watering.

3. A small bag of rocks. These can be used to build things, make paths, or as decoration in your garden.

4. A few embellishments. We stumbled upon a fairy section at the gardening store and decided to buy a few trinkets, but you probably have a lot of usable items around the house and outside. Spools, thimbles, and sticks all work great! You can also fashion your own shapes out of clay. Get your children involved in finding things, they will love it!

Fairy Garden in a Box

Pick a small container or corner of your yard and get started. I assisted with the planting in our garden, but the rest was up to my little designers. They enjoyed digging in the dirt and making rock paths. Watering the flowers was especially fun for them too. I anticipate our garden evolving and changing a little every time we visit it!

Here are a few books to get you started:

How to Find Flower Fairies (our favorite!)

The Complete Book of Flower Fairies

Fairy Houses

Fairy Gardens: A Guide to Growing an Enchanted Miniature World


Yoga for Kids: March is Like the Wind

By Mariah Bruehl,

Yoga for Kids: March is like the wind

Monique Barker is with us today sharing some great yoga poses that we can do with our children during this windy time of year. I love that Monique’s yoga series inspires us to tune into our bodies while at the same time honoring the changing seasons.

Hello.  Welcome back to our monthly Yoga series!  Given the weather we’ve been having lately here in the Northeast and looking at the busy March calendar, I’ve had the idiom “March comes in like a lion and goes out like a lamb” on my mind.  It struck me that this would be a good basis for a Yoga sequence but I just wasn’t sure how.  Then I came across this lovely little book at our library and it all came together.

The book tells a story about the many moods of the wind and a child that wants “to play like the wind.” We see that the wind can be mischievous…

Blowing hats off...

Blowing hats off

playful…

Making flags wave

Making flags wave

helpful…

Sailing a boat

Sailing a boat

and strong.

The accompanying Yoga sequence incorporates many of the wind’s moods and abilities (which are a lot like children’s).  It will bring your child from a gentle breeze to a strong, playful wind and back again.  Even without the book, I know you’ll have fun acting out all the characteristics of the wind with your child.  Just click the download to get started.  I hope you enjoy!
Download: March Yoga: Like the Wind


Small Acts: Simple Origami Hearts

By Mariah Bruehl,

Small Acts: Simple Origami Hearts

I have been pondering the approaching Valentine’s Day season. This year I thought it would be fun to focus on simple, small acts that remind the people in our lives how much we love them.

When I came across this DIY on origami hearts, I know it would be an activity that we could share in as a family and that would lend itself nicely to this notion of leaving sweet little surprises for the ones we love in places where they will least suspect them.

Small Acts: Simple Origami Hearts

Because of this simple tutorial, the girls picked up the steps quickly. We had a lovely time chatting and making a plethora of sweet, colorful origami hearts.

Small Acts: Simple Origami Hearts

We found a jar to house our new abundance of hearts, so they are at the ready when someone could use a dose of love.

Small Acts: Simple Origami Hearts

They have been popping up all over the house… In lunchboxes.

Small Acts: Simple Origami Hearts

Tucked into beds.

Small Acts: Simple Origami Hearts

And in favorite books!

Stay tuned for more ideas on small acts of love to share with the special people in your life this Valentine’s (and every) season…

Holiday Crafts with Kids: Winter Dioramas

By Mariah Bruehl,

We have Randi from Swoon with us today to share another fun project that families can enjoy together during the holiday season. We can’t wait to make some dioramas of our own!

There’s something magical about miniature scenes, isn’t there? A tiny world created from the imagination. I recently revived a long lost love of miniatures and dioramas by making some festive winter scenes with my kids. There are so many ideas for making these little displays out there from simple trees in jars, to elaborate paper creations. I love the versatility of a diorama project and the amount of creativity involved. The best part is that you can make a little scene with whatever you have on hand, even if that means paper, markers and a few (little) willing hands! All you really need to start is a box. Any size will do. This is less of a “how to” post and more of an inspiration to get creative with what you have and make something!

For our winter scene we gathered: a small box, glitter, glue, oven bake clay, and some moss and sticks from our yard. We also ended up adding some fake snow and a little deer friend from our animal collection.

To start I cut and glued some black felt to the inside of our box. Paper would also work great, whatever you have on hand!  I squeezed some dots of glue randomly over the back of our scene and then had the girls sprinkle glitter all over to make falling snow.We also lined our sticks with glue and sprinkled with more glitter “snow” to mimic the look of winter trees.

Next, we made some shapes with oven bake clay and baked them according to the instructions on the package. Once they were done baking and cooling, I added some black dots to our mushrooms with a toothpick and a bit of acrylic paint.

Then we starting setting up our scene by putting all of our elements together in the box. The only thing we actually glued down were our stick trees. The rest is moveable and can be arranged and played with as desired. We sprinkled fake snow (found at craft stores) and glitter over everything. Sugar or course salt would also work great as snow and probably look more realistic too!

If you’re looking for more inspiration, click on the links below to see other great examples of winter scenes and dioramas from around the web:

1. Easy winter scenes created in mason jars

2. A glittery Christmas tree diorama

3. Ski slope diorama

4. A simple scene in an unlikely container

5. A forest made using natural materials