Category: Seasonal


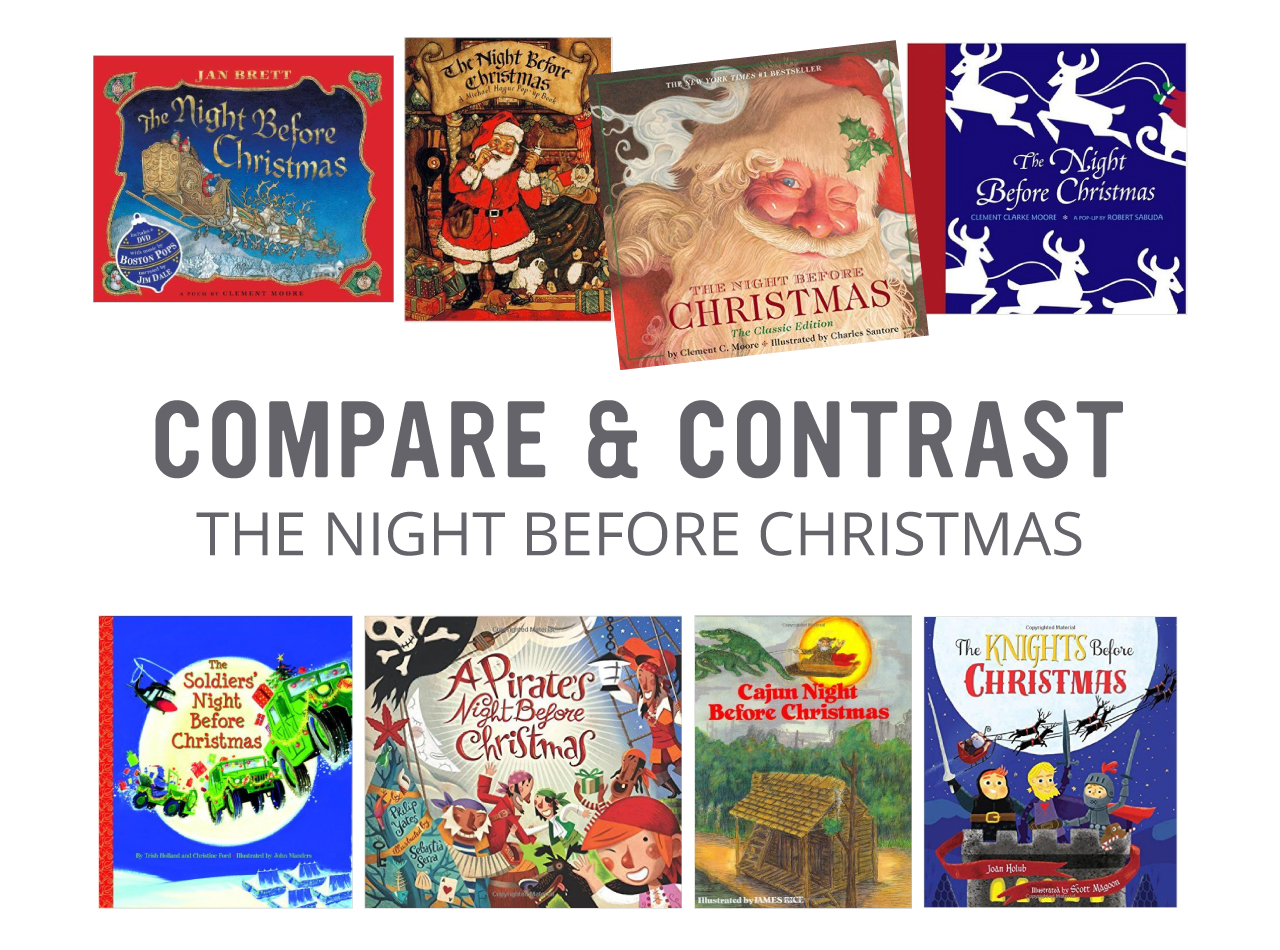
Compare and Contrast: The Night Before Christmas

By Mariah Bruehl,

night-before

Merry Christmas To All, And To All A Good Book…

We have an abundance of Christmas books at our house. I love Christmas, I love books, perfect harmony! Of course, we have several versions of the classic Christmas poem, ‘Twas the Night Before Christmas. This poem, originally titled A Visit From St. Nicholas, has been told and retold thousands of times in just as many variations. It presents a perfect opportunity for a holiday literary exploration comparing and contrasting different versions. Choose three different Night Before Christmas Books, use the link above to the original poem, and our handy printable to investigate the similarities and differences. Your library should have a wonderful selection of Night Before Christmas books, with a variety of reading levels, any of them would be compatible with this activity. Here are a few suggestions to inspire your picks.

night-before-christmas

These books are notable because of their beautiful illustrations and because they stay true to the original poem.

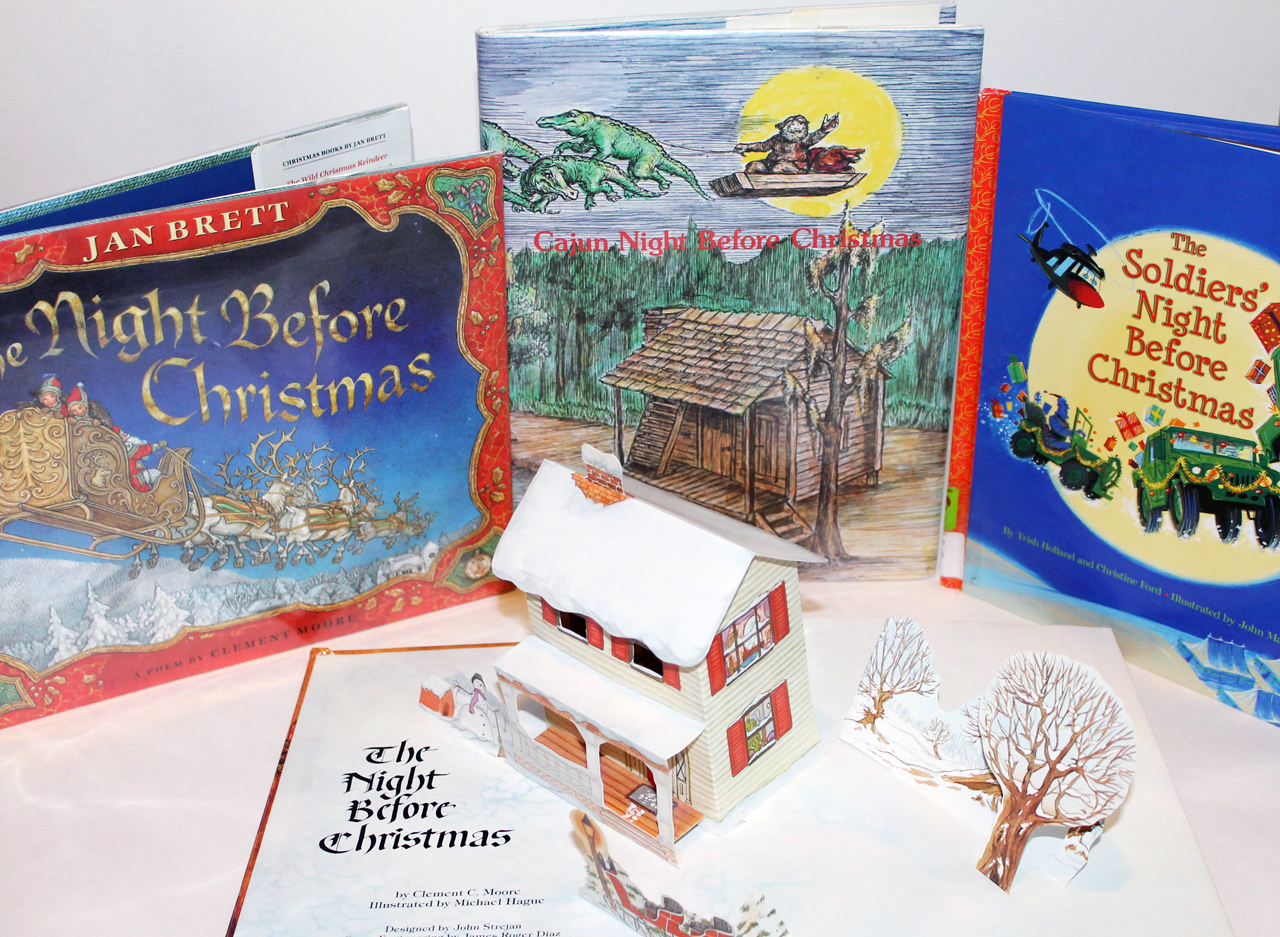
  • The Night Before Christmas: Jan Brett is an outstanding illustrator, and her version of the book is stunning. The main and surrounding pictures engage the reader in the poem on many levels.
  • The Night Before Christmas Pop Up: Robert Sabuda is known for his amazing paper art in his pop up books, and this book is no exception. An older pop up book we own (shown in the picture above) is The Night Before Christmas illustrated by Michael Hague. You may be able to find this at your local library, my daughter loves pulling the tab to send Santa up the chimney! 
  • The Night Before Christmas: The Classic Edition: Illustrated by Charles Santore, this book is noteworthy because it has not changed the wording, and it also has a special fold out page.

If you are looking for something more unique, there are a plethora of books with distinctive twists on the original poem.

  • The Soldier’s Night Before Christmas: With thanks to those who protect us, the ending of this book seems perfect for our world today. “Happy Christmas, brave soldiers! May peace come to all!”
  • The Pirate’s Night Before Christmas: Those who know me know I love pirates. For the child in you, or your child, you just can’t go wrong with this swashbuckling book. 
  • The Knights Before Christmas: This book is new this year, and is simply adorable. Three knights, Brave Knight, Polite Knight, and of course Silent Knight, find their castle has an invader, Santa Clause!
  • The Cajun Night Before Christmas: This is a book from my childhood, gifted to me by dear family friends from Baton Rouge, telling the poem through a southern cultural lens. It is a part of The Night Before Christmas Series which includes versions such as a Teachers’, Racecar Driver’s, Alaskan, Hawaiian, Librarian’s, Nurse’s , Firefighter’s, Sailor’s, Irish, Cowboy, Gullah, and many more.

After investigating several books, try adding a digital spin to your exploration. I am a huge fan of the video creation site Animoto. You can sign up for a free trial on their website, and best of all, teachers can apply for a free subscription to Animoto Plus. I have used Animoto in the classroom, and my students loved creating projects with it. Animoto is so simple. You upload your pictures, add text, select music from their database, and the website does all the challenging work, producing it into a final video presentation. There is also an Animoto app available, which makes creating projects even easier since you can upload your pictures straight from your phone or tablet. Here is a sample Night Before Christmas video that I created.

I hope these activities add some fun holiday learning to your Christmas season. Merry Christmas to all, and to all a good night!

Printables

Fall Into Leaf Learning

By Mariah Bruehl,

Fall Into Leaf LearningFall is my favorite season of the year, the cooler temperatures, the tasty flavors, and the vibrant changing colors. Fall leaves lend themselves to hands on learning in so many ways that can be differentiated to any child’s age and ability easily:

To delve a little deeper, a fall leaf scrapbook is a perfect activity to engage in during autumn. As usual, I love to tie a little technology into my activities, so Leaf Snap is a very useful app for this project. Leaf Snap is so simple to use, and it is free! It has beautiful pictures of leaves, flowers, seeds, and bark. The app also includes detailed information such as scientific names, habitat, etc. After downloading the app, set out to collect a variety of fall leaves. Bring them inside and place each leaf on a piece of white paper, open the app, and click the “snap it” button. The app will proceed to give results of which type of tree each leaf fell from. After selecting the tree, and looking at the pictures, next click on the small book icon in the upper right hand corner, to open up further information. You can record the information about each leaf on the printable chart and then you are ready to make your scrapbook.

Leaf Information Chart

This is where the project can get creative and be differentiated. Record and use as much information as appropriate for your child on the chart, and use a variety of paper, markers, and other accents to make your scrapbook personal and unique. Simply glue each leaf to its own piece of paper, and then write information about the leaf on that page. Finally, staple all your pages together to make a scrapbook. If you are looking to make your leaves last longer, try placing them in contact paper, or laminating them before you place them in the scrapbook. This is a fun way to get outside and learn on a beautiful fall day.

For extending your knowledge on autumn leaves, try these titles for a little book love:


Outdoor Math Games

By Mariah Bruehl,

Outdoor Math GamesSummer is often when we all want to be outside to enjoy the sun, play with friends and explore nature. Fun in the sun can also coincide, playfully, with keeping up our math skills. The games and activities below can be played both outside and inside. The key is that they are portable and can be enjoyed in both environments.


Bracelet Fact Game:

Materials: pipe cleaners, colored tape or thin post-it notes

This activity helps children to remember basic facts in an area of your choice. Help your child or group of students decide on facts to practice (addition, subtraction, multiplication or division). Start with five to learn and practice. These should be facts that the child knows how to figure out but needs to gain in recall speed.


Activity: To play this as a game with two players, have each player play with the same facts on their bracelet. One player keeps the facts on the questions and the other player turns hers’ over to the answers. The first player asks a question or gives an answer and the other player locates it on her bracelet. For example, if player one calls out 5 + 5, the second player finds the answer 10 on her bracelet and calls it out. Starting with the answer is fun too, where the answer of 10 is called out and the other player locates the question 5 + 5. Children can also play on their own by quizzing themselves and checking answers.

Outdoor Math Games

Beach Ball Facts:

Materials: large beach ball, sharpie pen

This game can be played with as little as one player to a whole large group of players.  Before playing write math facts on the spaces of a beach ball. Choose facts based on your child’s needs. To play alone, the player simply tosses the ball up in the air, catches it, and answers the question closest to him on the beach ball. If playing with other children, the ball is tossed back and forth and each player answers the question closest to him when he catches the ball. This game is easy to take with you and can be used in all different subject areas by simply changing the questions.

Outdoor Math Games

I Have, Who Has Card Game

Materials: I Have, Who Has card set (click on photo above to download)

This is another game that can be taken anywhere but does require a group of children. To play, pass out each child one or two cards, depending on size of group, and have them figure out the answer to their questions. Have students form a circle and the player with the start card begins. Students play until the player with the end card plays. Encourage children to answer quickly so that it becomes a fast paced, quick recall, game.


Hopscotch Counting or Facts

Materials: sidewalk chalk, and flat small sticks

I just taught my own children the game of hopscotch and we played for hours. In this version, it is played the same way as the original with a little twist in the labeling of the boxes. Instead of labeling each square with numbers one through ten, have your child practice skip counting. We labeled boxes by 2’s and 3’s to practice but you could decide on something different. Another fun idea is to start the first number higher, maybe 22, and then count by 2’s. Your boxes would be labeled: 22, 24, 26, 28, 30, 32, 34, 36, 38, and 40. Facts can also be written in the boxes with or without the answer. You could make boxes labeled 1+1 = 2, 2+2 = 4, etc. and have your child say the facts as he/she moves through the box.


Link: http://www.wikihow.com/Play-Hopscotch


Have fun!


3 Wildcrafted Herbs for Summer Days

By Mariah Bruehl,

3 Wildcrafted Herbs for SummerIn our part of the world summer is in full swing.  Despite my best intentions for a stress free summer I find we have a packed schedule of farm work, a garden that demands attention, fun trips out with friends, summer activities and the regular list of chores to do.  Summer days are wonderfully long but can be tiring too.

When I feel a bit below par, or when I notice my kids are looking a little ragged round the edges, I turn to our herbal allies to help boost us up and set us on the right path again.  As well as my own herb garden, I regularly turn to nature’s herbs too; they are a wonderful source of nutrients and don’t put a strain on the family purse.

If you are wondering what I mean by natures herbs, in short it’s weeds.  There are many wonderful wild plants that can be harvested and used safely in our own homes, boosting our health and costing nothing but time.  A nature walk can turn into an opportunity to stock your tea cupboard or medicine cabinet with wonderful tastes and uplifting nutrients.

At this time of year there is an abundance of wild plants available, many are at the peak of their power so it’s a great time to collect and store a little extra for later months.  There is nothing more wonderful than opening a jar of dried herbs in the middle of winter, and drinking in the sweet scent of the summer breeze when summer itself is long gone.

Here are 3 of my favorite herbal allies, easily found in hedgerows and even gardens right now.

3 Wildcrafted Herbs for Summer

Nettle

Also known as Stinging Nettle, this amazing plant is packed full of nutrients.  It’s green leaves are full of iron and even vitamin C, the perfect pick me up on a hot summer day.  Even the seeds can be dried and used, sprinkle them on cereal in the same way you would with flax seed.

To collect you’ll need to be wily.  They’re not called Stinging Nettle for nothing and the stings can be quite sore.  Wear thick gloves (rubber gloves are great) when you snip these plants and then put them in an airy place to dry, out of direct sunlight.  Use as a refreshing tea with a dab of local honey to help fight allergies and restore the nervous system.

3 Wildcrafted Herbs for Summer

Plantain

It makes sense to follow Stinging Nettle with Plantain, as this is the perfect remedy should you find yourself stung!  Plantain leaves can be crushed and the juice rubbed right  on the sting to pain relief.  You can also make a simple tincture by filling a jar with the chopped leaves and then add brandy or vodka until the jar is full.  Leave for 6 weeks or longer and then strain.  The resulting tincture will work wonders on any bites or stings you many collect on your summer adventures.

3 Wildcrafted Herbs for Summer

Red Clover

This familiar and attractive ‘weed’ can be found in many a lawn or border.  Instead of getting rid of it we should be collecting it!  This is a really fun one to collect with the children, get them to gently snip off the purple flower heads and then dry them in a single layer in a dry place, out of direct sunlight.  Both fresh and dry flowers make a wonderful, uplifting tea that is particularly soothing for women.   If you have swollen feet, pop clover tea in a footbath and relish it’s calming power.  It nourishes and much as it calms and couldn’t look prettier in a jar in the pantry.
Once you introduce wild plants to your children, you’ll be amazed at how each outing turns into a learning experience.  You are also teaching your children that nature is their ally and helping them become their own healers too.  So before you mow your lawn this summer just double check, you may want to collect your medicine first!

Summer Reading Bucket List

By Mariah Bruehl,

Summer Reading Bucket List
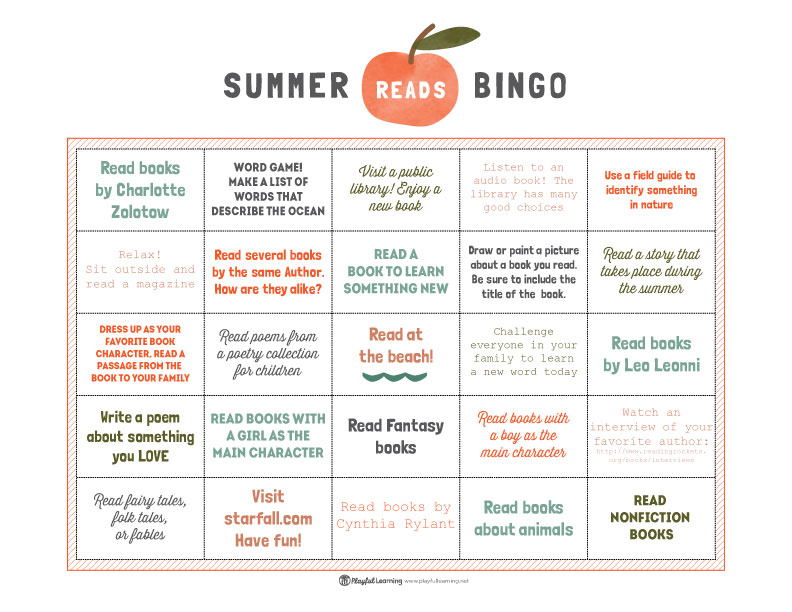
What is on your summer to-do list? It may be packed with adventures, getaways, and activities, but did the simple act of reading throughout the summer make your list?

No matter your age, summer is the loveliest time to pick up a book and relax, soaking up the story as you soak up the sunshine. It’s easy enough to know that you must “read!” during the summer, but in the spirit of novelty (or novel-ty), why not make your reading to-do list playful? Not only will it get you to model strong reading habits, it will make summer reading even more approachable for your child, no matter his or her age.

Here are some ideas to create your own “Summer Reading Bucket List.” You can post the list anywhere in your home, and have your child check off each item as he or she reads different pieces in different ways. The bucket list can be hung on your refrigerator, written on a chalkboard to keep all summer long, placed in your child’s room, or posted above a dedicated workspace your child might have. Be creative, and amend the list as needed. We’ve created a  few printables for you if you prefer to use to use them (click on the pictures at the bottom of the post to download). Of course, to make it even more enjoyable for everyone involved, you can participate right along with your child!

Summer Reading Bucket List

Places to read:

  • On the beach
  • In a pillow fort
  • On the grass
  • In a tent
  • Under a tree
  • On a boat
  • In the car
  • At the library
  • In bed
  • At the park

Things to read:

  • A new book
  • An old favorite book
  • A silly book
  • A book about a place you have never been
  • A magazine article
  • A recipe
  • A poem
  • A pop-up book
  • A rhyming book
  • A chapter book

How to read:

  • Read aloud to your pet or stuffed animals
  • Read aloud in a goofy voice
  • Read aloud to a group
  • Listen to a book being read
  • Read upside down
  • Read and act out a book
  • Write your own story and then share it
  • Read by flashlight or firelight
  • Read while eating ice cream
  • Listen to a family member tell an original story

Can you help your child cross off all of these items on the list? Can you cross off all of these items for yourself? The most important item yet unwritten on the list is simply to make sure you read all summer long – happy summer reading!

SummerReadingBucketList2

SummerReadingBucketListBlank

* Photo and printables by Randi Edwards


Summer Reads Bingo

By Mariah Bruehl,

SummerReadsBingo
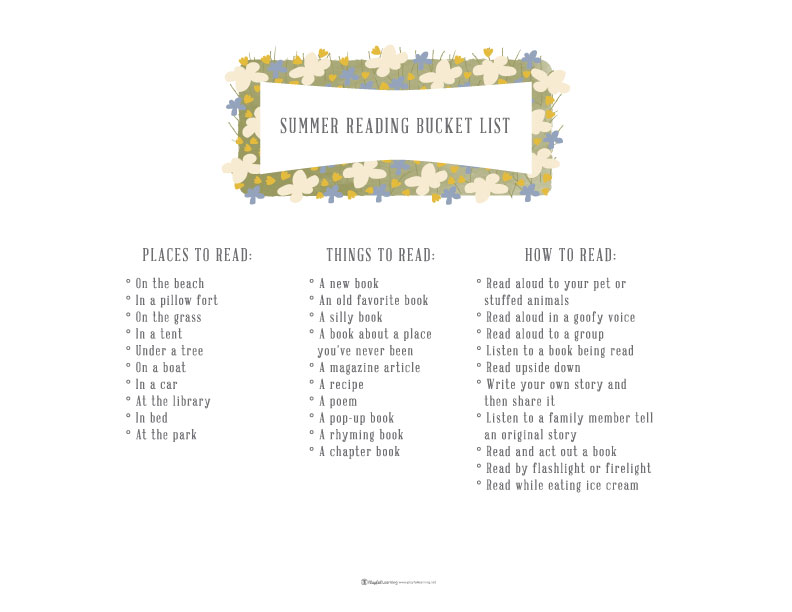
Summer is here and we all want our children to read for pleasure over the next few months… Although, over the years, I have found that the requirement schools often have for children to read for any given number of minutes backfires. They become preoccupied about watching the clock, are not truly engaged with their book, and far worse, see reading as something that needs to be completed as quickly as possible. The clock becomes the focal point rather than the book at hand and eventually for some children their innate desire to read disappears.

To nurture a love of reading, it’s far more beneficial to give children reading experiences—a variety of special, shared moments that highlight the joy of reading.

Many years ago, our 1st grade daughter came home with a great summer reading assignment–Summer Reads Bingo. When I saw this “playful” approach to encouraging summer reading I thought is was so good that we adapted a version of our own to share with you and your budding young reader.

Summer Reads Bingo


*Photo and printable by Randi Edwards

An Invitation to Learn About Seeds

By Mariah Bruehl,

An Invitation To Learn About Seeds

Despite the deep snow all around us, there is a stirring of spring under our feet. The temperatures are not bitter cold as they were, we can stay outside for longer and linger in the sunshine more and more. As the days begin their slow warming cycle, our thoughts turn here on our homestead to the coming gardening year. Though the soil cannot yet be seen, let alone planted, we are plotting the myriad plants that we hope to grow in our garden this year.

While we can’t get our garden on outside, we can begin to learn a little of the plant life cycle inside. Call it a placebo, but I want to share my enthusiasm about seeds with my boys beyond their practical help in the garden. I want to share with them the mysteries of life beneath the soil.

The first activity we explored was this free activity from Montessori Print Shop .This activity involves matching the names of seeds to their pictures as well as the plants they come from. It encourages children to understand where seeds come from and to notice how many of them are common in our own kitchens. This is a great opportunity to talk about the uses of some of the seeds too. For example fennel is great for tummy aches and sunflower seeds are a common and nutritious food.

Next we moved on to looking at the evolution of the bean seed. I chose this one because it is something we eat often and so familiar. I wanted to look at this common item from a new perspective and learn the science behind the food source.

An Invitation to Learn About Seeds

For my 6 year old I used this great free resource from Twinkl (Bean life cycle worksheet (younger children), it is an sequencing activity to help develop their understanding of the order in which each step appears. The first worksheet works on sequencing, while the second encourages understanding of the cycle of the seed/plant. It is very simple but really effective and a great way to begin learning about life cycles more broadly.

For My older son we used this great resource from Exploring Nature (Bean life cycle worksheet (older children). This activity also involves sequencing but to a higher level and requires identification of more subtle differences as the plant evolves from seed to plant. A great follow on from this would be to actually plant a bean seed and watch it grow, matching it to your sequence to see if it follows the same pattern.

For my younger son I gave him another matching activity (known in the Montessori method as Nomclature) that gives more detailed vocabulary on seed development. This activity (found free on The Helpful Garden website)-introduces scientific terminology is a great way to encourage confidence and curiosity in children. Once they know the terms they can apply them to other types of seeds that they come across.

I also provided an extension activity found on the Montessori Print Shop , that goes into more detail about each life stage, explaining the terminology in more depth. This would be a great accompaniment to some seed observation and dissection!

Along with the information it’s really wonderful to explore real seeds and watch them grow. You can soak beans and use them for dissection and observation, you can grow a seed in a small cup or even germinate seeds on paper towels to watch them sprout. By sheer luck I discovered a cluster of sprouted seeds inside the squash I was cutting up for lunch! Along with a magnifier, these provided a great way to interact with living, sprouting seeds.

A Charley Harper Scavenger Hunt

By Mariah Bruehl,

A Charley Harper Scavenger Hunt

Our world is full of opportunities to learn and discover something new if we keep our minds open and experience new things. It is also essential to show this concept to the children in our lives.

Last summer, I was able to attend an amazing concert and light show called Lumenocity (see below for a clip from a YouTube video).

This was a phenomenal experience where art, music, and technology were combined! The show featured a local artist that was new to me, Charley Harper. I was stunned that I had not heard of this artist before, especially with his local ties. After the program, I was hooked on his artwork. I immediately came home to search for more information and view more of his works. I was also excited to share this new to me artist with my daughter. Charley Harper’s works are so playfully perfect for children and she was able to see how enthusiastic I was about learning something new.

Charley Harper was an American Modernist painter who specialized in wildlife artworks. Capturing his subjects with a minimal amount of visual elements, he illustrated many books and created many prints and posters. I love the clever titles for his artworks and their simple, yet beautiful depictions:

A Charley Harper Scavenger Hunt

Headbanger, Slumber Party, Good Lovin’ and Turtle Dovin’ (all pictures courtesy of © 2015 Charley Harper Art Studio)

Art and nature certainly go hand in hand! I decided to combine the two in an activity to get children moving outside, appreciating art and nature all at the same time. Using the artwork of Charley Harper, I have created a fun spring scavenger hunt. Use this printable to go on a nature walk and see how many of these creatures you can discover. I hope that this activity will open your eyes to the beauty of spring and lead to new interests and activities around your house, just as experiencing a new artist has done for me.

If you get hooked on Charley Harper art like me, check out the Charley Harper Art Studio to see more of his works. If you are looking for a mindful gift for someone in your family they have an outstanding selection of children’s products. We have two puzzles at our house, and I have my eye on some of the books, sticker sets, and coloring cards.


Snowflake Math

By Mariah Bruehl,

Snowflake Math

Anytime learning can be rooted in the world around them children thrive.  This is true for mathematics-based explorations, just as it is for science and history.  Right now snow, lots and lots of snow, surrounds my children.


There are many activities that can be done with snowflakes that enhance children’s mathematical understandings.

Snowflake Math

First, if you can, observe snowflakes outside; watch them fall, catch them on a gloved hand, or on black paper, and observe them with a magnifying glass or a camera zoom.  With older children you can try a snowflake fossil technique.  If the weather is not cooperating with you look at snowflake books or pictures of snowflakes.  When observing the snowflakes ask your children questions such as, “How many sides does your snowflake have?”  “Do all of the snowflakes we see have the same number of sides?”  “It’s said that no two snowflakes are exactly alike, but can you find any that are similar?”


Next make paper snowflakes, there are many methods for making paper snowflakes, but one of the simplest methods starts with round paper coffee filters and a pair of scissors, appropriately sized for your child.  First have your child fold the filter in half.  Then count the “valleys” in the filter.  Our coffee filter halves had 12 valleys.  We knew we wanted to fold this piece into thirds so we divided 12 by 3, arriving at 4.  This told us we needed to have each section have 4 “valleys”.  Now fold the half-moon filter into 3rds, using these “valleys” as a guide.  Finally fold the filter one last time.  You have essentially folded the coffee filter into 12 pieces, but after cutting you will be left with a six-sided snowflake.

Snowflake Math

If you are folding snowflakes with older students now might be the time to take out a protractor.

Snowflake Math

Instead of counting the “valleys” in the filter and using a division problem to decide where to fold you could instead try to figure out the angles you will need to create.  Present questions such as, “If the paper snowflake is a circle and therefore 360 degrees, how many degrees will the angle be when we divide the circle into sixths?”  “Into twelfths?”

Snowflake Math

Now cut out your design making sure not to cut all the way through the folded edge.

Snowflake Math

Snowflakes also lend themselves to discussions of fractions.  When you observe snowflakes in their natural setting it is very rare to find some that is completely intact.  They have taken quite a ride to get to the ground and often have broken branches.  You can observe what fractions of the branches are broken.

Snowflake Math

Symmetry is another mathematical concept that can be reviewed when observing snowflakes.  Leaving aside the damage that can happen to a snowflake while it falls, snowflakes form in a symmetrical manner.  Each snowflake starts as a hexagonal prism and since each arm of the flake forms under the same weather conditions each branch will be identical.  After creating their paper snowflakes children can find the lines of symmetry by reviewing their folds, or using a straight edge, or pencil, to mark them.


Math really is all around us, especially in those little flakes currently falling outside my house!

Winter Nature Science: What’s Warmer?

By Mariah Bruehl,

Winter Nature Science

In the midst of winter, staying inside by the fire with a blanket certainly seems ideal. People bundle up in layers to brave the cold and blustery temperatures. Animals, however, don’t have furnaces or coats, so what do they use to build shelters to stay warm in the winter? Peak your child’s curiosity with this notion and take advantage of a nice winter day to venture outdoors and conduct a fun, winter, nature science experiment. It will be a great way to get moving and learning outside just when you are feeling a little cabin fever!

For this experiment you only need a few simple items you can find around your home:

  • Clear cups
  • Thermometer
  • Some habitat items (we’ve used dirt, leaves, grass, sticks, and rocks, but you can modify this based on what you have readily available)
  • This printable

First, fill cups with the habitat items you find around your home.

Next, use your thermometer to measure the temperature of the air, and record it on your printable.

Place the thermometer in each cup, measure the temperature, and write those temperatures on the printable.

Now it is time to analyze! Here are some follow up questions to ask your child:

  1. Which natural item kept the warmest temperature? Why do you think this is the warmest?
  2. Which natural item had the coldest temperature? Why do you think this is the coldest?
  3. If you were an animal building a shelter what type of natural items would you use in the winter to keep warm?
  4. Draw a picture of your animal shelter and label your building materials.
  5. What are some other materials we could include in this experiment?
  6. Aside from their homes, what adaptations do animals bodies have to stay warm?

Hopefully a little fresh air and a little curiosity can bring some much needed excitement to your chilly day!