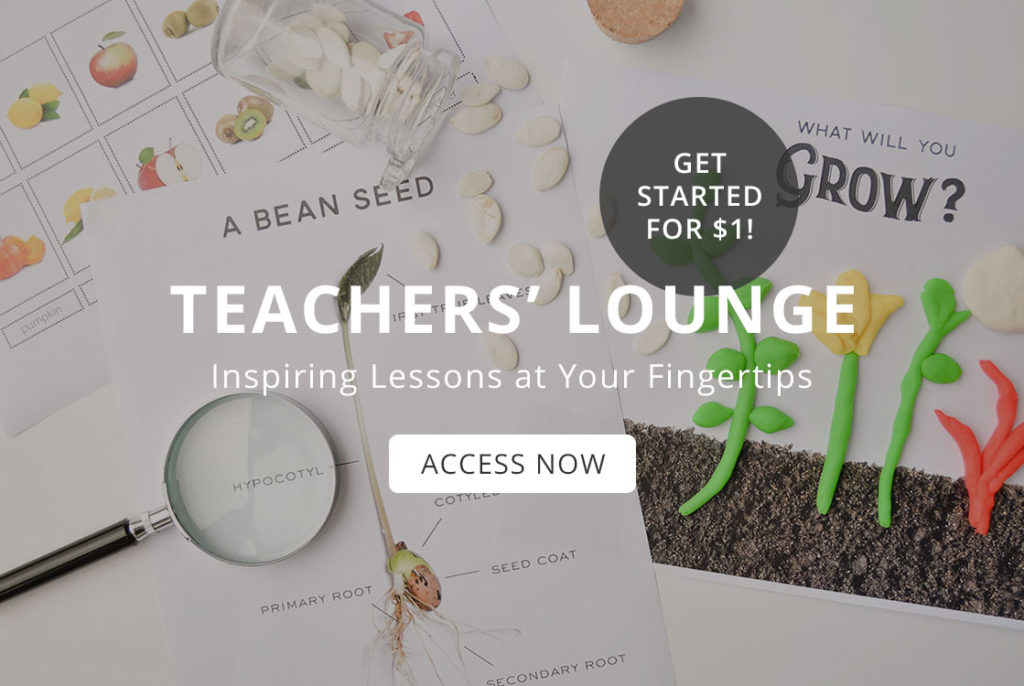
Volcanos are one of those universal topics that captivate children young and old…
These lessons guide you and your child through the process of “exploding” a volcano and learning about how they work!
Do you know why a volcano erupts? Over thousands and thousands of years, the gas bubbles inside of magma (hot liquid rock) expand and cause pressure to build up. When that heat and pressure pushes on weak spots in the Earth’s surface, it is eventually forced up and expelled. This lesson demonstrates that idea. Adding vinegar to baking soda causes a chemical reaction which mimics the appearance of an actual volcano!
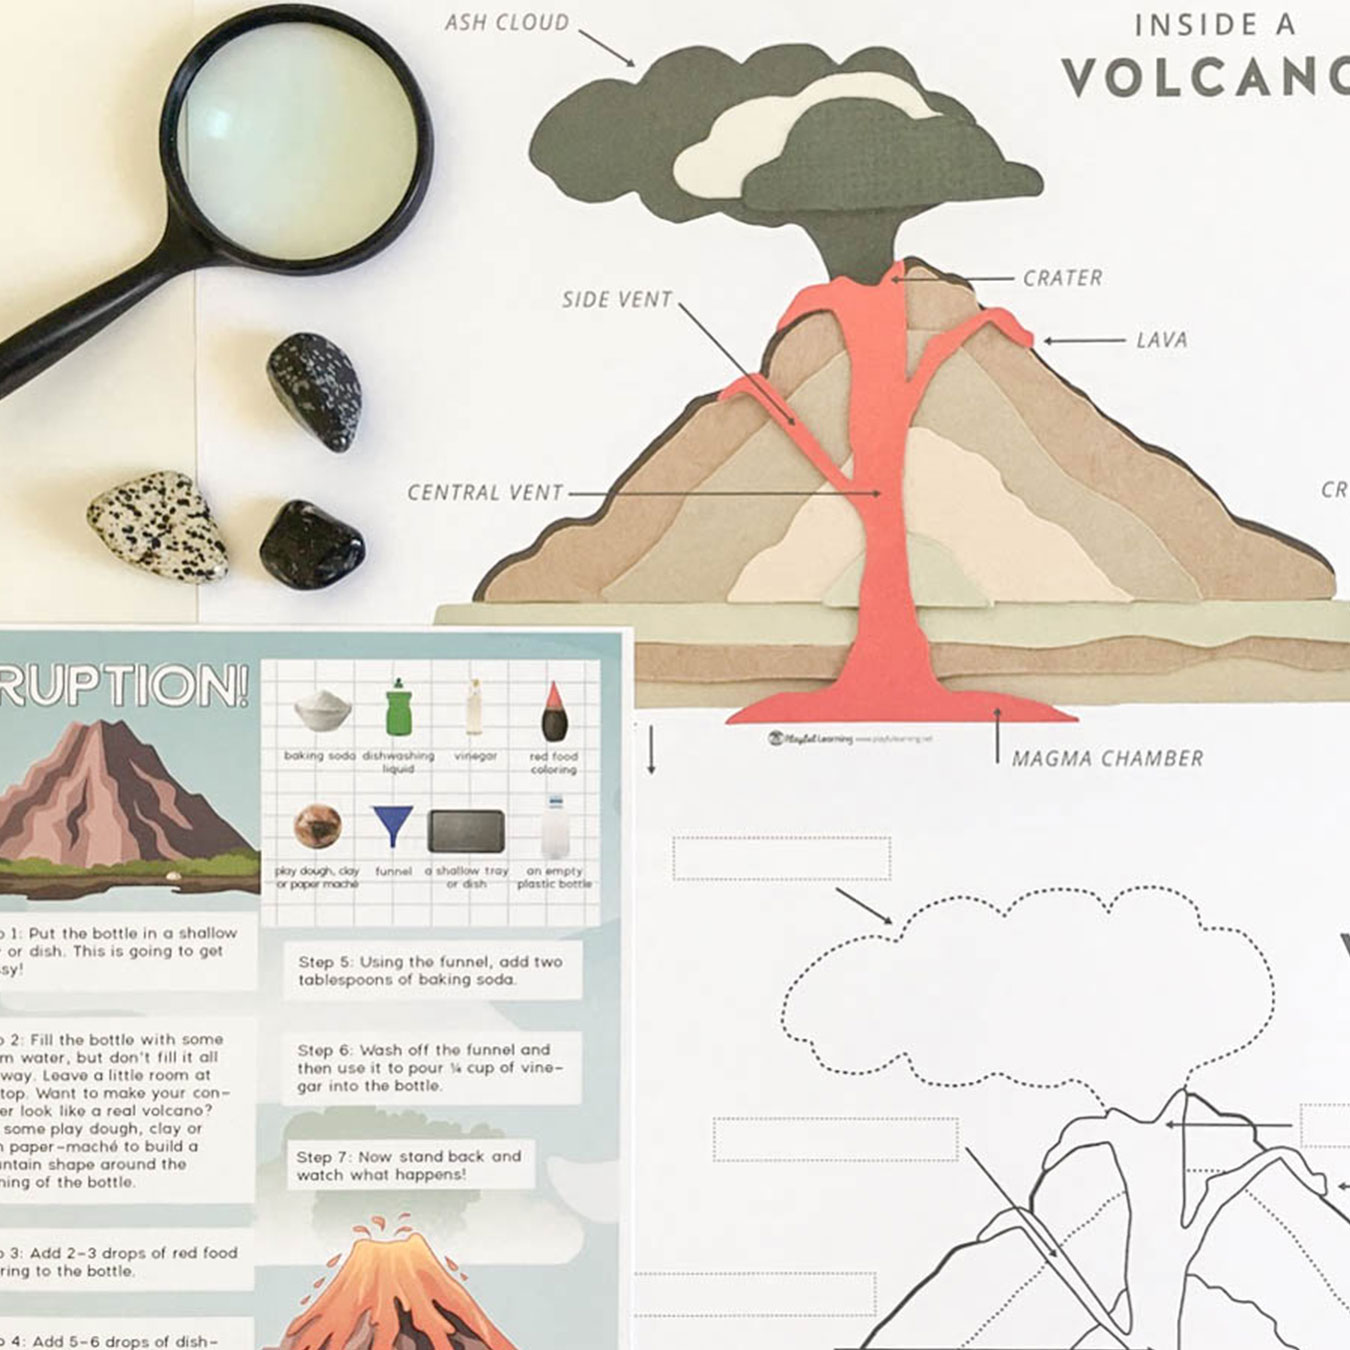
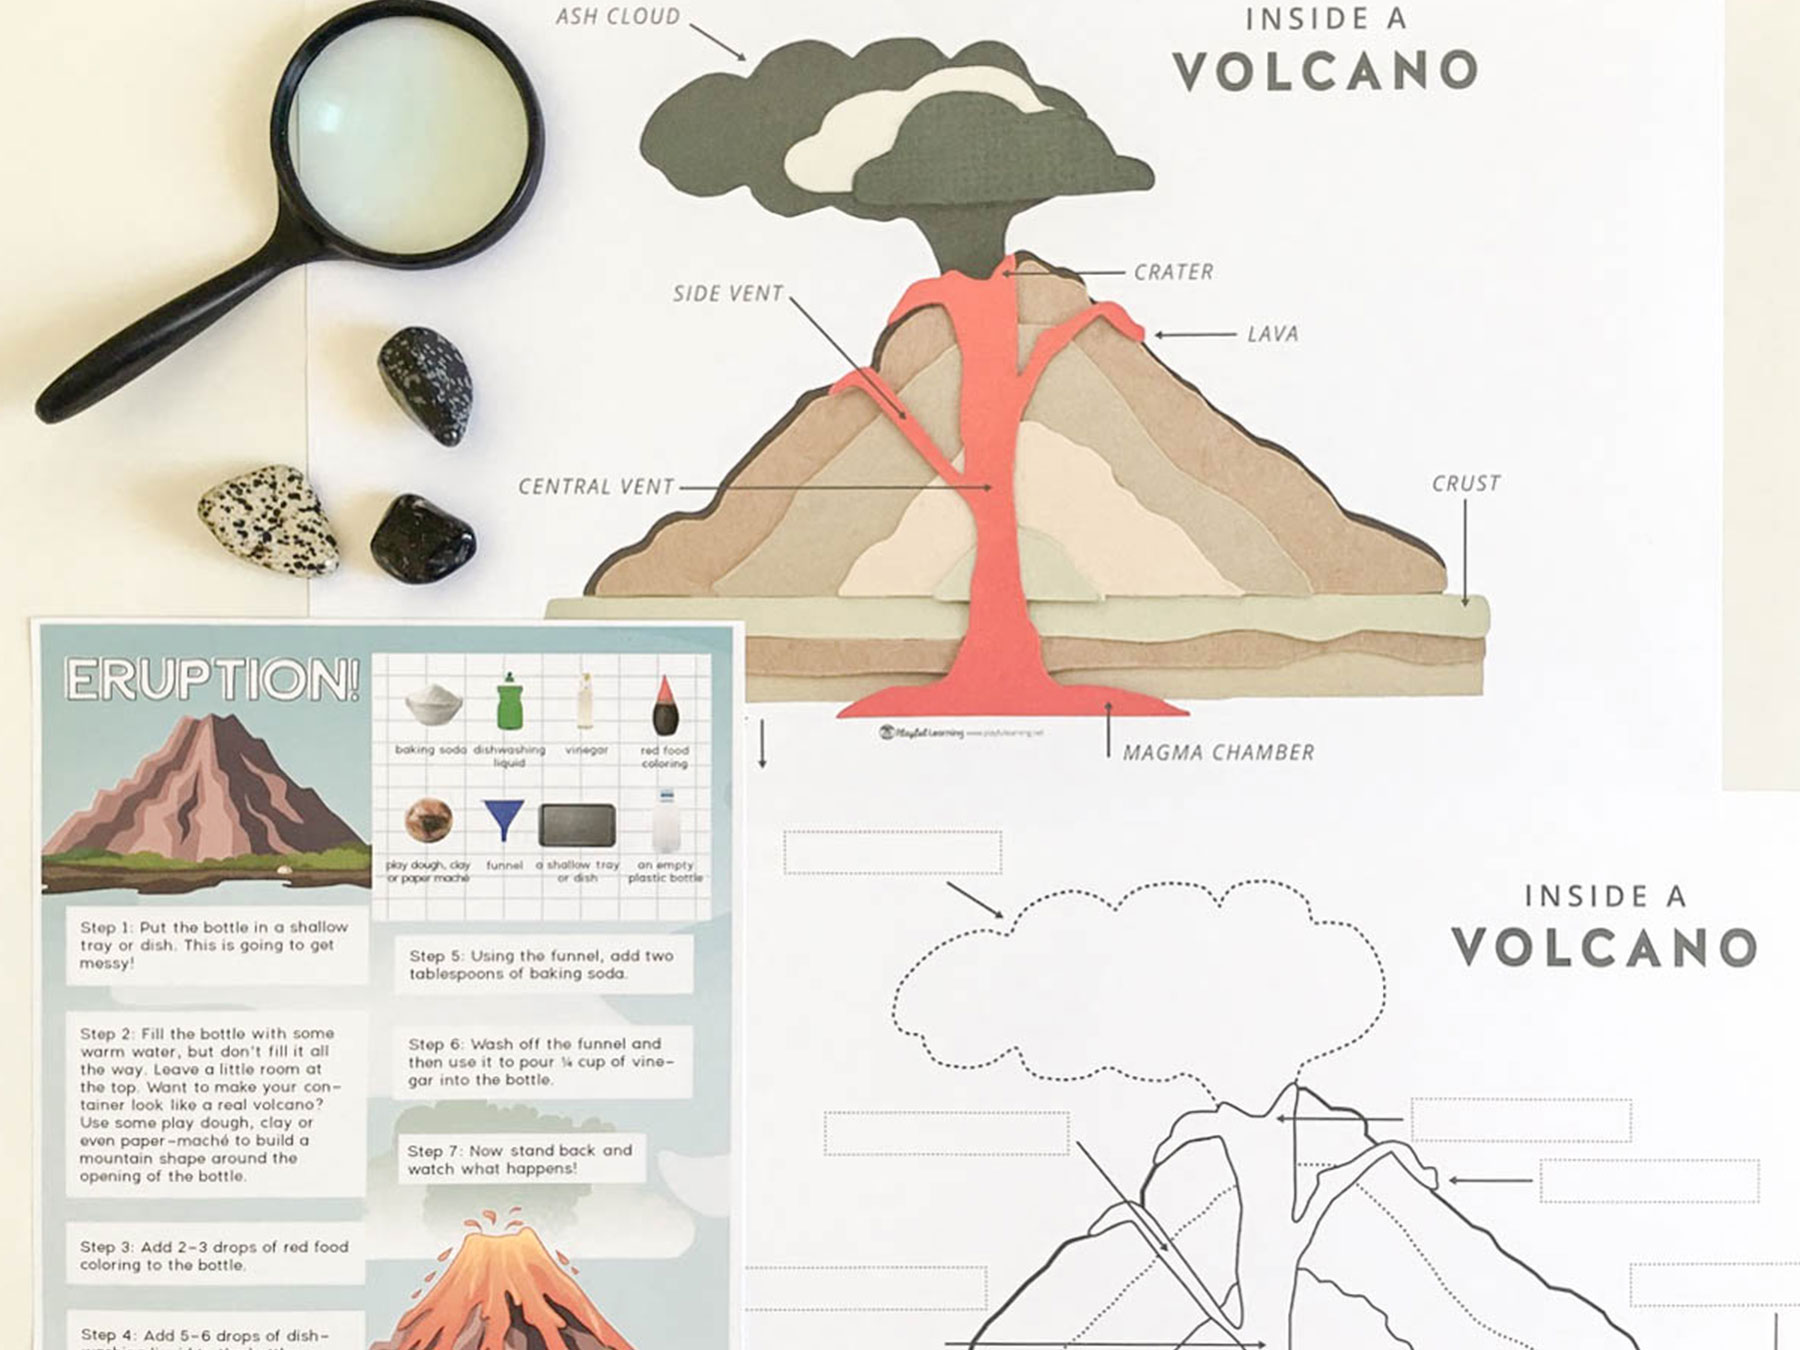
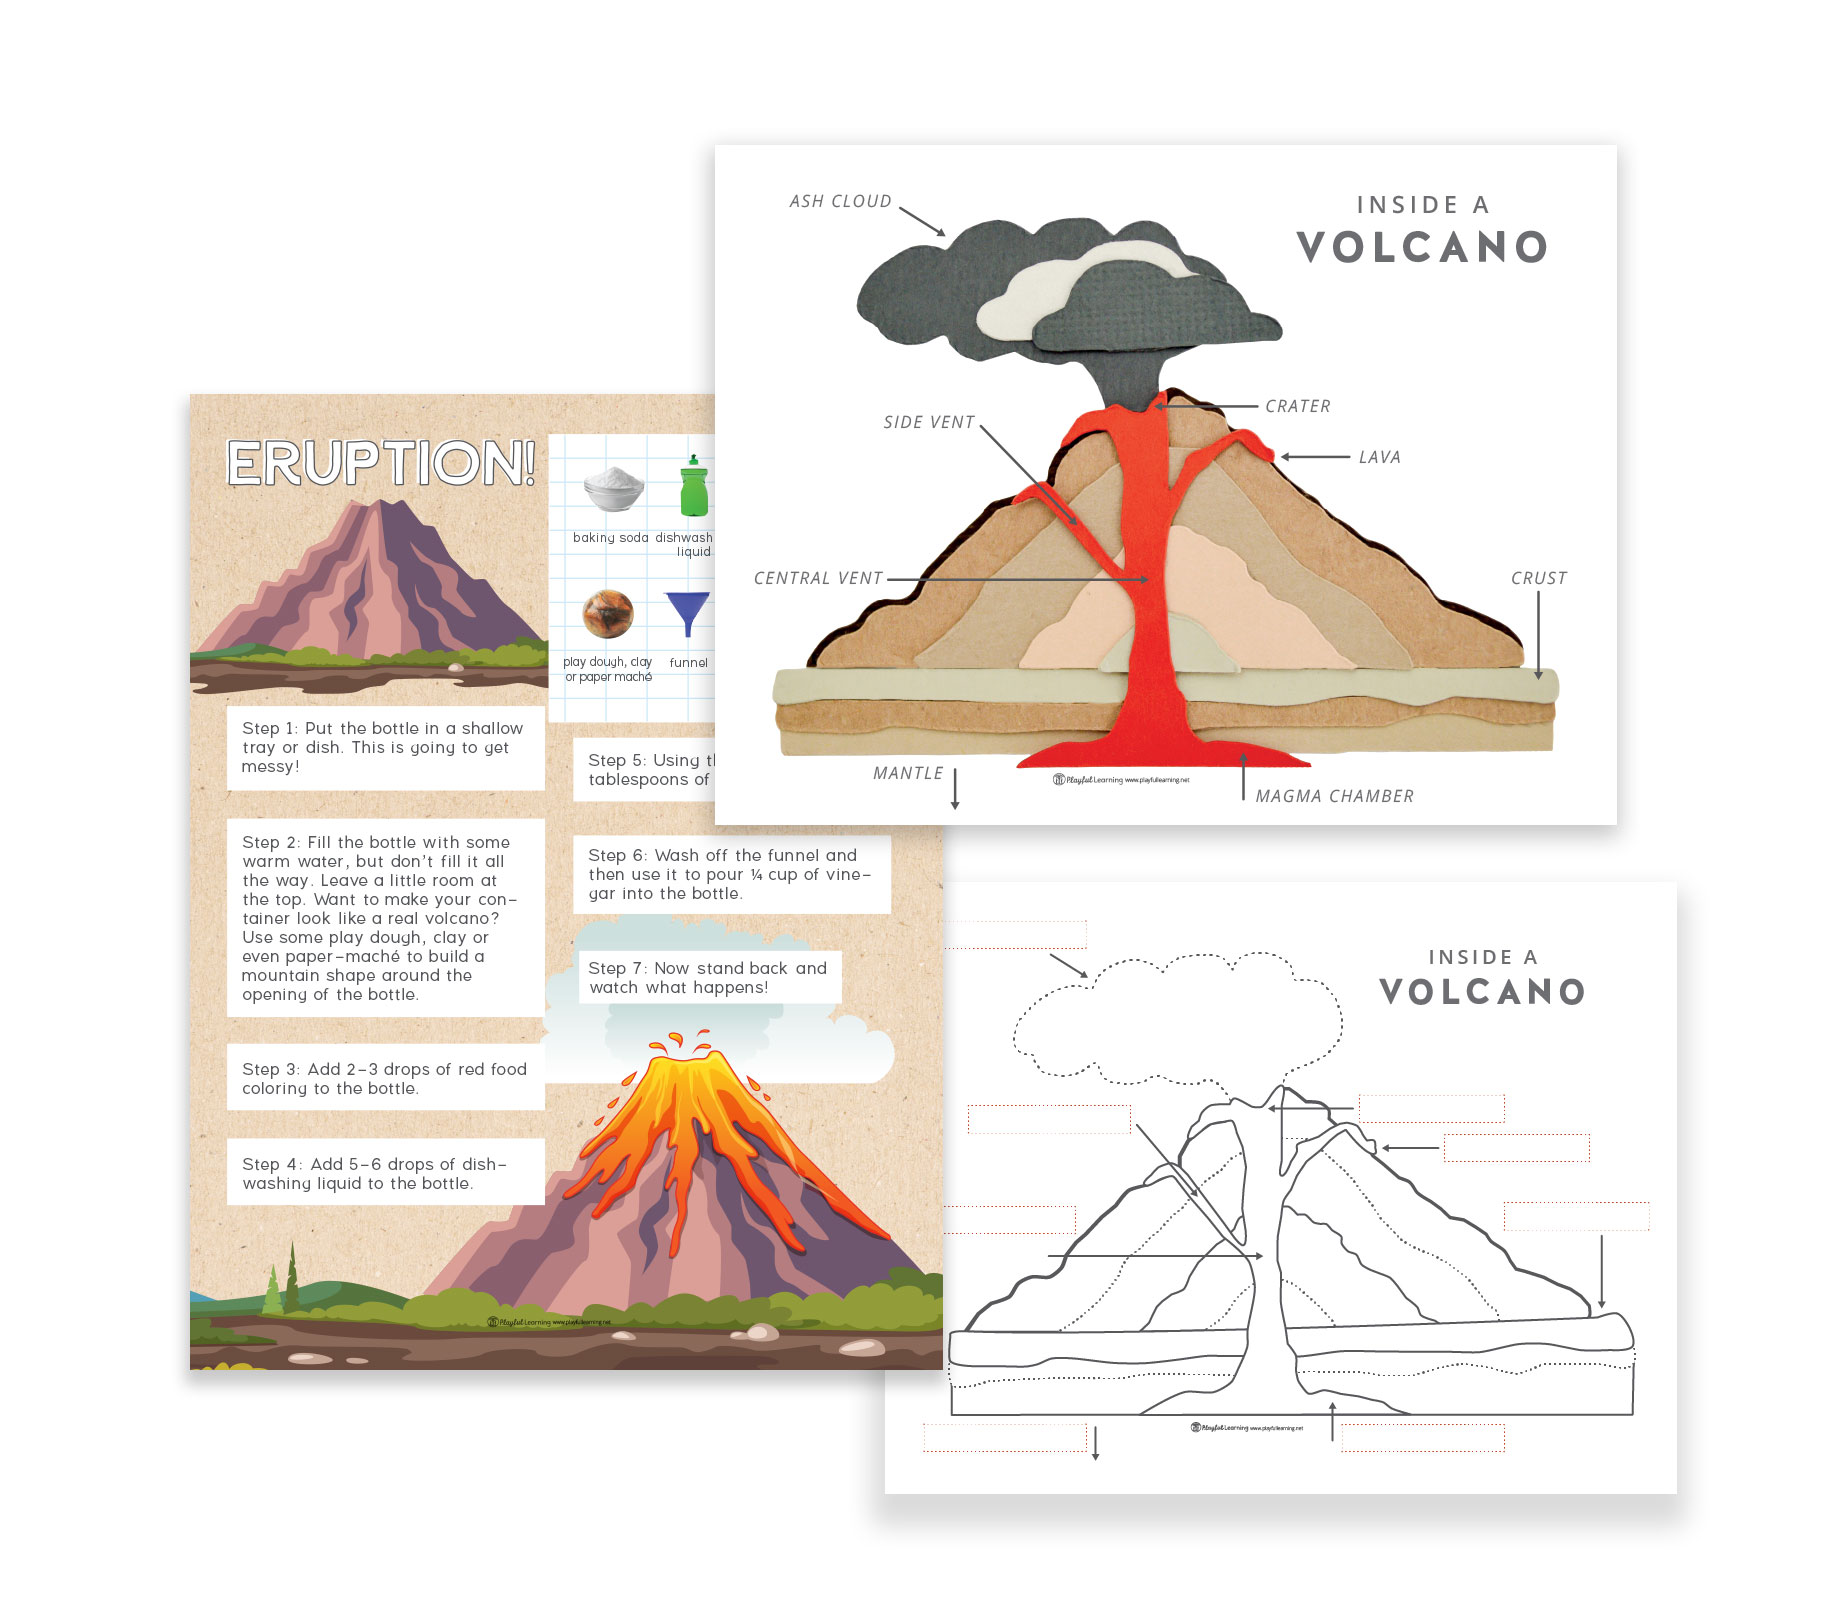
Once you have made a volcano erupt, it’s time to settle in and learn a bit more about how they work. The next activity includes vocabulary development, handwriting practice, and scientific discovery all rolled into one lesson! In this lesson, children identify the different parts of a volcano and learn about their functions. Label the parts of a volcano or use the printable as an invitation to build one out of play dough, clay, or paper mache. Junior volcanologists might even want to make an observational drawing or learn more about the different types of volcanoes. So hang up the diagram and put out a collection of resource books to give your scientist the freedom to explore and discover.
Here is some language to use as you explore the various parts of a volcano:
Mantle: The layer of the Earth between the crust and the outer core.
Crust: The outermost part of the Earth that is composed of rock.
Magma Chamber: The area below the earth’s crust from which magma flows out.
Central Vent: The main opening of a volcano where molten magma is released to the surface.
Side Vent: Smaller openings through which ash, gases, and lava escape.
Lava: Rock that is hot enough to be in liquid form and expelled during an eruption.
Crater: A small depression at the top of a volcano which has gotten blown off after an eruption.
Ash Cloud: Small pieces of rock, minerals, and volcanic glass that are discharged into the area during an eruption and then carried further by the wind.
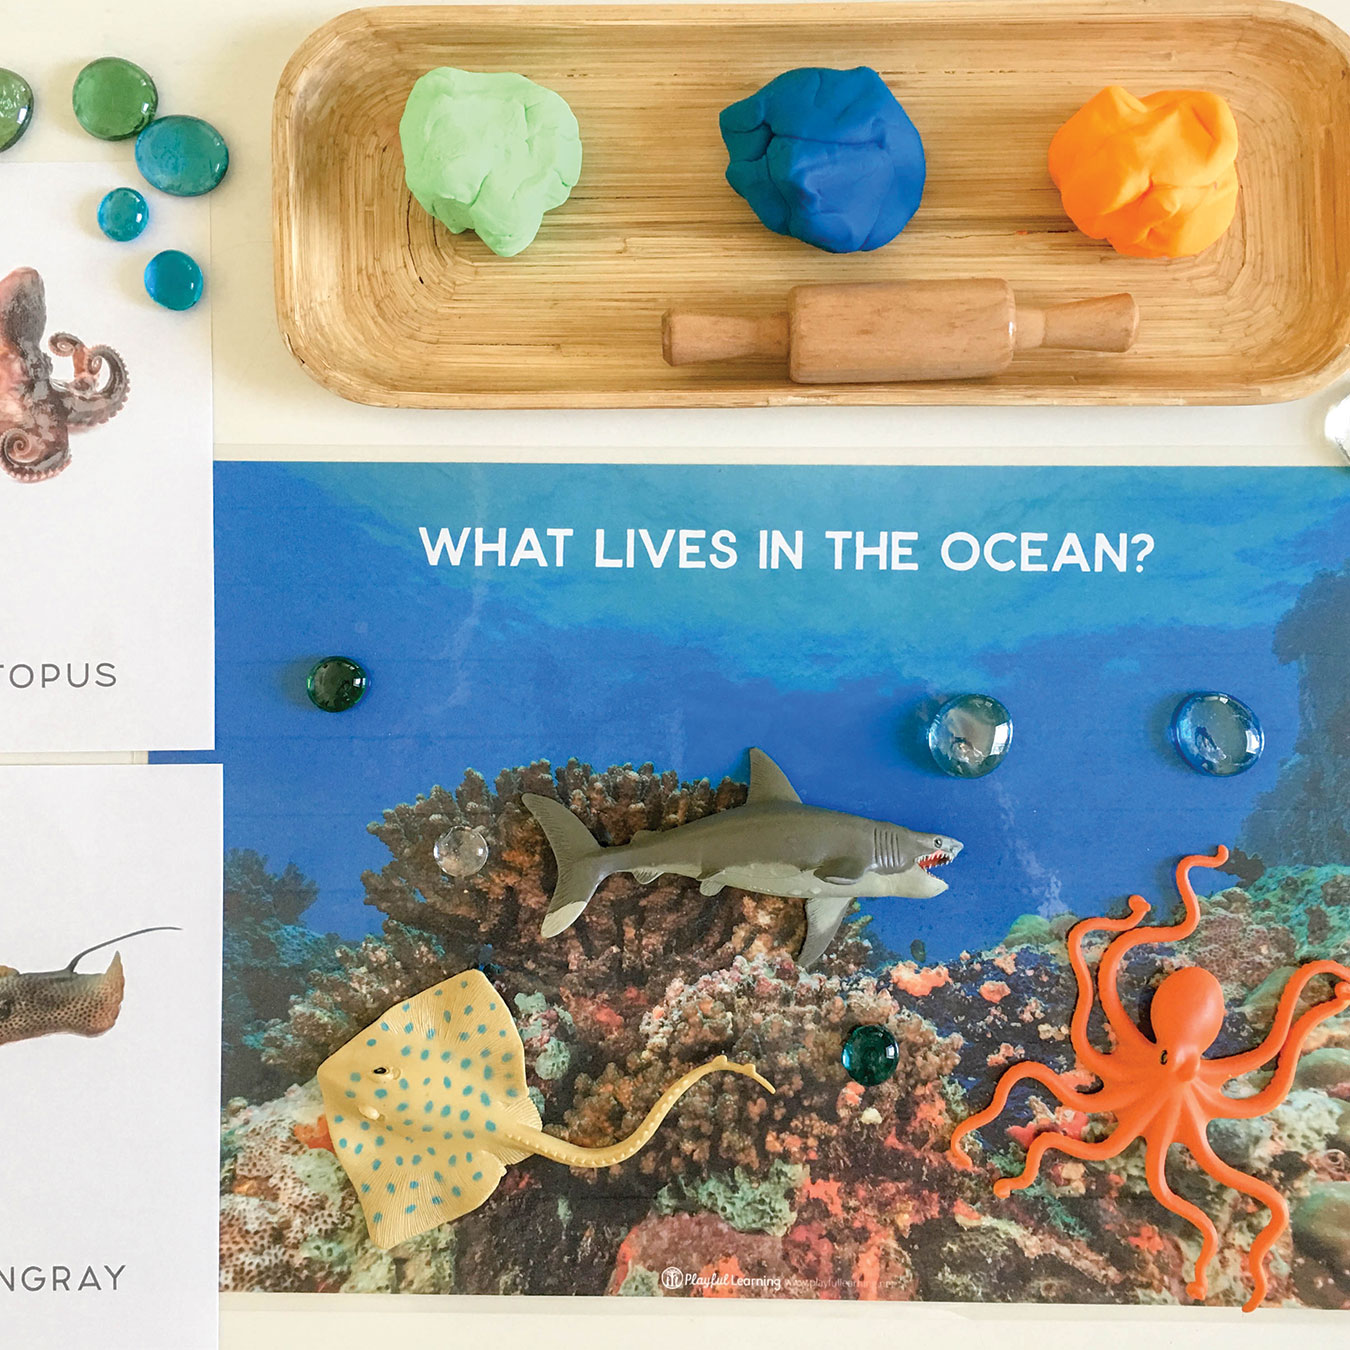
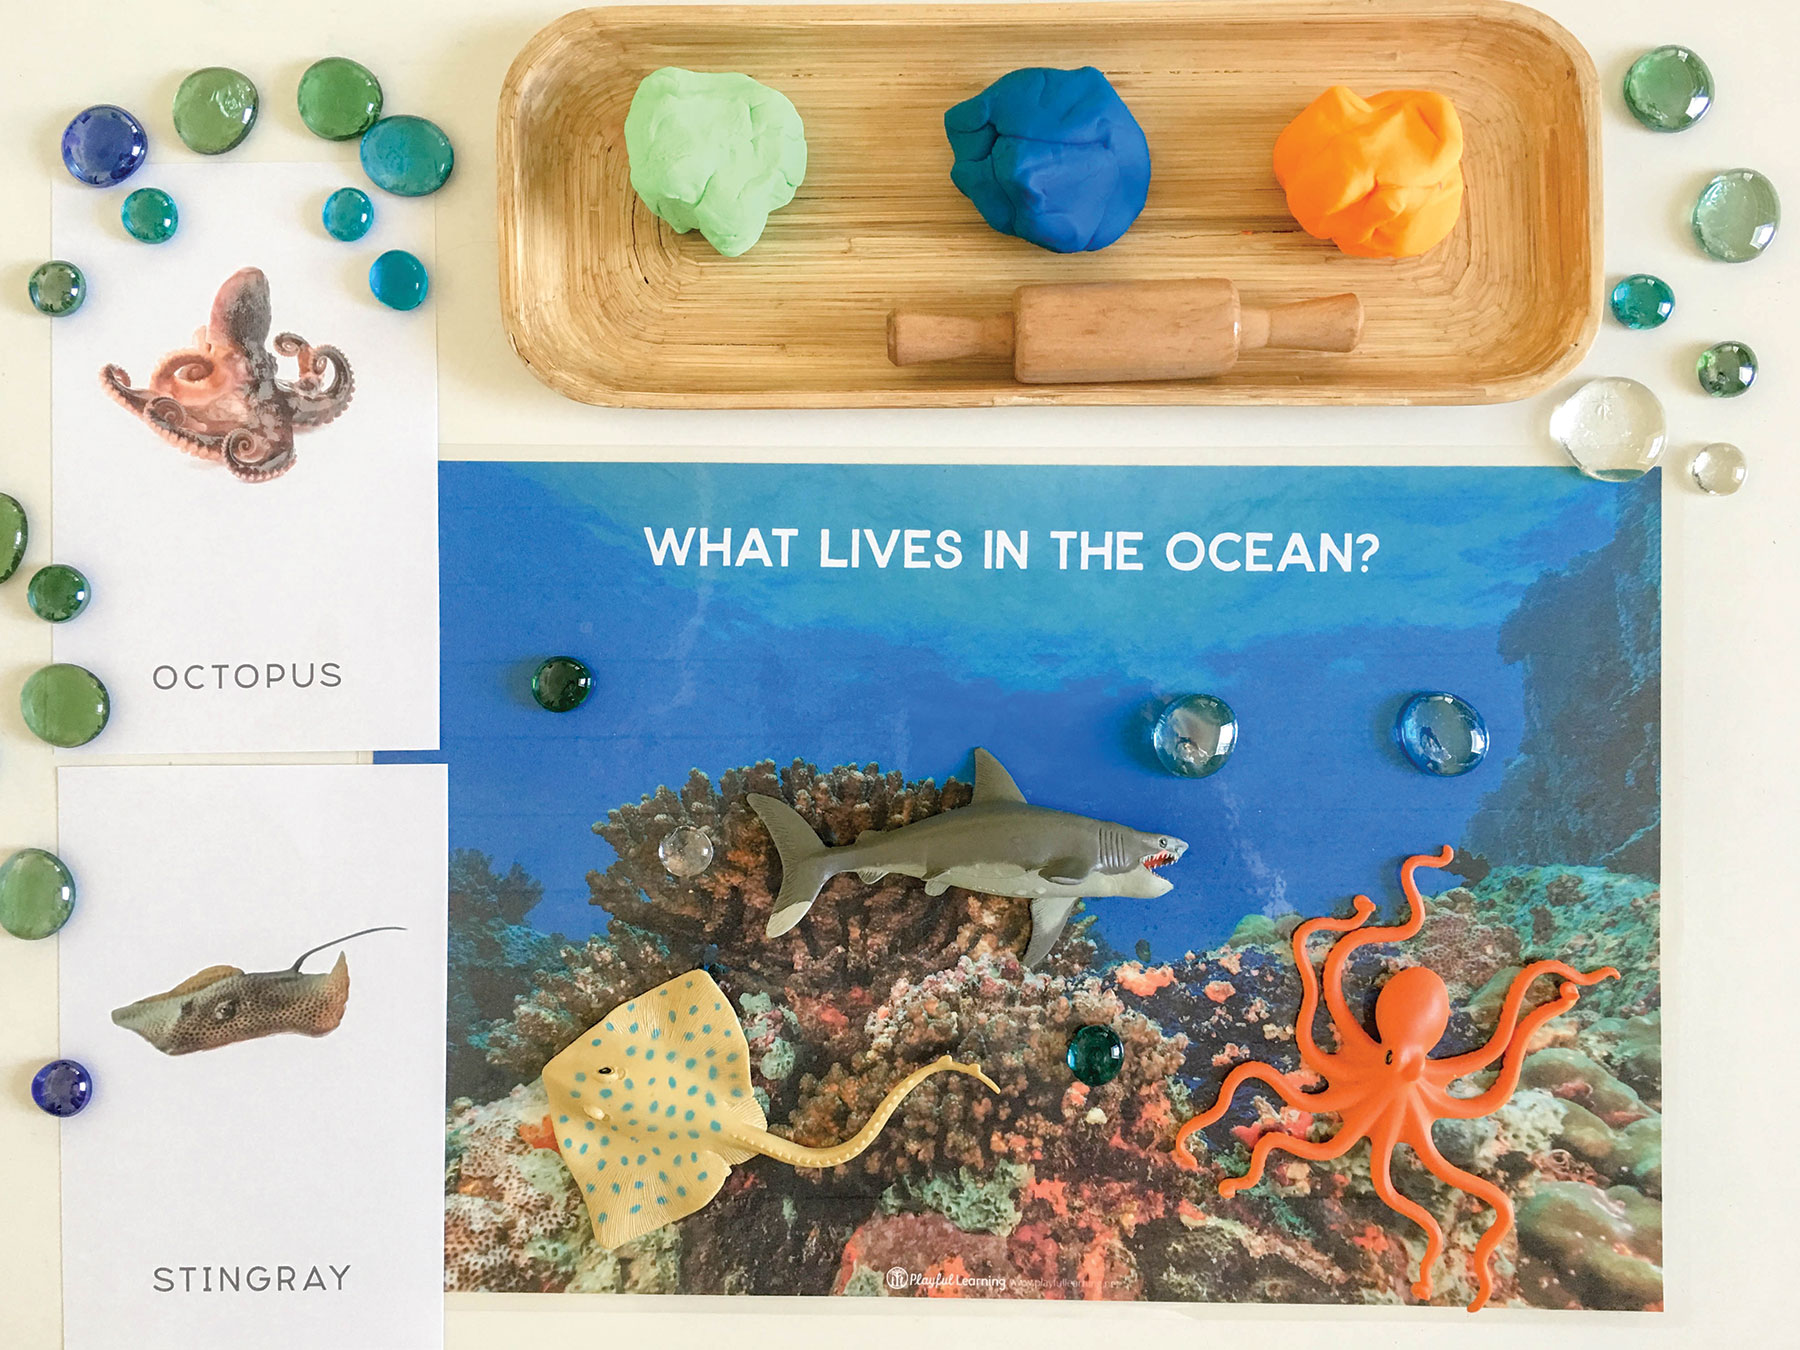
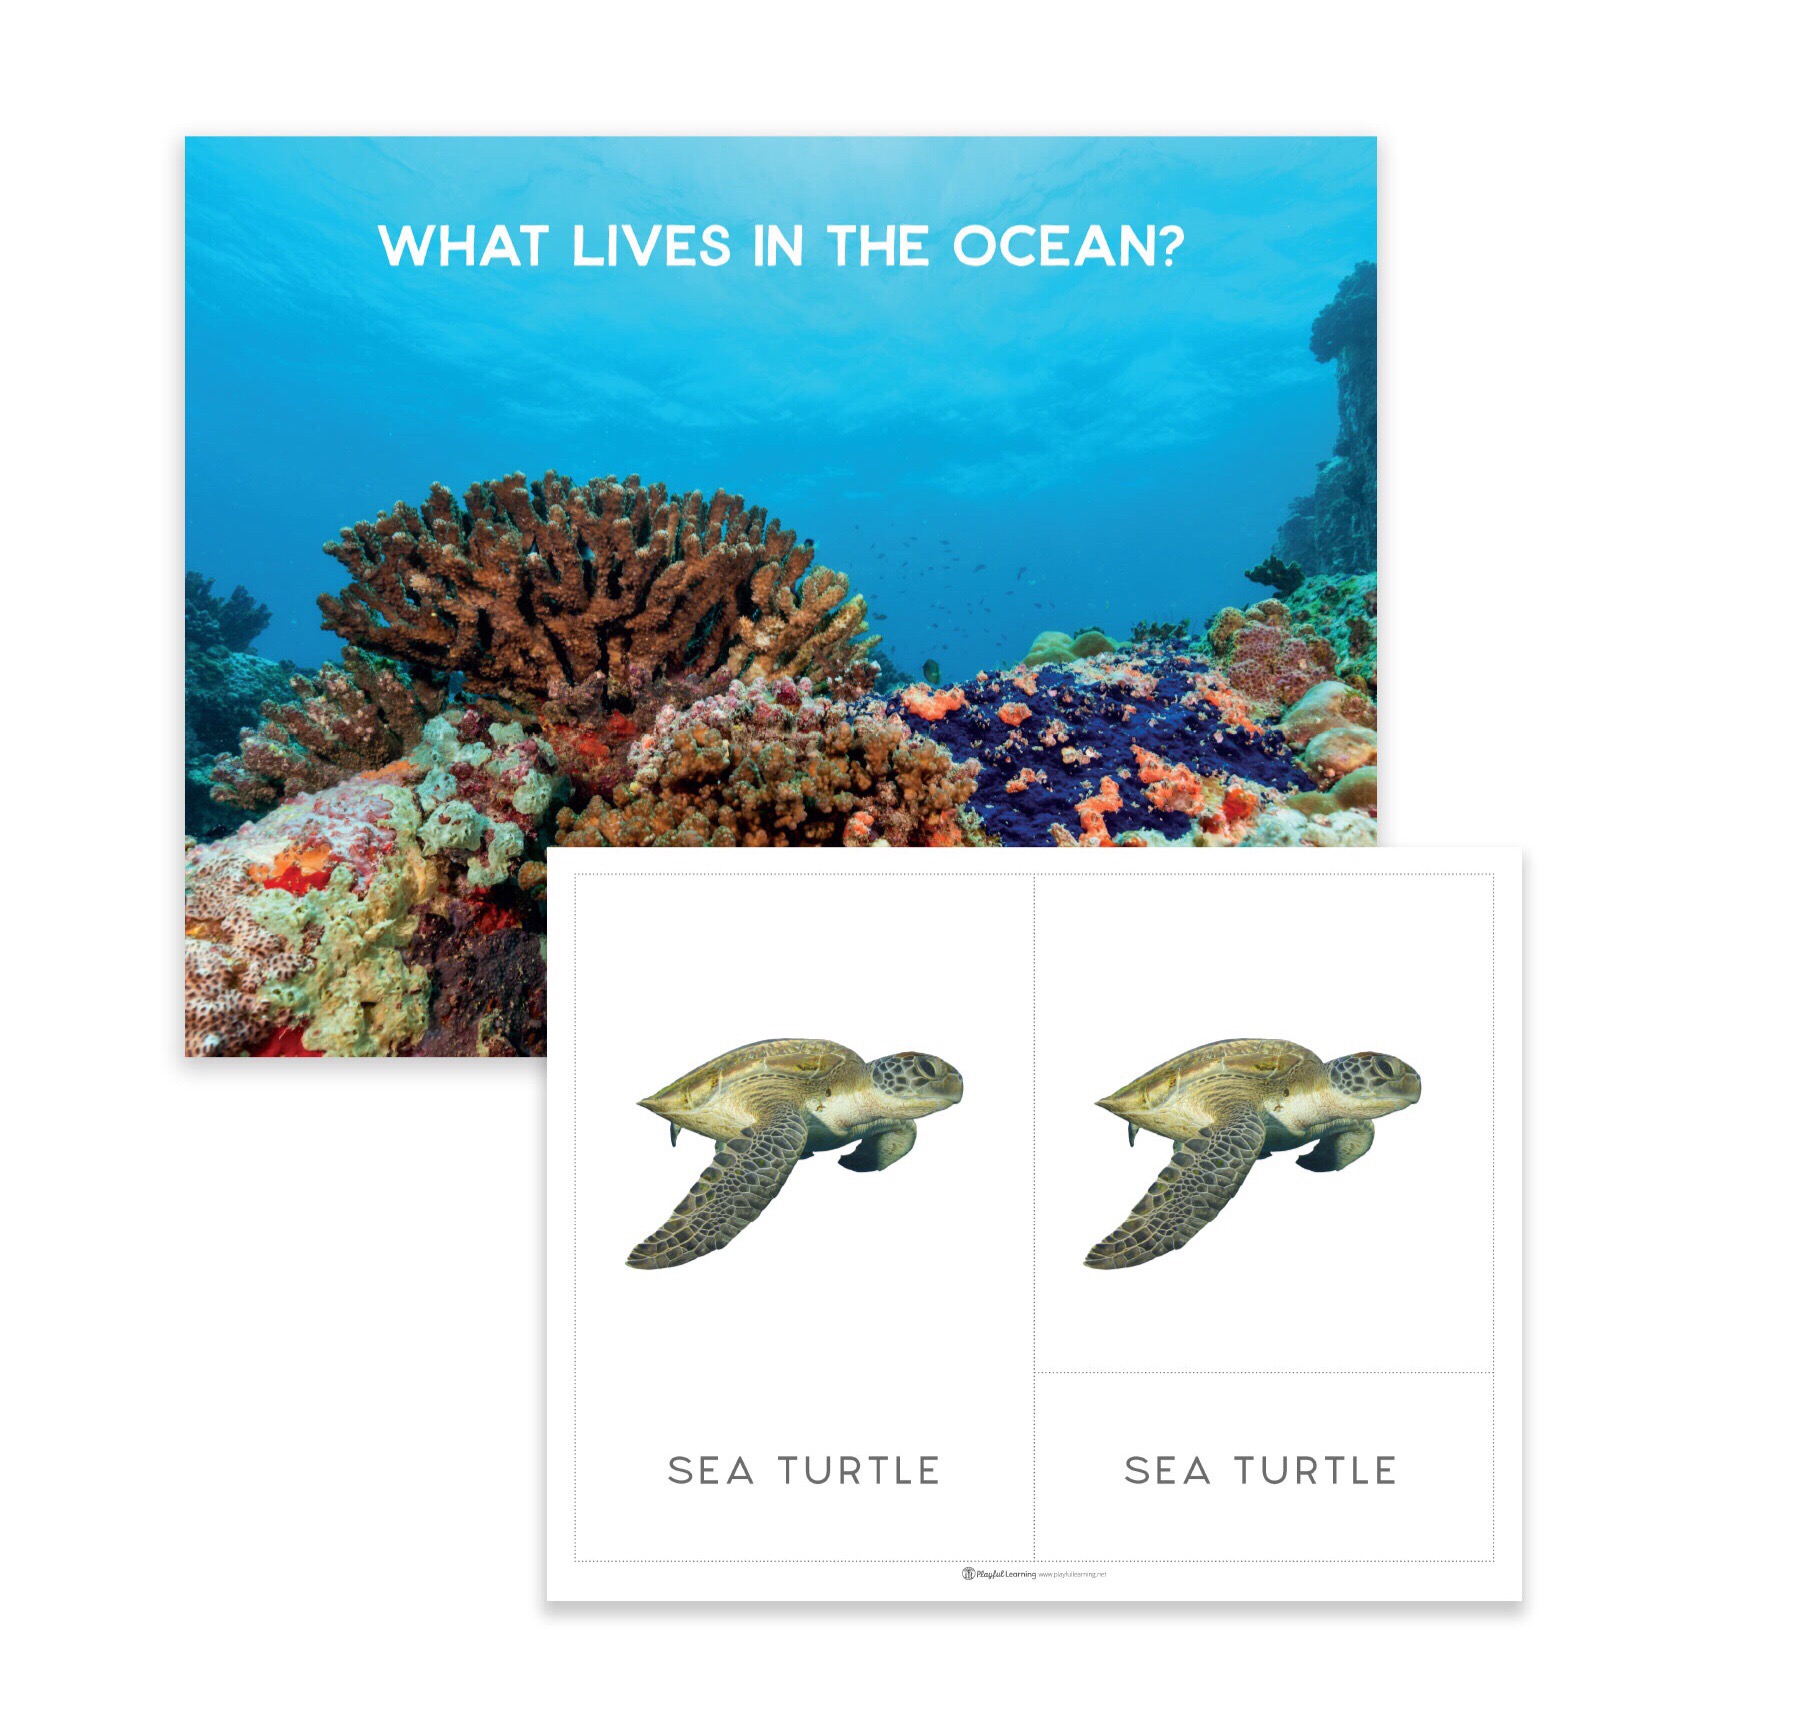
Children are fascinated by sea life… Our oceans and bays are full of fascinating creatures that can captivate young minds. One way to explore sea life with young chidlren is through open-ended dramatic play!
Simply, laminate our play dough mat and put out a collection of small figures, shells and some fun play dough colors and have children create their own creatures from the deep.
A favorite in the Playful Learning Studio is to match toy ocean animals to those labeled on our three-part-cards. Three part cards are a classic Montessori tool, used to build vocabulary and aid children in learning new information about a topic. In this set, children explore different types of animals that live in the ocean. There are many ways to use these cards including playing memory, matching words to pictures, or playing a “Go Fish” style game.
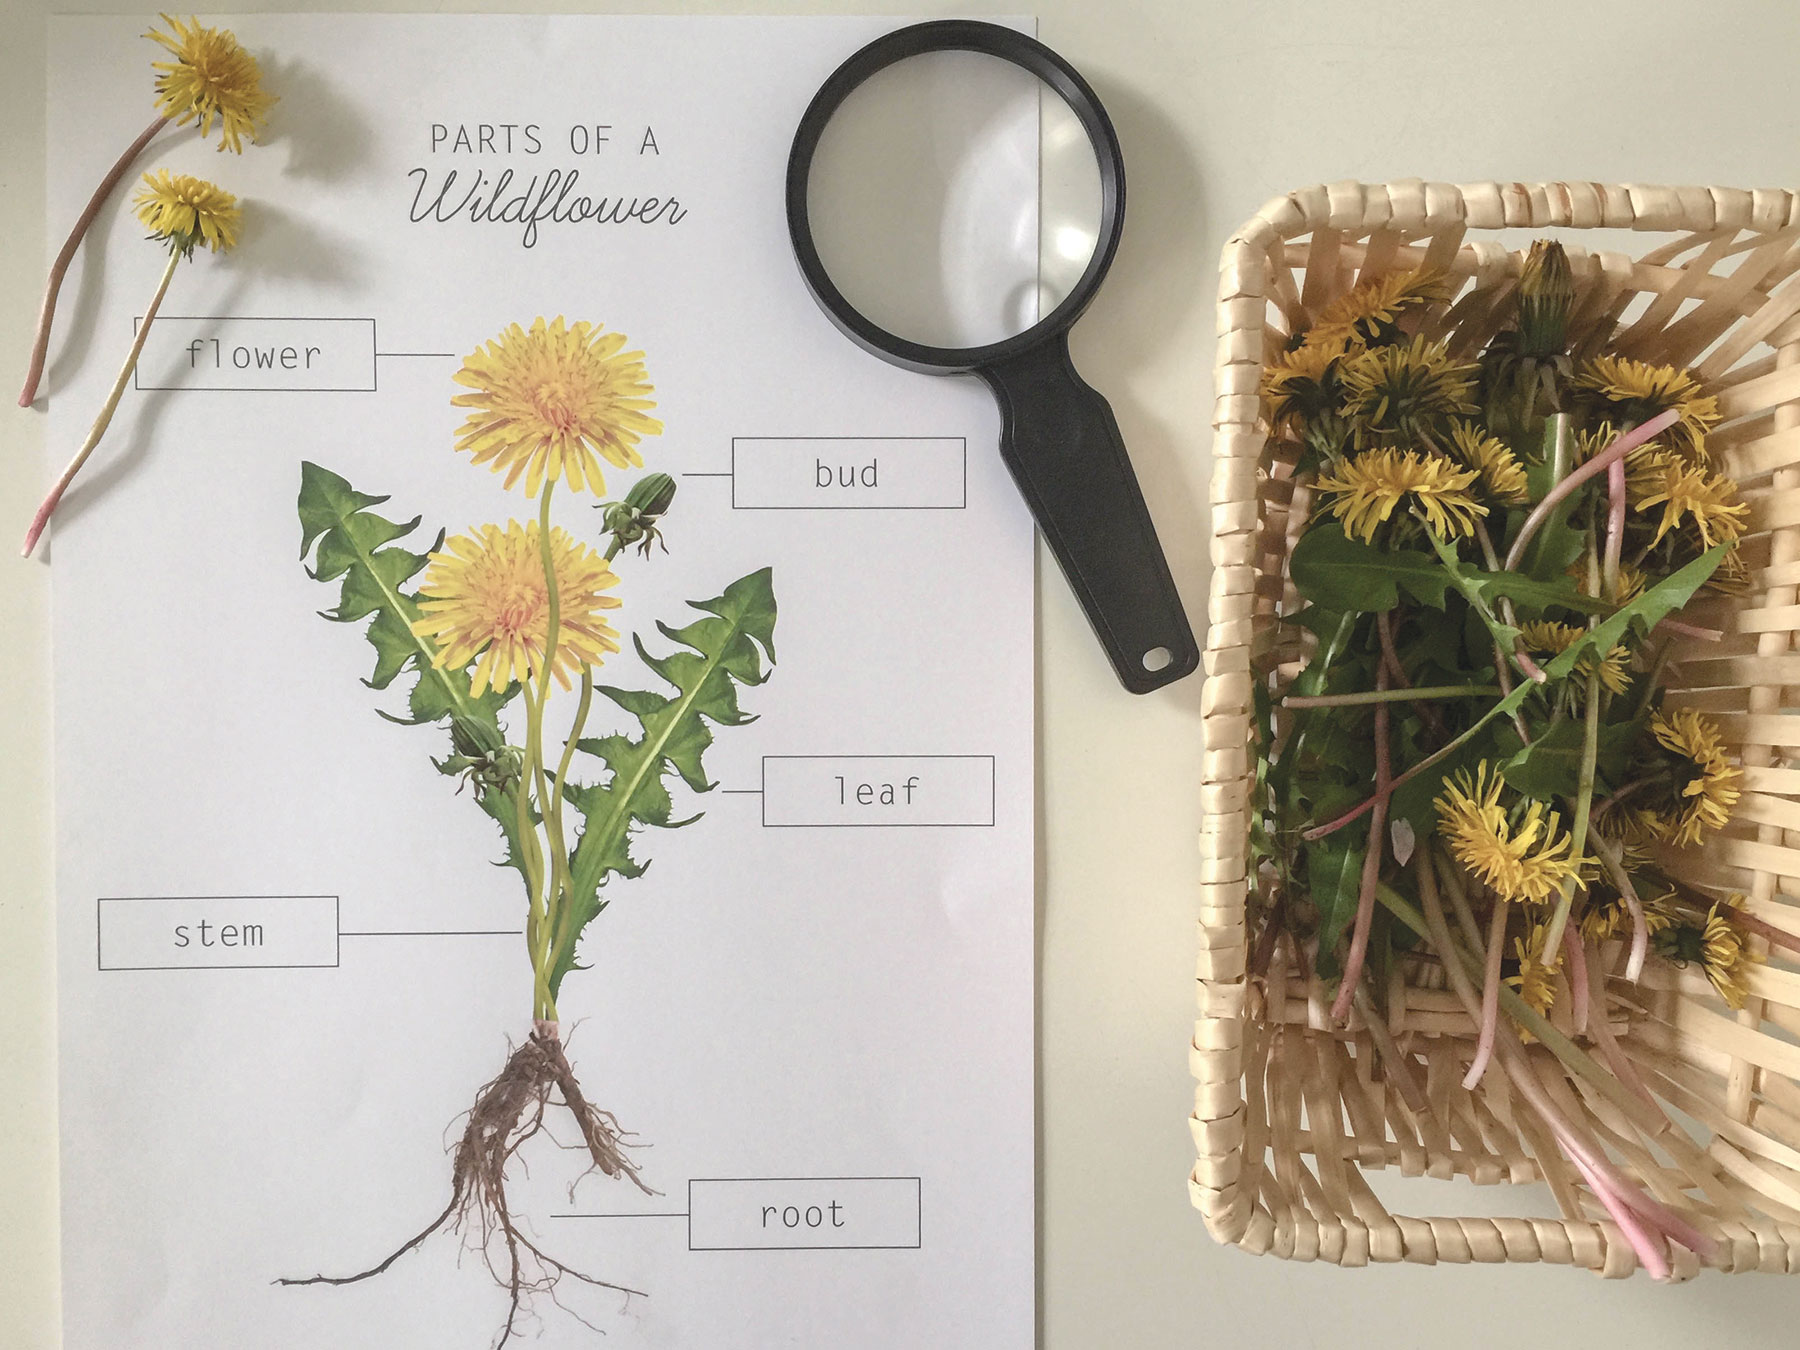
Have you ever slowed down enough to notice a flower? To really examine and admire each tiny little part of these wild and beautiful bits of nature? Use our printable to learn about, and label, different parts of a flower. Laminate the blank printable, and use dry erase markers, so that it can be used over and over again.
Here is some language to use as you explore the various parts of a flower:
Root: Anchors the plant, absorbs water and minerals and stores extra food
Stem: Supports the leaves and flowers, carries water and minerals up from the roots to the leaves, and then takes food back down so that it can be shared with other parts of the plant
Leaf: Turns energy, from the sun, into food for the plant as well as breathe in carbon dioxide and breathe out oxygen
Bud: May develop into a flower, leaf, or shoot
Flower: Blossoms to produce the seed, or fruit, of the plant
Though I do not believe that a plant will spring up where no seed has been, I have great faith in a seed… Convince me that you have a seed there, and I am prepared to expect wonders. – Henry David Thoreau
Description
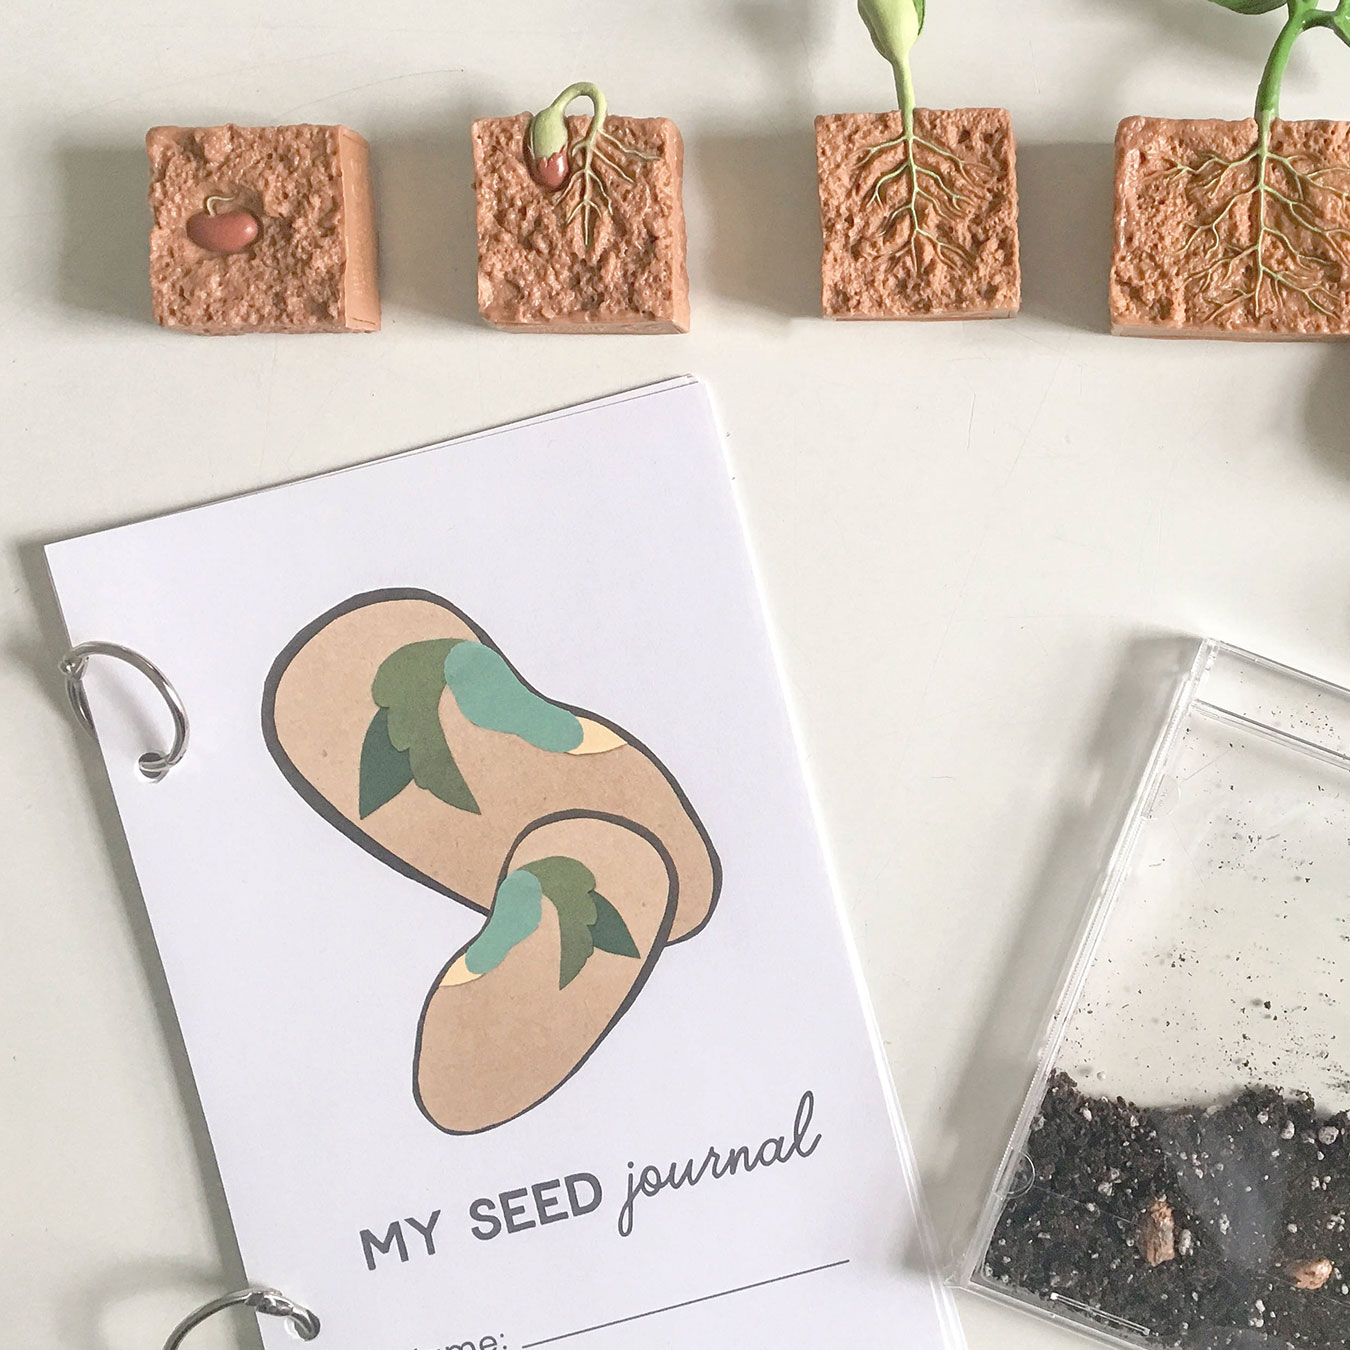
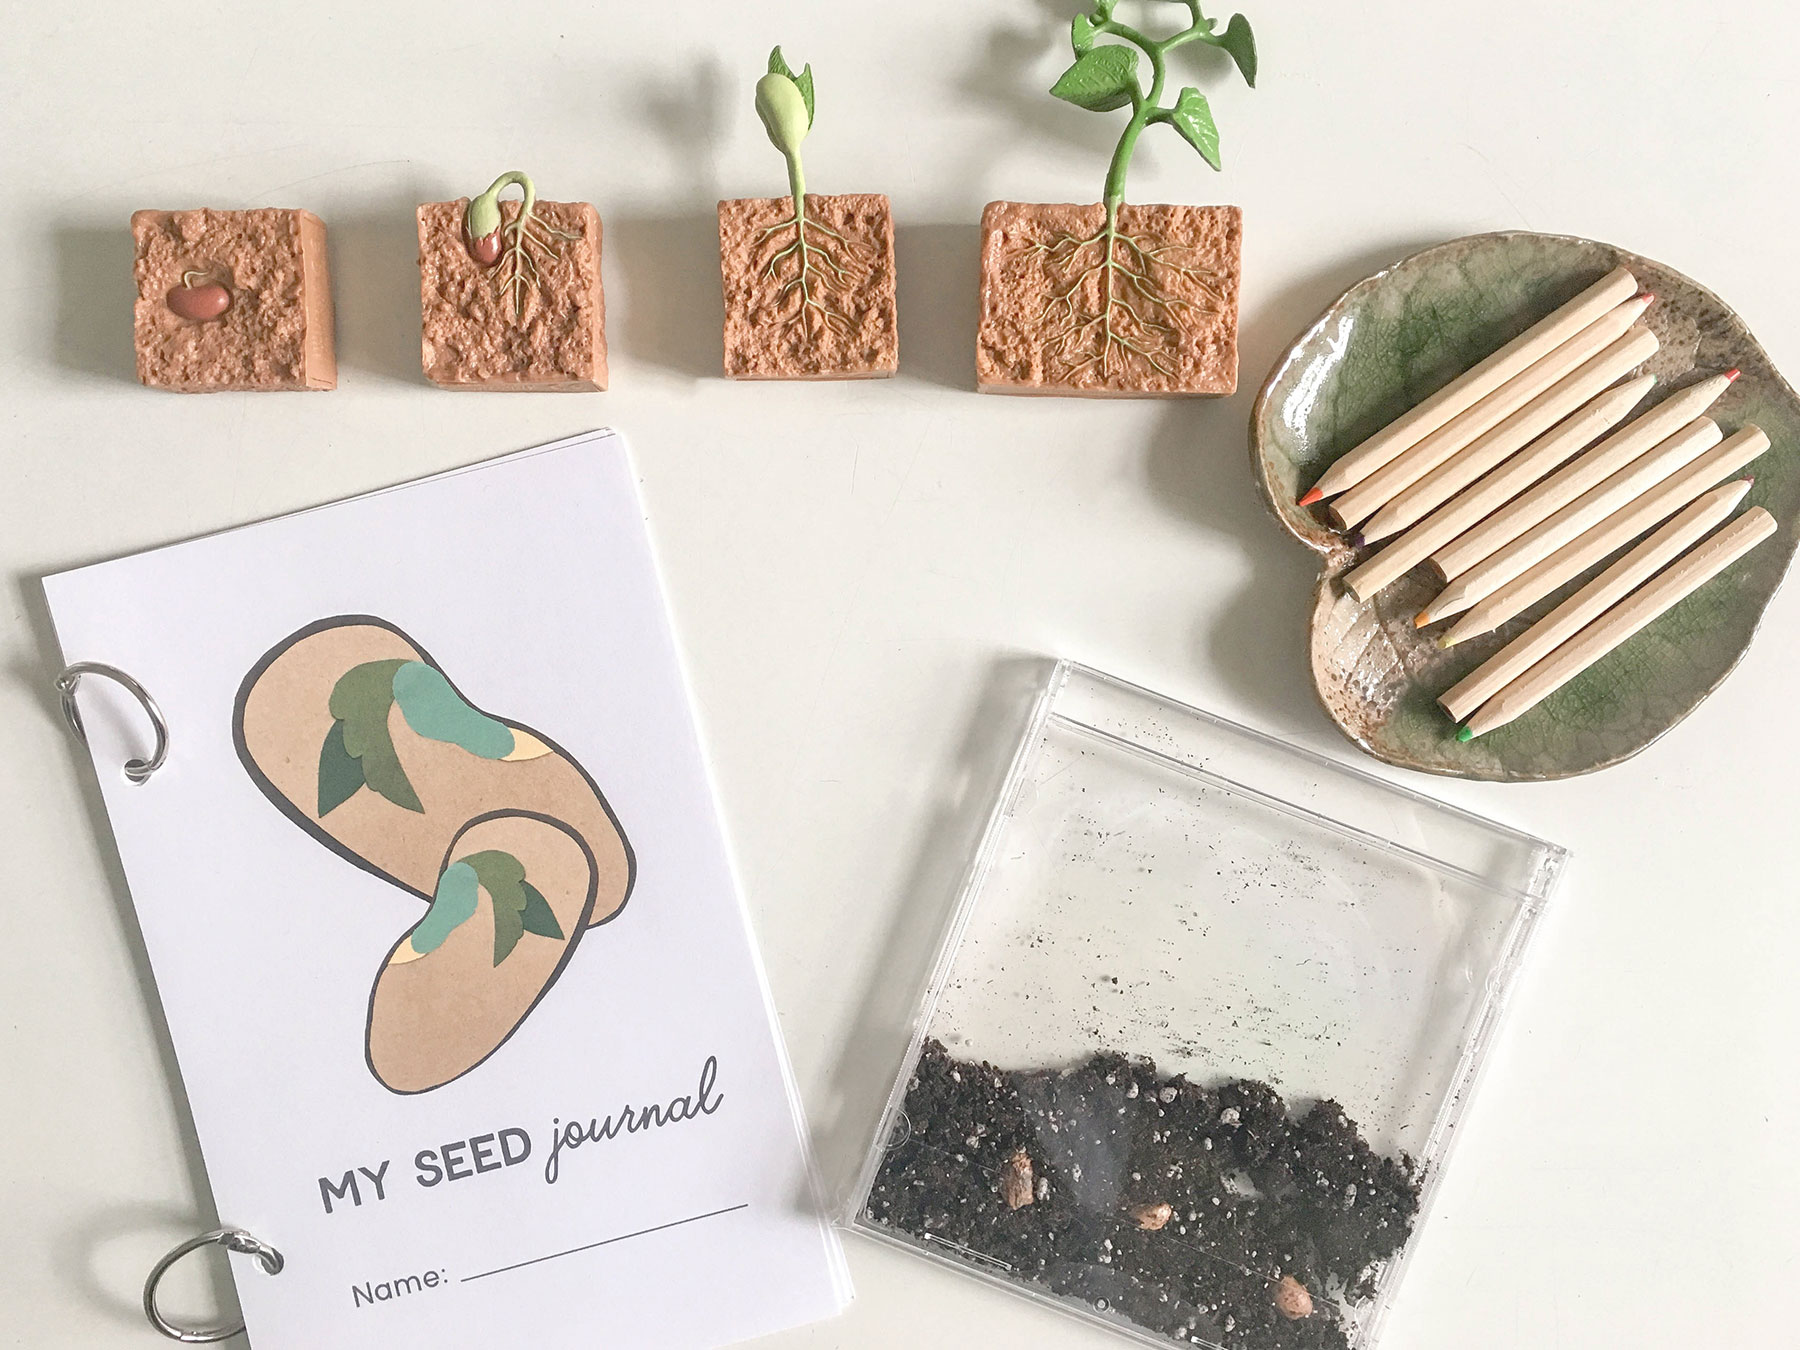
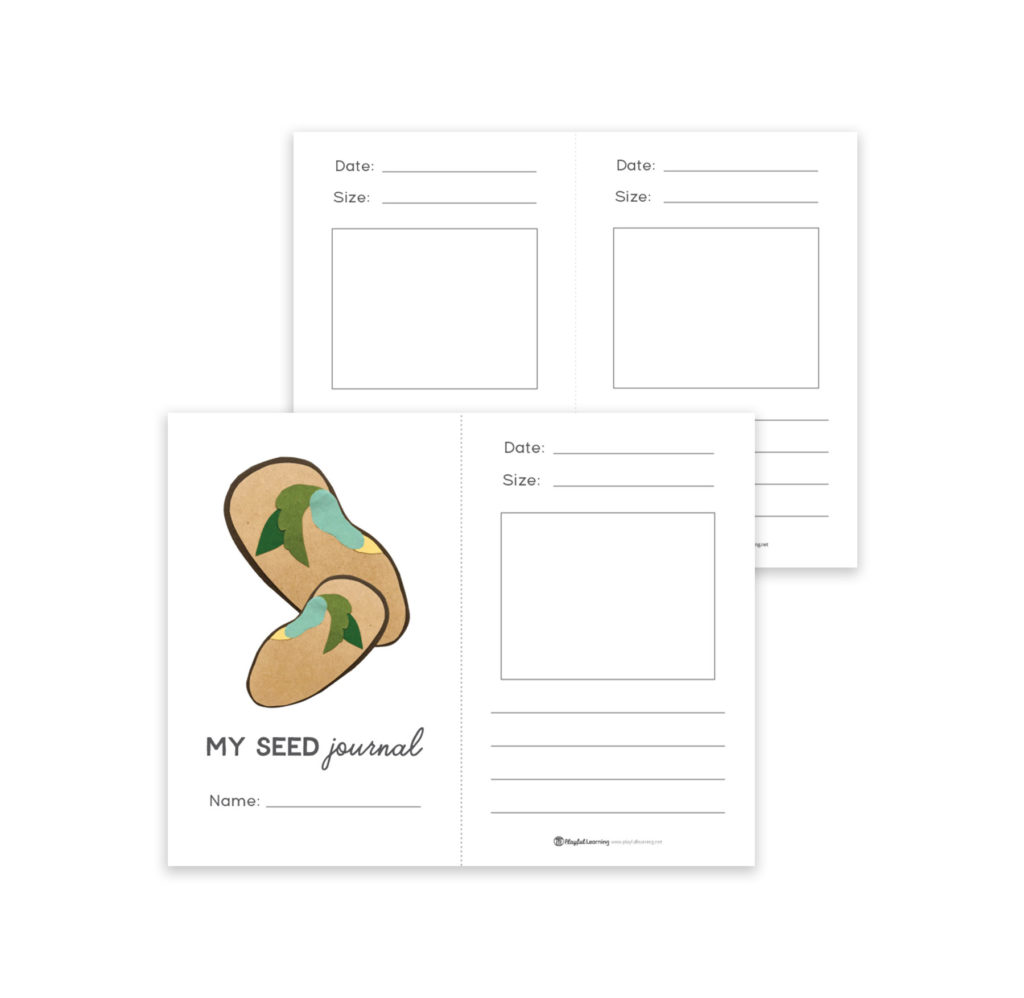
The best way to learn about seeds is to plant them, care for them, and then watch the magic unfold! Whether you plant your seed in a jar (filled with cotton balls), a small pot filled with soil, or in an outside garden, children will enjoy watering their seed and making predictions about what it might look like as it grows. Use our seed journal pages and put together a book to track the seed’s growth. We suggest observing your seed for about 12-16 days. Each day, your child can draw a picture, record observations, and measure the height of her plant. Keep our Parts of a Bean Seedprintables nearby, along with a magnifying glass and a measuring tape, so that your child can label the parts of the seed and the plant as it grows. Don’t forget to try this out with different types of seeds! Which seeds germinate the fastest? Which seeds germinate the slowest?
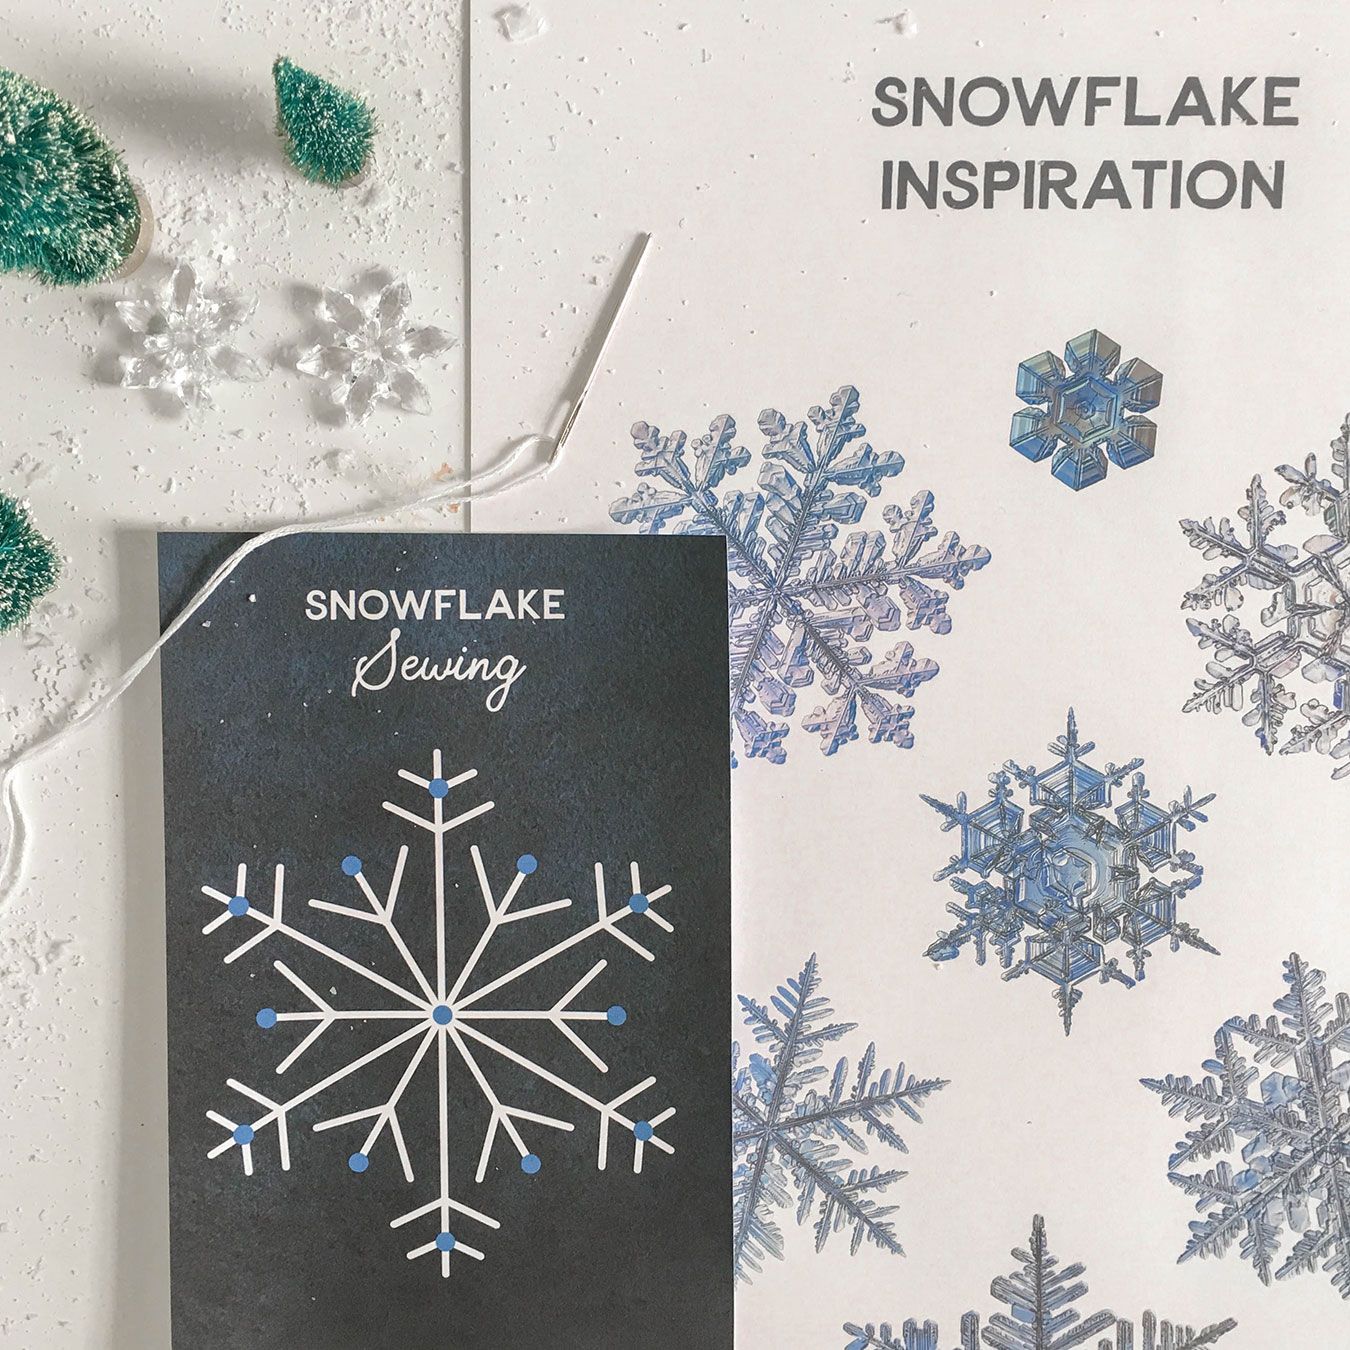
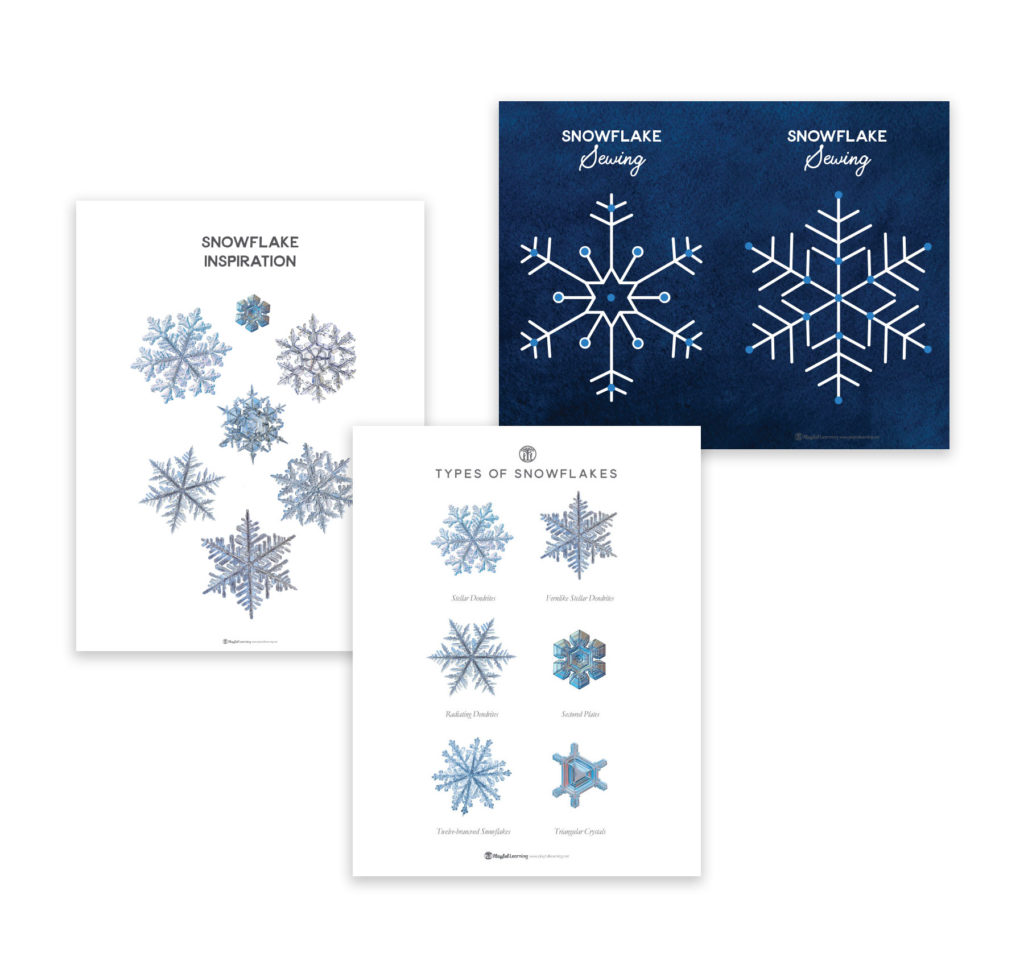
‘Tis the season to celebrate snow! This hands-on activity encourages children to slow down and look at the details in snowflakes, while practicing their fine motor skills. Before presenting the cards to your child we suggest cutting each page in half and printing them out on cardstock, or on paper and laminating them. Then use a nail to poke holes in the blue dots. You may also want to look at photographs of snowflakes and have your child explore and trace the lines. When you’re ready, present your child with the prepared cards along with a threaded embroidery needle.
Next, enjoy the time sewing and chatting with your little scientists…
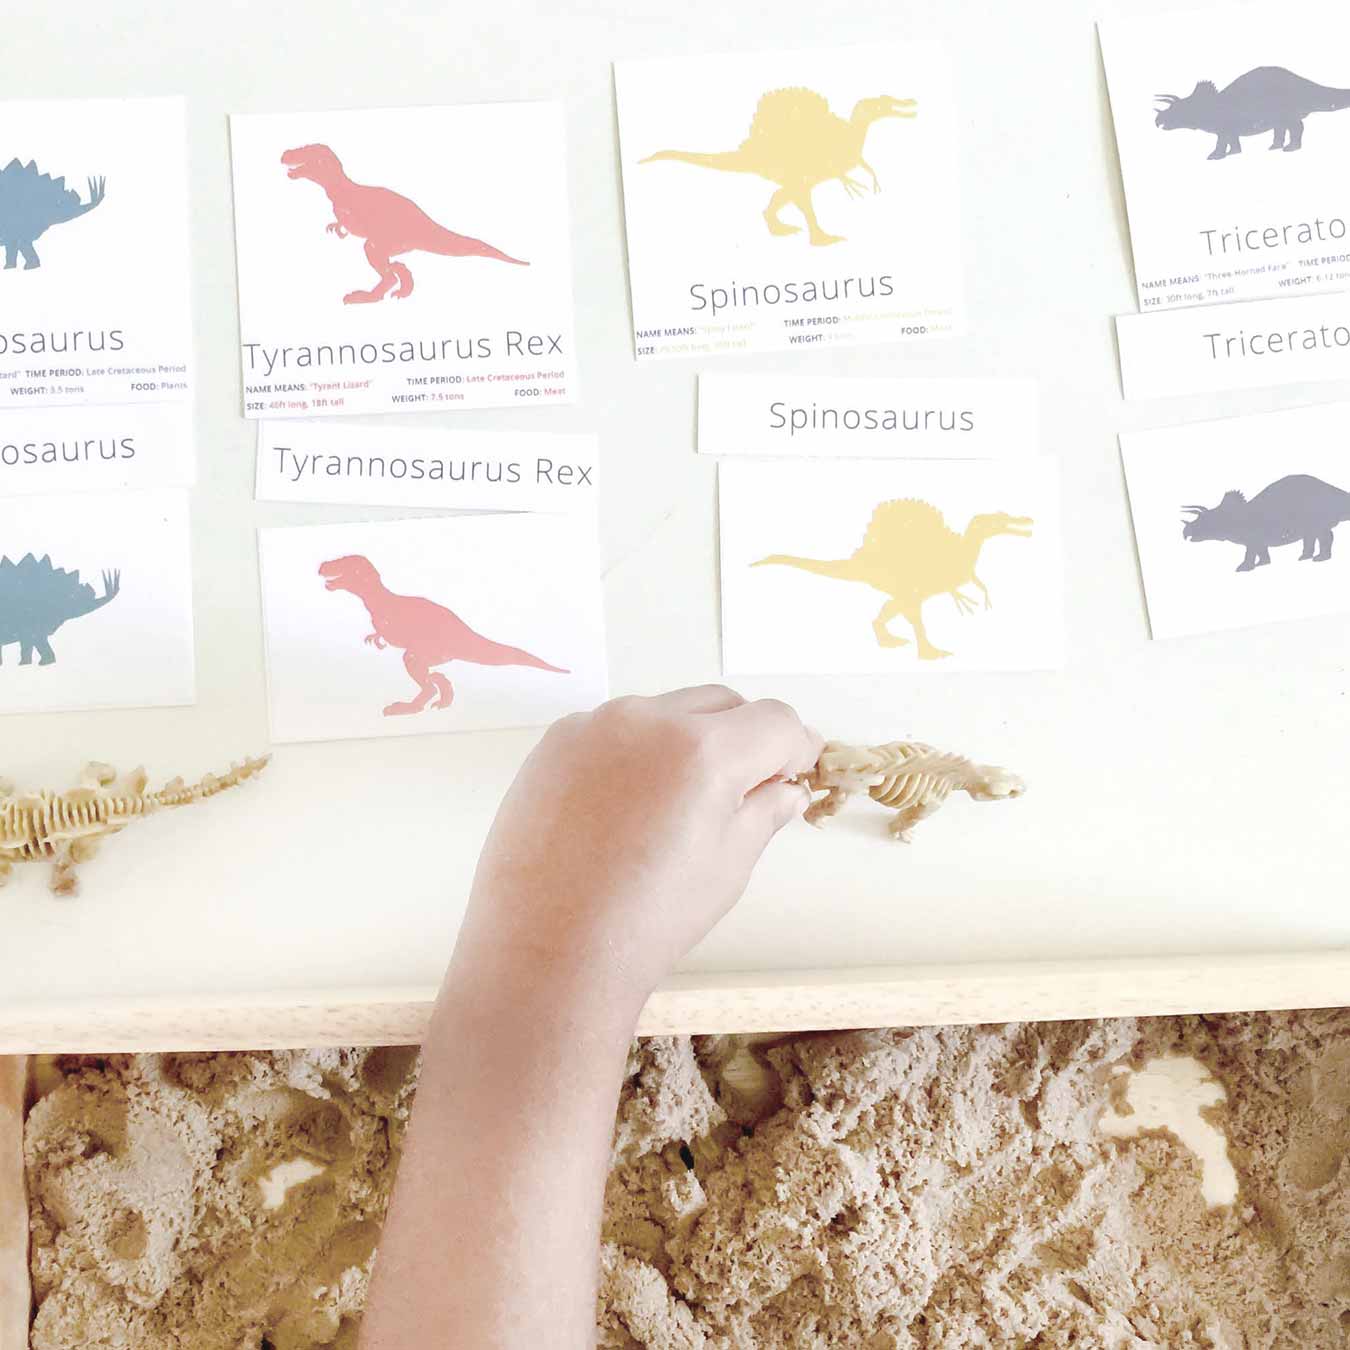
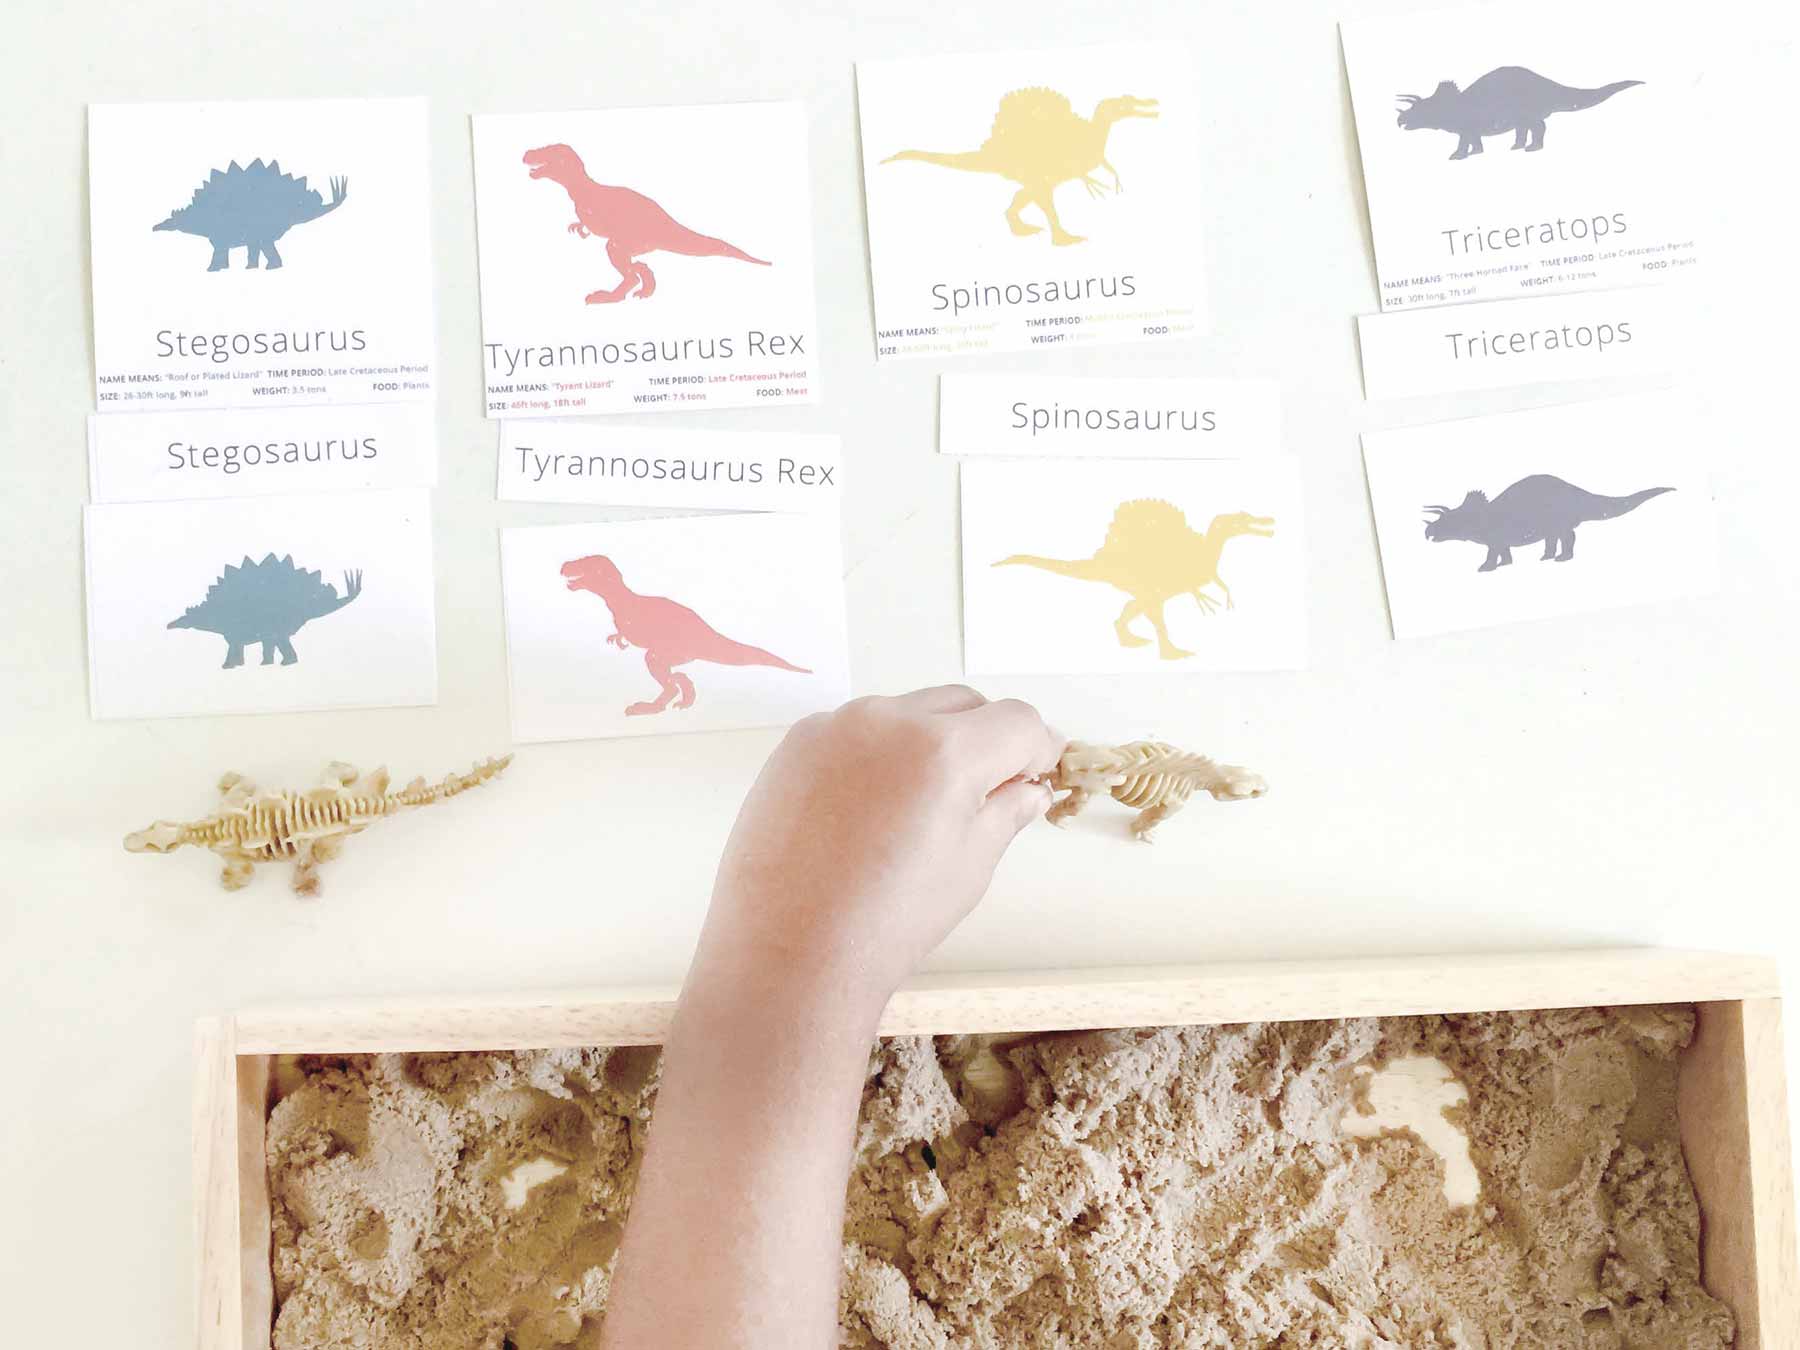
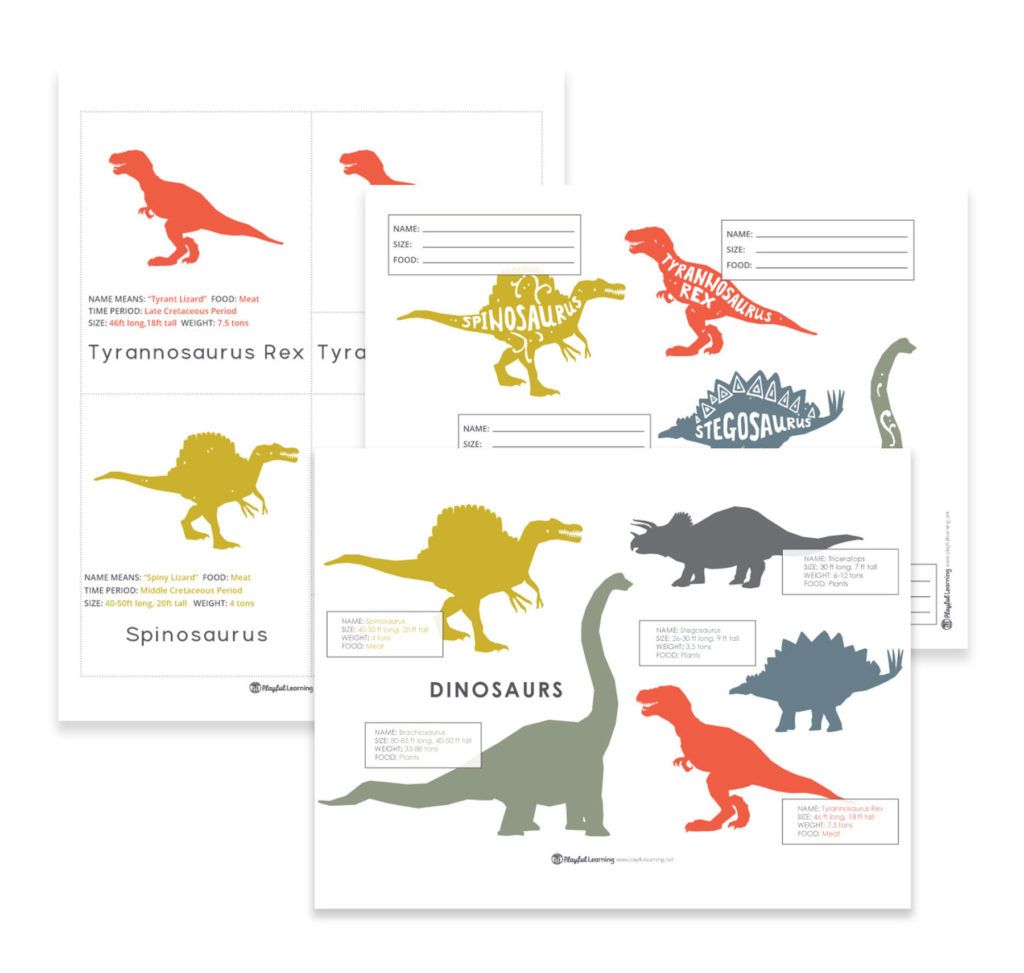
Learning about dinosaurs can be very exciting for children, and often times they end up knowing more about dinosaurs than the adults do! Use our fun printables to guide children as they begin to identify the names of different types of dinosaurs and learn interesting facts about these prehistoric beasts. How big was a brontosaurus? How much did a tyrannosaurus rex weigh? What did stegosaurus eat? Browse through books, or visit a natural history museum if you’re lucky enough to have one in your area, and absorb as much information as you can. A favorite way to use this guide in the Playful Learning Studio is to have plastic dinosaurs in a sensory bin with the laminated guide nearby. Children enjoy matching the dinosaurs in the bin to the pictures on the guide.
Also enjoy our dinosaur three-part cards! Three part cards are a classic Montessori tool, used to aid children in learning vocabulary and new information. There are many ways they can be used including, matching, playing memory, or playing a “Go Fish” style game. A favorite in the Playful Learning studio is to match a collection of toy dinosaurs directly to the cards.
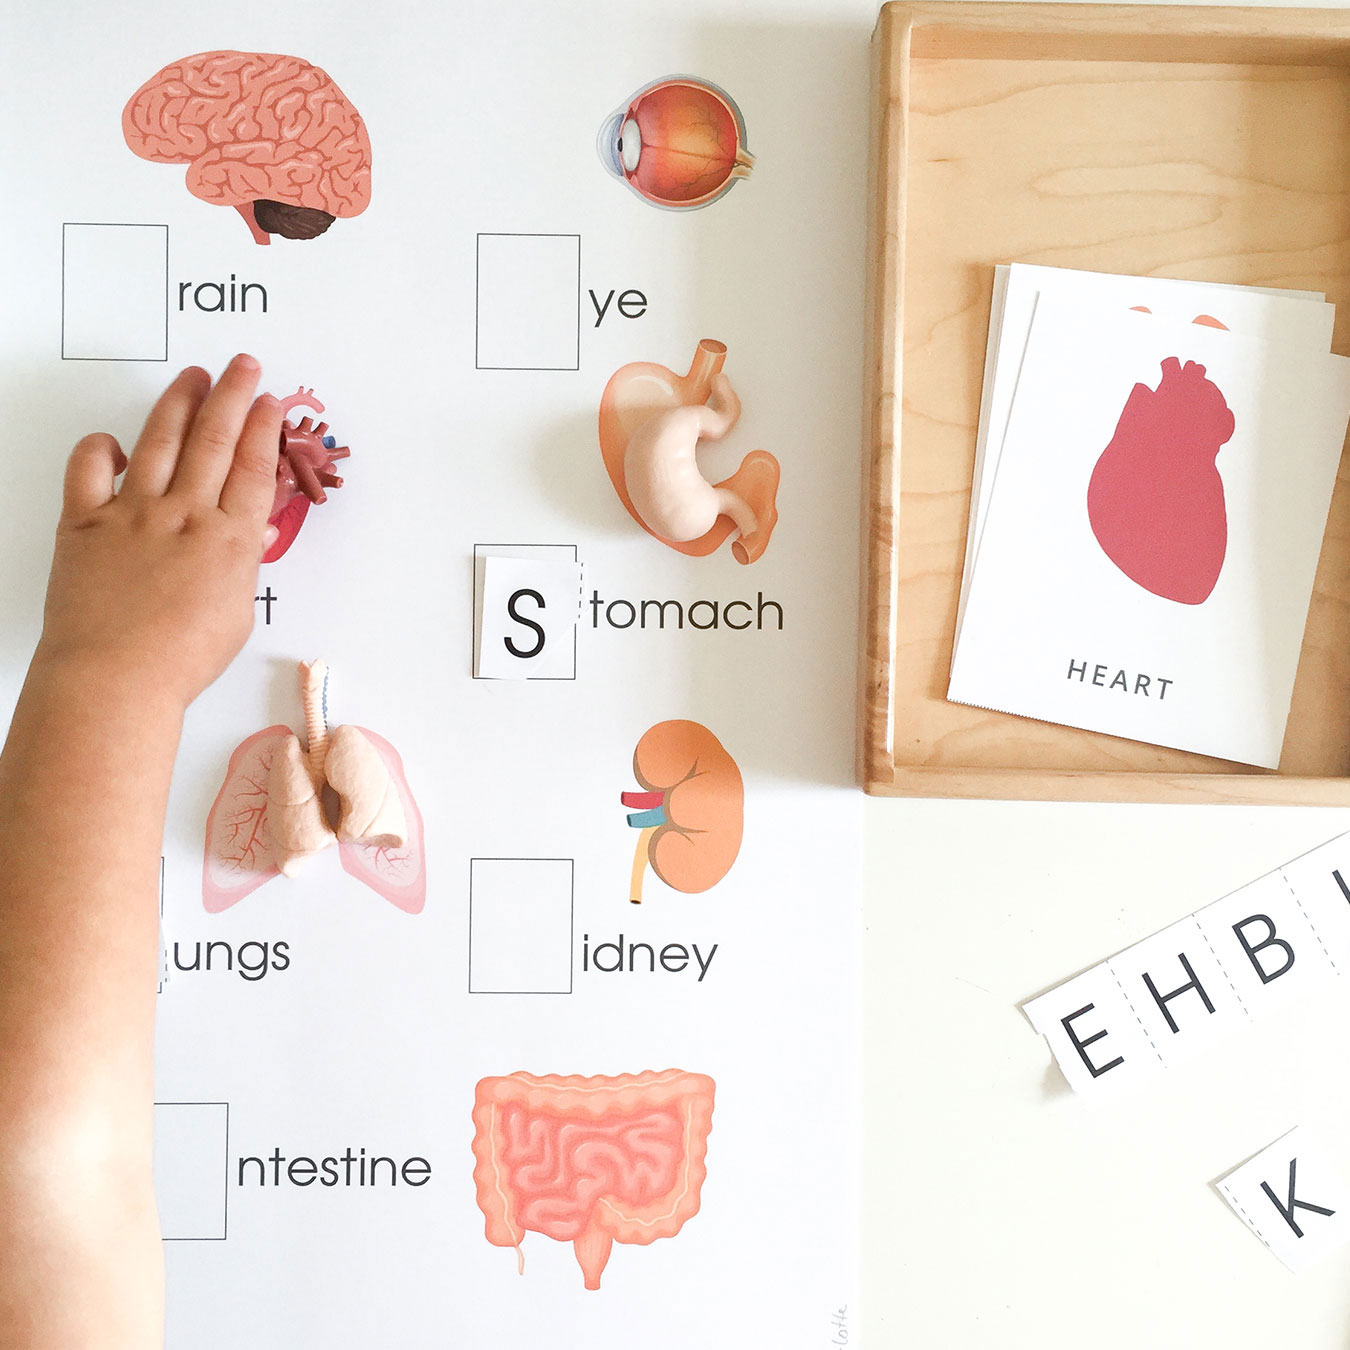
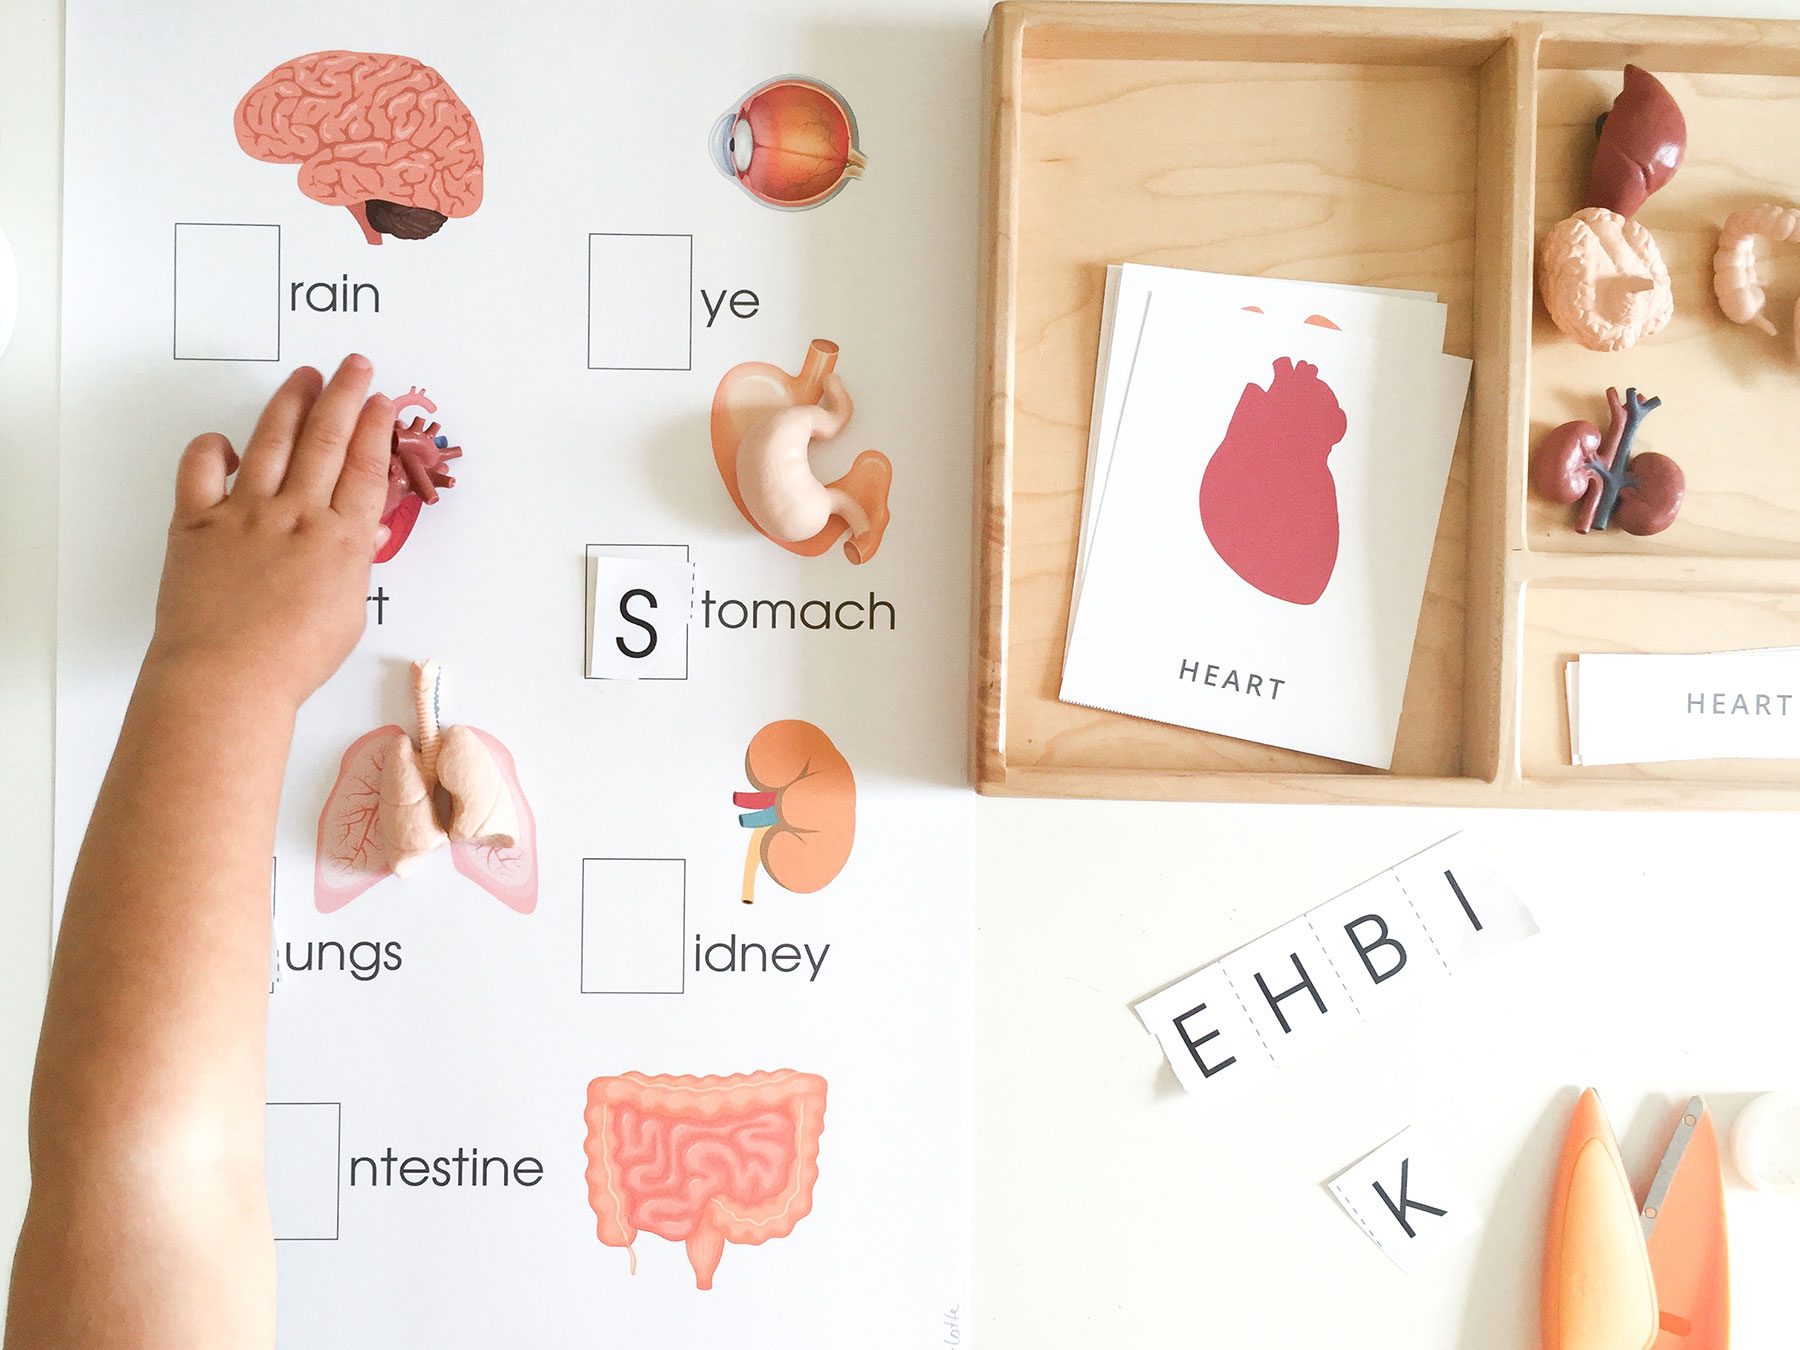
Identify beginning letter sounds while learning about the human body. Children cut apart a letter strip and match each sound to the correct picture. Do you have wooden or magnetic letters on hand? Deepen your child’s understanding of letter sounds by using them to make the words on the printable. We love to pair this experience with corresponding plastic figures. It’s fun to put them in a mystery bag and then match each one with the image in the printable.
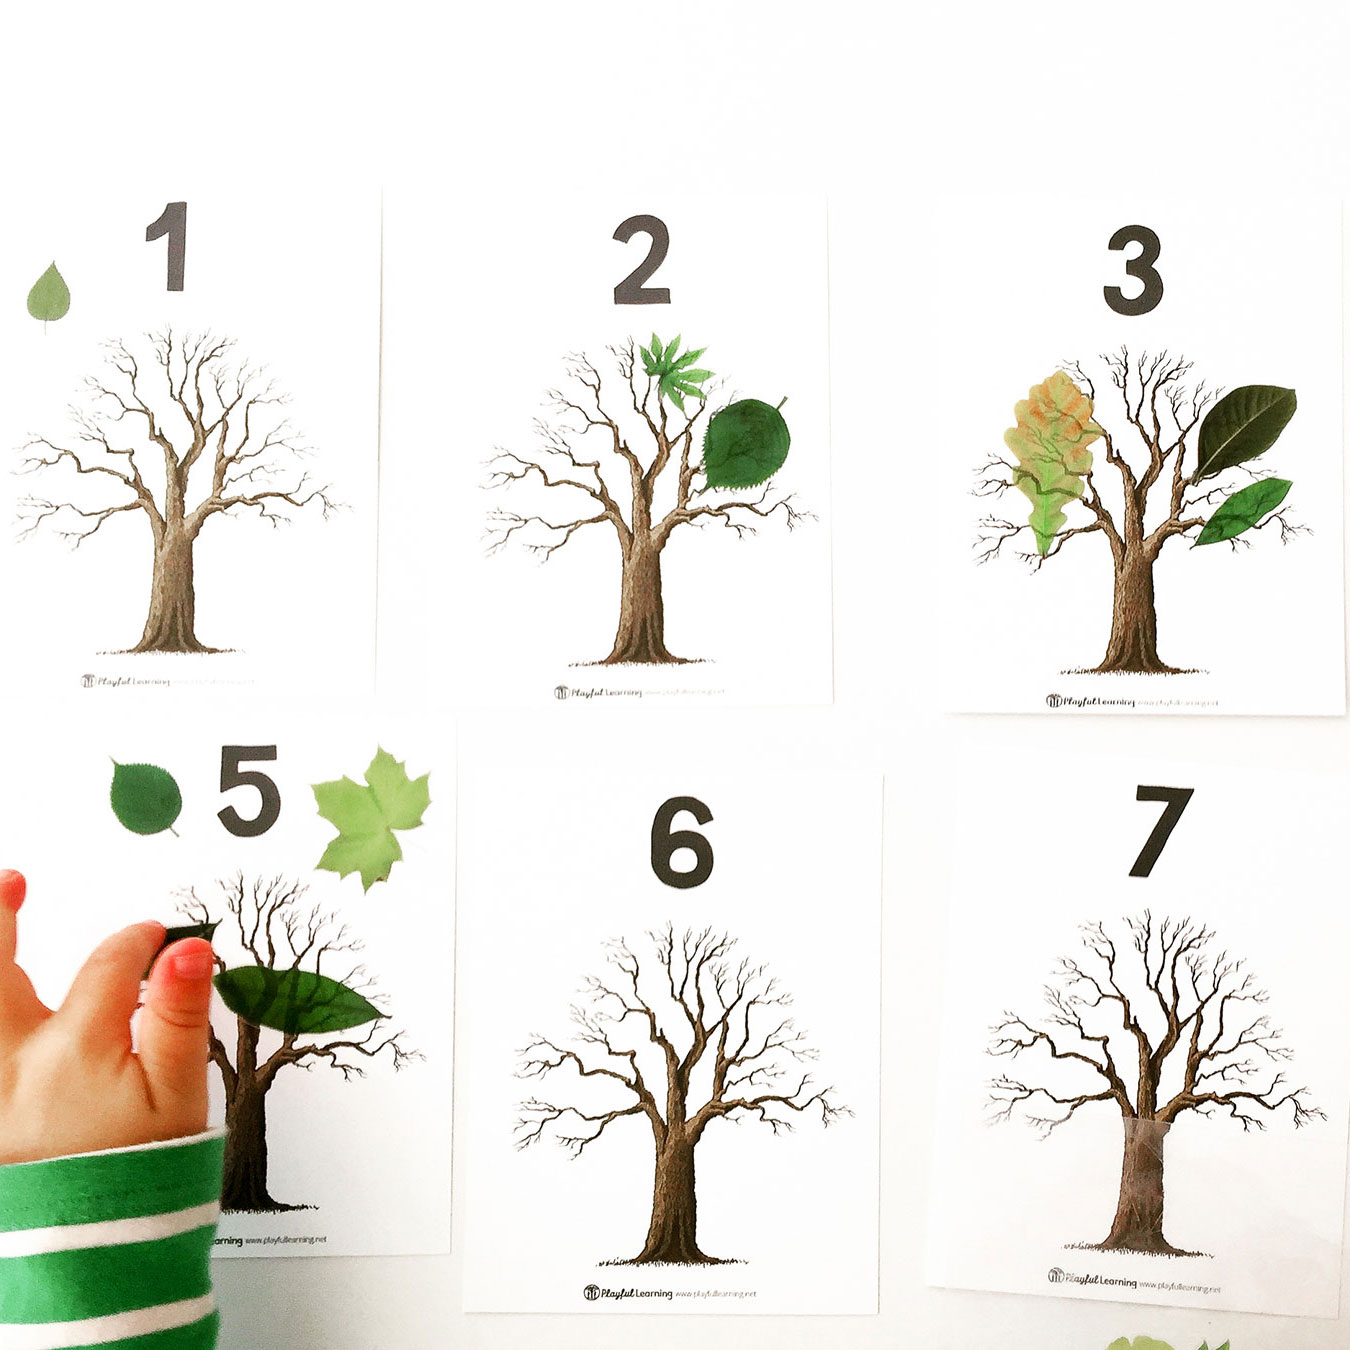
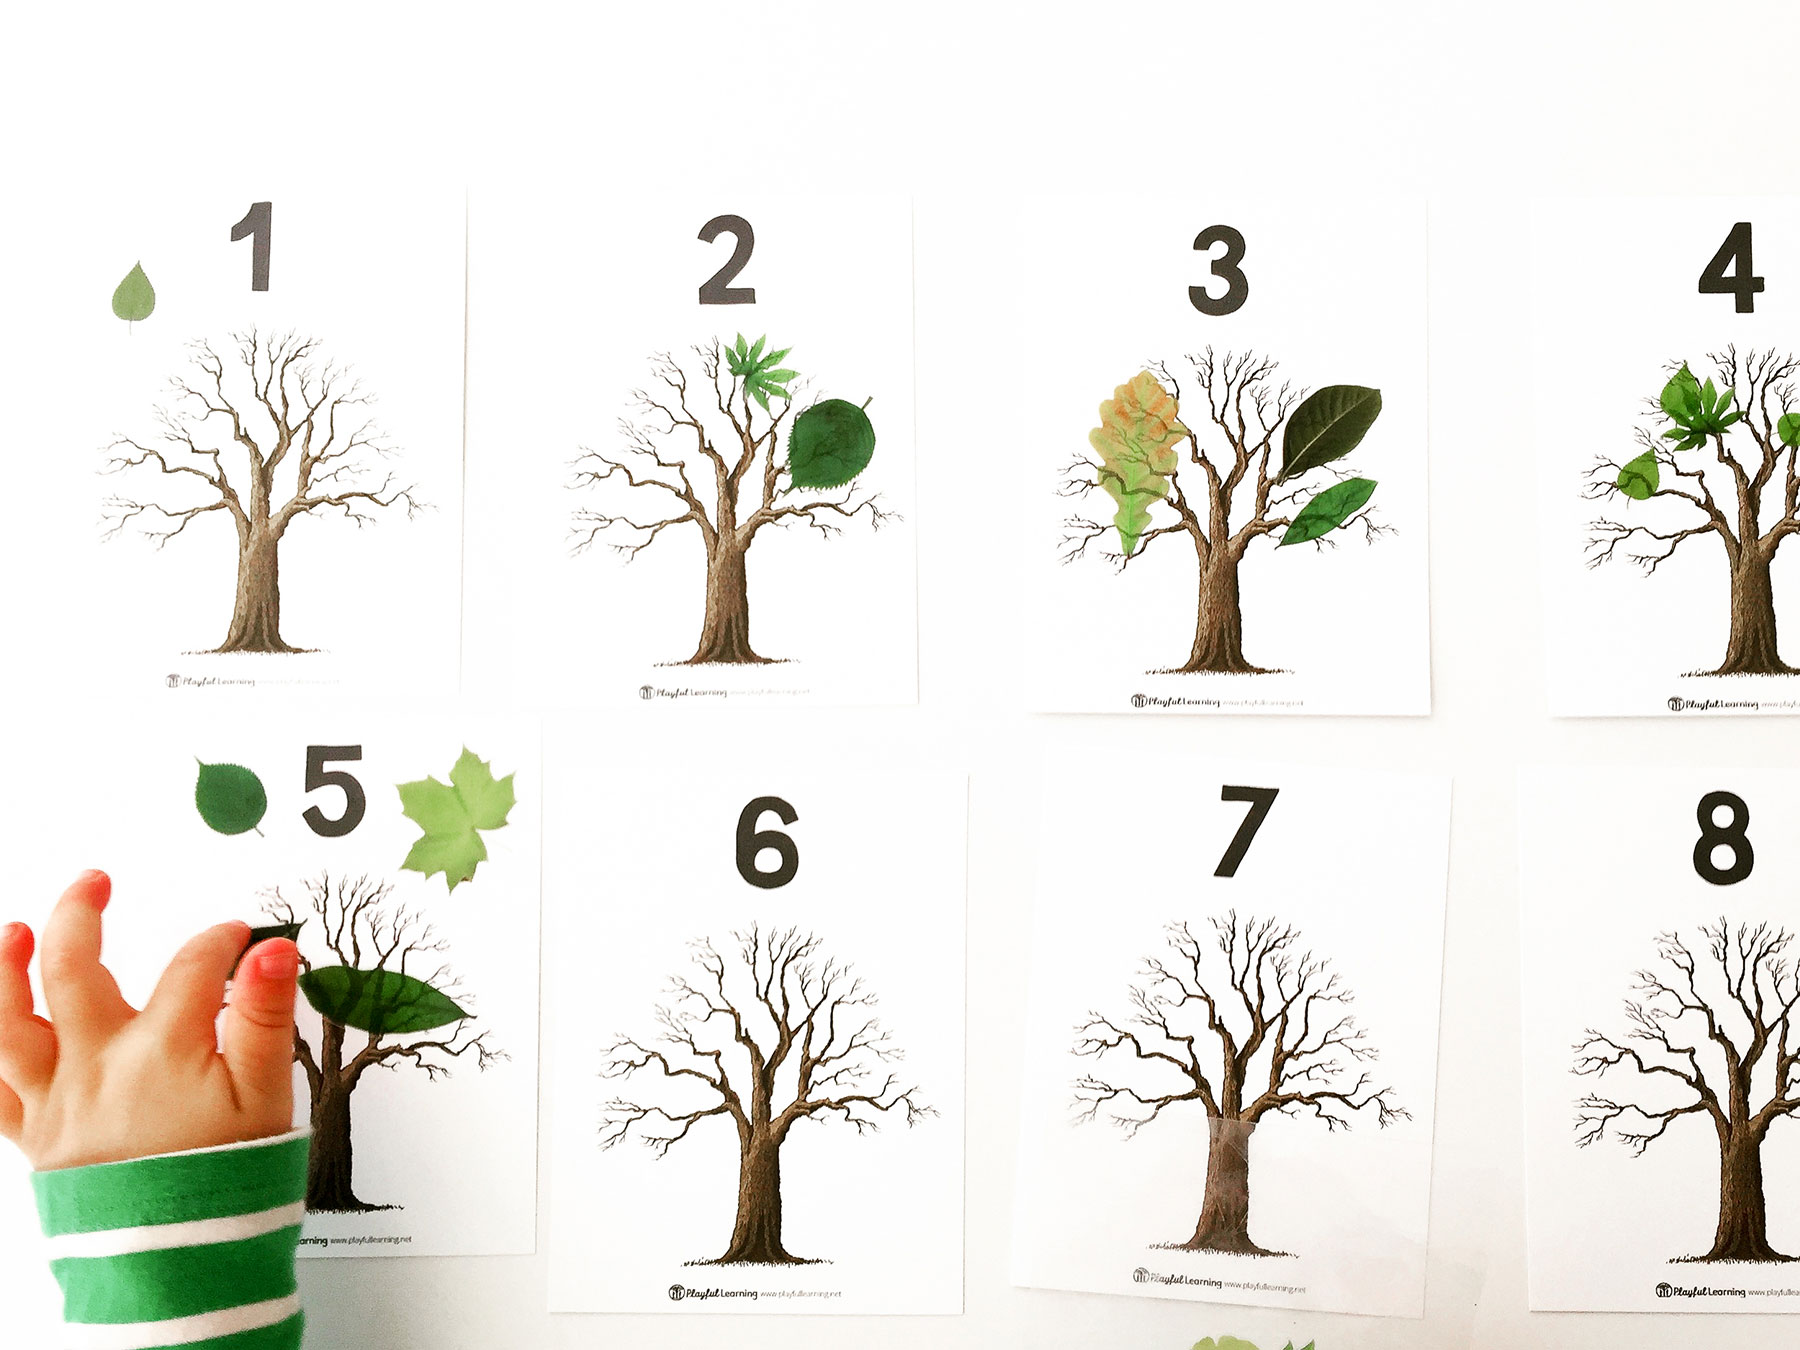
‘Tis the season for appreciating leaves as they change color and gracefully fall from the branches… What better way to join in on the fun than with some leaf counting and leaf observations?
Description
Math is everywhere! For this activity have your students find the numeral under each tree; you may want to cut the printable up so that each tree is on it’s own card. Once they find, and identify the number have them count out the corresponding number of leaf gems or stickers and place them on the tree. Some of our members have also used painted leaf rocks and finger paints to add leaves!
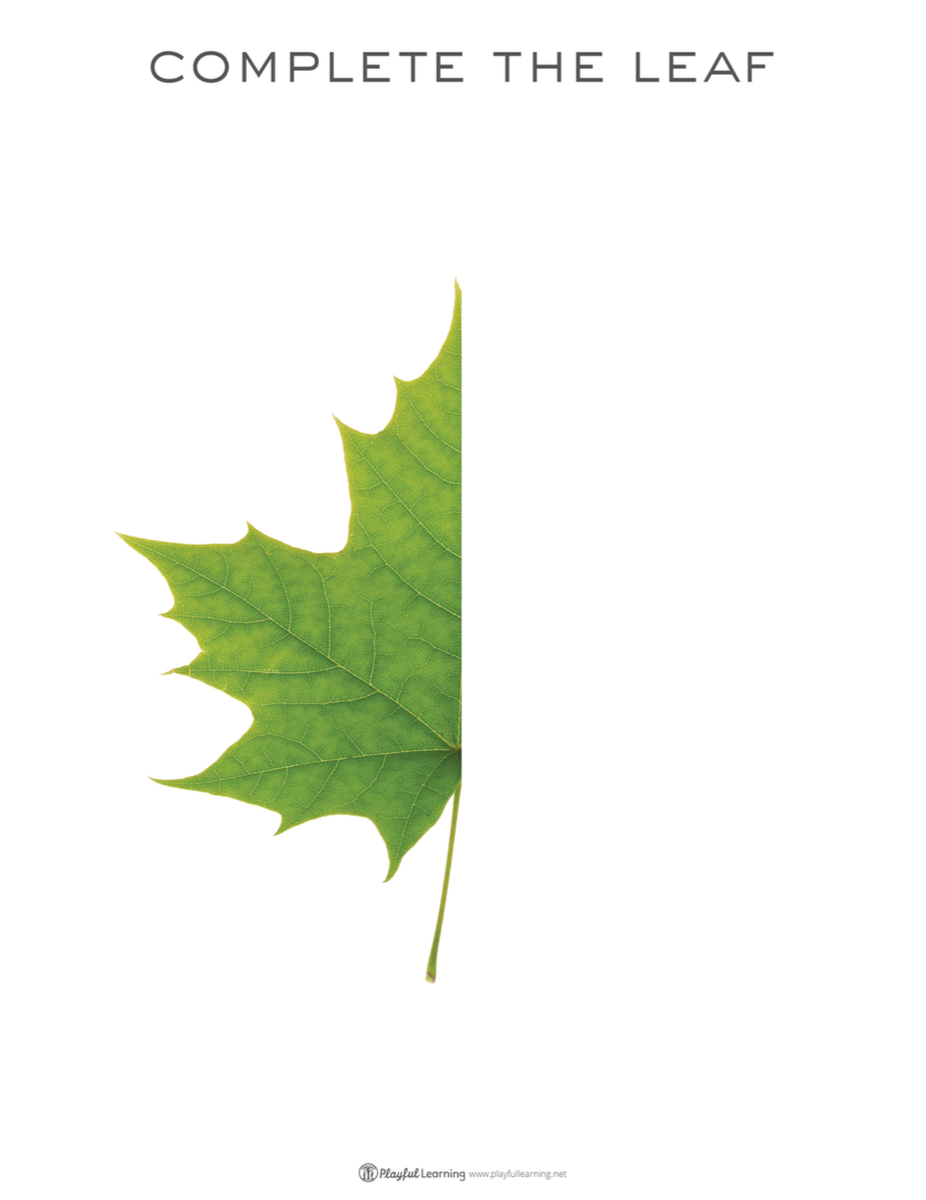
You can also enjoy our, Complete the Leaf activity. Start out by collecting some leaves in your backyard or on a walk. Observe each leaf carefully with a magnifying glass and notice the small details like the veins and margins. Next, invite your child to incorporate the details they observed by drawing the second half of the leaf.
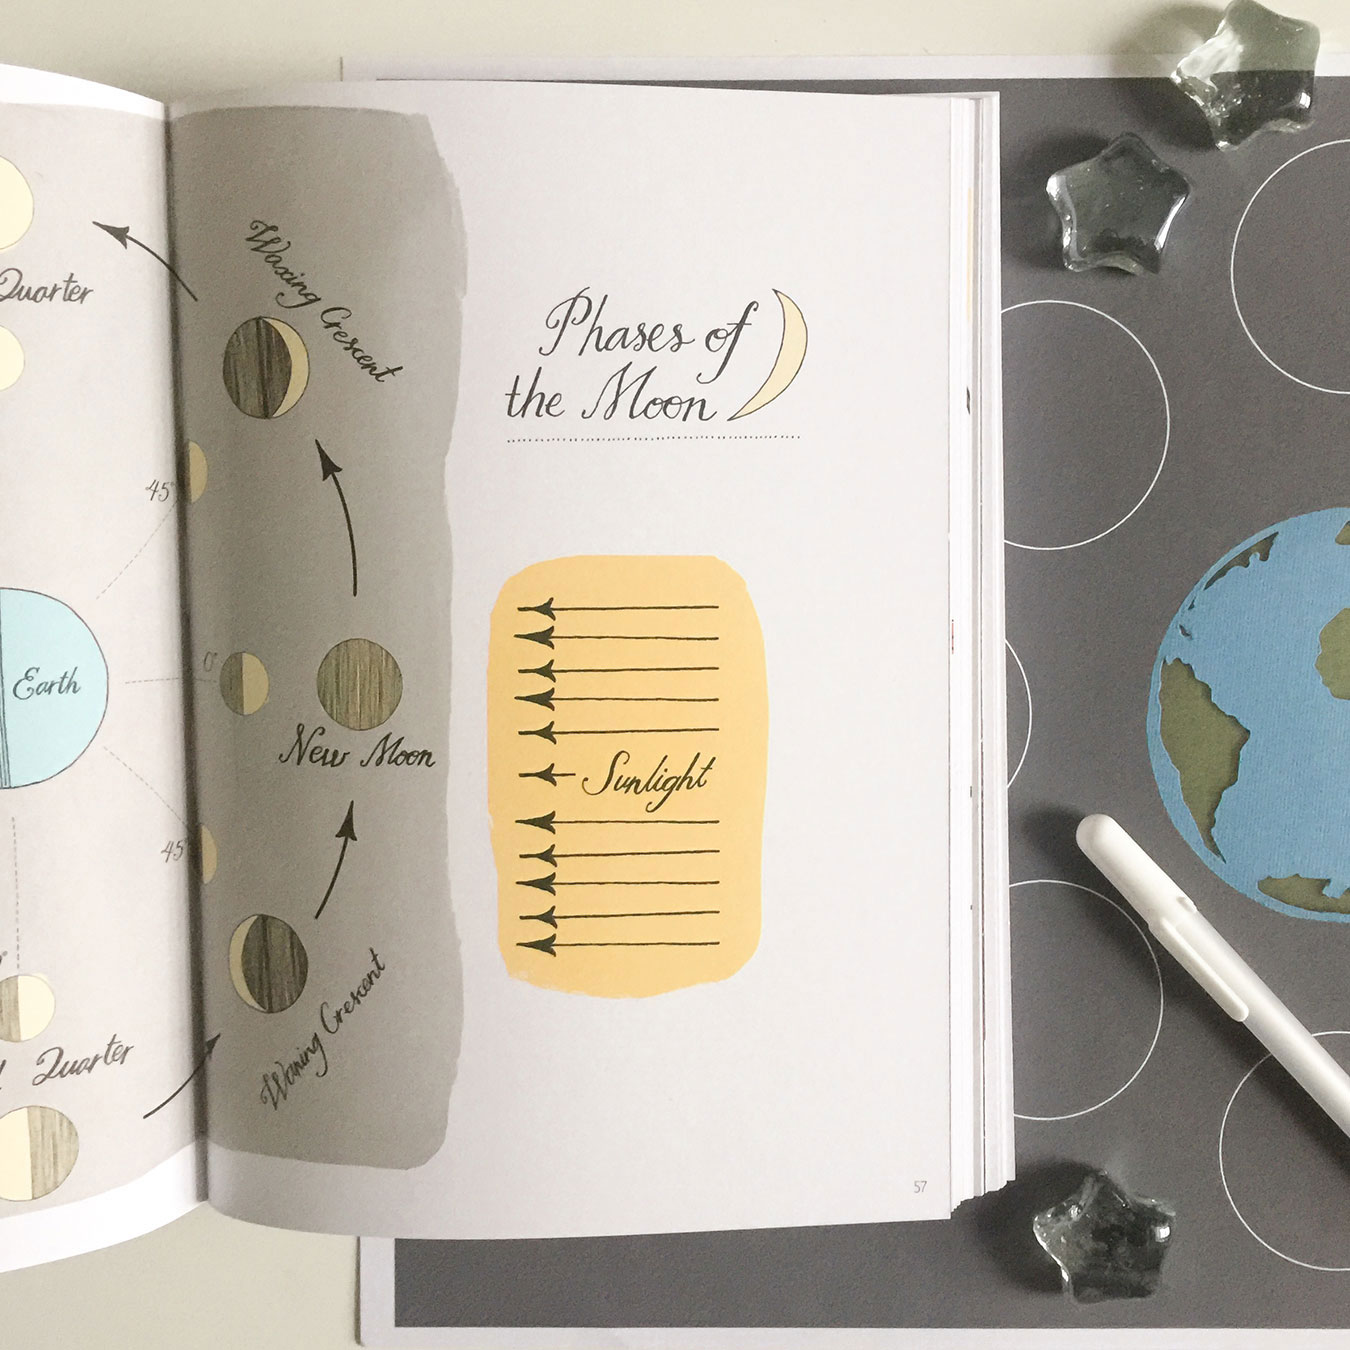
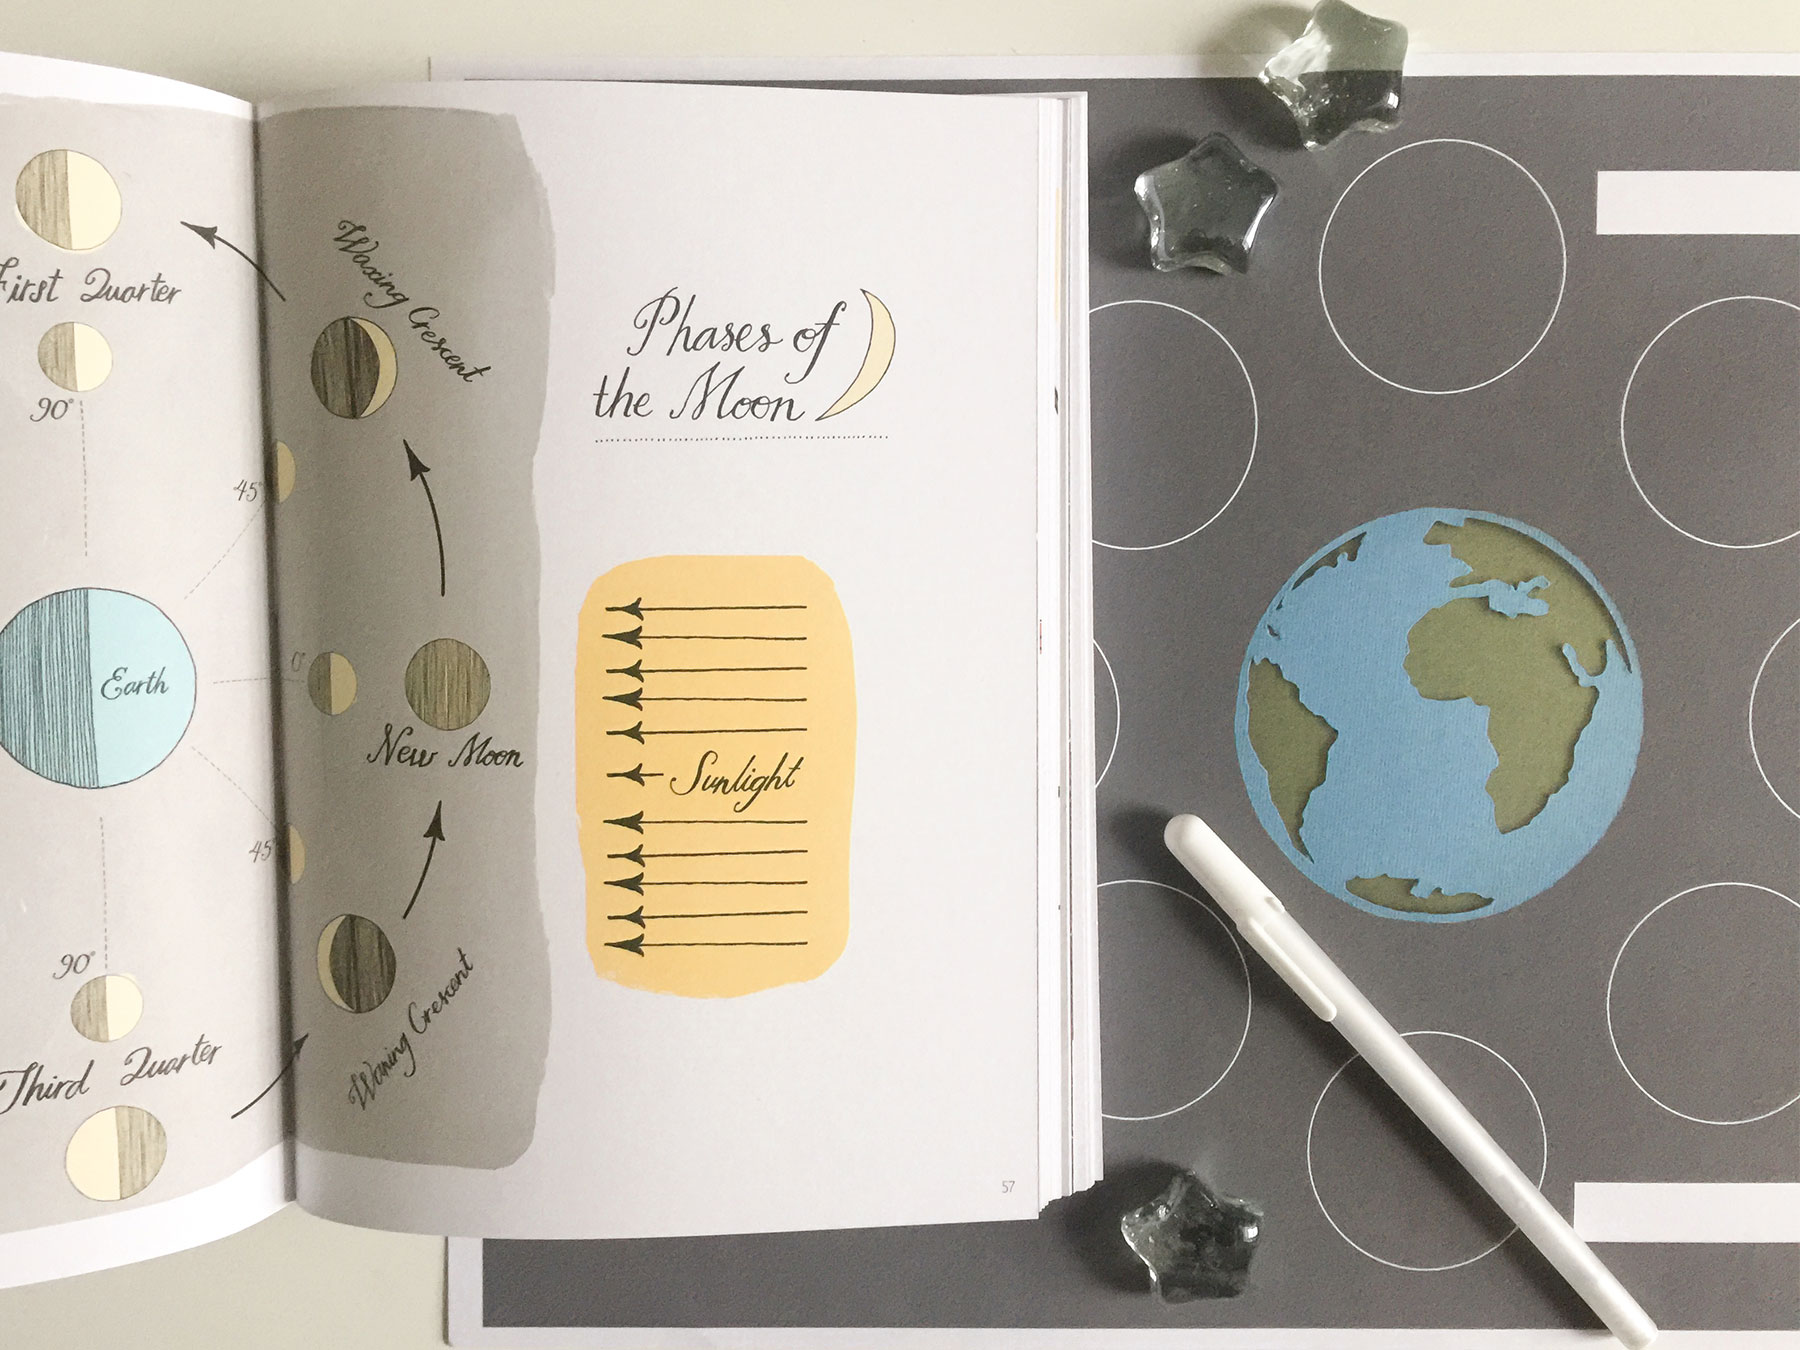
There are few things in life as constant as seeing the Moon at night, yet what seems most predictable about the Moon, is the cycle of change that it experiences month after month. Children are naturally curious about the Moon and the mystique that it holds, which makes it a great entry point for learning about cycles in nature and how-to observe change over time.
Capturing the moon together also inspires a sense of being connected to something larger than oneself…
Description
Learn why the moon seems to change shape during the course of a month. Children may use a white gel pen or play dough to create the moon phases and then label the parts. For some added fun, look up the current monthly moon calendar on Farmer’s Almanac. Invite your children to observe the subtle changes first hand.
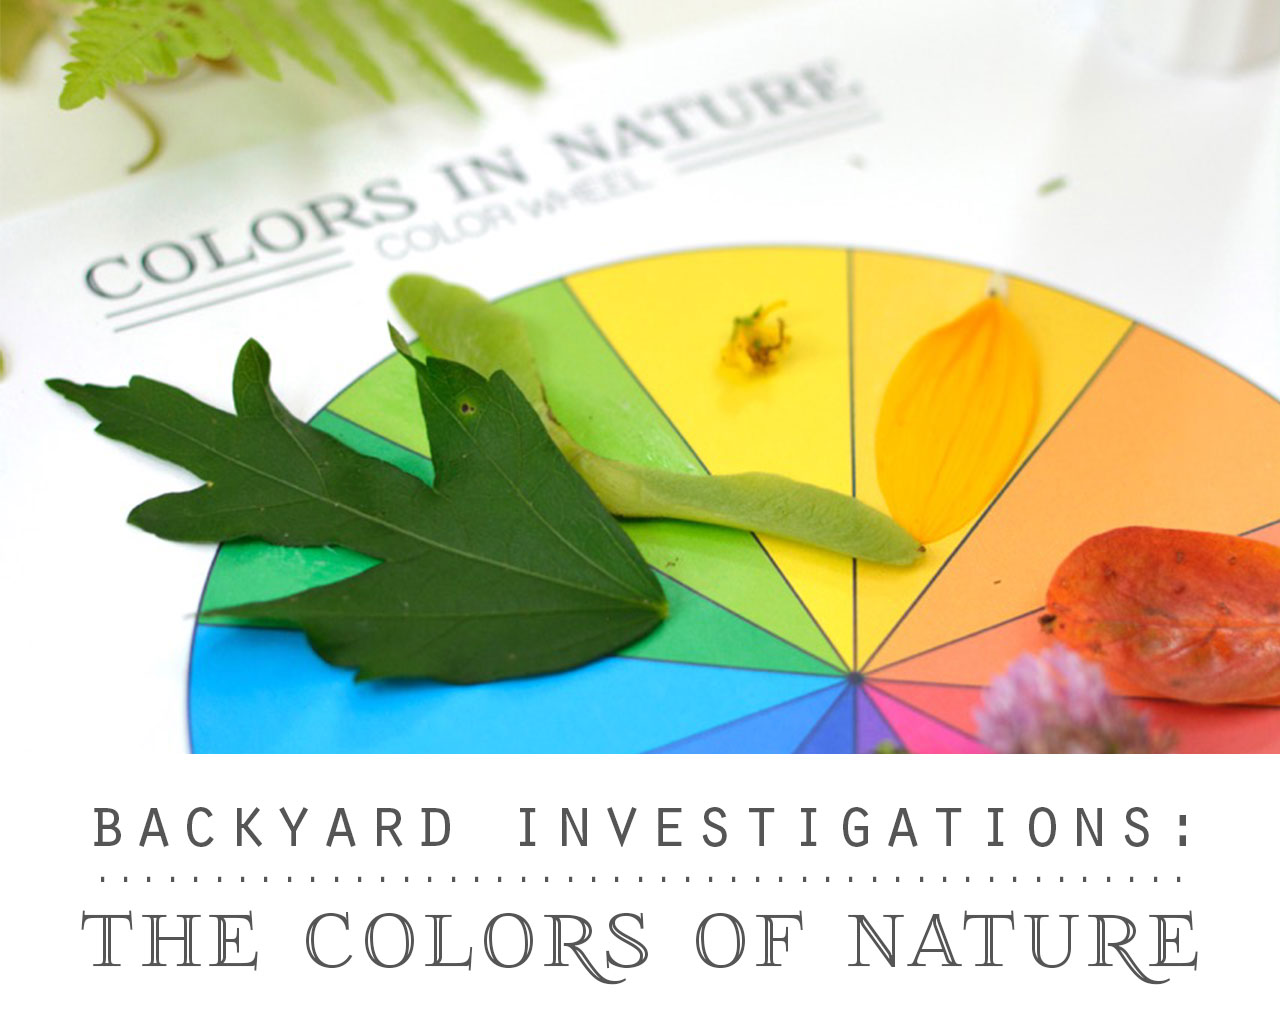
When we slow down and and take the time to focus on simply noticing, the natural world comes alive with inspiration. The Colors Of Nature activity encourages us to slow down with the children in our lives and take in all of beautiful color variations and subtle nuances that nature has to offer.