Category: Math


Integrating Math & Art: Calculating Area + Perimeter with Piet Mondrian

By Mariah Bruehl,

Calculating Area + Perimeter with Piet Mondrian
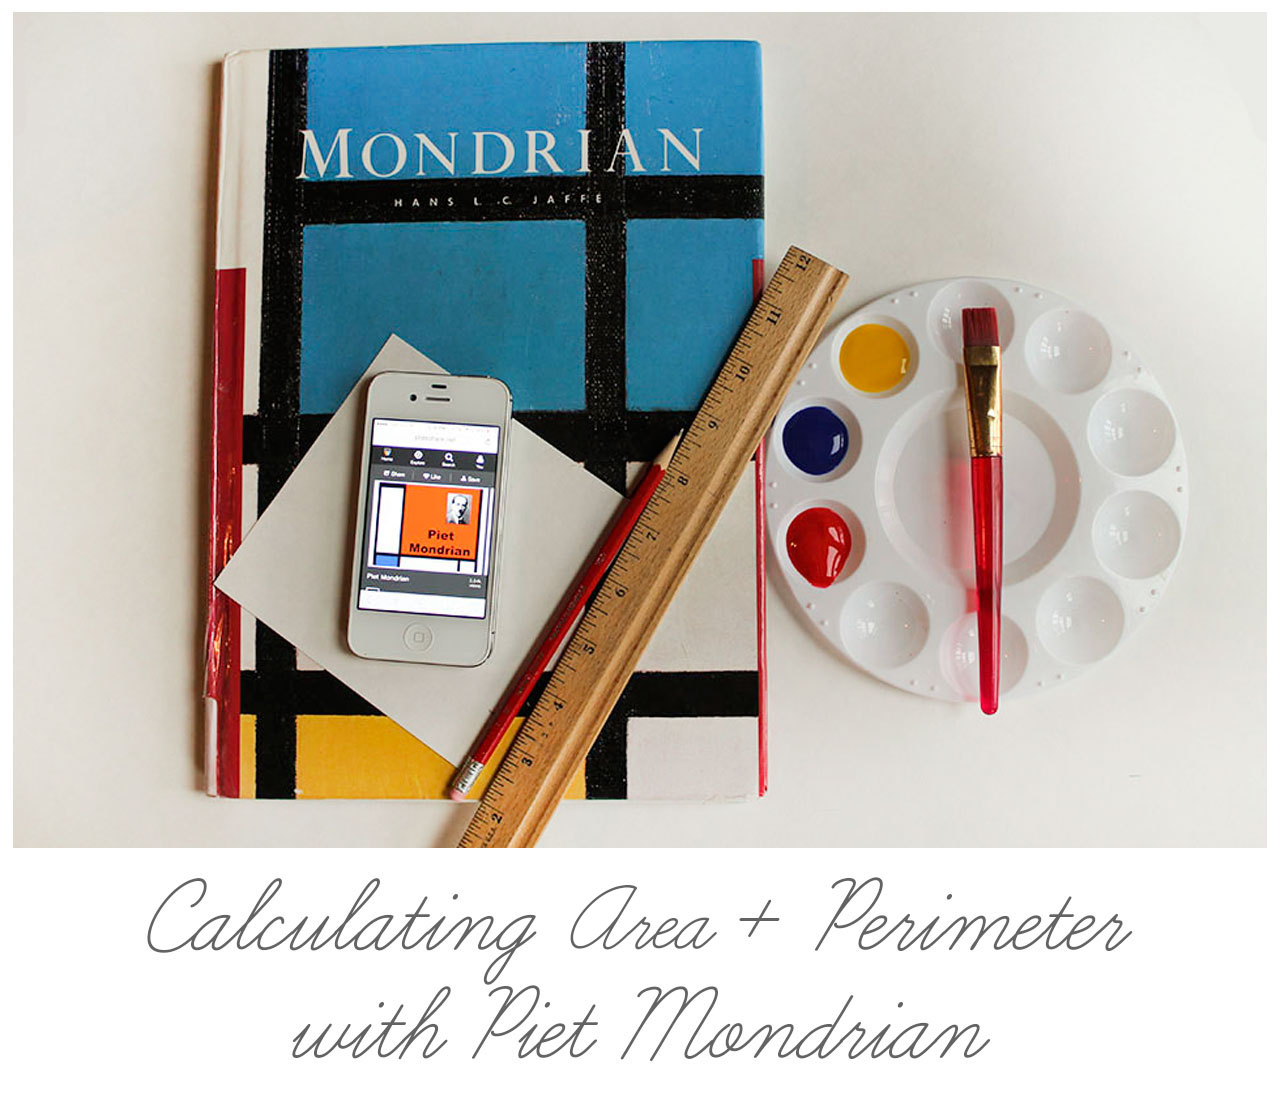
Learning to calculate the area and perimeter of rectangular shapes is a required skill in third grade math. The integration of art makes perfect sense in learning this skill. Piet Mondrian, indeed, is the ideal artist to study when discussing the measurement of shapes.


In my third grade classroom, we began our study of Piet Mondrian with a slide show depicting his work. A website dedicated to slide shows www.slideshare.net has shows about the art of Piet Mondrian. We watched and discussed the following show:http://www.slideshare.net/duniwayart/mondrianppt


The images presented gave us a good starting point to discuss the famous painter and his later work where he used only primary colors and bold black lines.  We focused on Mondrian’s paintings from 1920 and forward. These paintings are beautiful and simple. Students will easily see bold rectangles and will be able to emulate his style to create a work of their own.


Questions To Consider:

What do you notice about Mondrian’s later (1920 and on) paintings?

What effect do you think he was trying to achieve when he used bold black lines?

Why do you suppose he limited his color palette to the three primary colors?


Let’s create our own


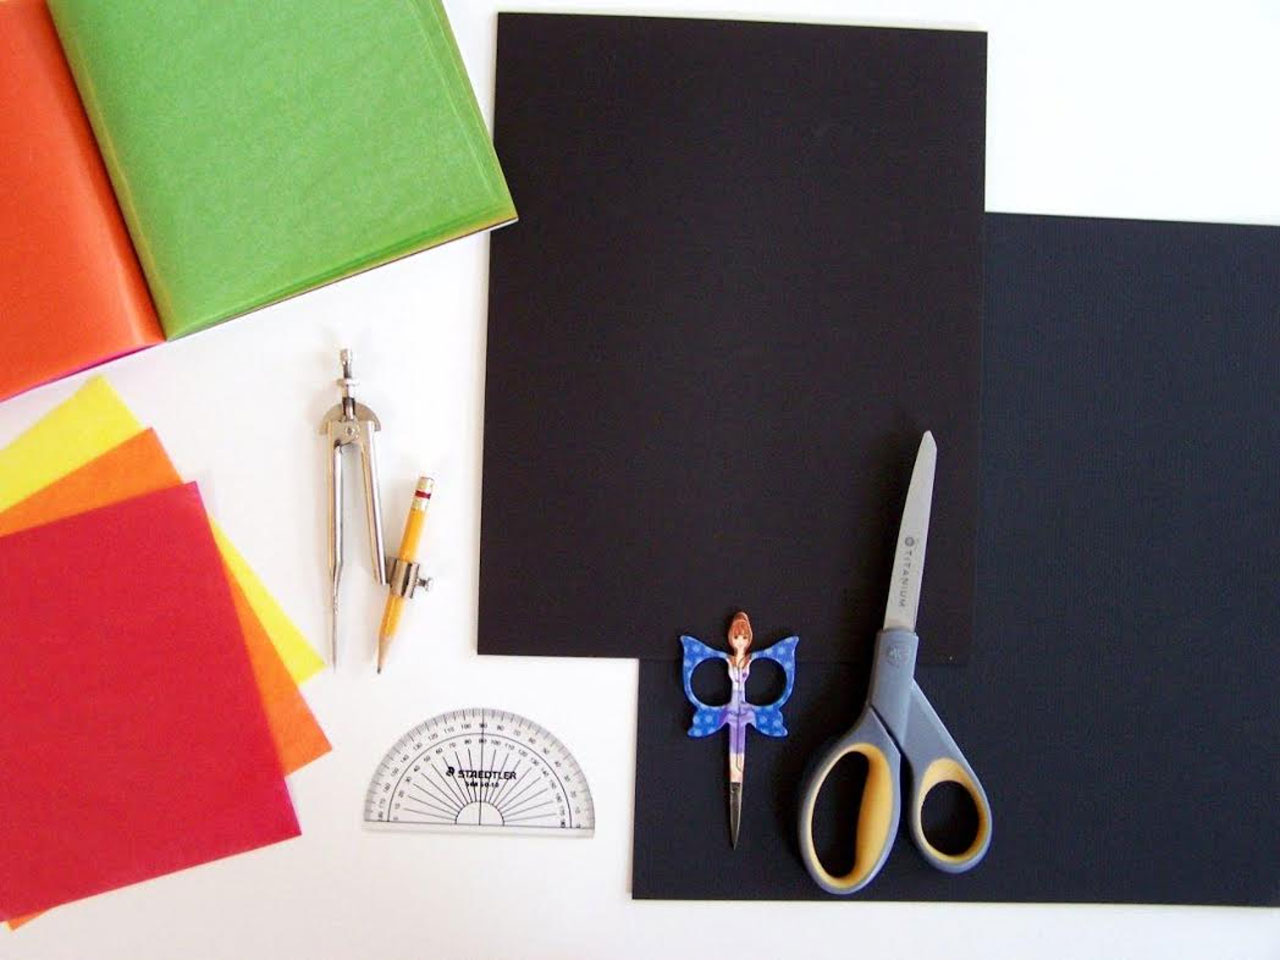
Materials: white art paper, graph paper, a black permanent marker, paint colors red, yellow and blue, a ruler and a pencil


If you decide to use white art paper, share how to mark centimeters or inches off along the sides of the paper. This creates a grid to use when measuring and helps young learners in drawing straight lines.
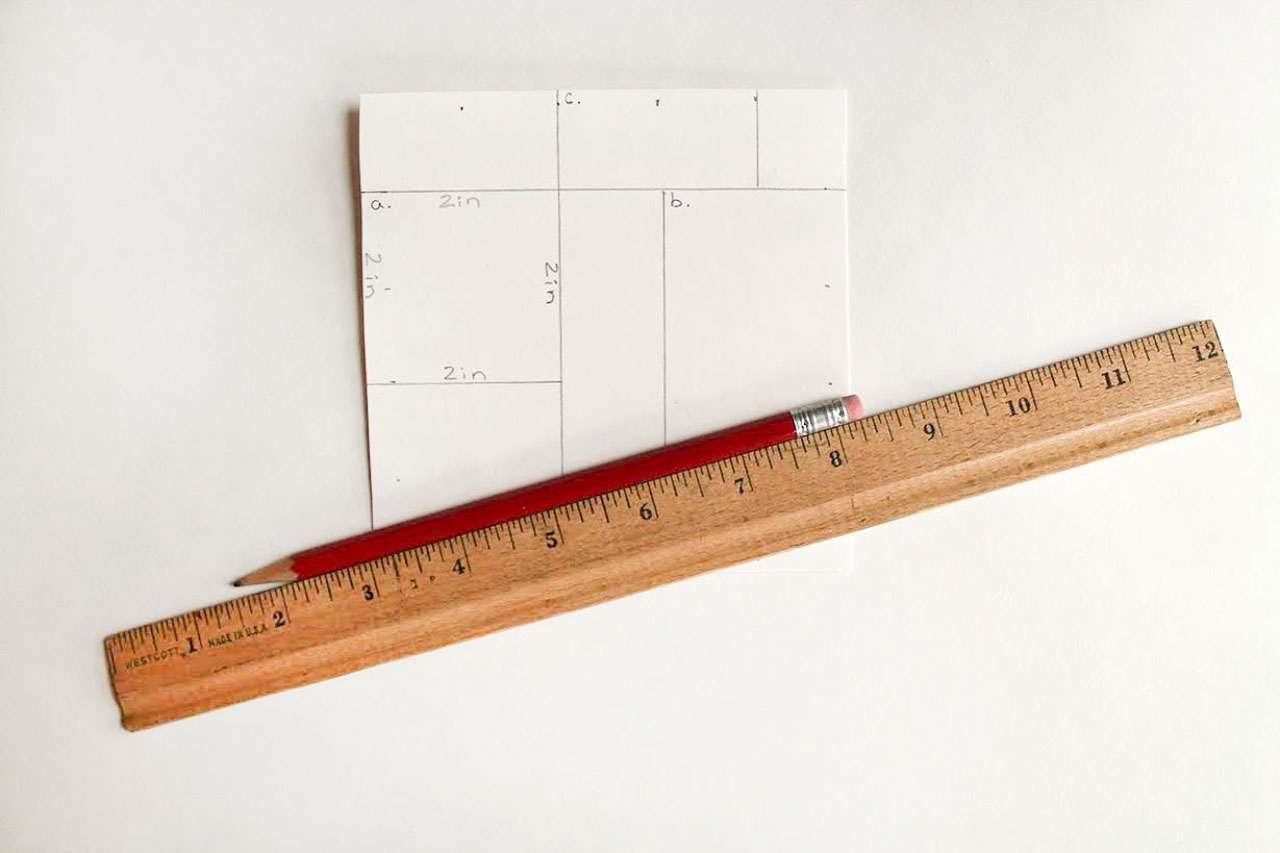
Calculating Area + Perimeter with Piet Mondrian

Step One:

Draft out your idea in pencil using lines and rectangles.


Step Two:

Measure the area and perimeter of some of the rectangles (3 or more). Discuss that measuring the perimeter is adding up the length of each side, which are four sides for a rectangle. We then add all the side measurements together to get the total perimeter. Area measures the inside of a shape in square units and may be figured out by simply counting the squares covered inside a shape (with graph paper) or by multiplying the length by the width of a rectangle.

Calculating Area + Perimeter with Piet Mondrian

Step Three:

Show the calculations and totals on a separate recording sheet.
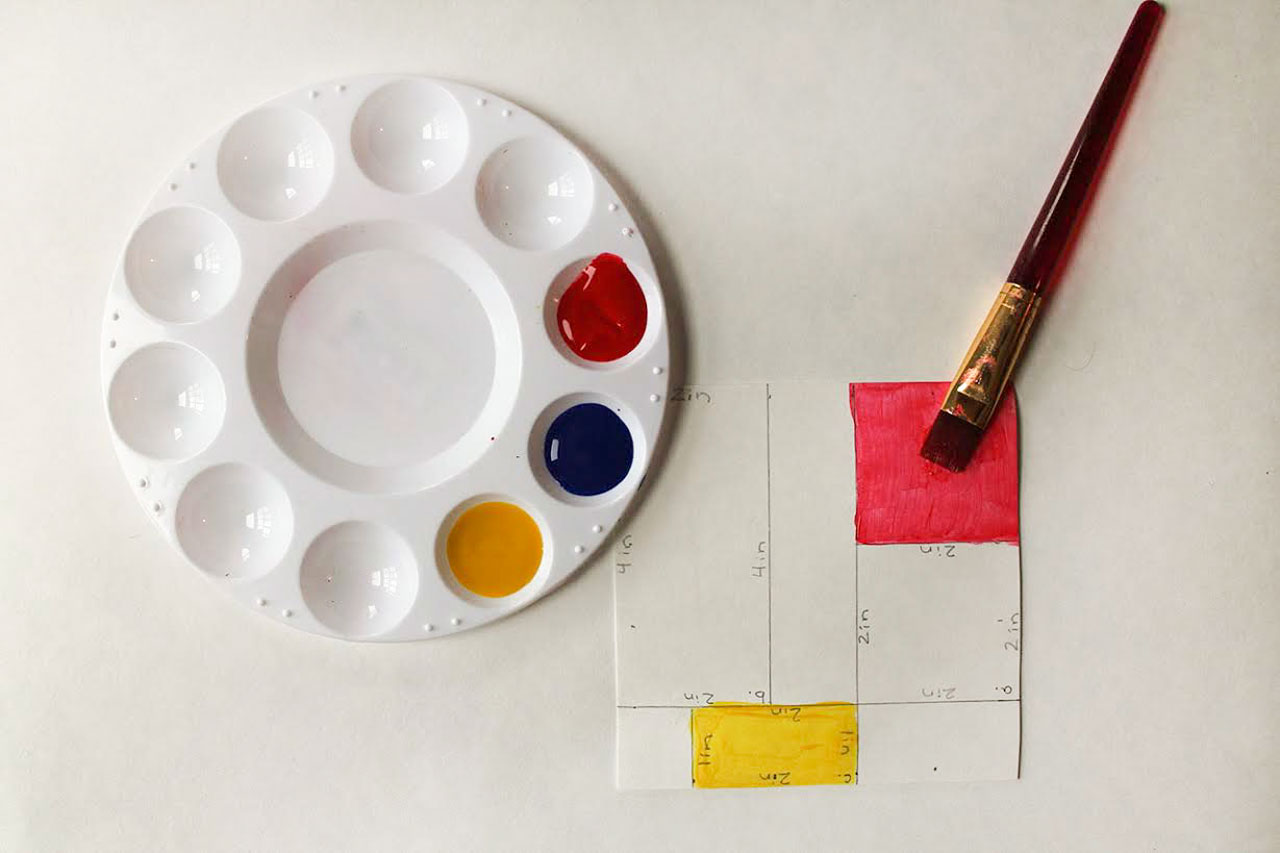
 

Step Four:

Decide where you would like to put color down and where you would like to leave white space. Mondrian left a lot of white space and sparingly added primary colors. This is your choice in creating your own composition.

Calculating Area + Perimeter with Piet Mondrian

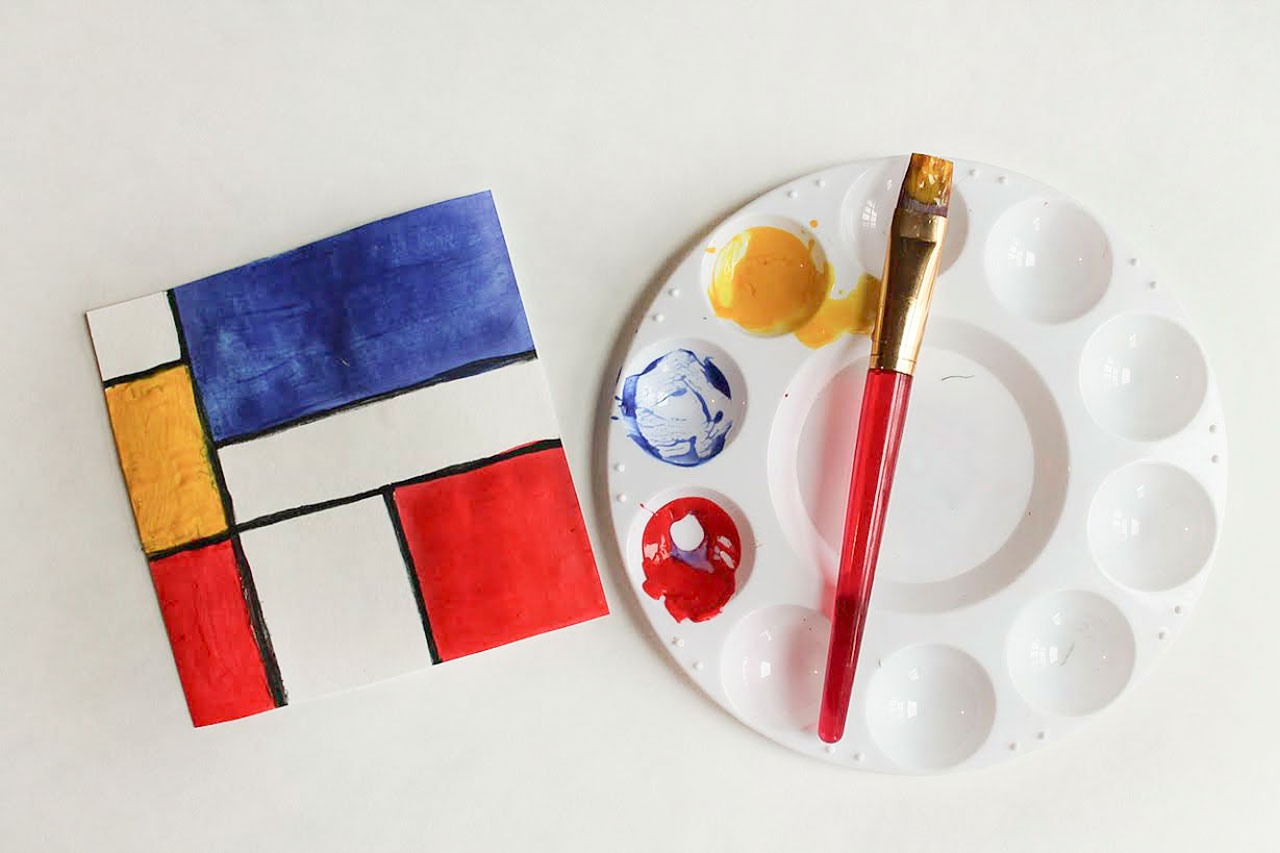
Voila! You have created a beautiful piece of art, learned about the fabulous Piet Mondrian and explored how to measure the area and perimeter of a rectangular shape.

Calculating Area + Perimeter with Piet Mondrian

Arts integration is often very motivating for students. Learners have the chance to engage in the process and thus understand at a deeper level.


Common Core Standards:

CCSS.MATH.CONTENT.3.MD.C.7

Relate area to the operations of multiplication and addition.

CCSS.MATH.CONTENT.3.MD.C.7.A

Find the area of a rectangle with whole-number side lengths by tiling it, and show that the area is the same as would be found by multiplying the side lengths.

CCSS.MATH.CONTENT.3.MD.C.7.B

Multiply side lengths to find areas of rectangles with whole-number side lengths in the context of solving real world and mathematical problems, and represent whole-number products as rectangular areas in mathematical reasoning.

CCSS.MATH.CONTENT.3.MD.C.7.C

Use tiling to show in a concrete case that the area of a rectangle with whole-number side lengths a and b + c is the sum of a × b and a × c. Use area models to represent the distributive property in mathematical reasoning.

Source


Websites:

http://art-educ4kids.weebly.com/piet-mondrian-colour-and-line.html

http://www.moma.org/collection/browse_results.php?artistFilterInitial=&criteria=O%3AAD%3AE%3A4057&page_number=1&template_id=SS&sort_order=1


Books:

Mondrian by Hans L. C. Jaffe

Arts with the Brain in Mind by Eric Jensen


Enjoy!

Mulitplication Games, Arrays, and Stories

By Mariah Bruehl,

Multiplication Games

Second, third and fourth grade students across the country are busy learning and practicing multiplication facts. There are many fun ways to engage with them and provide fun for all.


The third grade common core standards place an emphasis on learning to multiply and divide within 100. The Operations and Algebraic Thinking Standards for the Common Core include the following outcomes for third grade students:


Operations and Algebraic Thinking

  • Represent and solve problems involving multiplication and division.
  • Understand properties of multiplication and the relationship between multiplication and division.
  • Multiply and divide within 100.
  • Solve problems involving the four operations, and identify and explain patterns in arithmetic.

(Source)


There are many different fun, interactive ways to learn the multiplication / division facts up to 100.

Multiplication Games

  1. Matching Dominoes – Use two sets of six by six dominoes. This game can include up to four players or played individually. It provides students with a hands-on way to work on multiplication facts up to six times six. Have children take turns flipping over two dominoes to face up on their turn. Each player says the multiplication fact for the domino he/she turns over, even if it is not a match. For example, if a player turns over a 3 / 2 domino, the player says three times two is six. This way, all children hear the fact with the answer. Provide scrap paper for players to figure out facts as needed. This game is played like a traditional memory / match game where the player with the most matches at the end wins the round.


  1. Triangular Flash Cards These flash cards are perfect for working on fact families. Each card has one number in each of three corners showing a fact family. To work on having children see how multiplication and division are related play a game using the triangular flash cards. One player holds up a card while covering one corner. The other player figures out which number is covered. For example, multiplication / division fact family could be 6, 3, 18. The covered number is 18 and so the player says 6 times 3 equals 18. The corner is uncovered to check for accuracy. Provide paper or other supplies as needed to allow players to figure out answers.

Multiplication Games


  1. Make Arrays – Let’s take our math learning into the kitchen or to the great outdoors. Creating arrays is a meaningful way for children to see how multiplication works. An array is a group of items placed in rows and columns. One could make an array out of almost anything such as mini – marshmallows, chocolate squares, M & M’s, carrots, grapes or outdoor items such as pebbles, acorns and leaves. Provide a multiplication fact such as 4 x 2 and share how to create four rows of an object with two objects in each row. Discuss, then, how to count for the total. Try several different multiplication facts. To incorporate division facts, you could share a completed array, ask the child to count the total, and show him / her how to write a division fact using the total and number of rows or number in each row.


  1. Multiplication Snap – (2 player) To play you will need one set of playing cards and two players. Take out the face cards. Deal out the deck of cards evenly so that each player has the same amount. To play, each player snaps down a card and the quickest player to say the multiplication fact with the answer takes both cards. The player with the most cards at the end wins. The game ends when one player loses all of his / her cards or players decide to play by time and the time is up. Provide scrap paper for computation.


Multiplication Games

  1. Children’s Literature: There are many wonderfully rich children’s literature books to share with children that not only have a great story but also incorporate multiplication and division concepts. Read and discuss some of these titles with the young learner in your life. Work on figuring out the answers and discussing the concepts together.

Protractor Art: Window Transparencies

By Mariah Bruehl,

Protractor Art: Window Transparencies

So much can be learned when making art, so today I have a project that will not only brighten your winter windows but will show your child how to use a math protractor to make beautiful artwork.

Note: This project can be adapted for those under 12 by doing the calculations to make the template ahead of time. Working on a light table that shines through the papers makes this a visual delight!

Protractor Art: Window Transparencies

Materials to make a star transparency:

  • 2 sheets of black cardstock 8.5″x12″
  • A variety of colors of kite paper* including white (found here)
  • Drawing compass with pencil
  • Protractor
  • White pen
  • Scissors
  • White glue/toothpick
  • Optional: Light table

*Tissue paper may be used but may tear easily. Iron tissue flat before using.

Protractor Art: Window Transparencies

– Draw a 7 3/4″ circle with your compass on a piece of scrap cardstock.

– Draw a 5″ circle in the center of the first circle.

– Cut out the circles to create a donut shaped template.

– Trace the pattern onto the black cardstock and holding two sheets together, cut out two identical frames.

– Mark the following points onto the black frame with a white pen: 0, 30, 60, 90, 120, 150, 180. Turn the frame 180 degrees and repeat so that you have marks all around the circle every 30 degrees. (the marks should resemble a clock)

Protractor Art: Window Transparencies Protractor Art: Window Transparencies

– Using a toothpick, dab a few tiny dots of glue onto the frame and attach the sheet of white kite paper. Trim the edges.

– Cut 2 sheets of kite paper into thirds.

– Thinking of the frame as a clock, glue one strip of paper across each of the following points: 12:00 to 5:00, 5:00 to 10:00, 10:00 to 2:00, 2:00 to 7:00 and finally 7:00 to 12:00. Trim the edges.

– Place your work on a light box or hold up to the window to experiment with blending colors using different colors of kite paper. See how adding another color can change the effect.

– Once you have your transparency to your liking, glue the second black frame to the back to conceal the raw edges.

Take it further:

Protractor Art: Window Transparencies

Experiment with different shaped frames, calculate the angles for a 5, 6, or 8 point star, use different angles or adhere other shapes and patterns behind the kite paper. Here I have tucked a paper doily and a paper cut out behind the frame.

Mandalas:

Fold a kite paper circle into sixteenths and cut a “snowflake”. Iron flat and glue to the frame. Layer with other colored sheets or trim papers to fit behind the cut out spaces creating a multicolored mandala.

Books:


Enjoy the holiday season with your children by making something special together!

Fun Ways to Build Number Sense at Home

By Mariah Bruehl,

Fun Ways to Build Number Sense at Home

Encouraging a love of numbers throughout childhood helps children to develop a strong understanding of numbers, which is often called having good number sense. Children with strong number sense have the ability to use numbers confidently, with flexibility and with place value understanding. This means a child with strong number sense understands relationships between numbers. For example, when thinking about the number four, a child might describe it as three less than seven, one less than five, three more than one and one more than three. This child will also be able to estimate quickly by seeing numbers or groups of objects as sets instead of needing to count by ones. In addition, a child will be flexible with numbers which often allows them to build their own meaningful ways for solving number equations or when problem solving. These abilities will help build children’s mathematical confidence, as they understand how numbers work and thus become quick and reflective mathematical thinkers.


There are many fun, engaging ways to incorporate daily number sense activities at home. The list below shows how to get started building number sense activities into your daily lives with your children. Once we open the door, children soon realize that numbers really are everywhere and armed with this knowledge most children will want to interact with numbers on a regular basis.

Fun Ways to Build Number Sense at Home


 Activities to Encourage Number Sense:


  • Guess My Number (use a hundreds chart or a number line) – Dinnertime is the perfect time to play a simple number game such as Guess My Number. To play, ask one player to choose a number within a set and comfortable (based on age) range such as 1-100. This number remains secret until someone guesses it. To start have one participant at a time take turns narrowing the range until one is able to guess the number. Questions might include: Is it greater than fifty? Is it an even number? Is it less than eighty? Is it more than twenty? The range of numbers should narrow each time until someone guesses the actual number.


Tip: It is very useful to use a laminated hundreds chart or number lines with young learners. This way, the guesses can be highlighted and the range can be shown as it narrows. This shows players which numbers they have left to choose from and has them interacting with a hundreds chart. You can download and print a hundreds chart here.


  • Hundreds Chart Riddles

To play hundreds chart riddles, have one player choose a number. This number will be kept a secret. I usually ask the child to write it down but turn it over. This way, if the child forgets he/she can have a quick look. Next, this player provides one clue at a time for other players until the number is guessed. Clues start out broad and then narrow in on the number. For example: 1. My number is two digits. 2. My number is greater than forty. 3. My number is less than sixty. 4. One of the digits of my number is an even number. 5. One of the digits of my number is two less than nine.


Tip: This game can also be played using a number line with preschool / kindergarten students. Number lines could be 0 through 10 or up to 20.


  • Go Fish with A Twist: Change up the game of “Go Fish” by asking your child to use equations or number relationships when asking for a number card. For example, instead of asking: “Do you have a ten?” your child may ask: “Do you have the answer to five plus five more?” Instead of asking: “Do you have the number 4?” Your child may ask: “Do you have three less than seven?” This way both all players are using mental math to quickly do equations and learning how numbers relate to one another.


Tip: For children five and under, use the cards 0 through 5 and encourage equation building with their fingers. Or simply play “Go Fish” the traditional way using number cards.


  • Children’s Literature: Reading picture books with children almost always leads to rich discussions. Using picture books that focus on mathematical concepts are no different. Children often want to solve the problems while reading, or discuss possibilities. Greg Tang is the author of a unique and engaging series of picture books for children that encourage them to build their estimation skills. You will find most children adore reading these and learn skills in the process. I will often share a picture for only ten seconds, close the book, and then have children share an answer with an explanation of how they estimated the amount. Such fun!


Tip: I’ve created a short list of books below to get you started. But there are many fabulous mathematical picture books out there waiting to be read and discussed.


Teaching Math with Stories

By Mariah Bruehl,

Teaching Math with Stories

I was teaching my son triple digit subtraction (oh so fun) when I realized he had hit a wall. He couldn’t grasp the rules of where the numbers needed to go, the order, the borrowing, it was just a big mess of crazy. So I slowed things down and tried working with our manipulatives. That helped, but he was still having a hard time understanding the order of precedence when it comes to borrowing. I set it aside and got to thinking.


Our math manipulatives are color coded, so units are yellow, tens are green and hundreds red, which is pretty standard. So I made a three part presentation card out of three matching colors of card; that way, when a multiple moved out of it’s column (a ten into the units for example) it was a different color from those around it. This helped to signal that the ten needed to be converted into units so that it was the right color again.


The next step was to create a narrative to explain the borrowing process. My son responds really well to stories so I thought this would help. So when we came across a problem where borrowing was necessary ( 256 – 179 ) we worked through the story to explain the borrowing process. It went like this…


Okay, so we have these numbers:

256

179


So the bottom number is the one we are subtracting, so the first number is 6-9, can we do that? (No) Okay, so 6 needs to knock on next door (Hello! Please can you help me I need some more numbers!) and next door sends over a ten (Of course, I’ll come on over). But when 10 arrives she is a different color from the others, that won’t do at all (Oh I’m so embarrassed!) so we change her into units, now we have 16 instead of 6.

Teaching Math with Stories


The same applies when we need to subtract 7 from 5, we go knocking on the door of the hundreds column and ask for help (We need more numbers over here!) over comes the blue hundreds into the green tens column. Again, we convert 100 into 10 tens and now we have 15 from which to subtract 7. Much better.

Teaching Math with Stories


By converting the maths problem into a story my son was able to find a rhythm to the numbers that had not been there previously. Adding in silly voices, colors and conversation took away the scariness and made it fun and familiar. Even now he still talks about ‘knocking on the door’ when borrowing a number, for him that helps a seemingly mysterious process make sense.


I’ve tried to include lots of math stories in our work to bring it to life, and I’m always on the lookout for more. There are lots of great resources that help children see maths as a living subject, rather than a dusty collection of strange numbers. Here are a few I’ve enjoyed using or am looking forward to including soon:

  • The Sir Cumference series brings all sorts of mathematical concepts to life through the stories of a mathematical knight and his family. A fun read and a lovely way to engage children with concepts like angles, which can seem a bit complex.


  • The author Greg Tang has written many books that cover mathematical ideas from basic numeracy to discovering math in art. They are lively books and suitable for younger children too.


  • Mathematicians are People Too, is our current math reader and we are already enjoying it enormously. This book (and its sequel) brings the lives of great mathematicians to life through lively recollections of key moments in their history. My son is a real history lover so this one is a great hit. We’ll be reading Volume 2 when this one is done!


  • And on our ‘to read’ list for this year is The Adventures of Penrose the Mathematical Cat, an engaging series recommended to me by my very mathematically inclined friend! The stories cover some pretty complex concepts, but they are engaging and lively nonetheless. This is the first in a series I hope to explore further.

Teaching Math with Stories

If you are looking for further information on including stories in your maths teaching, the Living Math website is a fantastic resource with an extensive reading list and other suggestions about how to bring a much maligned subject happily to life for the young mathematician in your life.

Flip 10! A fun math game…

By Mariah Bruehl,


title69

Joey from Made by Joey is with us today to share a fun game to play with our developing mathematicians.


This is a simple card game for early learners to help them learn the combinations of numbers that when added, equal 10.

This game can be played with 2 or 3 players.

Here are the rules:

Flip 10!

1) Remove all of the 10’s, J’s, Q’s, and K’s from a deck of cards. This will leave you with 36 cards from A (which we use as the 1 card) to 9.

Flip 10!

2) Lay 18 of the cards face down.

Flip 10!

3) Deal the remaining cards to the players. 2 players – deal 9 cards each, 3 players – deal 6 cards each. Sorry, the game does not work with 4 or more players.

Flip 10!

4) To start the game the first player flips over one of the overturned cards. Let’s use a 7 as an example…if the player has a 3 in their hand then they may put it down next to the 7 to complete their turn. If the player does not have a 3 then they cannot make a move and their turn is done. When a player does not play a card, the next player now has an additional opportunity to play a card if they have it in their hand.

Flip 10!

5) The second player then turns over another card. If they have the number that would make the total ten then they may play their card to complete their turn.

Flip 10!

6) If during the game two single cards have been overturned and they add up to ten (in this case 6 and 4), then a player can move one of the cards over and place down one card from their hand into the empty spot(in this case an A).

If the player is really thinking and has two cards in their hand that add up to ten, then they will play both those cards (A and 9) and play 3 cards in one turn!

Flip 10!

7) The first person to put down all of their cards is the winner of the game, however, everyone is a winner when they learn these valuable number combinations!


Enjoy!


Math Stories

By Mariah Bruehl,

Playful Learning: Math Stories

When I was in elementary school, my Dad would often help me with my homework. He had a great way of incorporating stories into the work, and I always looked forward to that time with him. Children love stories and story telling and I’ve found that it’s easy for them to learn new things while lost inside a tale. With this thought in mind, we’ve started a new game around here that focuses on simple addition and subtraction. It started with a homework assignment, and has grown into something more…


Math Stories


All you need to play the game is a group of objects, preferably of the same nature. You can use a favorite set of toys or even dried beans.  We used a set of unfinished peg dolls for this post, but have also used ponies and paper dolls. The concept is simple, set up an invitation to play with your objects and perhaps and few little props. Take turns telling a story using your objects and props, inserting a few key questions about the amount of objects along the way. My children tend to like it when I tell the story and they do the counting and act it out with the objects.


Math Stories


For example, a story may go something like this…A group of people were spending an afternoon playing at the park. How many people were in the group? One Mom and her two children decided to go home for lunch.  Now how many people are left at the park? The stories can be as simple or complex as you’d like. My children really love counting and answering the questions. My oldest, six, is able to do the simple addition and subtraction easily, so I try to make the story a bit more complicated so she feels challenged. She also likes to make up stories herself. My four year old is fairly new to these concepts and loves counting the objects out each time to answer the questions. The objects serve as a great visual, concrete representation of mathematical concepts and the story makes things fun! Math Stories

11 Math Apps for the Little Ones (part two)

By Mariah Bruehl,

TITLE15
It has been a while since I shared some learning apps, so over the coming months I hope to bring you a new collection from all areas of the curriculum to download for the new iPad you may be getting for Christmas!  Some apps are free, but others have a cost incurred. There is something for everyone, even a few for Android users!
You might remember my earlier post about Math applications, here are a few more to add to the list:
  1. Counting to 10 – Based around the concept of one to one correspondence, this app teaches using little penguins, moles, elephants, manta rays.   It involves a lot of repetition with both visual counting aids, as well as a little narrator counting aloud for you as you go (available for Android as well)!
  2. Fiete Match – An adorable app based around a seafarers theme.  A lighthouse provides the base for this app and the different activities are stored within it. You can choose an activity by tapping on the porthole.  I adore that the memory game has the user playing against the lighthouse keeper.  The illustrations are beautiful-I adore this application for the illustrations alone!
  3. Geo Board – This application explores the world of shapes and the possibilities which are presented when given a peg board and a rubber band.  We have had fun creating our names, as well as various shape patterns. This application is aimed for those with some experience in using a tablet device (Little F, age 3, found it hard to use). It does not allow you to save your creations, however a quick screen grab by holding down the power button in the top right hand corner and the home key (on an iPad) will save an image to your camera roll.
  4. KaleioDraw – A beautiful kaleidoscope of colors.  Perfect for learning about symmetry and pattern.
  5. Rush Hour – This is the same as the popular game created by Think Fun. Problem solving at its best! (available on android as well)
  6. Montessori Numbers – Another app based on the foundations of Montessori created by L’Escapadou. This app is a delightful starting spot for introducing numbers, as well as for those moving into the hundreds. It uses tracing numbers, base ten, number stories, and one to one correspondence to help children learn.  There are a number of difficulty levels going up to 999.
  7. My First Tangram (iPad only) –  An absolutely delightful shape application with so many adorable creations using the basic tangram shapes.  A and R Entertainment have created a lot of apps, find them here on their website.
  8. Tally Tots – created by Spin Light  and available across all devises including Nook, Amazon and Google Play. This app focuses on counting patterns, has 20 different numbers with an activity for each, and includes audio and visual cues for each activity.  A sing along number song as well as one to one counting patterns make this app adorable for the littles.  Spin Light has created a huge number of applications, so have a look at their site for additional apps in the area of mathematics.
  9. Tam and Tao in Numberland created by Les Trois Elles Interactive – Adorable in every way.  This company create some delightful applications and Numberland is one of them.
  10. Maths Tree by Bellamon  – This application is the perfect visual introduction to addition, subtraction and number equations.  The graphics are bright and cheerful perfect for a school set of iPads. You can add and subtract owls, doves, or peaches.  The clear visual link between the the graphics and the algorithm makes the learning process very clear.  Bellamon has created some delightful applications and their website is well worth a visit.
  11. Cutie Monsters (iPad only) – This application is aimed at those learning base 10 and one to one correspondence. It is divided into two sections: a counting section and a jigsaw section. The graphics are adorable, and this is a lovely application to introduce to littles who are first time app users. See a you tube preview of the app here.


DIY Math Beads

By Mariah Bruehl,

Playful Learning DIY Math Beads

These math beads are inspired by the Montessori Bead Material. The idea of the Bead Material is to help children understand numbers (particularly units, tens, hundreds and thousands), to quantify, to create complex numbers (3, 4, 5- digit numbers), as well as understand that each category is ten times larger than the previous; 10 is ten times larger than one, 100 is ten times larger than 10 and so on.

DIY Math Beads

These math beads were really easy to make. All you need is:

  • some small beads – ok a lot of small beads
  • wire – I used 3 inch headpins but you can use any wire. 3 inches fits ten small beads nicely
  • beading pliers – or a pair of small pliers

Then simply thread your beads, twist the ends and trim. Easy.

DIY Math Beads

I wanted my son Jack to be able to create 2 and 3-digit numbers, add and do simple multiplication so in our set I made:

  • 2 sets of 1-9 beads
  • 30 sets of 10 beads

Montessori Bead Materials also have 100-bead boards and 1000-bead cubes. That’s a lot more work, but the 10-bead strings are really simple and meet our needs for now.

These wonderful math manipulatives have so many opportunities for learning. You can:

DIY Math Beads

Use them for addition.

DIY Math Beads

Work on multiplication.

DIY Math Beads

Skip count by twos or threes or…

DIY Math Beads

tens.

DIY Math Beads

And create complex numbers.

You could also use the math beads for working on fractions; so many possibilities. So why not make a set. They are really simple. You can pick up beads fairly cheaply at the dollar store and before you know it you’ll have a beautiful set of math manipulatives that you can continue to add to as your child’s understanding grows..


Making Math Fun: The Nifty Nines Trick

By Mariah Bruehl,

The Nifty Nines Trick

Annie from Alphabet Glue is with us to share a fun and easy trick for mastering those hard to memorize nines timetables…

Back in my days as an elementary school teacher, this was one of my favorite math tricks with which to wow the kiddos. It still kind of is. And it isn’t just a party trick; there is some actual math involved here, and for a kid needing to multiply a number by nine and feeling a little bit stuck, it can be a real confidence booster.

Here’s how it works:

Hold up both hands in front of you with your palms facing away, and pick an equation to solve that involves multiplying by nine. For example, 9 x 4. Starting from the pinky on your left hand, count up to the number that you are multiplying by (in this case, 4). Fold down the finger for the number you are multiplying by nine. Now look at your hands again. The fingers to the left of the finger that is folded down represent the tens place. The fingers to the right represent the ones. So, when multiplying 9 times 4, and folding down the fourth finger from the left, you will end up with three fingers to the left, and six to the right. The answer is 36.

The Nifty Nines Trick

Try this trick with any single digit number that you want to multiply by nine. Works like a charm every time!

Note about the photo: photos are a mirror image, so when you look at the picture, try to remember that the tens number will be equivalent to the fingers on your left in real life!