Category: Arts & Crafts


DIY Chalkboard Shadowboxes

By Mariah Bruehl,

Crafts for Kids: Chalkboard Shadowboxes

Randi from Swoon is with us today with a lovely DIY for making Chalkboard Shadowboxes! They look like just the thing for a fun afternoon of open-ended, imaginary play…

When it comes to dramatic play, I’ve learned that my children are drawn to activities which allow them to use their creative minds as much as possible. Toys that “do it all”  and leave nothing to the imagination tend to get left behind quickly. They jump at the chance to express themselves and define the materials they are playing with in some way. These chalkboard shadowboxes have been a fun addition to our play space and have been used often.

Would you like to make a few of your own?

Crafts for Kids: Chalkboard Shadowboxes

Here’s what you need:

Small wooden boxes (found at the craft store), chalkboard paint, painter’s tape, a sponge applicator or paint brush, chalk, and a little bit of patience.

1. Tape off the edges of your box to protect it from paint.

2. Paint the inside of the box. Here’s where the patience comes in handy…we ended up painting three coats, waiting about 45 minutes between each coat.

3. Let the paint cure. Chalkboard paint is unique and works best when it’s allowed to “cure” overnight (insert more patience).

4. Prep the chalkboard surface by rubbing a bit of chalk all around it and then wiping with a paper towel.

Crafts for Kids: Chalkboard Shadowboxes

5. Set up an invitation. Lay your newly made boxes out with a handful of chalk and a small amount of your child’s favorite toys or figurines and let them have at it! When you’re done playing,  wipe the shadowboxes with a damp paper towel or cloth so they’ll be ready when you want to start all over again.

Crafts for Kids: Chalkboard Shadowboxes


Crafts for Kids: Recycled Bird Feeder

By Mariah Bruehl,

Recycled Bird Feeder

Bird Feeders are a constant source of inspiration for our family. Kate from An Everyday Story is here to share a lovely DIY on how to create one from recycled items.

“He who can no longer pause to wonder and stand rapt in awe, is as good as dead; his eyes are closed.” ~ Albert Einstein

A few months ago we moved house into our first family home. It is a lovely little home, needs a little work, but it was mostly the yard which sold us. Our yard has several tall native trees; beautiful eucalyptus and wattle, as well as blossoming deciduous trees.

All the trees has meant that our garden is alive with bird calls, as rosellas, galahs, budgies, cockatoos, magpies and currawongs sit perched on the branches, while brown and blue wrens hop along the ground amongst the bushes.

Recycled Bird Feeder

We are so very fortunate to have such exquisite native birds here in our part of Australia. The colors are so vibrant and their songs are so distinct. For the past few weeks, Jack (4yrs) and Sarah (2yrs) and I have been learning more about these magnificent birds.

We made them a simple rustic bird feeder out of an old pot saucer and this one, to hang up in the trees, from an old plastic bottle.

Recylced Bird Feeder

Here’s what we did:

  • grab yourself an old plastic bottle
  • carefully cut a hole in the side of the bottle – how big and how high up the bottle will depend on your bird – if your bottle is strong enough you can cut a hole in each side
  • carefully cut a small hole on either side of the bottle for your perch
  • find a nice study stick and slide it through the two holes
  • add your wild bird seed
  • twist on the cap tightly and tie a loop of string
  • hang it from a branch and wait for the birds to feast

Recycled Bird Feeder

Recycled Bird Feeder

My children get such joy from watching these birds; a true sense of wonder as the birds fly in and out of our yard. Beyond learning to recognize the birds by name, observing their feeding patterns and learning their songs, Jack and Sarah are connecting with the birds, building an appreciation I guess for them, an understanding that we share this environment with the birds; a sense of connectedness.

Recycled Bird Feeder

‘Mummy I love these birds so much. They are so beautiful. Look! Another rosella! I wonder which birds will come and visit us tomorrow… we’ll just have to wait and see.’ ~ Jack (4 yrs)


10 Ways to Beat Summer Boredom

By Mariah Bruehl,

Ten Ways to Beat Summer Boredom

Randi from Swoon is with us today with a lovely list of activities that we can share with our children during these precious summer months…

Having the children at home during the summer is a special treat, but I think we can all admit that certain days are more challenging than others. When boredom hits and the children start to complain, or worse yet, begin to get into trouble, it’s a great idea to have a list of new activities up your sleeve. We’ve been out of school for about a month now here and I’m starting the hear the familiar proclamations of “there’s nothing to do!” and “can I just watch more TV?” I came up with a list of new to us activities recently that I can’t wait to try. I thought I would share them here, because chances are you’ve hit the same point in your house. All of these activities can be done by toddlers and involve things you probably have in your house right now. Super easy, right?

10 Ways to Beat Summer Boredom

1. Paint with Water. Yes, you read that right. Send them outside with containers of water and an assortment of brushes and let them have at it!  Paint on the porch, the sidewalk, and the outdoor toys.This can also be done on a chalkboard. {Photo credit}

2. Pencil Eraser Stamping. Press the bottom of a pencil eraser into a stamp pad and use to make all sorts of art. You can make animals shapes, greeting cards or your own wrapping paper. {Photo credit}

3. Play with your food. Make lunch or snack time fun by making faces, animals, or shapes out of your food. {Photo credit}

4. Mr. Printables. Got a printer and some paper? Visit the Mr. Printables website and browse all of the amazing and free printable projects, like these clever bird finger puppets.

5. Make some Land Art. Gather natural materials from your yard or on a family walk. Use them to make fun designs on the ground. Find this photo and more inspiration here.

10 Ways to Beat Summer Boredom

6. Set up a Miniature Scene. Grab a box or container and a few of your child’s favorite animals or small toys and set up a little scene. Make icebergs by freezing bowls of water and adding rocks for a North Pole scene. Or, use dried beans to make an interactive Construction Site scene.

7. Raid the Recycling Bin. A quick internet search will yield hundreds of ideas for cardboard and other things in your recycle bin. I love the simplicity of these hilarious monster feet-such a genius idea!

10 Ways to Beat Summer Boredom

8. Grape and Toothpick Sculptures. How fun! You could also try using wooden skewers instead of toothpicks to make larger structures. The perfect just-before-snack activity.

9. Paint Rocks. Set up a workstation with newspaper, a pile of rocks, and some acrylic paint and painting supplies.

10. Practice Your Letters. Make your own simple letter activity using a shallow tray or box and salt. Find the instructions here.

Scissor Practice for Preschoolers

By Mariah Bruehl,

Scissor Practice for Preschoolers

If an activity is a good developmental fit for a child it becomes evident in the amount of time he spends on it. Often a child will want to repeat the activity over and over again until it is fully mastered. There is something magical about finding the just right activity for a child that is a perfect match for her intrinsic desire to master developmental milestones.

Scissor practice activities for preschoolers provides a glimpse into what this magic can look like… For many preschoolers, practice with scissors is the perfect activity at the perfect time in their development, as they have an internal drive to master the skill.

The good news about scissor cutting activities is that they are easy to prepare and children often spend a long period of time focused on developing and perfecting their new found skill.

For a special three-year-old in my life, I simply cut colorful strips of paper and drew lines for cutting. It is also nice to include a small, bucket, basket, or bowl for the cuttings. You will be amazed at how careful your preschooler will be about putting her cuttings all in one place. They take great pride in seeing their accomplishment!

Scissor Practice for Preschoolers

Scissor Recommendations…

More Scissor Practice Inspiration…


Authentic Art Materials for Toddlers Part Four: Chalk Pastels

By Mariah Bruehl,

Authentic Art Materials for Toddlers Part Four: Chalk Pastels

Kate from An Everyday Story is here to share the next post in her series about introducing authentic art materials to toddlers. Today she is exploring chalk pastels…

Hi all. I’m back with the final part in our Authentic Art Materials for Toddlers series. I’ve really enjoyed showing some of our favorite art materials. We’ve explored clay, charcoal and paint. We’ve talked about the beauty of authentic art materials and their aesthetic appeal to young children. When you have beautiful materials, you don’t need to think about complicated art activities for your little ones. The materials will speak for themselves. The children will be drawn in, intrigued by the material’s beauty and possibilities.

Authentic Art Materials for Toddlers Part Four: Chalk Pastels

A simple kitchen tile and a block of clay, a piece of thick paper and some sticks of charcoal, two carefully chosen colors of paint and some paper, that’s all that’s needed to provide a rich and authentic art experience for your child. One that will deepen their language of art as they become more and more familiar with how each material works; using the materials to express not only their creativity but as another language for showing what they know and understand about the world and all the wonders within it. Through drawings and sculptures, paintings and models, they are able to make their thoughts visible.

Today I’m sharing one of our other favorite art materials; chalk pastels. Chalk pastels offer a similar experience to charcoal; they are the same shape and blend in a similar way. They give of a chalk dust like regular blackboard chalk but provide much richer colors.

Authentic Art Materials for Toddlers Part Four: Chalk Pastels

Setting up your creative space

The beautiful colors of the chalk pastels will invite the children in so try to make them the focal point of your creative space.

  • Arrange the chalk pastels into a rainbow of colors to emphasize the colors available. The pastels come in a tray but my daughter (27mths) finds it difficult to get each pastel out so I put them on a larger wooden tray for her
  • Decide whether or not you want to include black. Black is a very dominant color and I find my daughter favors it over all others. Sometimes I include black, other times I leave it in the packet.
  • Have another tray (or container) nearby for chalk dust. The pastels create a lot of chalk dust, especially with an enthusiastic toddler. Show your toddler how to gently pick up their paper and tip the chalk dust into the tray
  • Chalk pastels respond really well to thicker paper. The color will settle into the grain of the paper. I think it is worth buying a few different thicknesses of paper to have on offer when using chalk pastels (or oil pastels, charcoal and watercolor paint)
  • I like to have a rainbow of color swatches for my daughter to explore. She likes to flick through the colors, name each of them and match them to the pastel
  • A first experience with chalk pastels will likely result in wonderfully colored hands. Have a wet cloth on hand to catch any potential hand prints on the walls

Authentic Art Materials for Toddlers Part Four: Chalk Pastels

Inviting your child over

Mostly likely your little one will reach straight for the pastels and start exploring. Once they have had an initial exploration you could:

  • draw their attention to the thickness of the paper
  • compare it to regular drawing paper
  • notice how the chalk settles in the grain of the paper
  • show your little one how to blend the pastel with their finger
  • see what happens when you add another color over the top of the blended pastel
  • encourage them to use different sides of the pastel and see what kinds of marks they can make
  • draw their attention to the chalk dust. How are they making the dust?

Authentic Art Materials for Toddlers Part Four: Chalk Pastels Authentic Art Materials for Toddlers Part Four: Chalk Pastels Authentic Art Materials for Toddlers Part Four: Chalk Pastels

If you are a little put off by the chalk dust, or the messiness of paint and clay, I urge you to find a place (could be a table set-up outside) where you are comfortable with your child exploring fully. The more you offer art experiences, and the more your child becomes familiar with the process of working with the materials and cleaning up afterwards, the more comfortable you will become and the richer the art experience will be for your child. Make art part of your weekly rhythm. Just like sharing a book together, share some time creating together. Once you have the materials, it’s easy to pull them out and set them on the table.

Authentic Art Materials for Toddlers Part Four: Chalk Pastels Authentic Art Materials for Toddlers Part Four: Chalk Pastels

Happy creating and I’ll see you all again next month.


All Natural Tie-Dye DIY

By Mariah Bruehl,

All Natural Tie-Dye DIY

You are in for a real treat today! Randi from Swoon is sharing some great recipes and techniques for making lovely natural tie-dye creations…

Over the past year I have completely fallen in love with the process of making and using natural dyes! Did you know you can make dye solutions from many things in your house and yard? Berries, vegetables, spices, flowers, and plants can all be used to make the most beautiful hues, using just a few simple steps. The muted colors made by Mother Nature herself are so pretty and the process is really fun for kids (and adults too!).

We recently combined our knowledge of natural dyes with the age old technique of tie-dyeing and wanted to share it with you too. This activity is perfect for a summer afternoon spent at home.  The best part about using natural dye is the lack of harsh chemicals/odors, so you can even plan to do this inside on a rainy day!

All Natural Tie-Dye DIY All Natural Tie-Dye DIYAll Natural Tie-Dye DIYAll Natural Tie-Dye DIY

Materials: White cotton fabric for dyeing, rubber bands, gloves, vinegar or salt (to be used as a fixative), water, various pots and pans, stove, containers for dyeing, small strainer, and raw materials to make dyes. We used turmeric powder for yellow, red onion skins for pink, and red cabbage leaves for purple. Click here to see a list of possible fruits, veggies and flowers to use. There is a lot of information on the web, so grab your kids and do a search and decide together what you would like to use!

Step One: Prepare your fabric for dyeing. Use rubber bands to create a pattern on your fabric (for more information on this go here). Once you’re satisfied with your design, it’s time to treat your fabric with a fixative. If you are making a berry-based dye, mix 1/2 cup of salt with 8 cups of water and bring to a boil. Simmer your fabric in this solution for one hour prior to dyeing. If you are making a plant/veggie based dye, mix 1 part vinegar to 4 parts water and follow the same process. When done simmering, run under cool water and wring out a bit of the excess water.

Step Two: Make your dye. Wearing gloves, cut or tear your raw ingredients into small pieces and measure. Throw it in a pot and pour in water (2 parts water to 1 part raw ingredients. For example: one cup of torn cabbage leaves to two cups of water). If you are using a spice, such as turmeric, the proportions will be 1-2 Tbs. of spice to 3-4 cups of water. Bring mixture to a boil and simmer for about an hour. The longer you simmer, the more intense your color will become. When done simmering, strain dye into a container or jar big enough to fit your garment or fabric. You will feel a bit like a mad scientist at this point, but just go with it!

Step Three: Dye your fabric. Wearing gloves, place your fabric into dye containers and allow them to sit for a while. We didn’t play around with using multiple colors on one garment, but you could experiment with placing dye in a bottle with an applicator and squirting directly on the fabric as many people do when tie-dyeing. Once your fabric has reached the desired hue (remember, color will lighten a little as your fabric dries), pull it out of the dye and rinse with cool water separately until it runs clear. Remove rubber bands and hang to dry.

All Natural Tie-Dye DIYAll Natural Tie-Dye DIYAll Natural Tie-Dye DIY


Homemade Gluten-free Play Clay

By Mariah Bruehl,

Homemade Gluten-free Play Clay

Annie from Alphabet Glue is with us to share a fun gluten-free play clay recipe. Over the last few months I have slowly started to remove gluten from my diet and have notice a huge difference in my energy level. I am hearing more and more about children who have celiac disease or a gluten intolerance as well. I hope this recipe is helpful for all of you who are currently on that journey with your families…

When my daughter was diagnosed with celiac disease about a year and a half ago, I didn’t immediately realize just how many non-food considerations were going to be coming our way. But it didn’t take long for me to realize that art supplies were going to be tricky territory, and that many formerly favorite materials were possible sources of gluten contamination for my kid, who was becoming more and more sensitive to tiny amounts of gluten the longer that it was out of her diet. From the time that she was tiny, I had always kept homemade playdough on hand, and even at eight years old, she was lamenting the loss of playdough as a leisure time activity on a lazy Saturday afternoon.

Although it is more of a modeling clay than a soft playdough that will keep indefinitely, this baking soda based mixture has turned out to be a remarkably nice solution to our playdough problem. It is incredibly easy to mix up, and can be used as a playdough for a few days when kept in an airtight container between uses. Better yet, now that my daughter is increasingly interested in making more detailed clay sculptures and models, the clay can be easily dried overnight and then painted or otherwise decorated for use as a more permanent piece of art. We experimented with a handful of variations on what seems to be the favorite basic recipe for this clay, eventually deciding on the following combination of ingredients.

Homemade Gluten-free Play Clay

What you will need:

1 cup cornstarch
2 cups baking soda
1 1/4 to 1 1/2 cups water

canola or vegetable oil

food coloring (leave this out if you just want plain modeling clay to paint later)

What you will do:

Begin by pouring the water into a saucepan set over medium heat on the stove. Whisk in the baking soda, and once it is smoothly incorporated into the water, add the cornstarch, continuing to whisk to avoid lumps. Using a spoon, continue to stir over medium heat until the mixture thickens and resembles a soft clay. I’ve heard other websites say that is should vaguely resemble mashed potatoes. Add more water if you feel like the clay is too dry. Mix in food coloring as desired. Remove from the heat and scrape from the pan onto a lightly oiled plate. Shape into a patty or ball, allowing it to cool until it is ready to use.


Authentic Art Materials for Toddlers Part 3: Paint

By Mariah Bruehl,

Authentic Art Materials for Toddlers Part 3: Paint

Kate from An Everyday Story is here to share the next post in her series about introducing authentic art materials to toddlers. Today she is exploring paint…

Time to get arty with your toddler again. So far we have played around with clay and charcoal, today I thought we might get our hands messy with paint.

Paint can be a wonderfully sensory experience; the color, the texture, the sensation of running it through your fingers, over your hands and up to your elbows. So often though, I see paint offered to children in plastic lidded pots and always the same four colors; red, blue, green and yellow which inevitably blend together to give that murky greeny-brown. Yuck.

But what if we chose just two colors. Two colors that complimented each other. Two colors that when mixed together, transform into other pleasing shades and colors. And what then if we offered white? A true exploration of color.

Aunthentic Art Materials for Toddlers Part 3: Paint

So let’s paint. Or should I say, let’s explore colors. Let’s create colors.

Setting up your creative space:

When you are setting up your creative space try to create as big a space as you can. I often cover our entire table in a sheet of butcher’s paper. My daughter likes to move around when she paints. While she often paints in complete silence, she rarely sits still in a chair. A large sheet of paper allows her to explore without me redirecting her back to her seat.

Sometimes we forgo the paper completely and she paints directly onto the table or onto a large laminated sheet of plastic. She mixes paints, spoons out blobs, creates lines with her fingers and erases them again with her palm.

A child-sized table (like an old coffee table) allows your little one to really interact with the paint. They can lean over onto the table, move around the table, use large sweeping movements with their arms across the table; really have freedom of movement of their whole body.

Authentic Art Materials for Toddlers Part 3: Paint 4

When offering paint you might like to consider:

  • choosing two colors. Two colors which compliment each other
  • think beyond the primary colors of blue, red and yellow
  • think about colors found naturally in nature; bright oranges, subtle tones of green, light blue
  • include white. White paint creates different hues. Your little one can run their fingers and palms of their hands through the paint and as they do the colors will create new colors; pleasing colors
  • choose containers which allow your child to see the colors: clear containers or old glass jars draw attention to the paint

If your toddler is anything like my daughter, they will dive straight into the paint. But if your toddler is a little more apprehensive, like a little friend of ours, there are a few things you could do to encourage them to explore:

  • Start by adding a little paint to the paper and just dotting their fingertips across the paper
  • With a spoon, scoop a little paint onto their fingers for them to dab onto the paper
  • Using just one finger at a time, spread the paint across the paper
  • Using the second color, mix the colors together
  • Watch the colors change
  • Show them how to make lines in the paint with their fingers

And since this kind of painting, this exploration of color, gets all kinds of deliciously messy, think about the clean up. Find a place where you are completely comfortable with your toddler exploring paint in whichever way they enjoy, freely, openly, without interruption or redirection. Paint outside, paint in old clothes, have a bucket of water and old towels nearby and ready for washing. Have it all ready to go before you invite your toddler over.

Enjoy and happy painting.

Next month will be the last in our Authentic Art Materials for Toddlers series. I’ll see you all then.


Art on a Whim… Building an Art Library and How to Use It

By Mariah Bruehl,

Becky from a Sweet Hot Mess is with us today to share all of her favorite resources for exploring art and artists with children…

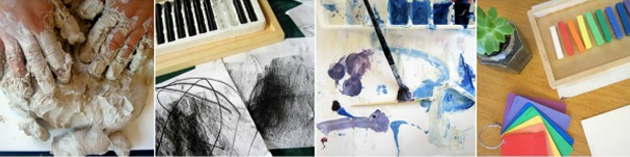
My children love to draw and construct, paint and sculpt.  Art is by far their favorite pastime.  I’m sure it’s your children’s favorite pastime as well.  In that vein, many of us keep art supplies on hand, from watercolors to cotton balls, popsicle sticks to crayons – we provide a veritable bounty of hands on goodness for our kids.

To further this passion, I have committed to building a library of art reference books as well.  I keep them at hand (and typically near our largest art center) and am ready to drop everything when they seek me out to teach me a new technique or ask me a question regarding art history.

Most recently, my children heard a reference to “expressionism” on one of their shows and sought me out for further enlightenment.  I immediately do what I do best – ran to my library of reference materials and dug out a few that would work in a pinch.  Here are a few of my favorite art books we have laying around.

Art on a Whim

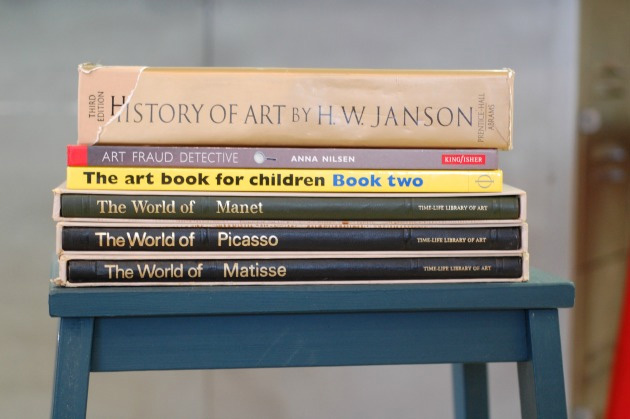
Last year, our Librarian asked me to recycle a bunch of encyclopedias and a large collection of Artists throughout history was included in the trunk full of musty old books.  I immediately brought them home and they have been a favorite ever since (check with your local library to make sure you’re notified if/when they are rotating materials off the shelf – you might get lucky!).  In that my kids had asked me about Expressionism, I grabbed Picasso and Matisse and on a whim I grabbed Manet as well.

I also have collected a few art compendiums, some children’s art books and even have started collecting artist’s autobiographies geared towards younger ages.

If you are limited on space or had to pick – pick a really good compendium of art.  Here are a few on my wish list.
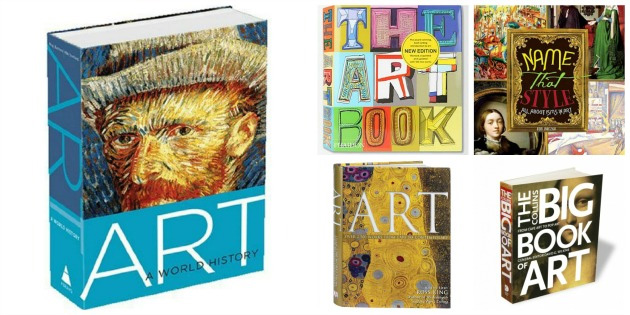
Art on a Whim

1, 2, 3, 4, 5

The subject matter to study with your children does not matter – go where their curiosity leads you.  My children specifically led me to impressionism and expressionism.  The following art project can be done with any period of art and highlight how we can put our art libraries to use.

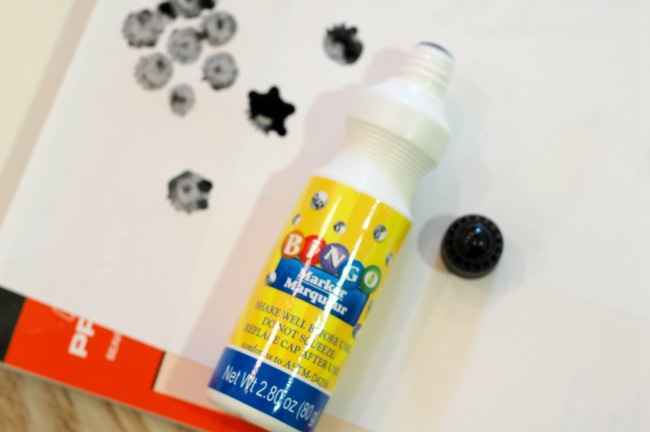
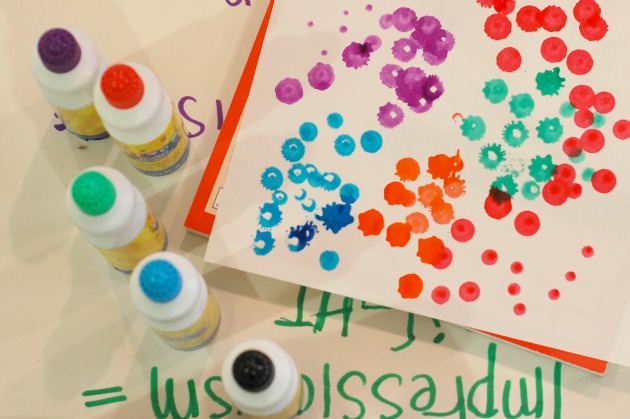
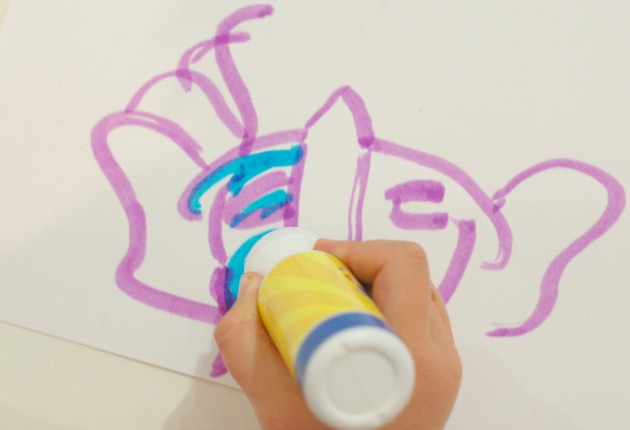
So to begin our art lesson on a whim – pull out your supplies.  In this case, I had just found a 5 pack of bingo dabbers at the dollar store (which are essentially dot sponges filled with watered down paint).  We’ve been dying to use these and this proved to be the perfect opportunity.

Art on a Whim

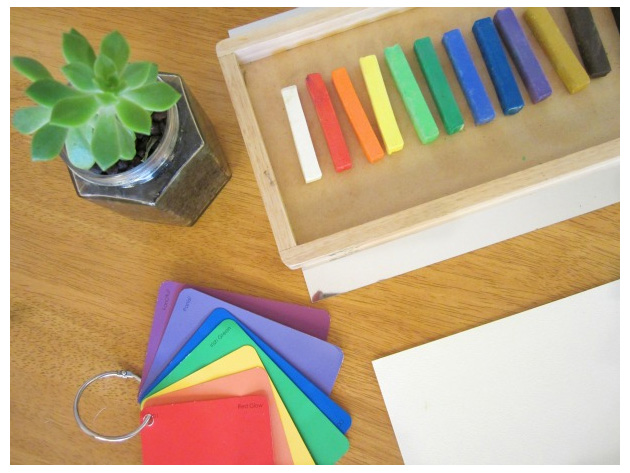
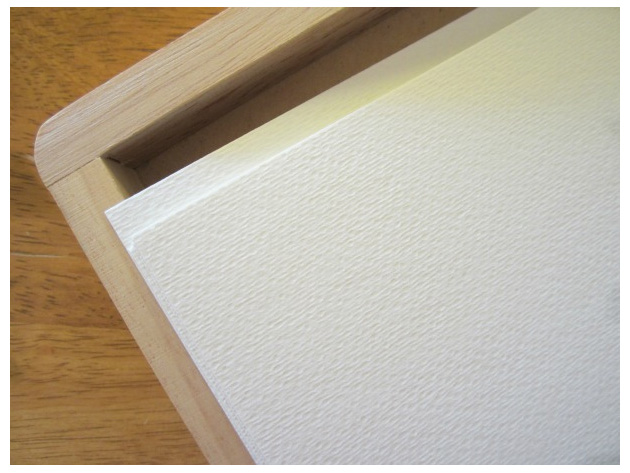
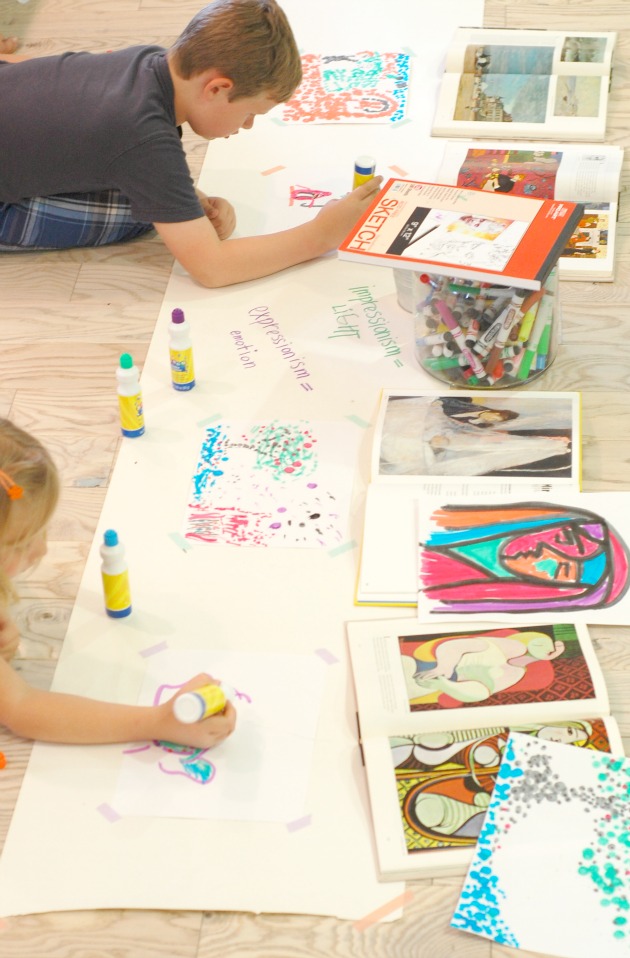
I highly recommend keeping the art tools to a minimum, so that the focus remains on the reference material and your art lesson doesn’t become an art free-for-all (my children have plenty of these).  So, pick one medium such as crayons, watercolors, chalks or paint and set up your art area.  What has worked best for us is to keep a roll of paper around as our safety net.  I tape this down and then tape down their paper to their temporary art station.

Art on a Whim

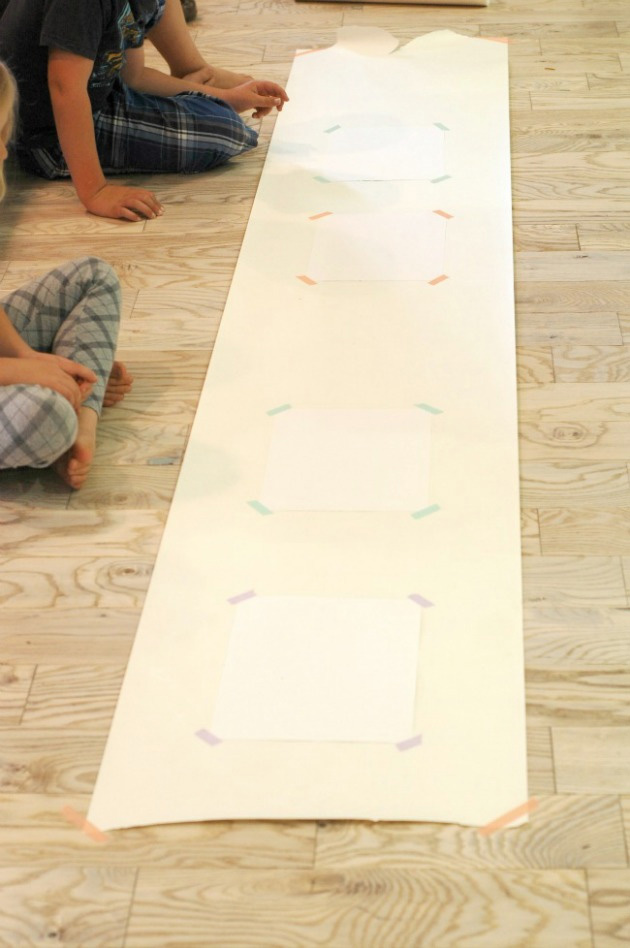
Since my children asked about Expressionism and I deemed it essential to backtrack a bit and introduce them to Impressionism to allow for historical context – I needed to have two sketch papers to each of their stations.

Art on a Whim

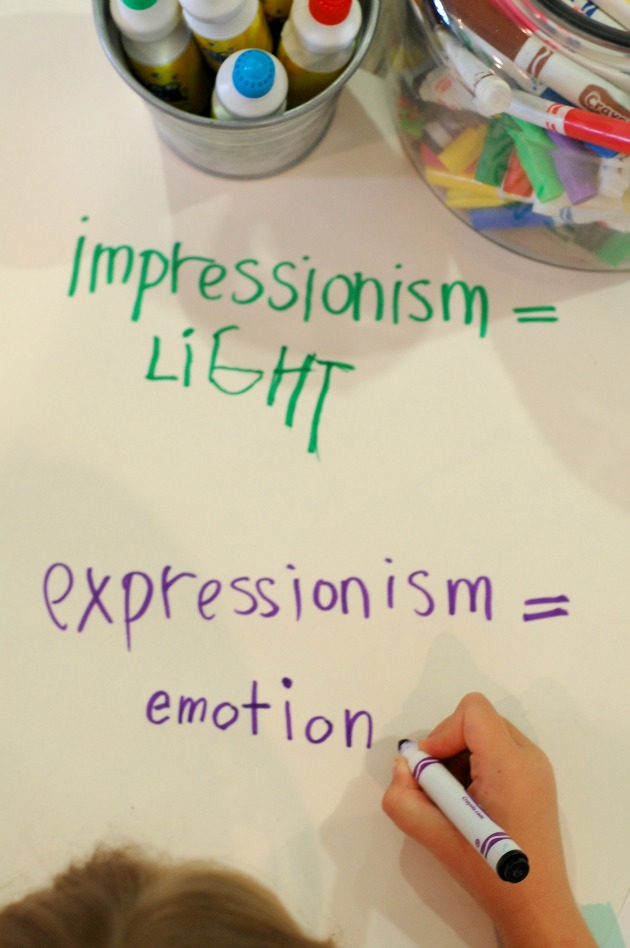
After a quick lecture on the two art periods, I had the kids write down reference words to help remind them which period represented what.  As with most of my kid’s learning – I introduce them to a lot of information, don’t dumb it down and yet make sure there are two or three key concepts I want them to walk away with no matter what.  I am always surprised with how quickly they learn these concepts and how much extra information they glean along the way.

Art on a Whim

At this point, we sat on the floor and dug through our books.  I had the kids pick an painting that inspired them from both periods in art history.

Art on a Whim

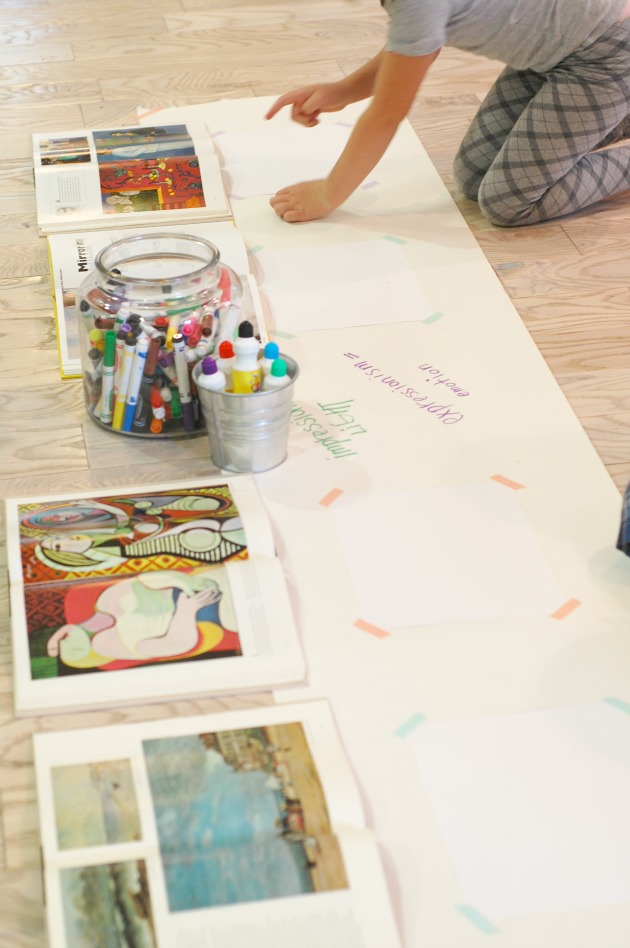
After setting up our books, readied our tools and I was able to show them how the Bingo dabbers worked.

Art on a Whim

I will typically work ahead of the kids or even with them on my own art so that they have an additional reference point as to what is expected – plus it’s fun.  Make sure your kids are started before you show them a peek of your art, so as to minimize copying.

Art on a Whim

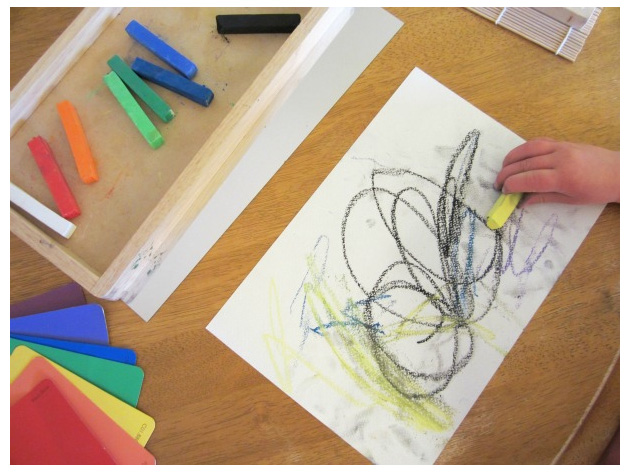
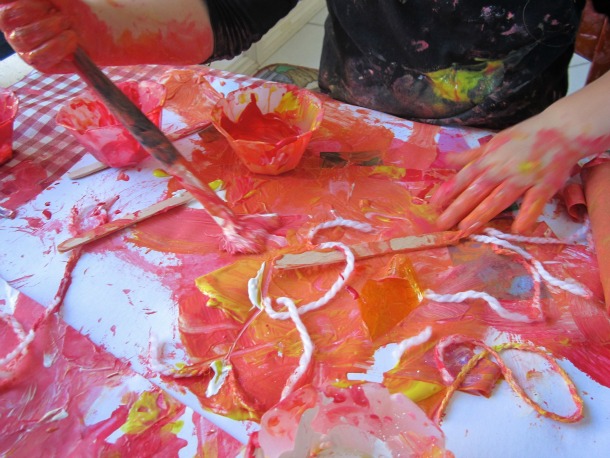
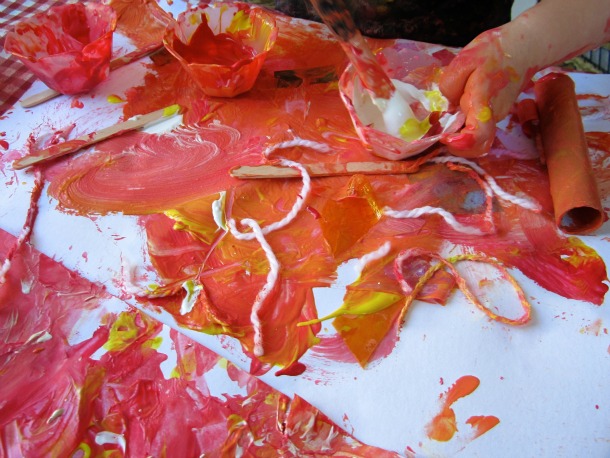
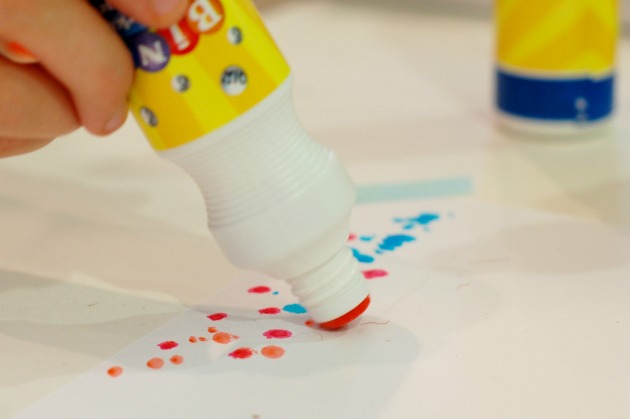
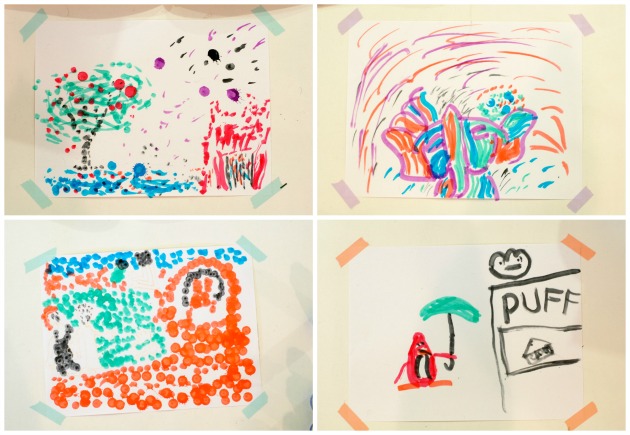
This is the point where I sit back and let them create.  It’s fun to watch them interact with each other, check out each other’s work and talk their way through their creations.  The dabbers proved to be a fun new tool, though with a limited palate which frustrated the kids at times – I had to keep reminding them to think outside of the box.  Limitations help us innovate.

Art on a Whim

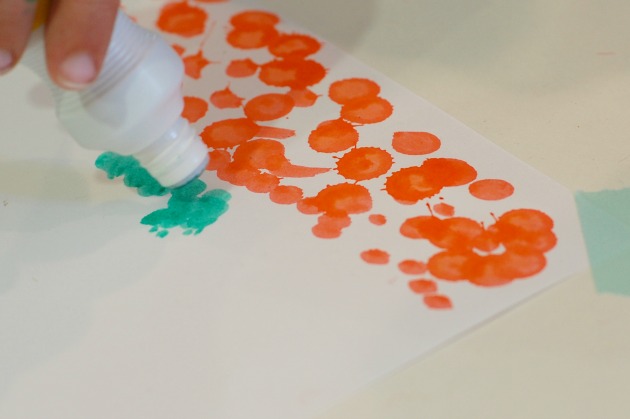
The kids quickly learned all the various ways to use the dabbers, so as to make their two pieces stand out next to each other.

Art on a Whim

I’m glad they picked up on the Impressionistic quick strokes (or dabs) of the paint, whereas they leaned towards thick bold lines with their Expressionistic pieces.

Art on a Whim

This approach worked very well for my two children in that there are both inclined towards art in very different ways.  So, while my daughter was very concerned with a deft hand, color and line – my son was able to connect to his piece through his newfound knowledge of these two art periods (ie: her finished product was very important to her while his was not, but the art lesson was)

Art on a Whim

I call this art on a whim, because I have to be prepared to drop everything and take advantage of this curiosity when it strikes.  My children are very independent artists and want very little input, so when they approach me with a question or for help with a new technique – I try to be as available as possible.

Plus I have a theory that curiosity is a finite resource – that if we do not mine it, foster it and take advantage of it…it will fade.  Or at the very least, my children will stop coming to me to answer to their curious moments in life.

And if your children need a little nudge, pick an art period or artist and introduce it yourself and see what questions arise.

Collaborative Art: Making a Masterpiece Together

By Mariah Bruehl,

Collaborative Art: Making masterpieces together

My favorite thing about art is how it transcends the normal lines that divide us. You don’t have to have incredible technique to create something meaningful. Seasoned experts can learn from the perspective of young beginners. For this reason, I love to see my young daughters create. They can’t tell you why placing that line there, or drawing that flower looks so good, they just do it. I find their uninhibited approach refreshing and I love to come up with new ways to challenge them.

My five year old daughter and I recently decided to make something together. She loves to paint, so we started there. We took a special trip to the art supply and picked out a few things. We started with watercolor paints, but ended up switching to acrylics for a more vibrant look.

Collaborative Art: Making masterpieces together

I set up a little work station with our supplies at one end of our dining room table. We also set a few guidelines before we got started:

1. We would each add one color to the canvas everyday.

2. We would do our painting while the other one was out of the room, so they would be surprised.

3. We would try not to paint completely over the other persons art work.

Collaborative Art: Making masterpieces together

We worked on our project for 3-4 days, sticking to the guidelines and each adding a new color each day. At that point we both decided we could each starting adding more than one color each day. After about a week, we both agreed the painting was finished and we added the final colors together.

I love this project for so many reasons! It was a pleasure to sit down everyday and see what my daughter had added to the painting. I was impressed by her focus and ability to stay within the guidelines (she normally finishes a whole painting within minutes). I could also tell that working on a project as my equal made her feel really special. And now I have tangible proof of the beauty that is created when we come together and treat each other with respect.

Collaborative Art: Making masterpieces together

This project could be easily modified to fit any type of art form. Does your child like to cut and paste? Why not work on a large collage together? Or perhaps a pencil drawing or clay sculpture. The important thing is to work together to create something you both love.


SaveSave

SaveSave