Category: Arts & Crafts


Sense-sational Painting

By Mariah Bruehl,

Sense-sational Painting

I still remember the day I got my first pair of eyeglasses. I was in third grade and really nervous about my classmates making fun of my new accessory. But as we drove from the optometrist’s office back to school, I was also amazed that I could see the individual leaves on the trees! I had never realized that you were supposed to be able to see leaves and not just a blob of green when you looked at a tree. I have been grateful for my vision (even though it’s certainly not perfect) ever since.

October is Art Beyond Sight Awareness month—a time for museums, schools, and other community organizations to come together to raise awareness for making the arts and culture more accessible to those with no vision or low vision. It’s also a perfect time to help our children be more aware of the fact that we all experience the world in different ways and to challenge them to think more deeply about how they use their senses every day. What might you notice if you made a list of all the sounds you hear at home? Or all the smells you smell at the park?

Art-making is an especially rich opportunity to experiment with the senses, and sensory painting is one of my all-time favorite projects because of its immediate tactile qualities. Are you ready to use your senses?
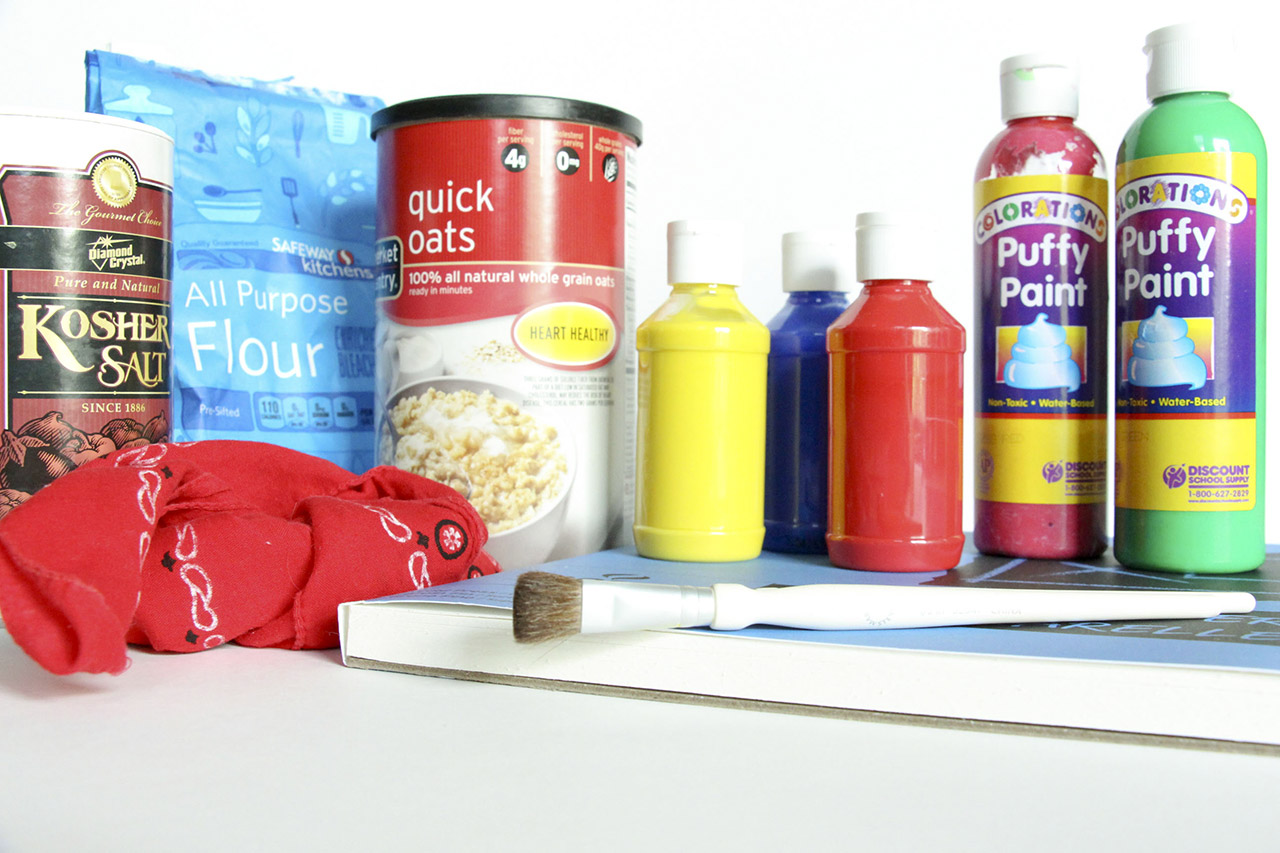
Sense-sational Painting

Materials:

  • Paper
  • Puff paint
  • Tempera or acrylic paint
  • Paintbrush
  • Sensory mix-ins for the paint: salt, flour, oats, birdseed, sand, etc.
  • Blindfold


The challenge for your child (and you!) is to create a painting without using your sense of sight. Just like those who are blind may use the Braille alphabet to read, tactile pictures allow those with vision impairment to feel the different contours, shading, and subtleties of visual images. {For a fabulous example, check out Art & The Alphabet: A Tactile Experience by Ileana Sanchez Santiago and Rebecca McGinnis.}


Sense-sational Painting


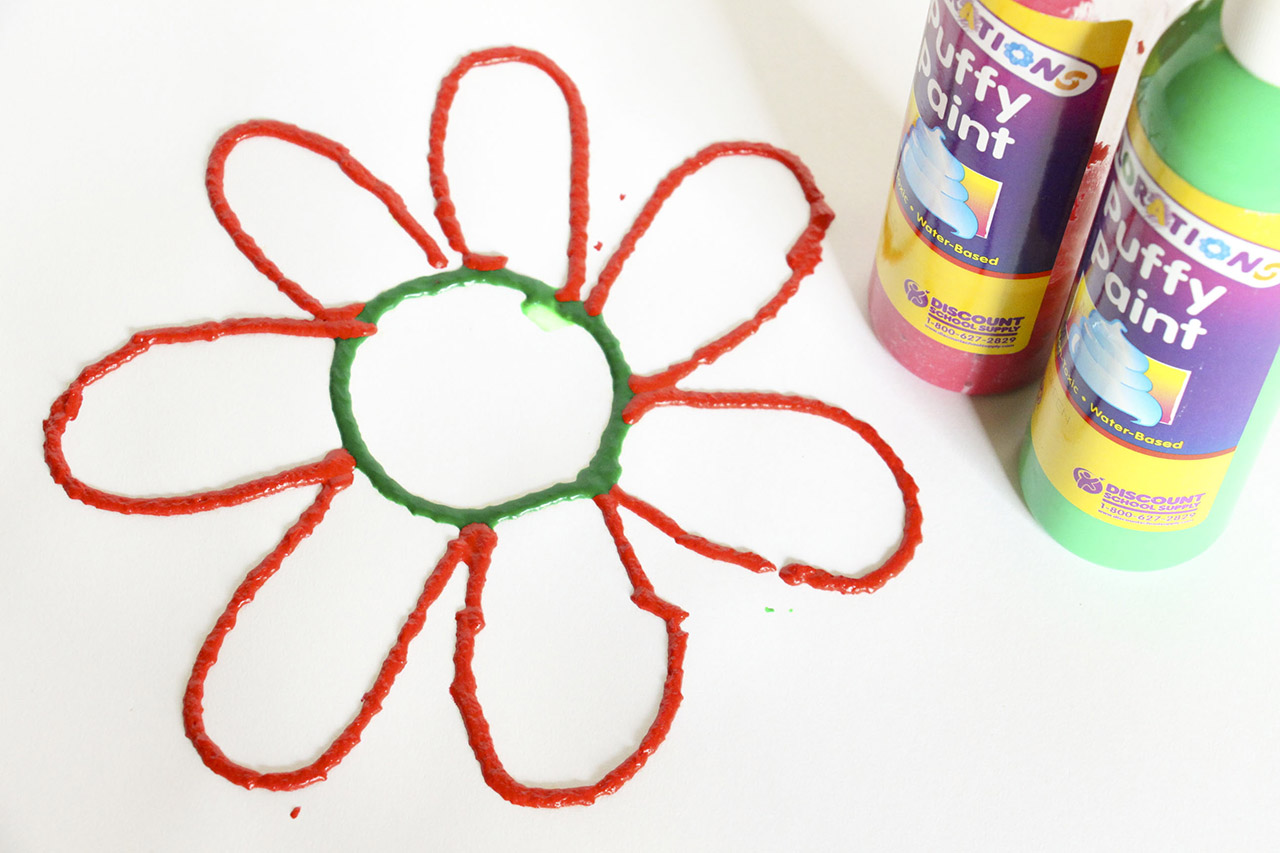
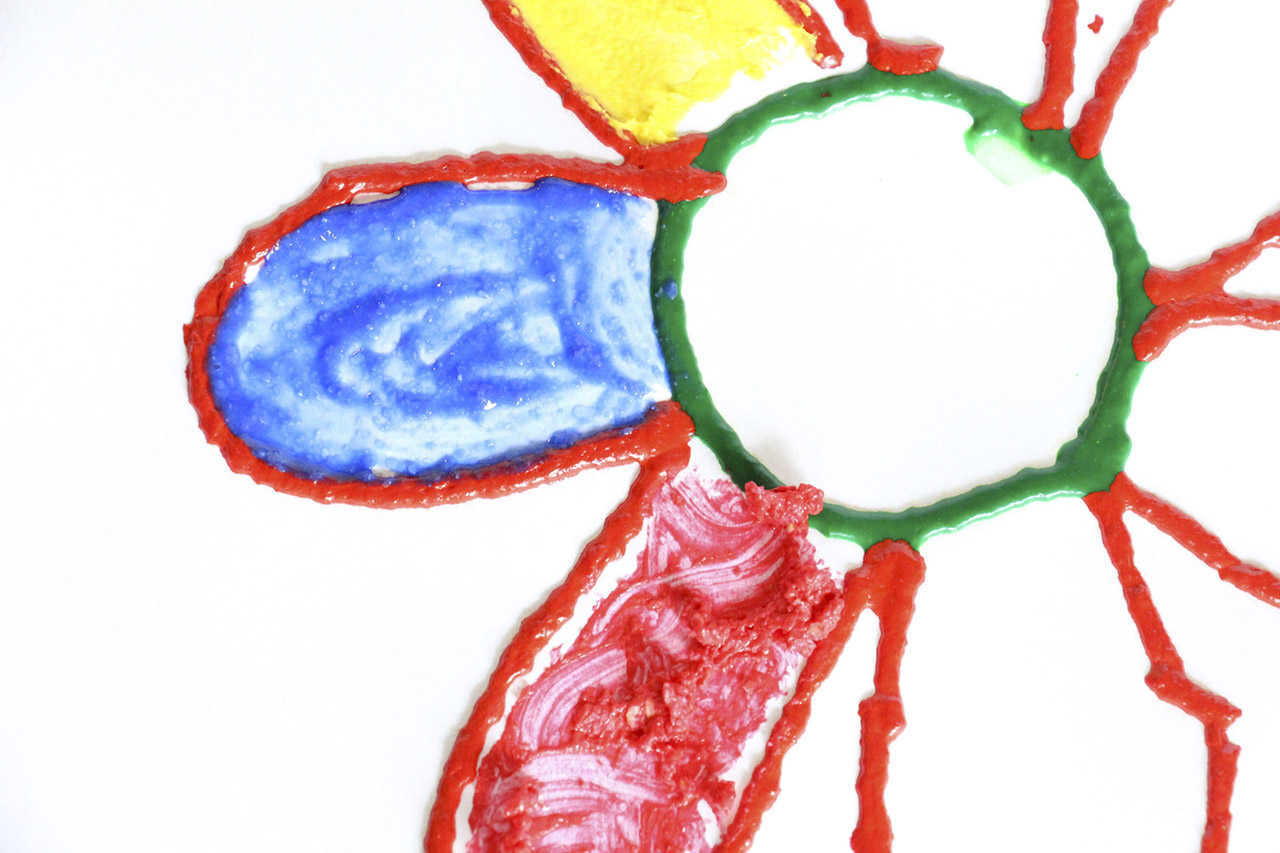
To begin your sensory painting, use puff paint to create a raised line drawing on your paper. The puff paint is like a stand-in for your pencil, creating lines that pop off the page that you will be able to feel. As you draw, you may want to choose simple shapes or familiar objects with minimal details. Make as many pictures as you like and allow the paint to dry. Once the paint has dried, you and your child can play a quick guessing game to see how well your fingers can “read” the drawings. Select a drawing and challenge your child to use only their sense of touch (eyes closed!) to determine which picture has been drawn on the paper.


Sense-sational Painting


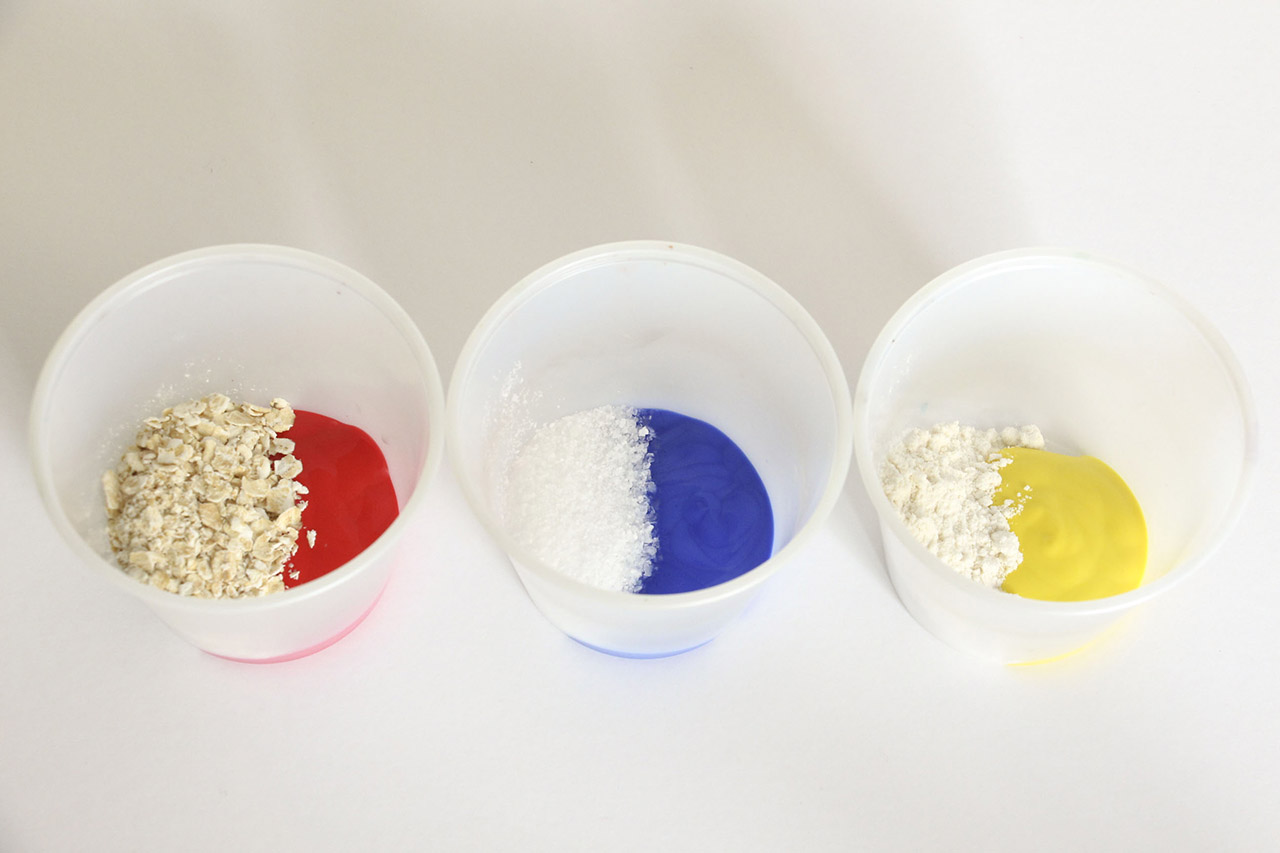
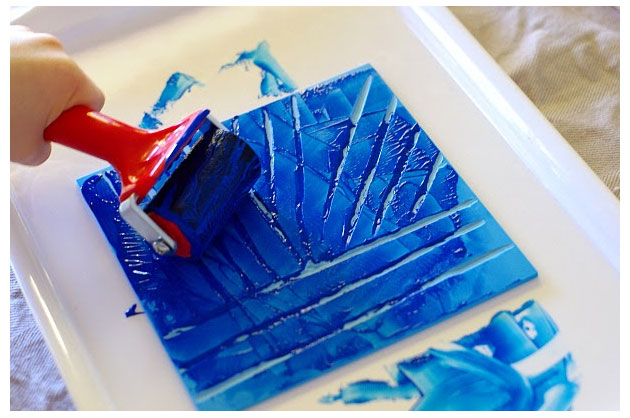
Now it’s time to get messy! Artists with vision impairment often depend on the texture of their materials to distinguish different colors or shades—white paint may feel thick, while black paint feels runny and slippery. Create your own tactile paint palette by mixing common kitchen ingredients into each color of paint to create unique textures for each one. For example, you can mix oats into red paint, salt into blue paint, and flour into yellow paint.


Sense-sational Painting


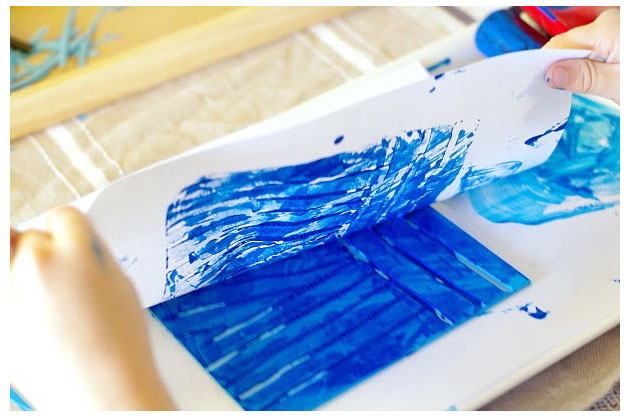
Put on the blindfold, and you are ready to paint! Spend a few minutes simply exploring the paint, learning the textures for each color. Can you tell which color is which using your sense of touch? Once you are comfortable with the feel of the paint, try painting one of the raised line drawings you created earlier. Younger children may enjoy finger painting, while older children might want to try using a paintbrush. Experiment with mixing new colors of paint based on touch alone. Can you make a shade of green, orange or purple based on how the paints feel when mixed?


Continue experimenting with your sensory paint and see where it takes you. {For a slightly different approach to sensory painting, try this idea from the Casa Maria’s blog.} Once your paintings are dry, explore them again with your sense of touch and talk with your child about what you notice. Not only will you be learning to “see” as others do, but you’ll also create some sense-sational art!

Lino Block Printing for Kids

By Mariah Bruehl,

Lino Block Printing for Kids

Kate from An Everyday Story is with us today to share a great DIY on block printing with the budding young artists in our lives.

Lino block printing is a challenging and engaging experience for children. If your child enjoys monoprinting, lino block printing will give them the opportunity to apply their understanding of printmaking to a new technique; encouraging them to grow in their creative expression.

When we introduce our children to a new art technique, it is important for them to discover the process. As we guide them through the steps, we allow our child to make the experience their own. They will have their own questions as they discover the possibilities of a new medium and a new technique:

“How hard do I have to press?” “How can I make my mark?” “How much paint do I need?” or “How can I make my print better?”

Getting Started with Lino Printing:

You’ll need the following materials:

  • Lino printing block: Art supply stores sell easy-carve flexible blocks which are soft and smooth to carve; creating deep lines
  • Printing Ink: You can buy water-based and oil-based printing inks. Water-based inks dry quickly but will run with water. Oil-based inks take longer to dry but once dried, you can introduce watercolor paints to add to the print
  • Paint: We prefer to use paint. It’s cheaper than ink and while your child is still learning how to make prints, you can allow them to explore without worrying about wasted resources
  • Lino carving tools: You can purchase a range of lino carving tools however, while your child is still learning how to carve, it is better to offer one wide carving tool which will allow them to make bold lines easily
  • Paper: No special paper is required for lino printing
  • Roller: A hard roller called a brayer is used to roll the paint on to the print block. You could also use a soft foam roller
  • Paint tray: A small tray to spread your paint or ink

Lino Block Printing for Kids

Step 1: Have your child draw their design on the lino block

We have been exploring shapes and patterns lately in Japanese architecture and so inspired by these elements, using a permanent marker, my son (5 years old) marked out his design. The lines will be the portion of the print that will remain white.

Lino Block Printing for Kids

Step 2: Carve your design

Allow your child to explore the carving tool. Encourage them to press the tool gently on their skin to feel the sharpness. Demonstrate how to carve away from you, making sure to keep your other hand behind the lino block and out of the way of the carving tool.

As their skills improve and they become more familiar with using the carving tool, you can introduce a finer tool for more detailed carving.

Step 3: Get your ink or paint ready

For this I let my children experiment with how much paint they need to make an effective print. Only a very small amount of paint is needed but I think this can be a very valuable learning experience for your child. Too much paint and the roller will push paint into the carved portions of the block.

The photo below shows my son’s first attempt at filling the roller. He soon learned that less paint would produce a better result. He was able to learn this through experience.

Lino Block Printing for KidsLino Block Printing for Kids

Step 4: Roll your paint or ink

Once your child has learned how much paint is needed (and it is only a very small amount), roll your paint on the lino block. It will take a few rolls to get a nice even coverage


Step 5: Make your print

Have your child gently place their paper on the block. With their hands or a dry soft sponge, gentle push the paper flat. Carefully pull back the paper to reveal your print and leave to dry.

Lino Block Printing for Kids

With each new print your child’s skills will become more refined. They will learn how much paint to apply, they will learn how deeply to cut the lino print and they will learn how to apply multiple layers of color as they cut more detailed designs from their blocks.

Their knowledge of printmaking will grow. They might like to try their hand at lino block printing on fabric next; creating their own individual designs for t-shirts or fabric which they will later sew into a small handkerchief.


6 Games to Play With Your Child at the Museum

By Mariah Bruehl,

6 Games to Play With Your Child at the Museum

Nuria from the The Adventures Archive is here today to share some great ideas for learning through play at art museums.

Are you visiting an art museum with your children this summer? Here you have some ideas to make the most of the visit.

6 Games to Play With Your Child at the Museum


1. Start the visit in the souvenir shop. Let him choose a few postcards of the museum’s collection and then invite him to find them around the museum. Once he has found them all, ask him which one is his favorite and why. Tell him to write those reasons to the artist on the back of the postcard. Pretend to post the card. A few days later you may surprise him with a reply postcard written “by the artist”.


2. Bring props: Look at the paintings through a kaleidoscope, a fly eye pair of glasses or a magnifying glass and have a laugh together.


3. Mixing art: At home, draw lines on an A4 drawing paper to divide it into squares (if your child is very young start with just 4 squares, for 6+ children try at least 9). Once you are in the museum, let your child copy the top left part of the first painting in the top left square of the paper. Move to another painting and let him copy the top right one. Continue the visit, filling a square with each painting. You’ll end up with a fun and quirky mixed work of art.


4. Continue the story: Choose a painting and let your child look at the scene for a few moments. Then start “Once upon a time there was…” and describe the scene. Then, turn it over to your child and ask him to continue the story. If you have more than one kid they can take turns so they come up with a long story.


5. If you visit a museum of abstract art, ask your children to guess the title of the paintings. My daughters come up with the funniest titles like “Super Dot” or “The Clumsy Squares”. They marvel when I tell them that the real title is something like “Sunset” or “The Cow and the Moon”.


6. Create a character: Choose a portrait and let your child imagine who this person was: What was his name? What did he do? Where did he live? Back home, if it was a portrait of a historical figure, do some research with your child so he can learn the real story and compare it to the one he had imagined.

6 Games to Play With Your Child at the Museum

Picture Book Projects: Extra Yarn

By Mariah Bruehl,

Picture Book Project: Extra Yarn

Randi from Swoon is with us today to share a fun project to compliment the inspiring book, Extra Yarn by Mac Barnett.

Being displaced and living with family this summer has made doing activities with my children especially difficult. This week they reminded me that the best projects don’t have to require a lot of skill, time, or materials and preparations.

While reading one of our favorite picture books, Extra Yarn by Mac Barnett, my daughters expressed an interest in making something with yarn. They love this story of a young girl with a generous heart who fills her village with color. If you haven’t read this book, look for it on your next trip to the library. You’re in for a real treat!

Picture Book Project: Extra Yarn

We chose to make God’s Eyes as a simple introduction to working with yarn. We gathered up some sturdy sticks, a pair of scissors, and some yarn. We were also able to invite a friend over to share in the fun, which was a lot of fun!

Picture Book Project: Extra Yarn

Picture Book Project: Extra Yarn

Want to make a few of your own? Start with two sticks, roughly the same size.

Picture Book Project: Extra Yarn

1. Lay two sticks across one another, forming a cross. Take the end of a piece of yarn (approx. two feet long) and tie it around the middle, fastening the sticks together. Wrap yarn diagonally  across the middle of the sticks a few times in each direction to secure. Do this until you cover the middle completely. Don’t clip the end, as this will become your working string.

Picture Book Project: Extra Yarn

2. Working counter-clockwise, wrap the end of yarn over a single stick. As you pull the yarn up and around, bring it directly over the top of the next stick, pulling tightly and turning cross as you go. Continue around and around until you have about two inches left of yarn.

3. Attach another color by tying a new piece of string to the working string and trimming the ends. Continue working your way around.

When you’ve added all the colors and rows you want, it’s time to finish. If you have glue, you can glue the end of your yarn to the back of your design. Or, you can tie it to the strings in the back, like we did. We also added some fun tassels to ours after they were done, as well as tying on a small loop of yarn for hanging.

I hope this week you are able to get down on the floor with your kids and do something creative, perhaps inspired by a favorite book, or just your wild imaginations!

Collaborating with Nature

By Mariah Bruehl,

Collaborating with Nature

Kate from An Everyday Story is with us today to share a fun way to bring together an appreciation of nature and our creative spirits…

It started with a stick, “Mummy wouldn’t this stick make a great tree house?…It’s a great shape, but it’s a bit small.” My five year old son wondered to himself how he could make this stick into a tree house… “What if we drew a tree house on top of the stick?” I suggested. He looked a little puzzled at first but then became very excited once I explained.

Collaborating with Nature

When you start looking around at all the differently shaped leaves, sticks and flowers in our yards, you can’t help but be inspired. A small round leaf could be a balloon, a long leaf could be a boat sailing on gentle seas or a snippet from a pine tree could be beautiful Christmas tree.

The tree house was just the beginning. Soon we had pages of pictures, as each different leaf or petal inspired different creations. We wanted to keep them but sadly the transient nature of petals and leaves means they will eventually wilt. For now we have pictures to remember them by.

Collaborating with Nature

An Invitation to Independently Explore

By Mariah Bruehl,

An Invitation to Explore Independently

Joey from Made by Joey is with us today to share some great tips on encouraging independent explorations with your children.

In an age where more and more of children’s play is based on following instructions, it is important to provide your child with lots of opportunities to lead their own play with independent exploration.

One thing that I loved doing for my kids when they were between 3-9 years old was to put together collections of materials for them to explore on their own first thing in the morning*. I remember waking up to hearing the squeals of delight whenever they discovered that I had left out a collection for them to explore on their own. Part of the thrill stemmed from the surprise of discovering it first thing in the morning!

*only include items that your child can use safely without adult supervision.

Putting together an invitation to independently explore is as simple as going through your home collecting items that have a common theme.

An Invitation to Explore Independently

For example: for this little activity I paired up our wooden oranges, pears and apples from our play kitchen with the library book Orange Pear Apple Bear.


An Invitation to Explore Independently

– A collection of shells, driftwood and plants that we found on the beach was artistically arranged on this tray.

– A collection of smooth gemstones and an identification book for older children.


An Invitation to Explore Independently

The holidays are a great time to make up a basket of materials to be experimented with. The possibilities for playful learning are endless…


An Invitation to Explore Independently

This was one of my favorite collections to leave out! Simple raw wood pieces and some colorful sheets of felt turned into some beautiful creations!

The idea behind this concept is that there are absolutely no expectations of the child. They are left alone to freely touch the items, read the book, create some art, play a game, or make their own discoveries. Other items may be brought into the play by the child – it’s a completely unstructured, child-led learning experience.

After you have enjoyed the extra quiet time in the morning(!) be prepared to be impressed by what your child decided to do with the items all by themselves. Take notes… you may learn a thing or two!


How to Kill Your Child’s Creativity

By Mariah Bruehl,

How to Kill Your Child's Creativity

Kids are born creative geniuses. But unfortunately, by the time they reach the third or fourth grade, their creativity has sunk. With intelligence, there is a phenomenon called the Flynn effect: each generation, scores go up about 10 points because enriched environments make kids smarter. With creativity, a reverse trend has been identified: since 1990, creativity scores are falling. What are we doing wrong?

How to Kill Your Child's Creativity


These are some of the most effective creativity killers:


  • Rewards: scientific research has demonstrated that rewards inhibit children’s exploration and imagination. A kid will put as much effort as it is needed to get the reward and he won’t push himself any further. Prizes and stickers eliminate the intrinsic pleasure of creative activities. We want engaged, motivated children, not just kids with their notebooks filled with stars.


  • Shadowing: always sitting by their side and micromanaging their projects is detrimental to their creativity. If kids are constantly being observed and we give them always some advice they won’t learn to take risks and they won’t experience the value of making mistakes as part of the process.


  • Limited choice: we put our children into a system that teaches them “there is only one right answer” Most toys come with instructions and we barely let them choose. However, exploring options is at the heart of lateral thinking. Creative kids feel free to propose alternative solutions and are keener to follow their curiosity.


  • Over scheduling: organized activities, workshops, social dates… children’s diaries have never been fuller. But we are so busy over-stimulating them that we forget to allocate time for the most important stimulus of all: boredom. Boredom feeds imagination and imagination feeds ideas and creativity. We often say “I need to just sit down and do nothing to recharge” and yet we don’t apply this to our kids. It is during times when we are doing “nothing” that our mind gets the best ideas.


How to Kill Your Child's Creativity


Creativity flourishes when things are done for enjoyment. What matters is the pleasure, not the perfection. Let’s forget about the “getting it right” and let’s give our kids the opportunity to explore, to make mistakes and take risks and to feel the freedom to express all their wonderful ideas.


SaveSave

Growing Your Child’s Creativity With Constructive Criticism

By Mariah Bruehl,

Growing Your Child's Creativity With Constructive Criticism

Nuria from the The Adventures Archive is here today to share some great advice on giving our children honest and useful feedback.

By now we all know how crucial it is to foster our children’s creativity. Painting, cooking, dancing, playing an instrument…whatever their activity choice if we want to ignite their creative spark it is important to learn the best way to constructively criticize their work.

Criticism shouldn’t be avoided. It is, after all, a gift of knowledge and values. But it requires a fine balance: kids creativity cannot evolve in an environment of constant critiques and inadequate praise can also be detrimental because it doesn’t leave any room for improvement. Critiques need to send messages of both respect and support.

Growing Your Child's Creativity With Constructive Criticism

Chuck Jones, the talented animator behind characters like Bugs Bunny and Road Runner, has talked about constructive criticism: -“when a kid brings you a drawing don’t just look at the work, look at him. If you can see that your kid is proud of his work you should promote that pride to increase his self-esteem. But if the child is not happy with what he’s done don’t say to him “that’s wonderful”, because that’s not going to make him feel better. He knows that the drawing is not wonderful. If you give praise regardless he will lose the trust in you and may end up not interested in sharing his future works with you.”

Growing Your Child's Creativity With Constructive Criticism

Here you have a few more ideas to balance your critiques:

  • Follow the sandwich approach: offer him positive feedback before and after informing what needs to be improved. For example, if your kid has been playing the guitar for half an hour you may say to him: “You nailed the strumming today. You might want to improve the position of the finger on the second chord. Overall you’ve improve lots from yesterday and I can see that you’ve put lots of passion on it so I’m really proud of you”.
  • Ask your child’s point of view: try to see the work from his perspective before offering an unjust criticism. A flower in a drawing may seem too big to you but inside his little hands it is big so it is only natural that he draws it that way.
  • Be specific: don’t just use general adjectives: “lovely”, “beautiful”. Pick up a detail and comment on it: “I love the blue you used in this sky”, “I thought that particular pirouette was really creative”
  • Spend time showing him the masters of his passions: if he likes drawing take him to your local museum. If music is his passion be sure that he listens to the classics. Ask him what is it that he likes of a particular masterpiece or what part of it he would like to learn. Your next feedback will benefit from this info.

SaveSave

Crafts For Kids: DIY Springtime Masks

By Mariah Bruehl,

DIY Springtime Masks

Randi from Swoon is with us today to share some easy and fun springtime masks for the little bunnies in our lives.


The transition from winter to spring is a gorgeous one. The world around us is filled with beauty and the promise of new life. My children have been dying to spot a mama duck with a nice family of chicks in tow (no luck yet), and we’ve been finding all sorts of excuses to pick the freshly grown flowers from the yard and bring them inside. The signs of spring also tend to show up in our crafts.

DIY Springtime Masks

Last year we came up with these paper bunny masks and they were a hit! We decided to make them again this year, but thought we should add a baby chick friend into the mix too. These masks are simple to make, fun to decorate, and even more fun to play with!

Materials needed:

bunny mask template, baby chick template

-scissors

-hole punch

-markers, paint, stickers, sequins (anything you can dream of to decorate your mask!)

-ribbon or twine

DIY Springtime Masks

1. Print mask templates and fold in half.

2. Cut along the dotted lines. Small children will need help cutting out the eyes.

3. Unfold mask and lay flat. Gently fold the nose of the mask over so it lays over the front of the mask.

4. Decorate! We traced the template on to watercolor paper and painted them with watercolors this time, but the possibilities are endless.

5. Punch a hole on each side and tie a short piece of twine to each side. Tie around child’s head and have fun!

DIY Springtime Masks


Meaningful Literacy: Vegetable Stones for the Kitchen Garden

By Mariah Bruehl,

Meaningful Literacy: Vegetable Stones for the Kitchen Garden

I think the dream to carve out a little spot in our yards to grow our own produce is a common one. Growing and nurturing something with our own hands has given our little family such a deep sense of joy and connectedness; to each other, to our food and to this space in our yard.

We started creating our first kitchen garden about three months ago. We still have a lot to learn about soil preparation, crop rotation and natural pest control but this space has provided such wonderful opportunities for learning for our children; we planted the seeds together, watched as they grew from seedlings into plants and eventually produced delicious vegetables…which almost always get picked by tiny helping hands and straight into little bellies. However my children are learning more than how to raise and nurture seeds, this kitchen garden is also providing opportunities for meaningful literacy.

These little vegetable stones were an opportunity for my son Jack (5yrs) to write in a purposeful and meaningful way. These vegetable stones were for our garden; their garden.

Meaningful Literacy: Vegetable Stones for the Kitchen Garden

I collected small clippings from different plants for my son to identify and match to the word card which I had written in both lower-case and capital letters. He then used these word cards to create his vegetable markers using some beautifully smooth beach stones and a permanent marker.

Meaningful Literacy: Vegetable Stones for the Kitchen Garden Meaningful Literacy: Vegetable Stones for the Kitchen Garden Meaningful Literacy: Vegetable Stones for the Kitchen Garden

My children really enjoyed creating these stones for their vegetable garden. Over the next few days they added more stones under more plants.

Meaningful Literacy: Vegetable Stones for the Kitchen Garden

I think it is so important for children to have opportunities to read and write in meaningful ways; writing for a reason, reading to discover something, in this way we can help to nurture and preserve that innate drive to learn and help to keep learning connected to real life. Whether it’s by helping to write shopping lists, reading steps in a recipe, or creating vegetable markers from stones, we can gently encourage literacy by engaging our children in meaningful tasks which are relevant to our children’s lives.

More about our kitchen garden here, and our homeschool routine as well.