Category: Arts & Crafts


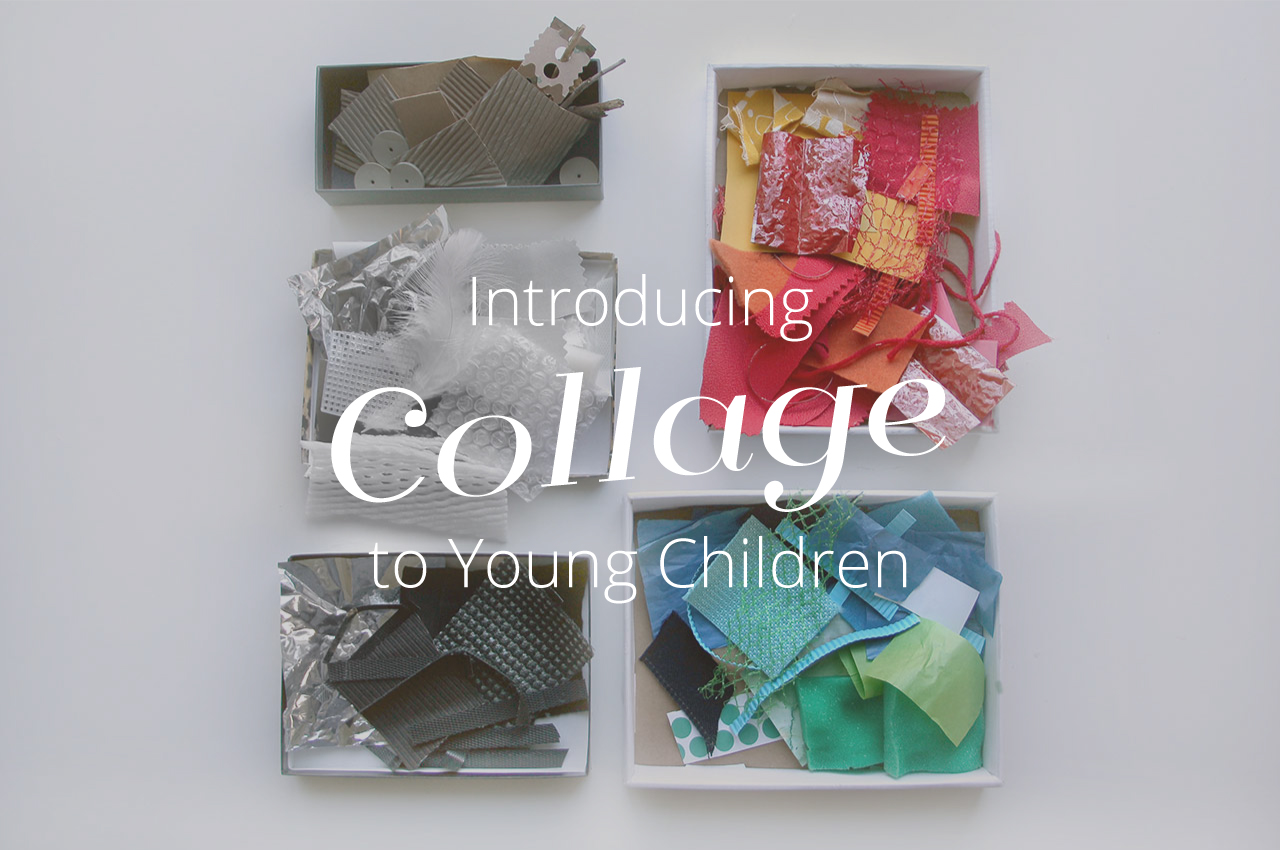
Introducing Collage to Young Children

By Mariah Bruehl,

leadphoto-collage

As a classroom teacher, I was always amazed at the opportunities my students had in the art room. Art was a vital part of the curriculum in the schools I was fortunate enough to work in. Children were given ample opportunities to recreate their life experiences and art was integrated into all areas of the curriculum. Open ended materials were carefully selected and respected as a means of communication. Children had endless opportunities for self expression because of their long term familiarity with the same basic materials; paint, clay, collage, and construction.

Nancy Beal captures this sentiment beautifully in her book, The Art of Teaching Art to Young Children

“My goal is to have the children feel so comfortable and confident with these materials that they are willing to use them to speak about their innermost thoughts and feelings. I see materials as being as much the teacher as I am.”
Children need a lot of time to explore the properties of any new material before they use it. If children are to become fluent in communicating through these materials, we need to first give them time to explore without the pressure of the product. We also need to expose them to these materials time and again so they can gain mastery over them.”

Playful Learning: Collage with Children

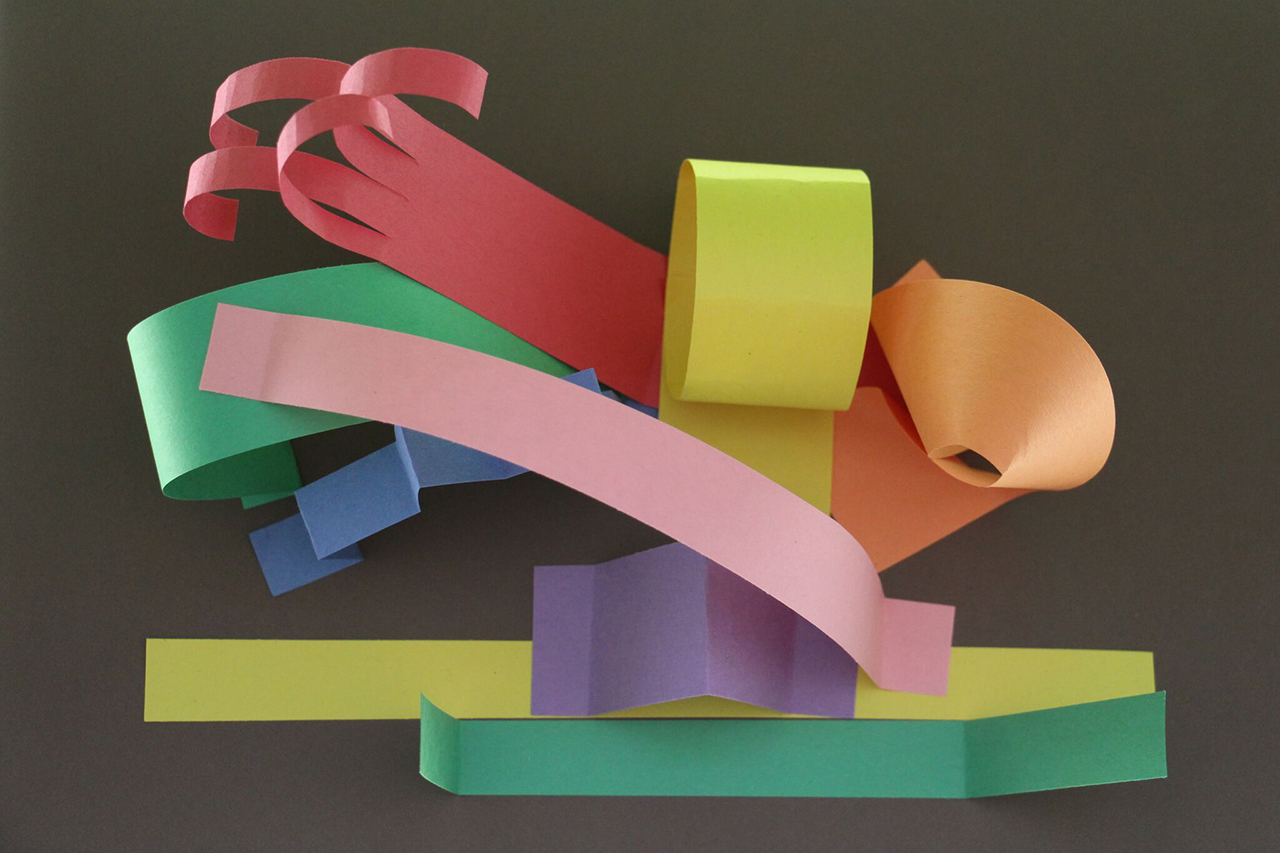
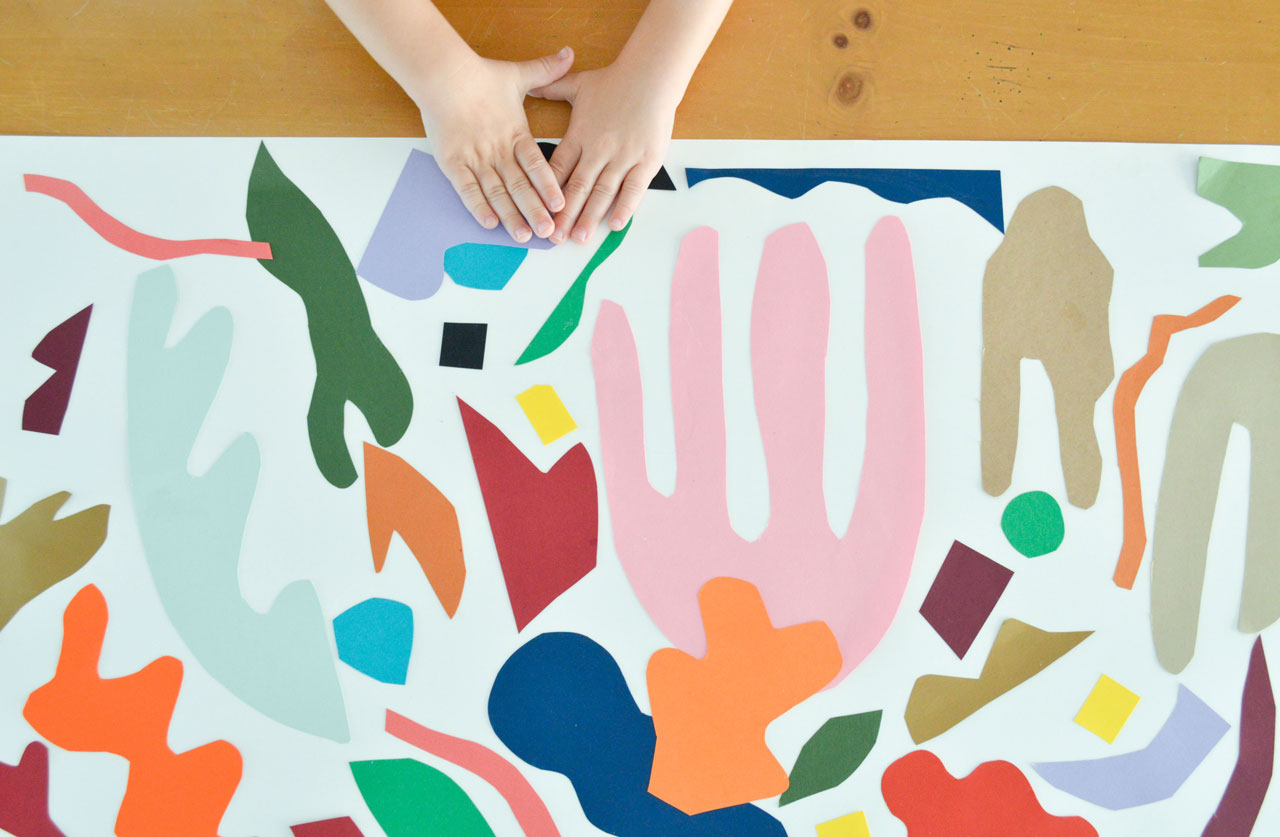
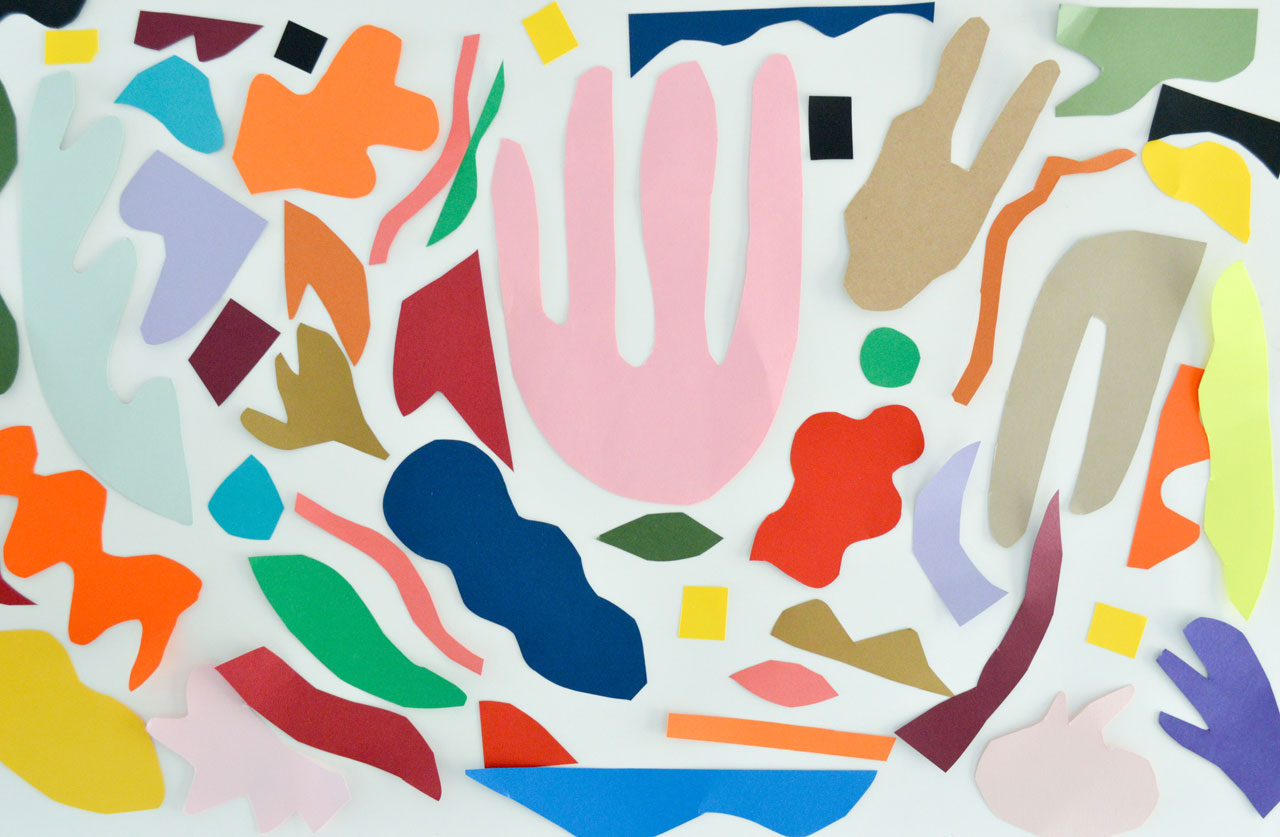
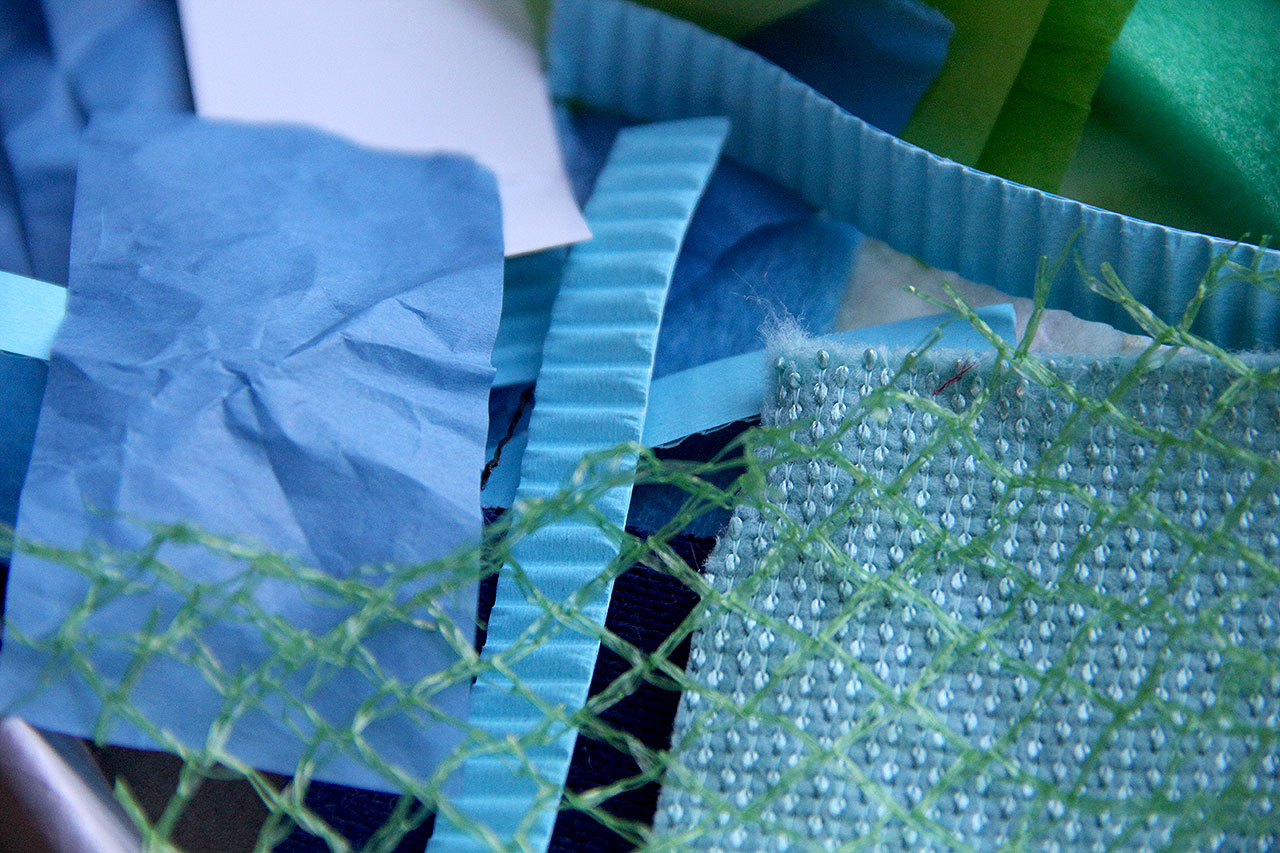
Collage is a wonderful place to start, especially for young children because it nurtures their natural desire to explore the world through their sense of touch. It also allows a certain level of flexibility. Children can make decisions about which materials to use and can then manipulate these shapes of various textures, forms and color until they are satisfied with their arrangement.

Since introducing collage to my children, I notice how much more observant they have become. They are beginning to look closer and notice texture and form out in the world. They see the beauty in ordinary things and can appreciate the possibilities of everyday objects.

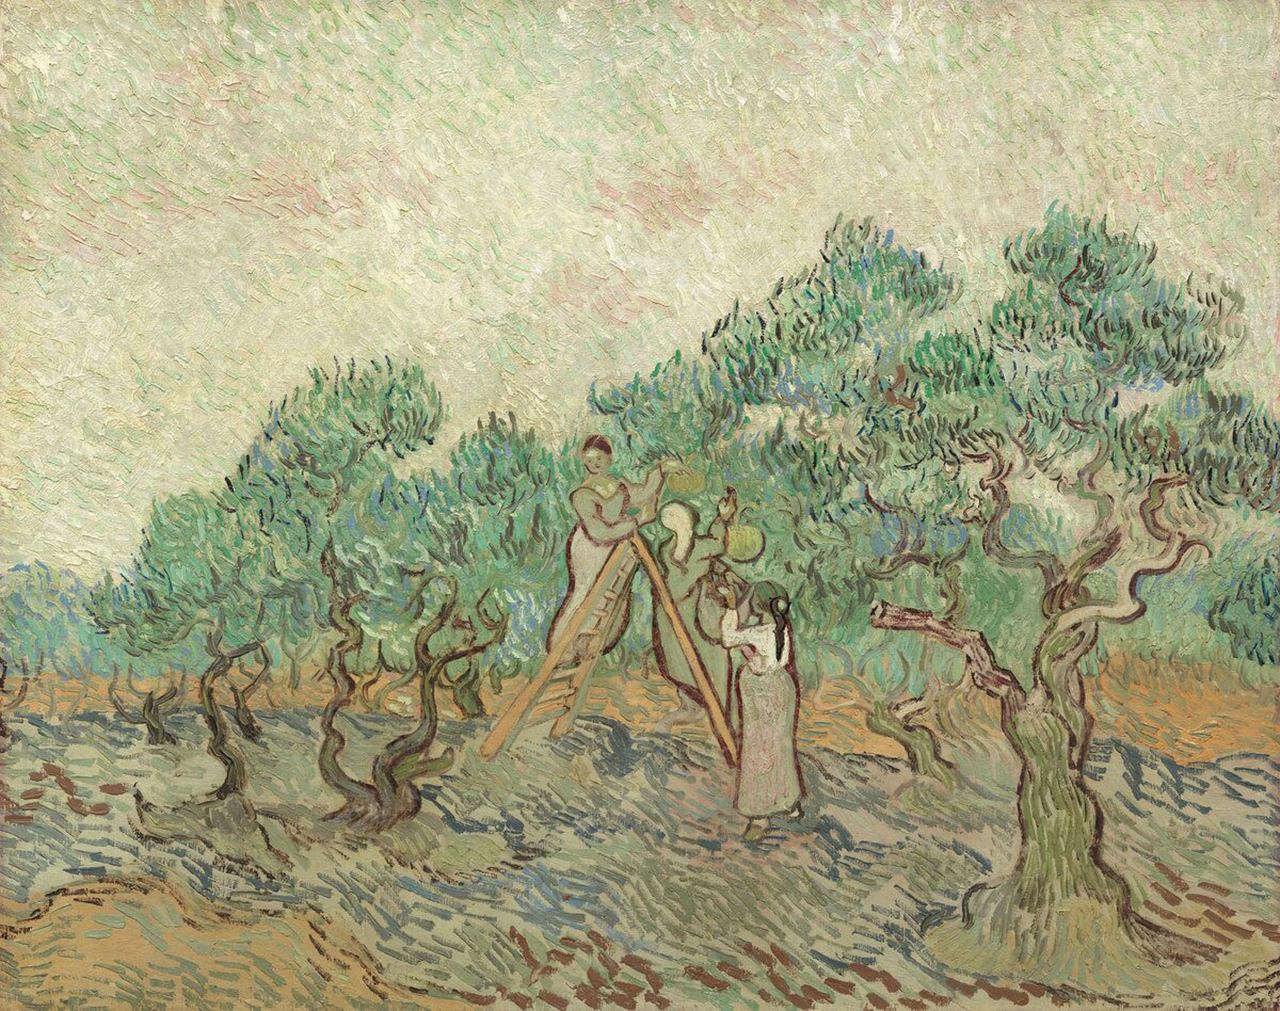
“Collecting and using materials of different textures, colors and patterns may help children to become the kind of adults who respond sensitively to their surroundings. They may learn to see more than just a building; to be aware that besides a structure they see complex relationships of rough, smooth, and shiny surfaces. They may realize that a tree has a relationship of textures; the rough indented bark and the hard branches contrasting with the smooth or soft leaves. Through collage children can be helped to see beauty in ordinary things and to grow in resourcefulness by appreciating the possibilities of using simple materials for art expression. Selecting materials for collage not only gives children intense pleasure but also gives them an opportunity to make independent choices.” – Lois Lord

Playful Learning: Collage with Children

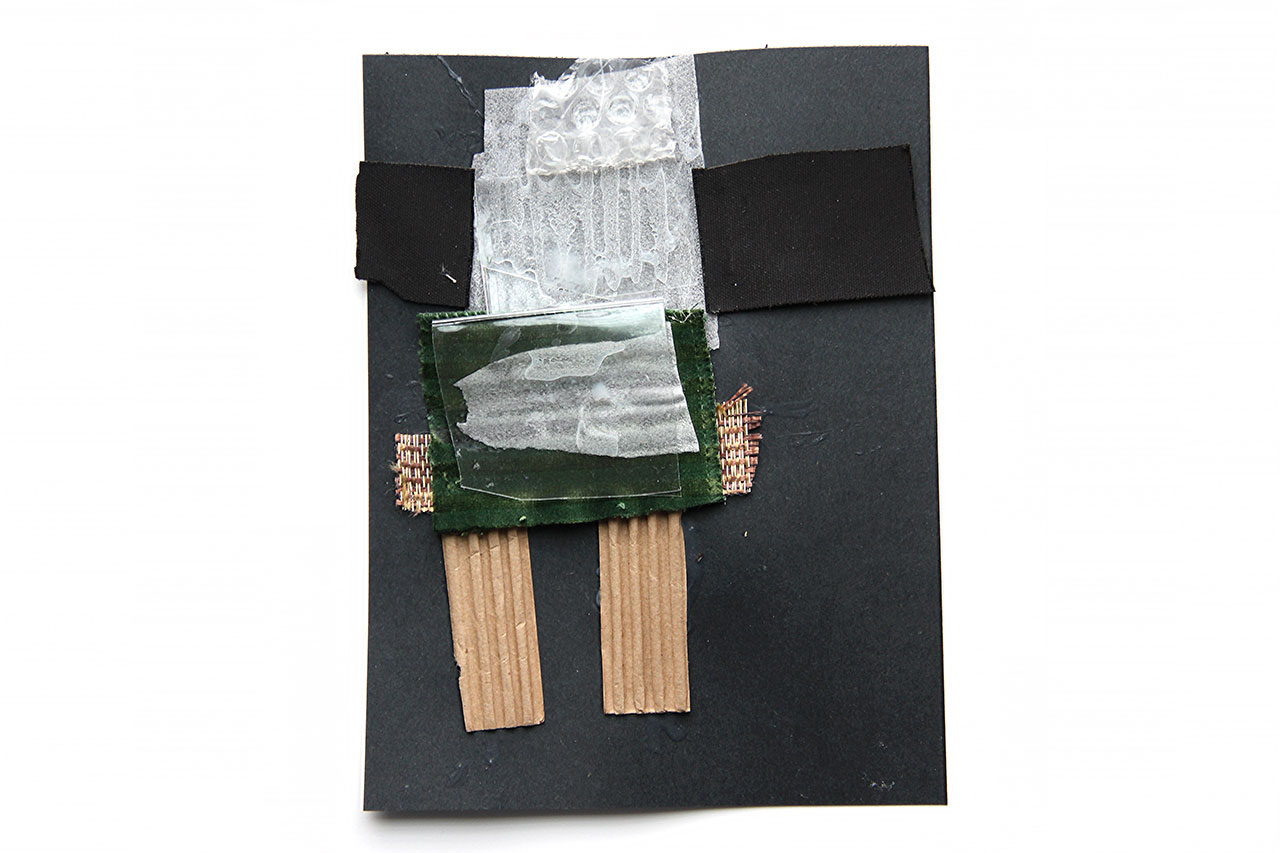
Collage, in its simplest form, is the glueing of materials to a flat surface.
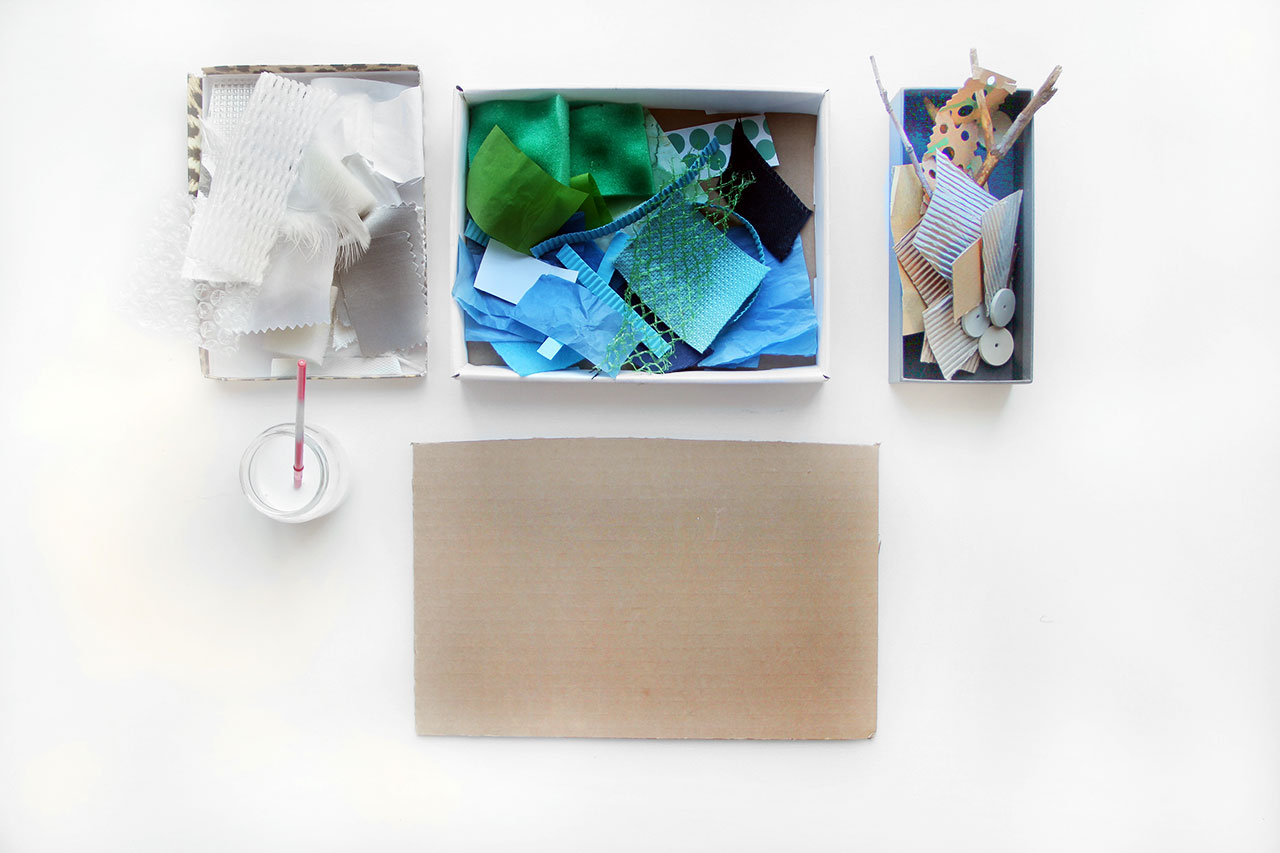
IMG_5951

You will need:

  • glue
  • a small brush
  • format paper
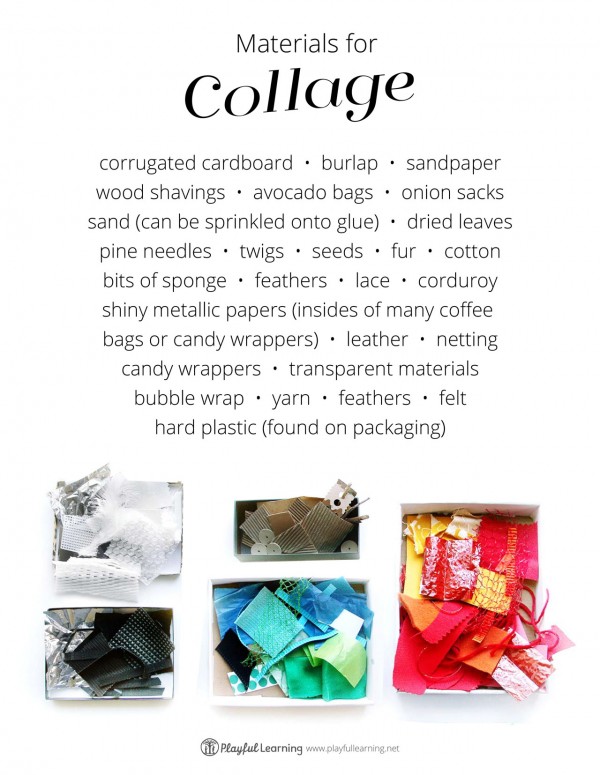
  • a wide selection of beautiful precut materials ranging in color and texture material list printable

The format paper is the background. The size can range anywhere from 7×9 inches for younger children to 14×20 for older. Cardboard or cardstock works best. For the glue, it is recommended to pour the glue in small jars (baby food jars work best) and offer children a small brush to apply the glue. Glue sticks can sometimes get children’s hands too sticky and take away from the tactile experience of the materials.

You can begin to collect a wide assortment of beautiful papers and fabrics from just about anywhere. You’ll begin to notice the abundance of texture and color in everyday packaging. I like to look for variety in texture and color. I keep a bin handy in the kitchen so when something catches my eye on the way to the recycling bin, I toss it in. Later, I’ll spend time cutting small shapes from these materials. I also look to fabric from old clothes, swatches from fabric stores, bags etc. Once the materials are precut, it is helpful to sort them in categories.

IMG_5948

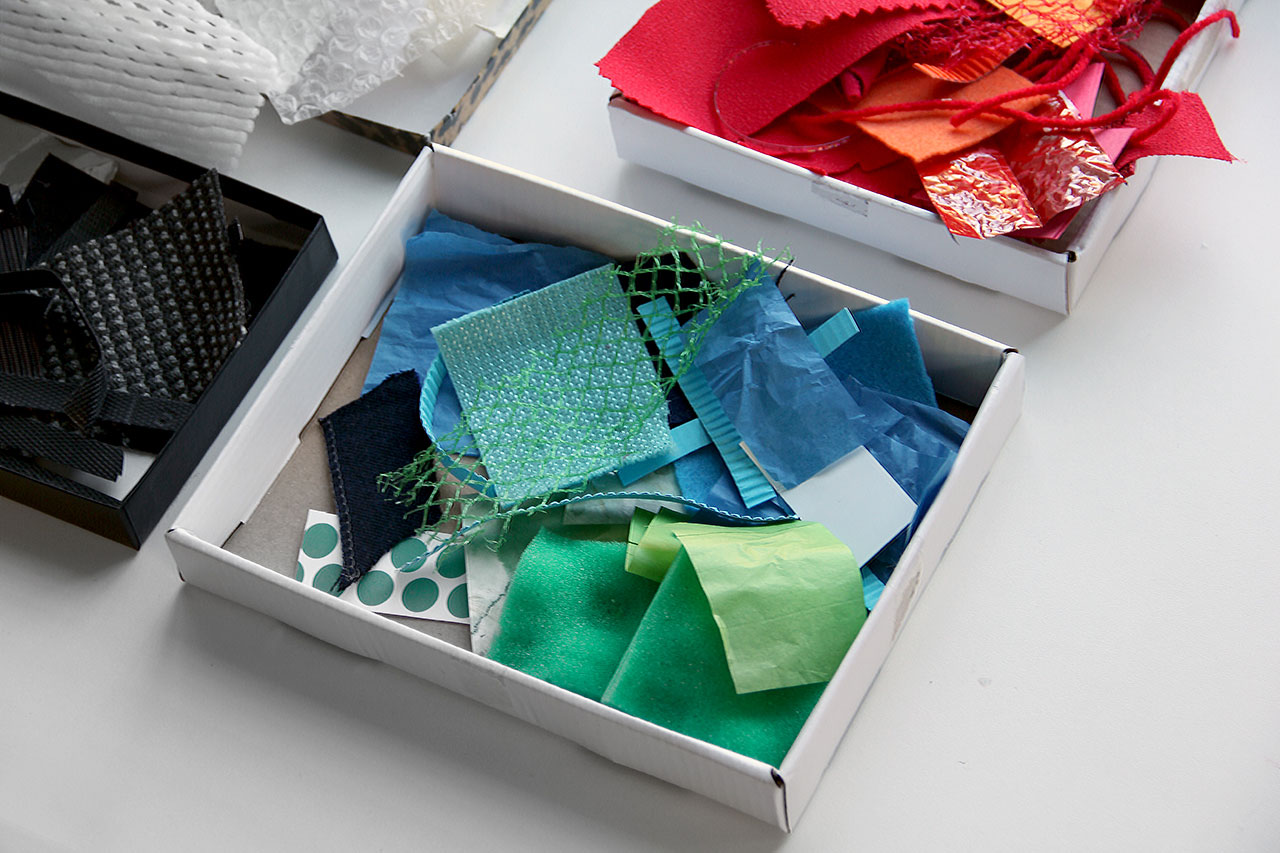
I have sorted my collection of materials by colors, which are then separated into two categories, patterns and solids. I use large ziplock bags and toss them into a big box for easy storage. When I’m ready to present materials, I choose from these bags and place selected materials into trays or shoebox lids.

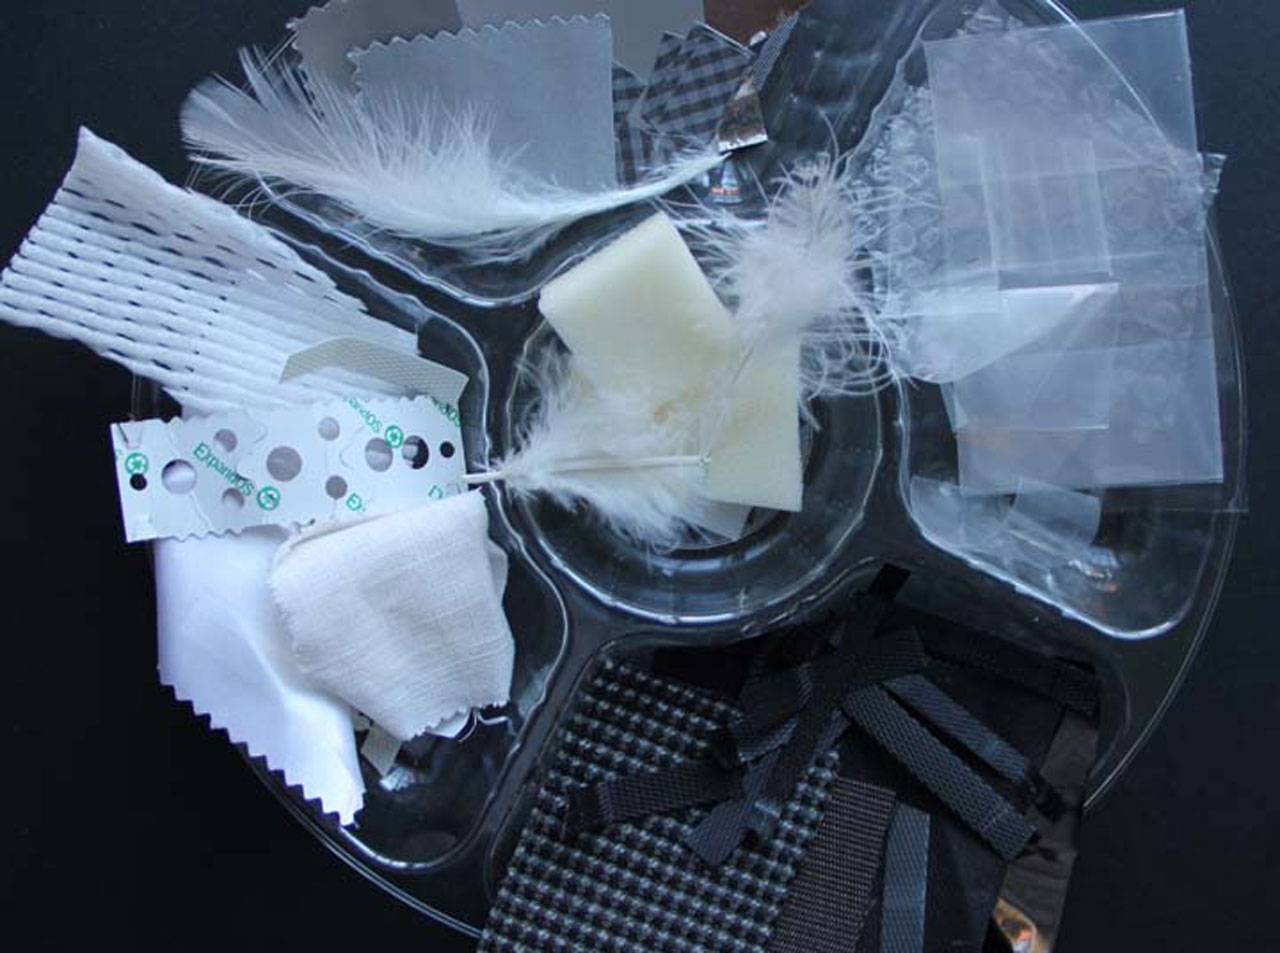
When deciding what materials to put out, the focus can shift from warm colors to cool, shapes that encourage symmetry and repetition, shapes with straight edges, curved edges, softer torn edges, rough textures, smooth textures or any other combination you can think of. When introducing the idea of texture, it is helpful to offer materials in the same color so children can really get a sense of the variation in texture within the same hue. Textures found in nature, such as dried leaves, pine needles, twigs, seeds, etc., are also a great addition to any collection.

Setting materials out in an inviting way encourages children to make more thoughtful choices. It is important to give children time to sift through and choose what materials speak to them. This selection process alone is an enjoyable experience for children. I usually give each child a small box or tray to gather the materials they would like to use. When finished selecting, they can return to their workspace and begin to experiment.

IMG_5965

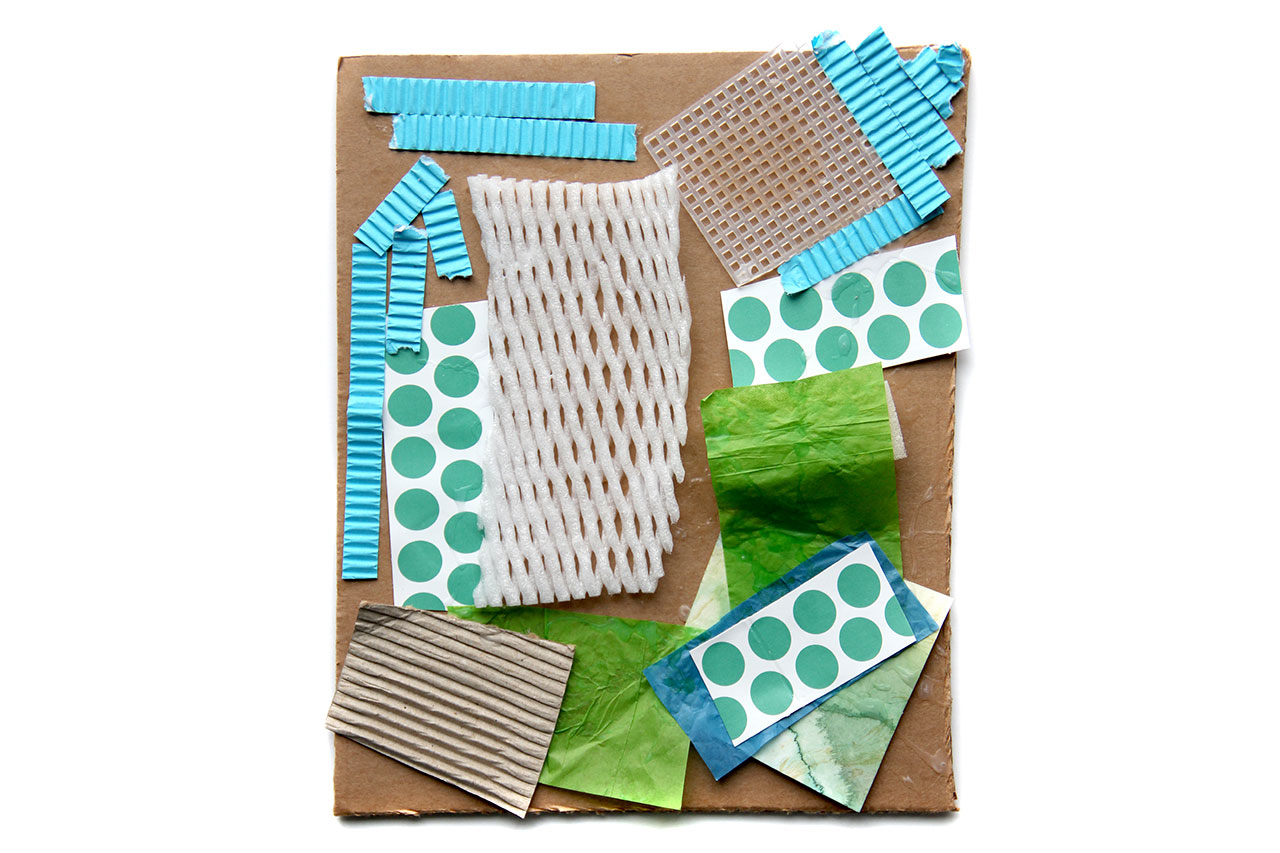
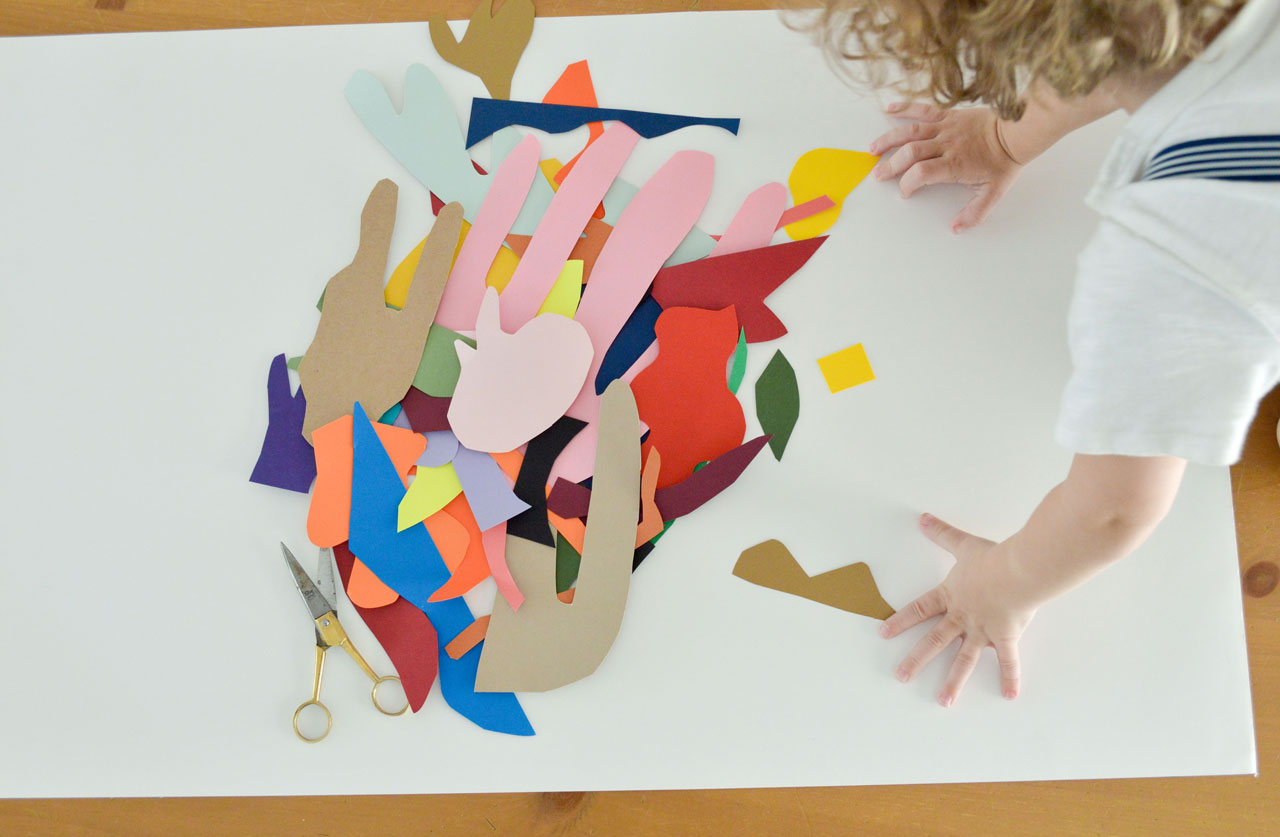
For younger kids or children just beginning to work with collage, it is important to let go of any expectation. Let them feel and manipulate the textures in their hands. They need time to do this. They may begin then to naturally create a composition or design. They may or may not glue it down. They may glue their hands together and that is ok too. Eventually, they will find their way. There is no need to make something specific. You can guide them towards symbolic representation by asking “How would you use these materials to make a person or an animal?” It is also perfectly wonderful to let them experiment with abstract designs and compositions.

For children that have had more experience with these materials, you can ask open ended questions to encourage them to use this material to share their personal experiences.

  • How can you use these materials to show your favorite place outdoors?
  • How can you arrange these materials to show something you like to do with your brother, sister, mother, best friend?
  • Think of a time you played in water, rode a bike, rolled down a hill. Use these materials to show the experience.

IMG_5964


Collage can be integrated into all areas of the curriculum. Natural connections can be made with children’s experience in the world. Collage gives children another opportunity to process their experiences on field trips and helps them to make sense of their learning. For example,

  • What do you remember most from our walk through Chinatown?
  • How can you use these materials to show the NYC skyline?
  • What materials would you use to create a portrait of your yourself, your mom, your best friend, an immigrant arriving at Ellis Island.
  • What materials would you use to show the busy streets of NYC or what life was like for Native Americans?

For younger children you can ask…

  • How can you use collage materials to show patterns?
  • How will you use collage materials to show the main character or setting in your story.
  • Can you use these materials to write you name?

So start collecting and have fun!

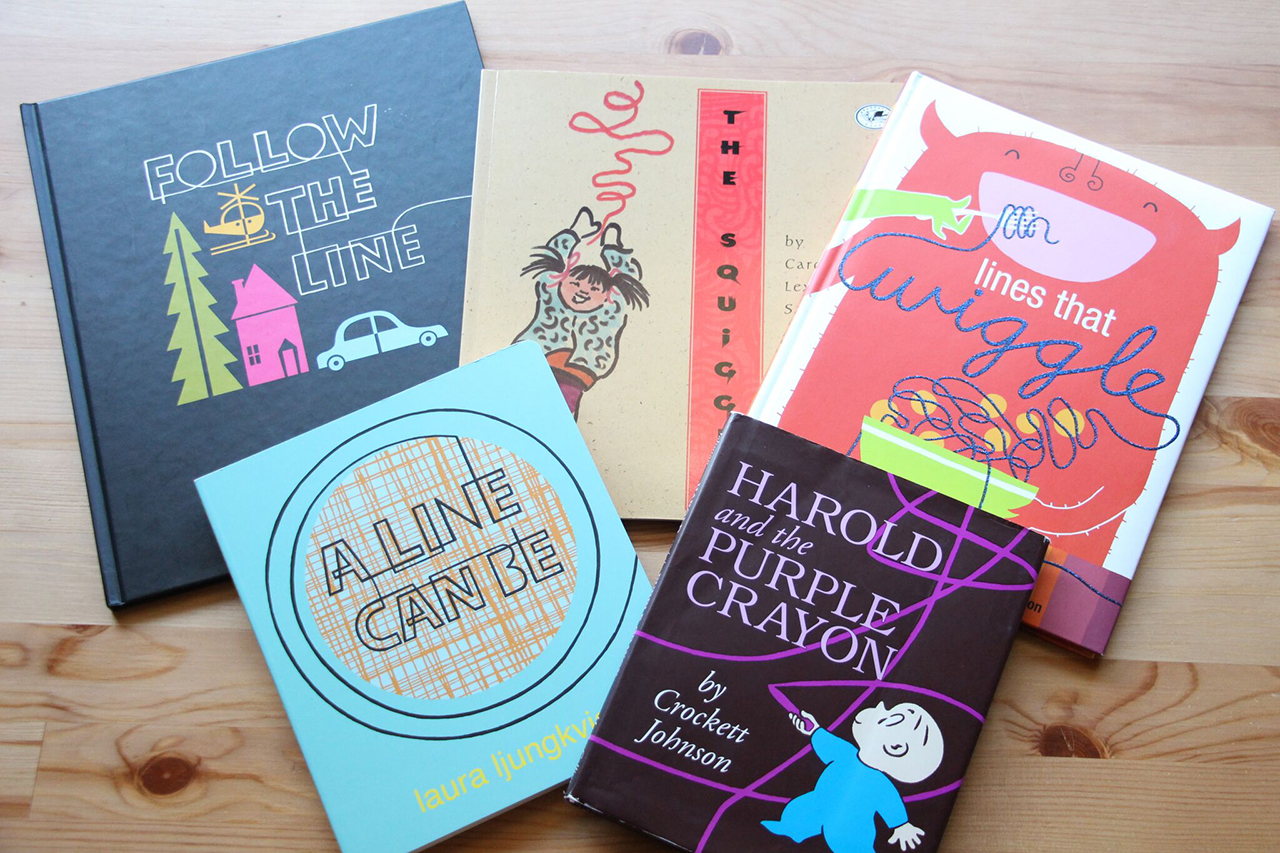
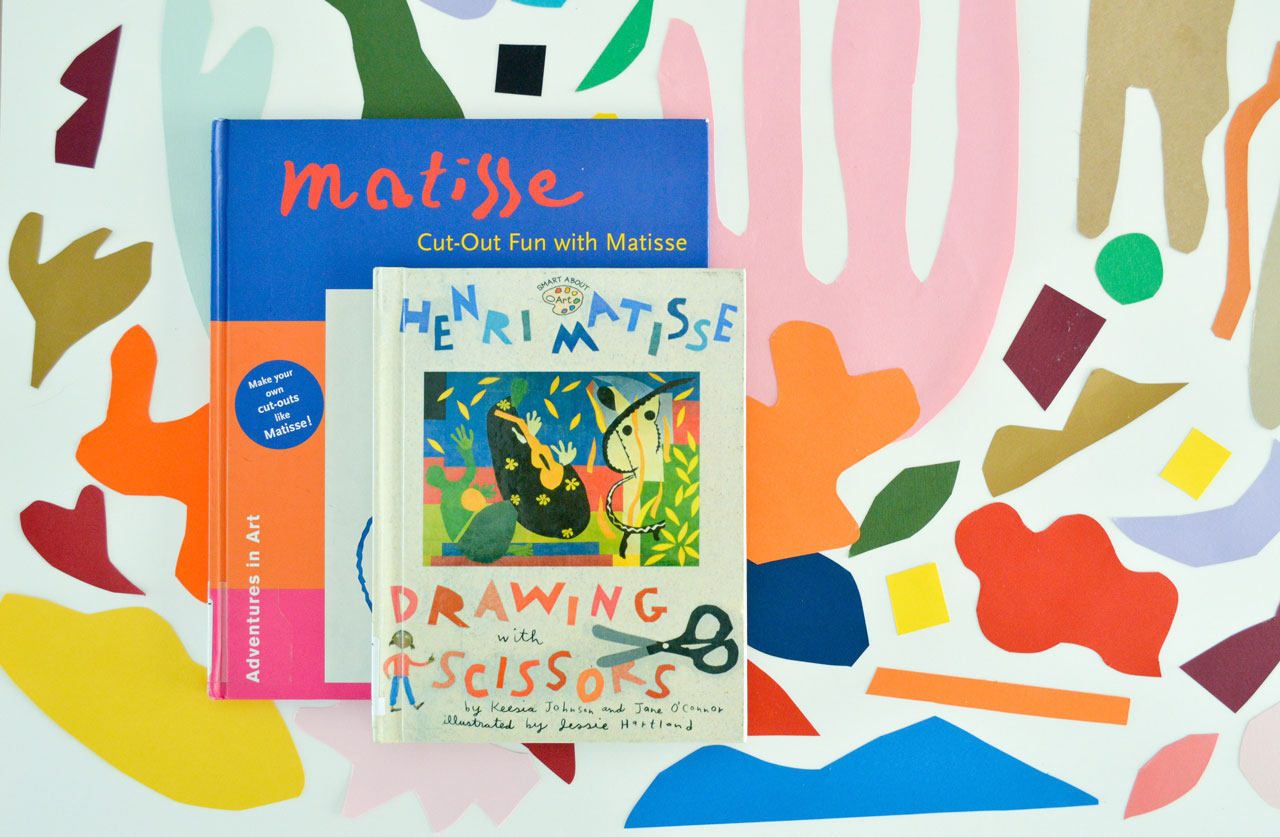
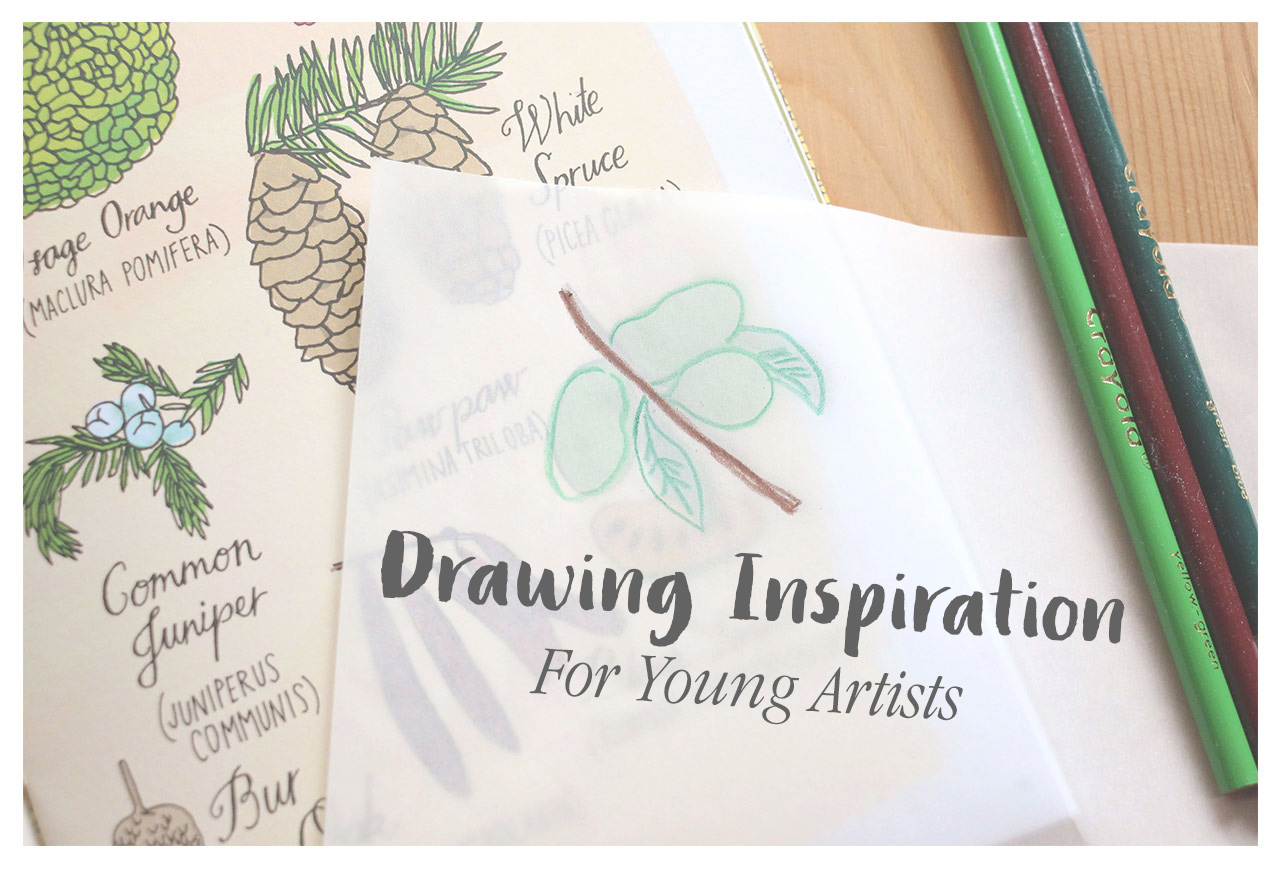
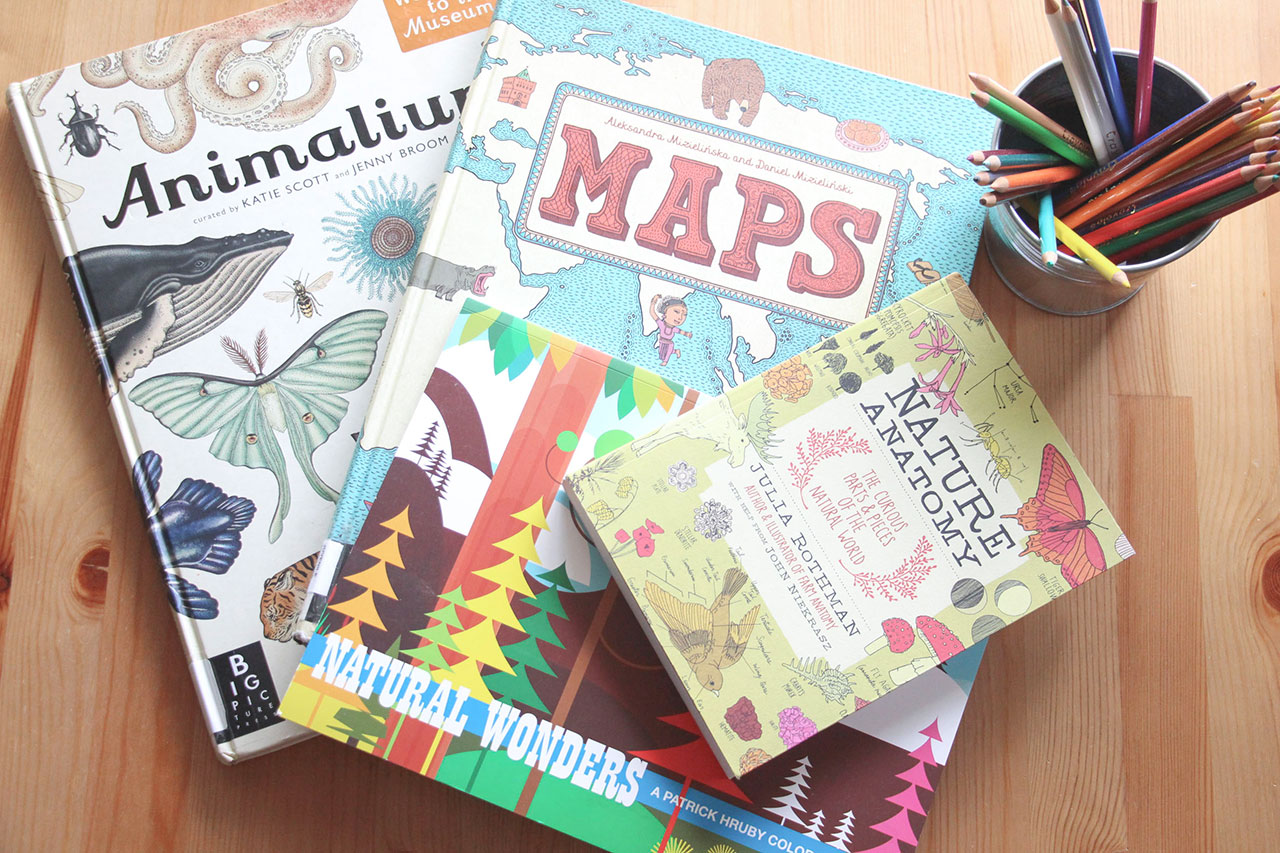
For more inspiration check out…

collage2

It’s Element-ary: Looking at Lines

By Mariah Bruehl,

elementary

Swirly, twirly, zig zag, straight—artists use all kinds of lines as they paint, draw, sculpt, and more. I often teach children that just like there is a recipe for making cookies, there is a “recipe” for making art. But instead of mixing together eggs and butter and sugar, you mix together things like line, color, and shape. These ingredients are known as the elements of art, and every artist has his/her own way of mixing the ingredients, resulting in all kinds of wonderful art.

I love the recipe analogy because of its flexibility. One recipe cannot make both spaghetti and cake; neither will one art recipe describe every kind of art. And just like you don’t need to know the recipe to enjoy your favorite cookie, you don’t need to know the elements of art to enjoy your favorite painting. However, introducing children to the recipe for art gives them another tool in their toolkit and encourages them to practice using a discriminating eye as they explore the visual arts. For kids who like to know how things work, the elements of art especially allow them to dig into the individual parts that artists put together to create a whole masterpiece.

So let’s pick apart the art recipe and focus on the element of line! A child’s first marks will almost always be lines in the form of exuberant scribbles and lines that go right off the page. Learning to read and write involves making sense of lines. And everywhere we look, from stripes on a t-shirt to painted lines on the highway, there are lines!

unspecified-2

Types of Lines

Begin an exploration of lines by creating a “collection” of lines. Look at picture books, works of art at your local museum, patterns in nature, even in your closet and help your child categorize the different types of lines you see. Collect lines in a sketchbook, in a chart, or in a photo scrapbook and have a conversation about what your child notices. How are the lines different? Which lines are her favorite?

Some of my favorite picks for pictures books about lines:

unspecified-3

Vincent van Gogh, The Olive Orchard, 1889

Almost every artist uses line in some way or another, but some of my go-to artists that clearly use lines as a key element to their work are: Piet Mondrian, Jackson Pollock, Joan Miro, Romero Britto, and Vincent van Gogh. In a museum setting, have your child look at a work of art and then draw the lines they see in the air or act the lines out with their entire body. At home, physically trace the path of a line on an art poster or an illustration in a book.

unspecified-4

What Lines Can Do

As you investigate lines, you’ll naturally begin to notice all the things lines can do. They can show emotion, create a sense of movement, or define a space. Mo Willems’ style of illustration is pitch perfect when it comes to using line. Pigeon, Elephant, and Piggie all express an entire range of emotion and action with just a few strokes of the pencil. Spend some time browsing your favorite Mo Willems’ picture book or any other cartoon or graphic novel, and search for examples of lines that indicate movement or emotion. What kinds of lines show speed, bouncing, or falling? How can a line suggest fear, excitement, or sadness?

unspecified-5

Playing with Lines

After all your investigating and close looking, it’s time to dive right into the wonderful world of lines! Toddlers will love the tactile experience of touching, squishing, throwing, and stirring lines (in the form of noodles!) in a sensory bin. Use either cooked spaghetti or plastic sensory noodles, and encourage your child to twist, turn, bend, and stretch the lines. Throw in plastic tweezers or tongs for some fine motor practice.

For some active line play, draw lines on the sidewalk with chalk or create lines inside your home on the floor with painter’s tape, and have your child follow the line—running, hopping, skipping, jumping, even riding a bike!

When it comes to creating line-inspired art, the possibilities are endless. Practice using rulers to draw straight lines, make a line masterpiece with washi tape, or drag and swirl paint-soaked pieces of yarn across a canvas.

unspecified-6

One of my favorite line art projects is making paper line sculptures. All you need is strips of construction paper and a glue stick. Bend, twist, and fold the strips any which way, then glue each end of the paper strip to your base. Your lines will jump off the page!

For even more ideas and resources, take a look at my line-themed Pinterest board.

5 Digital Art Resources for Older Kids

By Mariah Bruehl,

digitalartLEAD

In the early years of my children’s education art was a no brainer.  We crafted, painted, drew and molded.  We put googly eyes on everything we could find and used our body weight in glitter.  But as my eldest hit double figures, it became a bit trickier to fit art into our lives.  We were past the tempera stage, but what comes next?

My son is full of imagination and energy, but does not relish time spent laboring over a still life drawing, or perfecting a complex technique.  Yet we all still want art to be a regular part of our lives.  Luckily we live in the digital age, an age of opportunity and discovery that is beyond anything my younger self could imagine.  So I find myself more and more turning to digital tools to help him create and make without constraints. 

digitalart4

I’d like to share a few of the tools we are exploring right now.  There are of course more and this is just a starting place, but I hope this gets you started on your digital art journey!

Art for Kids Hub: This is a more ‘traditional’ resource in that it still involves the use of paper and pencil!  This online portal is full of video tutorials guiding kids step-by-step through the process.  There are a huge variety of videos from drawing Mine craft characters to spooky Halloween Mummies.  It may not be fine art, but it is fun, lively and encourages kids to see drawing as a series of steps rather than an overwhelming whole.  My son loves these tutorials and the drawings he makes are great!

Art Authority App: This app is phenomenal value and provides access to thousands of art works and artists.  You can use it as a traditional gallery, browsing artists and discussing their work, or you can use it to supplement other areas of study exploring the art of a given time period.  I love to explore a variety of artists with my boys and challenge them to tell me which one is ‘better’.  Of course they conclude that all the different types of art have value, helping them see their own work with a more charitable eye too.  I think there is great value in simply browsing and asking the question “What do you like?”  I’ve provided a printable Prompt sheet to give you some ideas about navigating art history with your child. 

Paper 53: This app is a digital sketchbook that provides access to all sorts of materials that would certainly not be usually portable!  You can paint, draw, create large sweeps of color or fine detailed lines.  I love the fact that this app provides a fine line option in a large range of colors, something we couldn’t afford to provide day to day. 

The open-ended nature of this app allows for exploration with no consequence, no paper wasted, no worries about materials.  While a stylus isn’t necessary, we do find it provides a lot more precision and detail.  It also helps develop the sense of making something ‘real’.  We’ve only scratched the surface of what this app can do, but I’m really looking forward to seeing the discoveries we make. 

digitalart1

MoMA Art Lab app: To me this is the perfect example of what the digital world can offer.  A world famous art museum invites you in to explore not only famous art pieces, but to make and develop your own works of art.  Though simple enough to be used by young children, there is plenty of scope to develop it for older children too.

Sketchpad Explorer – Similar to Paper 53, this app is a digital sketchbook.  The app is intended for exploring geometry, but we focus on using the ‘textures’, patterning that gives a multi media feel.  By alternating layers and colors pictures emerge, giving the work dimension.  These textures mimic the kind of art techniques used in 3D art and encourage a move away from seeing ‘line’ as king.  I love the textured but abstract work that evolved out of this app, a deceptively simple but effective process. 

Once you start exploring the possibilities with digital art tools you’ll soon be hooked.   You can make art at home or on the go, truly making art an experience you can have anywhere at any time.

artprompts

Me: In Poetry, Song, and Art

By Mariah Bruehl,

MichelleTitleWhen I was a classroom teacher, one of the most relaxing, yet beneficial professional development opportunities I attended was a “Picture Book Read In.” After various speakers, such as a local librarian who had been on the Caldecott committee, teachers had an opportunity to peruse new picture books at their leisure. I was always able to discover new books that sparked new ideas and new lessons.

It seems like there is always a steady stream of amazing books being produced, and this year is certainly no exception. There are many exciting new picture books and three of these that caught my eye are autobiographies or biographies.  Aside from the interesting life stories, these books are especially attractive because they feature outstanding artwork, and they also focus on unique and diverse individuals in the fields of poetry, music, and art.  Picture books easily engage children in non-fiction text, and these books can easily integrate reading, writing, and the arts. The more connections children can make across domains, the more effective learning opportunities become.

Enormous Smallness by Matthew Burgess is about the life of poet e.e. cummings. My favorite aspect of this book is the creative way the words themselves are incorporated into the illustrations. I love the use of the font style and the way the poems are presented throughout the book. Also, the book includes a nice chronology at the end.

Trombone Shorty by Troy “Trombone Shorty” Andrews is an autobiography. This book will resonate with children because it takes place in modern times. Troy is 29 years old, and the book covers his accomplishments and musical drive as a young child. The watercolors and collage by Bryan Collier are amazing.

Draw What You See by Kathleen Benson is a biography of Benny Andrews and features his actual paintings as the illustrations. What a better way to introduce his life and his art to students than by using his artwork. The book also ends with an nice timeline, and a listing of each artwork including the title, medium (mostly oil on canvas are featured in this book), and date created.

With each book covering an individual from a different artistic talent, there are so many possibilities for activities after reading and discussing these books, all of which can be adapted for different age levels and abilities.

  • Write an autobiographical poem
  • Compose an autobiographical song
  • Paint a picture of an important moment in your life
  • Create a timeline of your life so far
  • Create an autobiographical collage

I have created a printable booklet to inspire some of the ideas listed above (click on the photo below to download). A quote of e.e. cummings that speaks to me is, “It takes courage to grow up and become who you really are”.  Children thrive on expressing themselves and exploring what it means to be who they are. Poetry, song, and art are wonderful ways to delve into this. The booklet also has a chart to compare and contrast the individuals featured in these three books. An important comprehension skill with non-fiction reading is being able to locate and process factual information. Use of engaging texts, such as these picture books, is an excellent way to introduce and practice this skill in an interesting way for children.

Extending the reading of a book with supplemental experiences enhances children’s’ understanding as well, here are some links to use:

Me: In Poetry, Art, and Song

Art for Toddlers: Smooshy Blob Painting

By Mariah Bruehl,

Art for Toddlers: Smooshy Blob Painting

Give a toddler a paintbrush, and she’ll ask for more paint. Give her more paint, and she’ll probably make a mess. And with that mess comes all kinds of playful learning!

Toddlers don’t need much more invitation to create than an empty piece of paper and a cup of paint. Smooshy blob paintings is a great project that combines sensory play, fine motor skills, math, and color theory in a quick, accessible art-making experience. But all your toddler will care about is the chance to play with paint!

For the set-up, all you need is thick drawing or construction paper, tempera paint in squeeze bottles and something to protect your work area. Before your child begins, create a fold down the center of the paper—any direction will do!

Art for Toddlers: Smooshy Blob Painting

With the paper open flat on your work area, encourage your child to squeeze paint onto the paper. If this is your child’s first time painting with a squeeze bottle, she will probably be content simply to experiment with squeezing and moving the bottle around the paper. This is great fine motor practice and helps strengthen the pincer grip! Once that experience has lost its appeal, challenge your child to make different types of lines—straight, zigzag, squiggly—or different types of shapes. However you go about getting paint on the paper, the key is to leave some white space.

Now fold the paper again and show your child how to rub her hand across the surface, smooshing and squishing the paint around. She will be able to feel the paint move, but not see exactly what is happening. Paint will probably squish out the sides, which just adds to the fun.

Art for Toddlers: Smooshy Blob Painting

Open the paper up again and see what your smooshing has created—a colorful, symmetrical abstract painting! As you talk about the painting with your child, point out areas where colors have mixed together to create new colors for a quick color theory lesson. To talk about symmetry, point to a feature on one side of the paper and ask your child if she can find a match on the other side of the paper.

Try it again with your paper folded in the opposite direction. Now that your child has an idea of what will happen, predict together what you’ll see when you open the paper up again.

Art for Toddlers: Smooshy Blob Painting

If your child’s masterpiece has a good amount of paint on the surface, you can extend the experience by dabbling in a little printmaking as well. Place another piece of paper directly on top of the painting and press gently to make a second print. Peel the two pieces of paper apart and see what happens. More painting magic!

Art for Toddlers: Smooshy Blob Painting

Whether you are 2 or 20 (or 20 plus a few years!), this simple project is sure to bring oohs and ahs every time.

Art for Kids: Fun with Matisse

By Mariah Bruehl,

Art for Kids: Fun with Matisse

Using the work of a specific artist as inspiration can be a fun activity with budding young creatives. Recently, I’ve become quite involved with paper cutting as an art form and consequently have a large box full of colorful paper scraps, just waiting to be used.

We ran across two books covering the later works of Henri Matisse (Henri Matisse: Drawing with Scissors, by Jane O’Conner, and Adventures in Art: Cut-Out Fun with Matisse)  otherwise known as the “cut-outs,” at the local library. We learned all about how Henri spent the last years of his career “painting with scissors” instead of a brush, creating bright and colorful scenes constructed out of colorfully painted paper. We decided to use these books as inspiration and put our scissors to work. If you can’t get a hold of a book about Matisse, you can also do an image search of “Matisse cut-outs” and read more about his career and technique here. 

Art for Kids: Fun with Matisse

Art for Kids: Fun with Matisse

We spread out our paper, and opened our books. I was working with my toddler, who is not very skilled with scissors yet, so he helped me find the right shapes to recreate and I did the cutting. This turned into a fun open-ended activity as we imagined all the different things the shapes could be!

Art for Kids: Fun with Matisse

Next, spread all of your shapes out on your paper or workspace and have fun arranging them! A lot of our pieces unintentionally fit and moved together in a way. This is a great way for kids to evaluate how colors interact with each other and also to examine the use of white space and the form of the shape-all without realizing they are doing it! Play around and try different arrangements until you’re satisfied.

Art for Kids: Fun with Matisse

Now it’s time to glue your shapes down. This part is especially fun for toddlers and young children who enjoy gluing! Our design ended up changing and evolving as we secured the shapes down.

Art for Kids: Fun with Matisse


The impact of simple shapes and beautiful colors is amazing! Happy cutting…

Drawing Inspiration for Young Artists

By Mariah Bruehl,

Drawing Inspiration for Young ArtistsI have a confession—I’m an art teacher that doesn’t think she can draw. ??!! Now before you think you need to report me to the Art Teaching Officials, I should also say that I primarily teach four year-olds, in an art museum setting, and we spend most of our art-making time on the process rather than the product. So really, it’s the perfect crowd for me to be teaching. But still, there’s a part of me that thinks that I should be better at drawing.

Do you struggle with encouraging your children to draw because you secretly worry that you can’t practice what you preach? Luckily, a young child’s natural curiosity alone is usually enough to encourage her to pick up a pencil or crayon and explore making marks on paper. Your own willingness to explore something new, make mistakes, and try again alongside your child teaches important lessons about individuality, persistence, and self-discovery. But as children get older, they will increasingly become fixated on things “looking right.” And it’s then that us non-drawers begin to quake!

I’m still no expert on the sketch pad, but I’ve found some useful tools that help build my own confidence and work equally well as fun activities for kids.

Drawing Inspiration

  1. Books: Find inspiration in beautifully illustrated books. Drawing from real life is sometimes too daunting (and not practical), but looking at how another artist has successfully rendered an animal, plant, or landscape can give you ideas for how to go about it yourself. Animalium by Jenny Broom and Katie Scott is a lush volume covering the entire animal kingdom. Nature Anatomy by Julia Rothman offers gorgeous watercolors of plants, insects, land formations, snowflakes, and more in the style of an anatomy textbook. Maps by Aleksandra and Daniel Mizielinski is perfect for the map-obsessed kid, showing not only outlines of countries, but also detail drawings of animals, famous buildings, natural formations, citizens, food, and flags of places all around the world. Simply open up a book, and start to sketch from the pictures.
  2. Tracing Paper: Use tracing paper to learn in a very concrete way how parts relate to whole, how to arrange objects in space, how to create depth in your drawings and more. Again, books can act as the expert while you or your child takes on the role of apprentice. Understanding how it feels to draw a certain object—how to hold your pencil, how much pressure to apply on the paper, how to move across the surface—takes a combination of perception and muscle memory. Artists throughout time have often learned their craft by first copying the masters. It’s not cheating for us to do the same! I like to first trace from a favorite illustration, then practice again on my own. Once I feel like I better understand the mechanics of drawing a flower or bird, I can branch out and try sketching my own versions. Teacher Tip: With children, I take the time to explain the difference between practicing a skill and copying another’s work.
  3. Coloring Books: Pull out the coloring books! We’re too quick to put the coloring books away once children are elementary school age, but the satisfaction of creating a complete “drawing” doesn’t diminish with age. (In fact, I got distracted while writing this blog post, and just had to finish coloring my frog!) Amp up your drawing game by selecting coloring books inspired by graphic artists and illustrators. The two I have on my desk right now are Natural Wonders: A Patrick Hruby Coloring Book and Charley Harper’s Coloring Book of Birds. Although the coloring pages are obviously meant to be filled with color, they can also act as guided drawing practice.  These two in particular emphasize how geometric shapes can be manipulated to look like everything from foxes and frogs to whales and wrens.

Drawing Inspiration

So grab your pencils and sketch pads, take a deep breath, and dive into drawing with your child!


*This post contains affiliate links.

Painting with Toddlers: Black and White

By Mariah Bruehl,

Painting with Toddlers: Black and White

“Before launching into the full spectrum of color, stand at its edge with white and black, the beginning and the end of color.   Black and white provide a frame through which we more clearly see and understand color. Side by side on paper, the contrast between black and white call each more fully to life.”

– Ann Pelo, author of The Language of Art

We just started our first parent/child toddler art group in the Playful Learning Studio. After doing a lot of research on how to develop a program where each experience builds on itself and opens new avenues for exploration and dialogue with toddlers, I found myself drawn back to an old favorite—the work of Ann Pelo and her book, The Language of Art: Inquiry-Based Studio Practices in Early Childhood Settings. Originally, I thought it best to start with an investigation of one color at a time, but Ann brings it back one step further with an exploration of black and white—brilliant!

So, as I was browsing the aisles of Michaels and stumbled upon these sweet little black canvasses, it all came together in my mind and I made the commitment to start our journey into toddler art with black and white painting.

Each child was given a white canvas, a black canvas, white paint, and black paint. This allowed them to fully explore the bold contrasting colors and how they interact with each other.

A couple aspects of this set-up that I really liked for younger artists were that each color had its own brush and that we left out the extra water jar, which was new for me. This allowed for a smoother exploration and less steps that needed to be explained and followed. Of course, as children become more comfortable with the medium, it’s important to establish clear routines for painting, but for our particular situation, a simpler set-up was perfect!

I also loved keeping the art work contained in a tray, it seemed to give the children a defined work space and made for an easy clean-up. This tray is also the perfect size for 11×15 size watercolor paper, which is what we will be using for our next project.

Of course, no art experience is complete without the lovely discussions that ensue. Below are some possible topics and questions that Ann Pelo recommends for enhancing this exploration:

  • What story is the black line telling? The white line?
  • Where does the line begin?
  • Where does it end?
  • Where is it going?
  • Can you see the difference between the paint and the canvas?
  • What does the black make you think of?
  • What does the white make you think of?
  • Notice the way that black and white dance with each other on the canvas (this one was a big hit).
  • What do you notice about the way the colors are moving with each other?

More to Inspire…

Book Love…

Playful Learning: Black and White Painting Playful Learning: Black and White Painting Playful Learning: Black and White Painting


 * This post contains affiliate links.


Crafts for Kids: Make a Collage Bookmark

By Mariah Bruehl,

Crafts for Kids:Make a Collage Bookmark

Our Summer Book Clubs are well under way and we thought it would be fun to build on the experience by making some inspiring bookmarks!

Here is a fun eco-activity that will enhance your summer reading experience! Make a collage bookmark with the following supplies:

  • rigid card stock paper
  • discarded magazines, brochures, junk mail, etc.
  • scissors
  • glue stick
  • hole punch
  • yarn
  • optional: punches to cut out shapes

Instructions

  • Step one:  Cut a bookmark out of cardstock (any dimensions you like)
  • Step two:  Cut out interesting images, words, and colour patterns from magazines, etc.
  • Step three:  Arrange the images and words on your bookmark.
  • Step four:  Glue all of your pieces down remembering to secure the edges so they don’t curl up.
  • Step five:  Punch a hole near the top for the tassel.
  • Step six:  Make a tassel.  Wrap a long piece of yarn around your fingers.  Thread a shorter piece of yarn around the bundle closer to one end, and tie to secure.   Cut the loops on the longer end to create the tassel.  Thread another piece of yarn through the smaller loop and tie to secure.  Tie the opposite end and thread through the bookmark.

Crafts for Kids:Make a Collage Bookmark


Bookmark3Crafts for Kids:Make a Collage Bookmark

The power of words

Do you have a favorite quote or line of a poem that you could add to your bookmark?  Do you want your bookmark to have a message or follow a theme (ie: Eric Carle)?  Vary the sizes and fonts of your lettering to emphasize certain words.  If you can’t find the word you are looking for, spell it out with individual letters.

Layout and using color

Layer your images and lettering.  This bookmark has also used two layers of cardstock to create a border.  Words can be positioned vertically or diagonally for interest.  This bookmark uses three shades of color- blues, yellows and pinks.  This keeps it from looking too busy.  Some white space is good for balancing the color.   Another idea is to just use rows of words in different colors and fonts.

Let your imagination and creativity run wild!  Happy reading!

Flower Print + Scrape Painting

By Mariah Bruehl,

Flower Print + Scrape PaintingWith blizzards, cold fronts and low temperatures blanketing much of the country, spring and its promise of warm days and flowers poking up through the ground seems far, far away. But with a simple art project, you can magically create spring inside, no matter how cold it is outside! Read on for a fun painting project and art history extension.


Supplies:

  • Table covering
  • Heavy paper (watercolor or cardstock)
  • Paint (I really like Biocolor paint)
  • Paper plate
  • Fresh flowers
  • Ruler

This project can get messy, so cover your work area with newspaper, butcher paper, or a disposable table cloth.

Flower Print + Scrape Painting

Squeeze blobs of paint onto the paper plate, leaving plenty of room to press the flowers down into the paint. Now it’s time for flower painting fun! You are essentially replacing your paint brush with a fresh flower, so dip the flower into the paint, then gently press onto your paper.

Flower Print + Scrape Painting

Experiment with mixing paint colors and using differently shaped flowers as you cover your paper with flower prints.

Flower Print + Scrape Painting

Don’t worry if petals or other parts of the flowers get stuck in the paint—that just adds fabulous texture! Show your child how to twirl the flower back and forth in a circular motion to create a different type of mark. Younger children may also enjoy brushing the flower across the page just like they would with a paint brush.

Once your masterpiece is complete, set aside to dry.

Flower Print + Scrape Painting

Extend the painting fun and enjoy an easy teachable moment by introducing your child to the Impressionist paintings of Claude Monet. Towards the end of his life, Monet focused almost entirely on painting the water lilies in his garden pond, creating paintings that make the viewer feel as if he or she is gazing down into the water. Read a picture book about the artist to learn more about his life and work. Some of my favorites include: Philippe in Monet’s Garden by Lisa Jobe Carmack, Where is the Frog?: A Children’s Book Inspired by Claude Monet by Geraldine Elschner, Katie and the Waterlily Pond by James Mayhew and The Magical Garden of Claude Monet by Laurence Anholt.

Flower Print + Scrape Painting

To transform your flower painting into a Monet-inspired work, you only need some blue paint and a ruler. Squeeze a line of blue paint along the far left edge of your painting. (Left-handed children might find it easier to manipulate the ruler if the paint is squeezed on the right edge of the painting).

Flower Print + Scrape Painting

Use the ruler as a scraper, and drag the blue paint across the paper.

If needed, add additional lines of paint in the middle of your artwork so that you can completely cover the paper with blue paint.

Flower Print + Scrape Painting

I love the effect the scraper makes, smearing the flowers and creating a beautiful impression of rippling water—just like Monet! Experiment with how wet or dry your flower prints are before scraping paint across them (in the above painting, my flowers were not that dry at all, and you can see in the upper right how much of the flower smeared).

For more Monet-inspired art-making ideas, take a look at this Pinterest board with suggestions suitable for toddlers to teens! Or, if you’re ready to hang up your artist’s smock, channel your inner scientist and use any leftover flowers for this fun Dissecting Flowers lesson.