Category: All posts


Drawing Inspiration for Young Artists

By Mariah Bruehl,

Drawing Inspiration for Young ArtistsI have a confession—I’m an art teacher that doesn’t think she can draw. ??!! Now before you think you need to report me to the Art Teaching Officials, I should also say that I primarily teach four year-olds, in an art museum setting, and we spend most of our art-making time on the process rather than the product. So really, it’s the perfect crowd for me to be teaching. But still, there’s a part of me that thinks that I should be better at drawing.

Do you struggle with encouraging your children to draw because you secretly worry that you can’t practice what you preach? Luckily, a young child’s natural curiosity alone is usually enough to encourage her to pick up a pencil or crayon and explore making marks on paper. Your own willingness to explore something new, make mistakes, and try again alongside your child teaches important lessons about individuality, persistence, and self-discovery. But as children get older, they will increasingly become fixated on things “looking right.” And it’s then that us non-drawers begin to quake!

I’m still no expert on the sketch pad, but I’ve found some useful tools that help build my own confidence and work equally well as fun activities for kids.

Drawing Inspiration

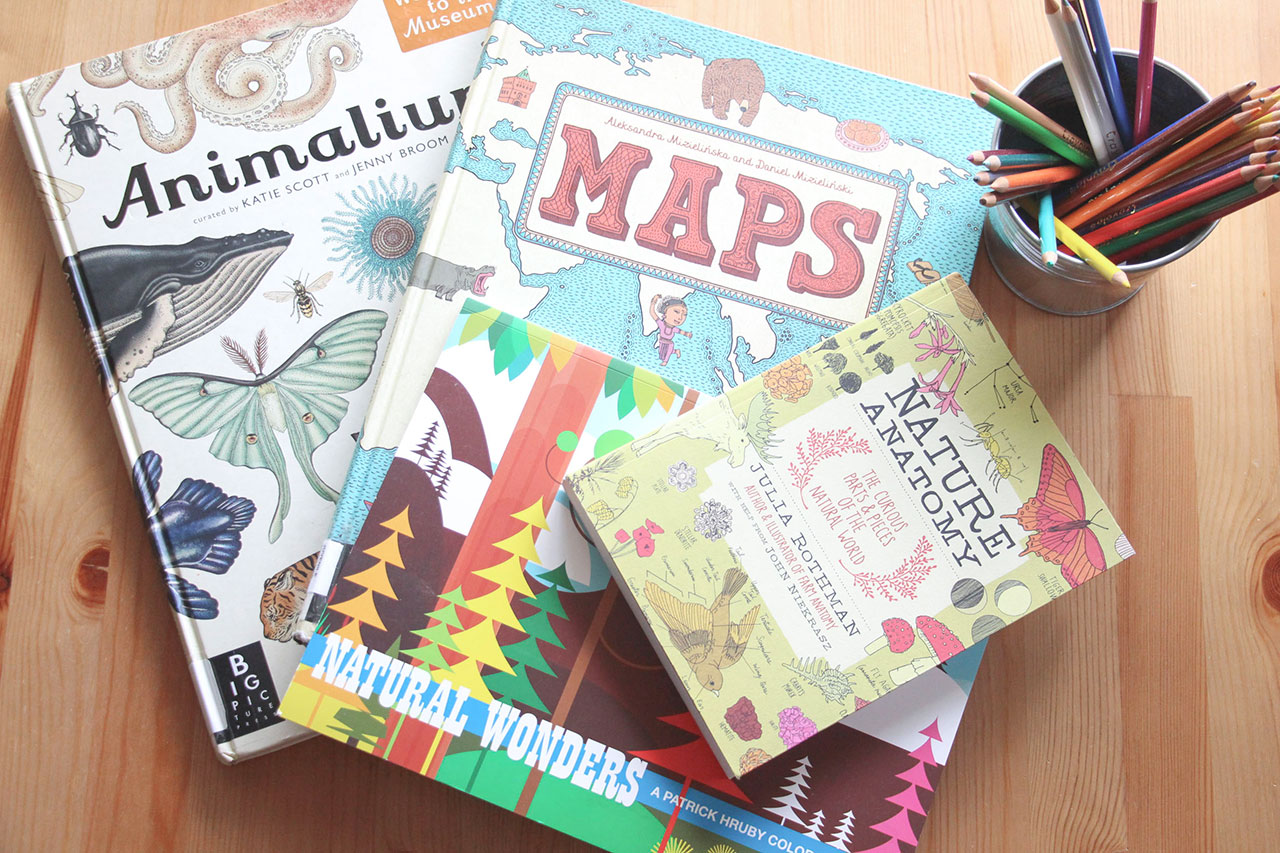
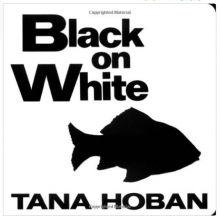
  1. Books: Find inspiration in beautifully illustrated books. Drawing from real life is sometimes too daunting (and not practical), but looking at how another artist has successfully rendered an animal, plant, or landscape can give you ideas for how to go about it yourself. Animalium by Jenny Broom and Katie Scott is a lush volume covering the entire animal kingdom. Nature Anatomy by Julia Rothman offers gorgeous watercolors of plants, insects, land formations, snowflakes, and more in the style of an anatomy textbook. Maps by Aleksandra and Daniel Mizielinski is perfect for the map-obsessed kid, showing not only outlines of countries, but also detail drawings of animals, famous buildings, natural formations, citizens, food, and flags of places all around the world. Simply open up a book, and start to sketch from the pictures.
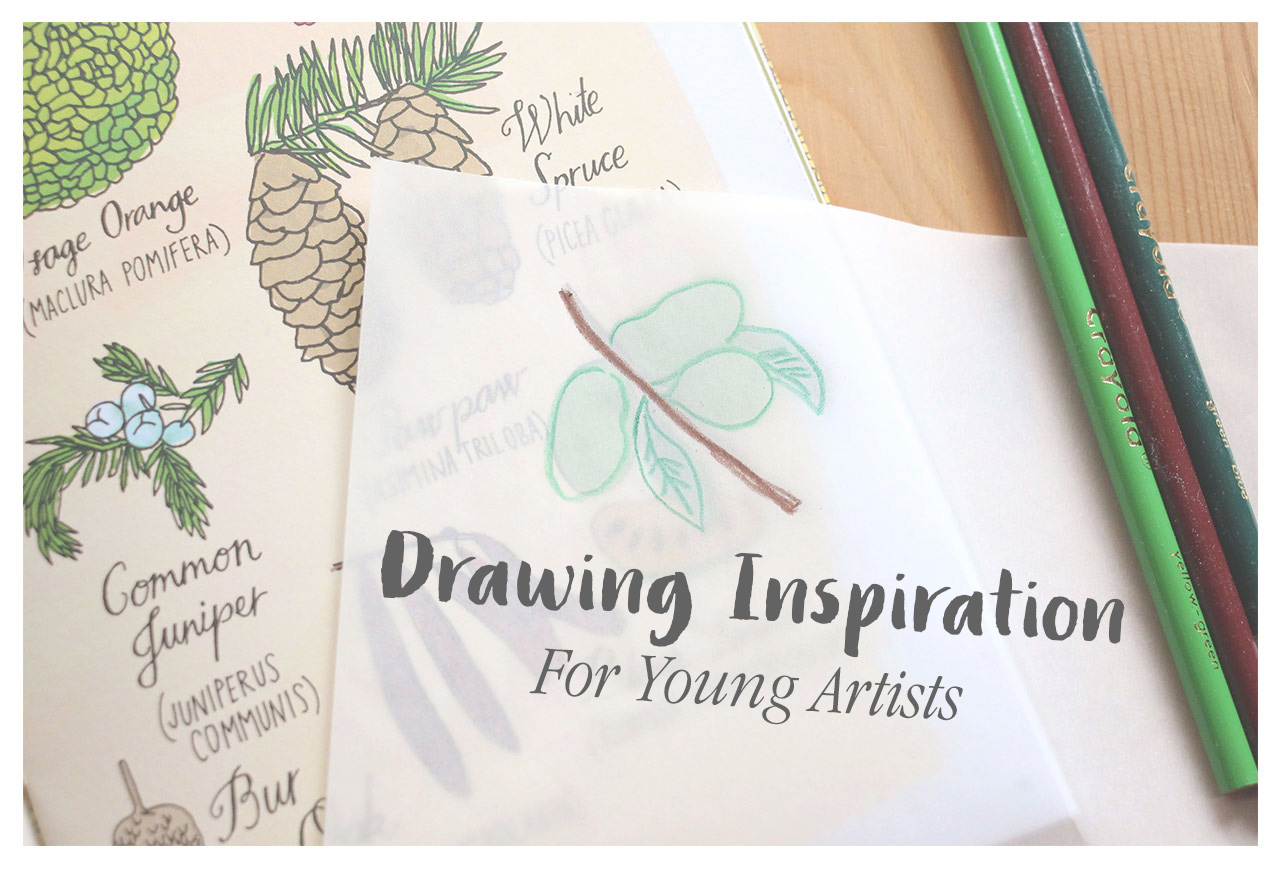
  2. Tracing Paper: Use tracing paper to learn in a very concrete way how parts relate to whole, how to arrange objects in space, how to create depth in your drawings and more. Again, books can act as the expert while you or your child takes on the role of apprentice. Understanding how it feels to draw a certain object—how to hold your pencil, how much pressure to apply on the paper, how to move across the surface—takes a combination of perception and muscle memory. Artists throughout time have often learned their craft by first copying the masters. It’s not cheating for us to do the same! I like to first trace from a favorite illustration, then practice again on my own. Once I feel like I better understand the mechanics of drawing a flower or bird, I can branch out and try sketching my own versions. Teacher Tip: With children, I take the time to explain the difference between practicing a skill and copying another’s work.
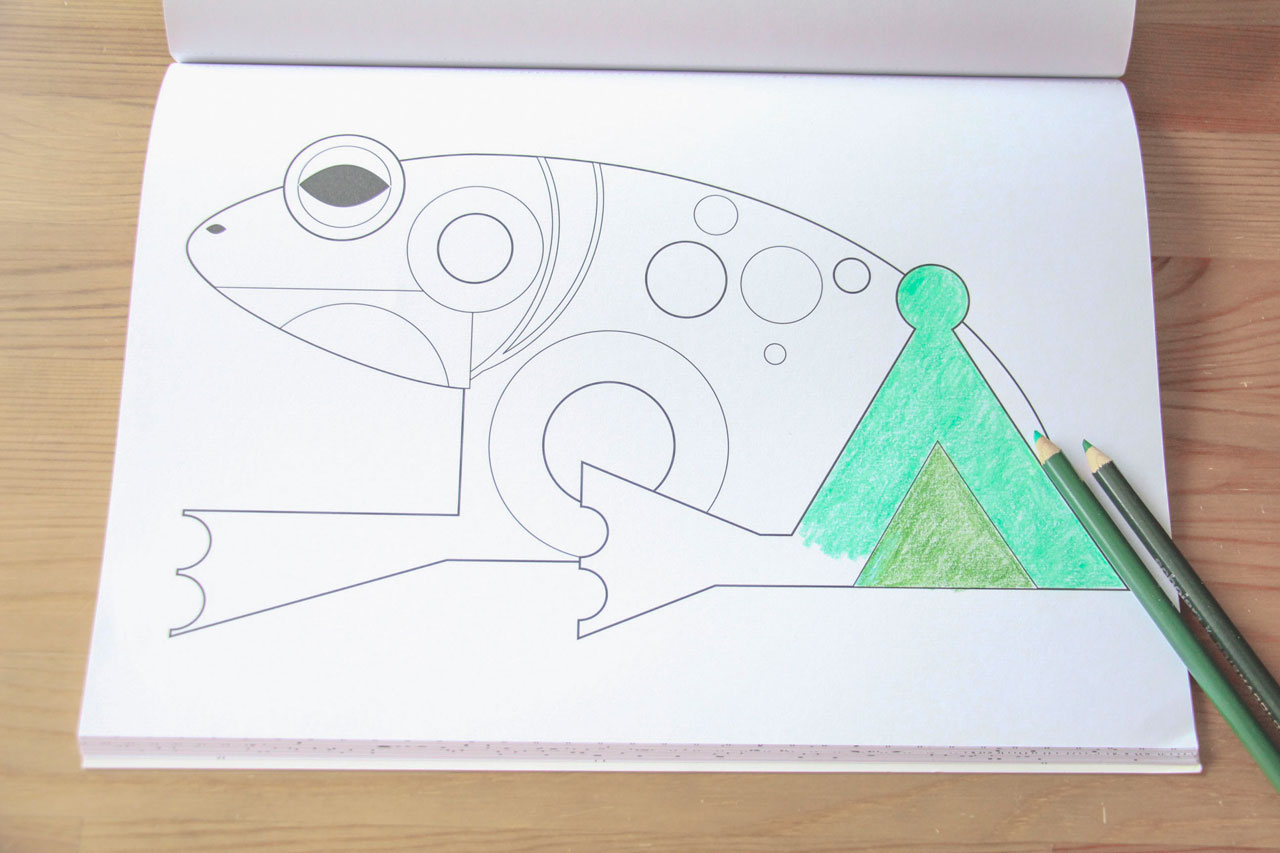
  3. Coloring Books: Pull out the coloring books! We’re too quick to put the coloring books away once children are elementary school age, but the satisfaction of creating a complete “drawing” doesn’t diminish with age. (In fact, I got distracted while writing this blog post, and just had to finish coloring my frog!) Amp up your drawing game by selecting coloring books inspired by graphic artists and illustrators. The two I have on my desk right now are Natural Wonders: A Patrick Hruby Coloring Book and Charley Harper’s Coloring Book of Birds. Although the coloring pages are obviously meant to be filled with color, they can also act as guided drawing practice.  These two in particular emphasize how geometric shapes can be manipulated to look like everything from foxes and frogs to whales and wrens.

Drawing Inspiration

So grab your pencils and sketch pads, take a deep breath, and dive into drawing with your child!


*This post contains affiliate links.

Let it Go! When to Abandon a Book

By Mariah Bruehl,

Let it Go! When to Abandon a Book

I am a list maker, mostly because I find immense satisfaction in crossing things off my list.  Sometimes I actually add something to my list just so I can put a checkmark next to it.  For most of my adult life, I had also been that kind of reader.  Once I started a book, even if it was the worst book I’d ever read, I felt like I didn’t have a choice but to finish it.  I had to cross it off my list.  And of course I couldn’t cross it off my list unless I had completed the whole book, which meant reading every single dull, slow moving, depressing, this-is-not-holding-my-attention-when-is-this-going-to-be-over page.

My epiphany came when I realized that I have never looked my students in the eyes and told them they had to finish reading a book that they were totally disengaged and uninterested in.  Never.   So why on earth was I torturing myself and taking away valuable reading time?  (This is what I call my “Duh” moment, but in the teaching realm it sounds much better if I call it my “A-Ha” moment).

I actually remember the first book I let go.  It was hard, really hard.  I felt like a failure.  But at the same time, it felt good abandoning something that just wasn’t a good fit for me.  I kept the book on the coffee table for a while (maybe to remind me of my guilt) and then after a week or so put it back on my bookshelf.  At that time, I was writing down the titles of books I had read (yup – making a list) so that I could recommend books to friends, and to be quite honest, remember what I had already read.  So when I abandoned this particular book, I was stumped!  Where would I write down the title of this book?  I had read about half of it, but I couldn’t exactly write it down on my “read” list.  It was a serious problem (well, for me it was).

Goodreads literally saved my life.  Now when I let a book go I add it to a virtual shelf I have labeled “Abandoned,” and in the last two years I am not ashamed to say that I have abandoned 10 books.  Many of those books have come to me highly rated by people in my personal reading community, but for whatever reason they just didn’t appeal to me.  I have tried to reread a few of them a second, and yes even a third time, but rarely have I reversed my initial verdict.

So why does this matter?  Well now, I intentionally use my own reading behaviors to inform my teaching.  I teach my students when and why it might be appropriate to abandon a book.  I share my Goodreads list with them, and tell them about the books I have let go.  I tell them that it feels hard to let one go.  Sometimes they beg me to give a book another chance, but they are ALWAYS surprised when I tell them that adults abandon books too.  I share my thinking, and I tell them that abandoning a book does not equate to failure.  I tell them that I wish someone had told my younger self that abandoning a book was an option, because it took me well into adulthood before I even allowed myself to leave a book unfinished.  I teach them when to give a book a second chance, and how to self-select books so carefully and thoughtfully that the chances of them abandoning a book decrease simply because they know how to choose wisely the first time.

So let’s teach children WHEN and WHY it is okay to abandon a book:

  • Too easy
  • Too difficult
  • Not interesting
  • Too confusing
  • About a topic you don’t particularly enjoy
  • Not what you expected
  • Slow moving and hard to get into
  • Don’t like the characters
  • Disappointing sequel
  • Not interested in the genre
  • Too long and you lose interest
  • Doesn’t feel like the story is going anywhere
  • Poor writing style

But let’s also make sure that children know HOW to give a book a chance by:

  • Reading more than just the first few pages.  In the classroom, I tell my chapter book readers that they should read to at least page 50 before making a final decision to abandon.  For early chapter book readers, I tell them to read at least two chapters.  Sometimes books that start out slow turn out to be great reads!
  • Talking about the book with a parent, teacher, or classmate who has read it.  Readers may need help clearing up early confusions about complex characters, unfamiliar settings or plot twists.  Once children understand these elements, and have a context for reading, they may be more willing to continue reading it independently.  Let them know they can stop and have conversations about the book as they read!  Readers are not alone.

And most importantly:

  • Help children build their reading stamina.  Children must have structured reading time.  Some readers choose lengthy books (think Harry Potter) only to abandon them because they lose interest.  Reading takes practice, and children who aren’t able to sit and read for longer periods of time may be more likely to abandon books.  Encourage children to read a little more each day!
  • Beware of children who abandon books often.  This is usually a red flag that they are not making good first choices and may need support in learning how to self-select just right books (See earlier post: Selecting Just Right Books for Your Reader at Home).  If children are finishing books too early, browsing but never making a final selection, or never seem to read a book all the way through, then take some time and find out why!  

We certainly don’t want children to get into the habit of abandoning book after book, but we do want them to know that abandoning books is an authentic reading behavior.  Hey, even I do it a few times a year.

Follow me on Goodreads (Nicole C.) to see what I’m reading and what I’m letting go.


Outdoor Math Games

By Mariah Bruehl,

Outdoor Math GamesSummer is often when we all want to be outside to enjoy the sun, play with friends and explore nature. Fun in the sun can also coincide, playfully, with keeping up our math skills. The games and activities below can be played both outside and inside. The key is that they are portable and can be enjoyed in both environments.


Bracelet Fact Game:

Materials: pipe cleaners, colored tape or thin post-it notes

This activity helps children to remember basic facts in an area of your choice. Help your child or group of students decide on facts to practice (addition, subtraction, multiplication or division). Start with five to learn and practice. These should be facts that the child knows how to figure out but needs to gain in recall speed.


Activity: To play this as a game with two players, have each player play with the same facts on their bracelet. One player keeps the facts on the questions and the other player turns hers’ over to the answers. The first player asks a question or gives an answer and the other player locates it on her bracelet. For example, if player one calls out 5 + 5, the second player finds the answer 10 on her bracelet and calls it out. Starting with the answer is fun too, where the answer of 10 is called out and the other player locates the question 5 + 5. Children can also play on their own by quizzing themselves and checking answers.

Outdoor Math Games

Beach Ball Facts:

Materials: large beach ball, sharpie pen

This game can be played with as little as one player to a whole large group of players.  Before playing write math facts on the spaces of a beach ball. Choose facts based on your child’s needs. To play alone, the player simply tosses the ball up in the air, catches it, and answers the question closest to him on the beach ball. If playing with other children, the ball is tossed back and forth and each player answers the question closest to him when he catches the ball. This game is easy to take with you and can be used in all different subject areas by simply changing the questions.

Outdoor Math Games

I Have, Who Has Card Game

Materials: I Have, Who Has card set (click on photo above to download)

This is another game that can be taken anywhere but does require a group of children. To play, pass out each child one or two cards, depending on size of group, and have them figure out the answer to their questions. Have students form a circle and the player with the start card begins. Students play until the player with the end card plays. Encourage children to answer quickly so that it becomes a fast paced, quick recall, game.


Hopscotch Counting or Facts

Materials: sidewalk chalk, and flat small sticks

I just taught my own children the game of hopscotch and we played for hours. In this version, it is played the same way as the original with a little twist in the labeling of the boxes. Instead of labeling each square with numbers one through ten, have your child practice skip counting. We labeled boxes by 2’s and 3’s to practice but you could decide on something different. Another fun idea is to start the first number higher, maybe 22, and then count by 2’s. Your boxes would be labeled: 22, 24, 26, 28, 30, 32, 34, 36, 38, and 40. Facts can also be written in the boxes with or without the answer. You could make boxes labeled 1+1 = 2, 2+2 = 4, etc. and have your child say the facts as he/she moves through the box.


Link: http://www.wikihow.com/Play-Hopscotch


Have fun!


3 Wildcrafted Herbs for Summer Days

By Mariah Bruehl,

3 Wildcrafted Herbs for SummerIn our part of the world summer is in full swing.  Despite my best intentions for a stress free summer I find we have a packed schedule of farm work, a garden that demands attention, fun trips out with friends, summer activities and the regular list of chores to do.  Summer days are wonderfully long but can be tiring too.

When I feel a bit below par, or when I notice my kids are looking a little ragged round the edges, I turn to our herbal allies to help boost us up and set us on the right path again.  As well as my own herb garden, I regularly turn to nature’s herbs too; they are a wonderful source of nutrients and don’t put a strain on the family purse.

If you are wondering what I mean by natures herbs, in short it’s weeds.  There are many wonderful wild plants that can be harvested and used safely in our own homes, boosting our health and costing nothing but time.  A nature walk can turn into an opportunity to stock your tea cupboard or medicine cabinet with wonderful tastes and uplifting nutrients.

At this time of year there is an abundance of wild plants available, many are at the peak of their power so it’s a great time to collect and store a little extra for later months.  There is nothing more wonderful than opening a jar of dried herbs in the middle of winter, and drinking in the sweet scent of the summer breeze when summer itself is long gone.

Here are 3 of my favorite herbal allies, easily found in hedgerows and even gardens right now.

3 Wildcrafted Herbs for Summer

Nettle

Also known as Stinging Nettle, this amazing plant is packed full of nutrients.  It’s green leaves are full of iron and even vitamin C, the perfect pick me up on a hot summer day.  Even the seeds can be dried and used, sprinkle them on cereal in the same way you would with flax seed.

To collect you’ll need to be wily.  They’re not called Stinging Nettle for nothing and the stings can be quite sore.  Wear thick gloves (rubber gloves are great) when you snip these plants and then put them in an airy place to dry, out of direct sunlight.  Use as a refreshing tea with a dab of local honey to help fight allergies and restore the nervous system.

3 Wildcrafted Herbs for Summer

Plantain

It makes sense to follow Stinging Nettle with Plantain, as this is the perfect remedy should you find yourself stung!  Plantain leaves can be crushed and the juice rubbed right  on the sting to pain relief.  You can also make a simple tincture by filling a jar with the chopped leaves and then add brandy or vodka until the jar is full.  Leave for 6 weeks or longer and then strain.  The resulting tincture will work wonders on any bites or stings you many collect on your summer adventures.

3 Wildcrafted Herbs for Summer

Red Clover

This familiar and attractive ‘weed’ can be found in many a lawn or border.  Instead of getting rid of it we should be collecting it!  This is a really fun one to collect with the children, get them to gently snip off the purple flower heads and then dry them in a single layer in a dry place, out of direct sunlight.  Both fresh and dry flowers make a wonderful, uplifting tea that is particularly soothing for women.   If you have swollen feet, pop clover tea in a footbath and relish it’s calming power.  It nourishes and much as it calms and couldn’t look prettier in a jar in the pantry.
Once you introduce wild plants to your children, you’ll be amazed at how each outing turns into a learning experience.  You are also teaching your children that nature is their ally and helping them become their own healers too.  So before you mow your lawn this summer just double check, you may want to collect your medicine first!

The Power of Wordless Picture Books

By Mariah Bruehl,

The Power of Wordless Picture Books

A few months ago, I was at home perusing a stack of books that I was planning to share with the students in my 2nd/3rd grade classroom.  My kindergarten daughter peeked over my shoulder and nonchalantly said, “Mommy, is that a think book?” The question confused me, but I knew I needed to dig a little deeper because I could see her wheels spinning.  So I asked her to explain what she meant by think book.  She replied, “Well, because you have to think about what’s happening.” My first thought was yes, you have to think about what’s happening every time you read a book. It was then that I glanced down and realized I was reading a wordless picture book.  Now it was starting to make sense.  In her mind, reading a wordless book meant some serious thinking must be involved.  After all, there was no text to relay a message or in essence tell the story. This three-minute exchange with my daughter got me thinking about the power of wordless picture books.

Over the years, I have had many students tell me that wordless books are for children who cannot yet read. Their exact words are usually something like this: “those books are for babies because they don’t have any words.” So clearly, parents and educators have a responsibility to set the record straight and show students the beauty, and power, of wordless picture books. Perhaps my daughter can also help spread the message about these think books.   

In my opinion, wordless picture books are even more difficult to “read” than other picture books. In order to comprehend a book in this genre, children must be thorough observers and read with a very careful and thoughtful eye. Wordless picture books push the reader to summarize, make inferences, interpret and evaluate visual information, ask questions, and make connections without any support from the written word.

Young readers (pre-emergent, emergent, and early readers) can use wordless picture books to learn how the illustrations support and often drive a story. They can learn how to retell a story in their own words, which encourages creativity, imagination, language play, and vocabulary development. Wordless books also provide an easy entry for young readers to be the authors and illustrators of their very own stories. So many times we, as adults, forget just how vital pictures are to a story. Wordless books become a perfect model for explaining the significance of creating high quality illustrations and for inspiring young artists.

Older readers (fluent and transitional readers) learn how to think more deeply and critically about plot elements, the interaction among characters, cause and effect, the tone of the story, and the intended theme. These readers can add words to support the illustrations and author their own version of the story. The illustrations can become engaging writing prompts or a vehicle for making precise observations and perceptive inferences. Again, all of this learning happens without any textual support from the book.

As I was writing this post, I began browsing my own bookshelves to see which titles I might like to recommend to all of you. What I realized was this: I own A LOT of wordless picture books! I pulled all of them off the shelves and laid them out in front of me.  Then I took a moment to reflect why, over the years, I have been drawn to these books. I picked up Bluebird and remembered how my heart ached for the little boy when the other children were teasing him.  I reread Journey and remembered how it took my breath away when I turned the page and saw the little girl sailing toward that immense castle in the sky. I opened the pages of Flora and the Flamingo and giggled watching Flora mimic the movements of the flamingo – she so badly wanted to be friends. These books create true, heartfelt moments for the reader. They make us laugh, and cry, and sometimes feel at peace. All without one… single… word.  I think that’s pretty powerful.

Teaching with wordless picture books will:

  • Develop vocabulary and oral language development
  • Foster observation and critical thinking skills
  • Improve writing skills
  • Build reading comprehension skills
  • Enhance understanding of story elements (character, setting, plot, theme)
  • Promote creativity and imagination
  • Model the importance of high quality, detailed, and meaningful illustrations
  • Serve as an inspiration for a child’s own art work

Check out these wordless picture books (they’re some my personal favorites):

Looking for something to do with these books?  Try these fun activities!

  • For early readers, draw speech/thought bubbles on post it notes and write down what characters might be thinking or saying in the story.  Place the post it notes directly on the pages of the book as you read.
  • Use Post It notes to enhance observation and critical thinking skills as well as teach your students how to ask questions and make inferences.  Copy and enlarge key illustrations in the story.  Before you read the book, display these illustrations or hand them out to pairs of students.  Encourage students to use the post it notes to make observations (I see), ask questions (I wonder) and make inferences (I think) about what is happening in the illustration. As you read the book, students will naturally be drawn to these particular pages and will begin piecing together the story, asking questions, and building comprehension.
  • Ask readers to look through the illustrations and write down the story in their words.  Depending on their age and ability, have students draft strong leads, introduce characters, describe the setting, relay the sequence of events, use transition words, and consider word choice.

I’d love to hear how you use wordless picture books in your homes and classrooms!

* This post contains affiliate links.


Summer Reading Bucket List

By Mariah Bruehl,

Summer Reading Bucket List
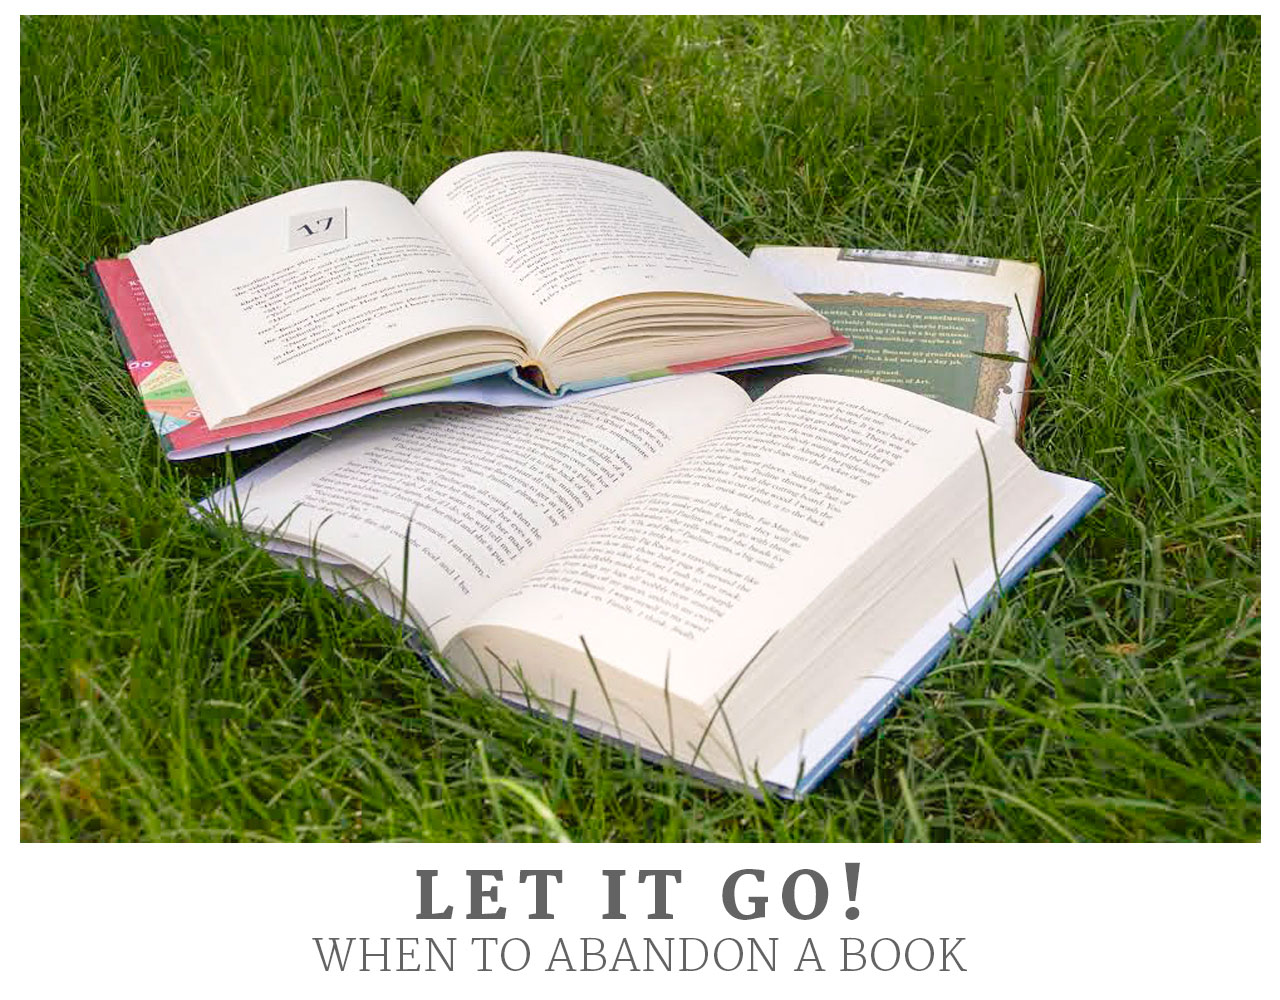
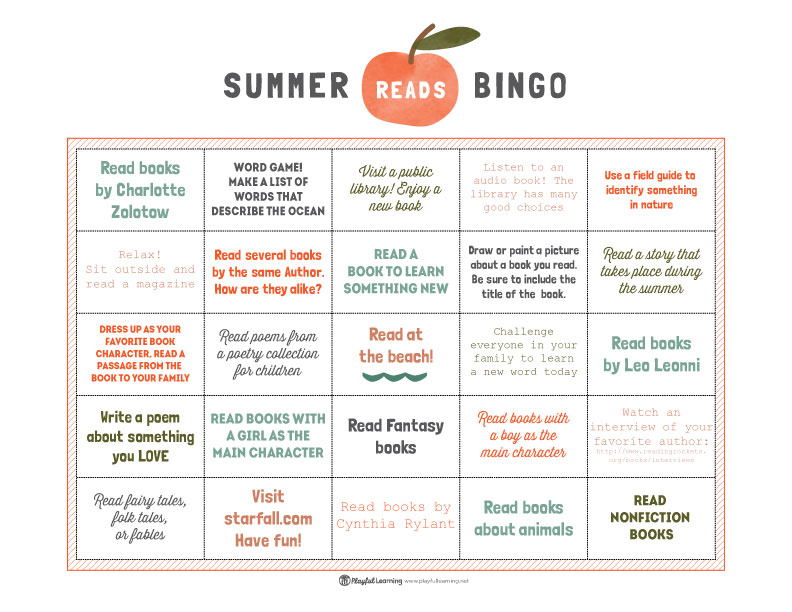
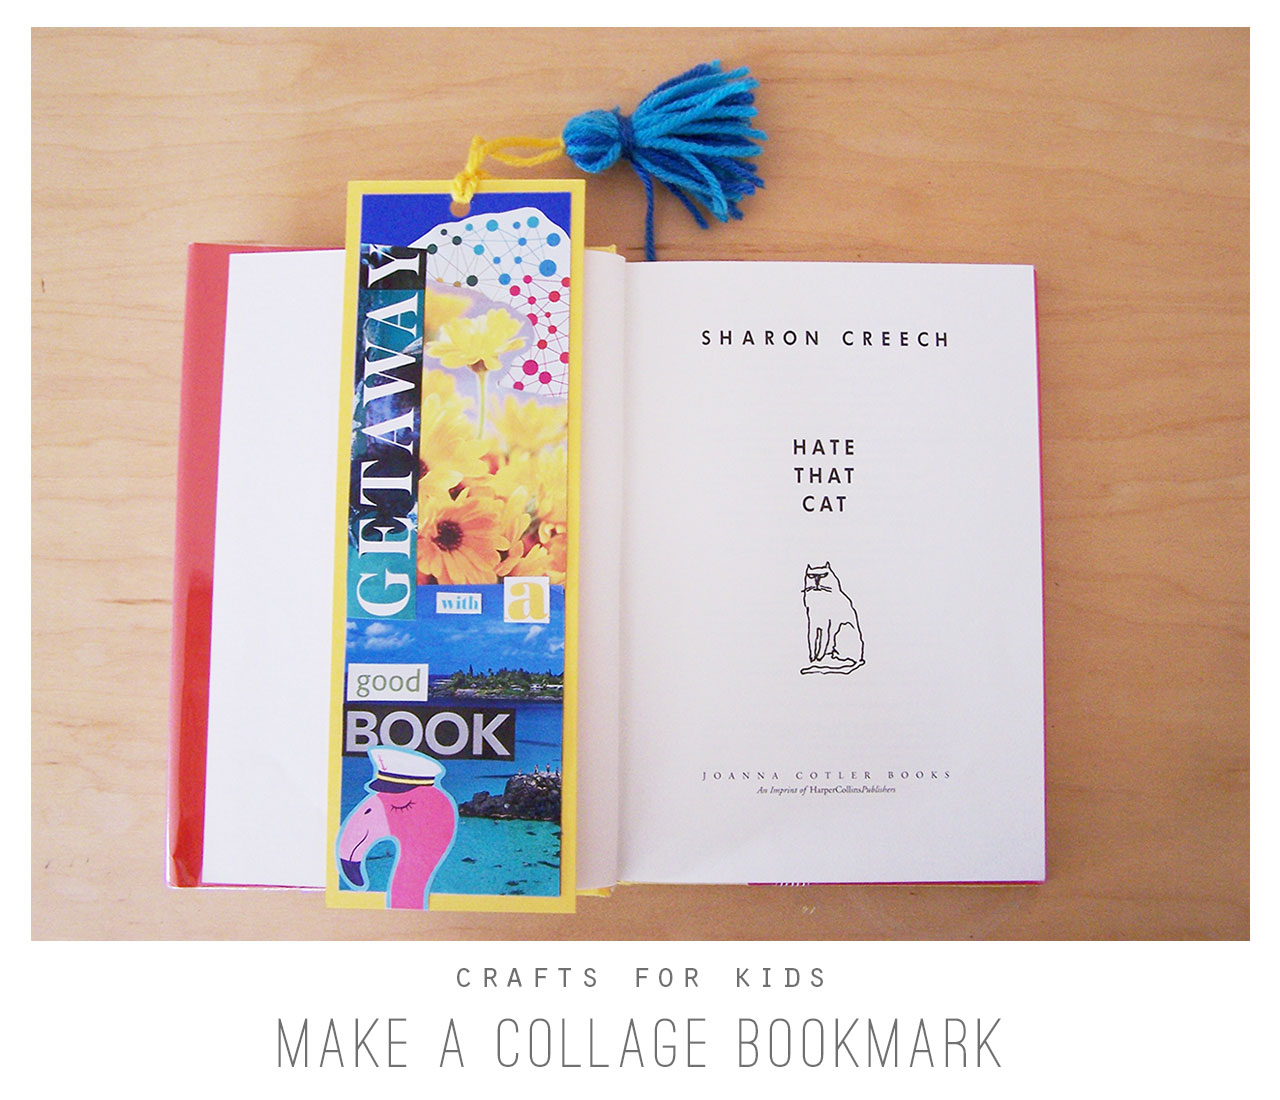
What is on your summer to-do list? It may be packed with adventures, getaways, and activities, but did the simple act of reading throughout the summer make your list?

No matter your age, summer is the loveliest time to pick up a book and relax, soaking up the story as you soak up the sunshine. It’s easy enough to know that you must “read!” during the summer, but in the spirit of novelty (or novel-ty), why not make your reading to-do list playful? Not only will it get you to model strong reading habits, it will make summer reading even more approachable for your child, no matter his or her age.

Here are some ideas to create your own “Summer Reading Bucket List.” You can post the list anywhere in your home, and have your child check off each item as he or she reads different pieces in different ways. The bucket list can be hung on your refrigerator, written on a chalkboard to keep all summer long, placed in your child’s room, or posted above a dedicated workspace your child might have. Be creative, and amend the list as needed. We’ve created a  few printables for you if you prefer to use to use them (click on the pictures at the bottom of the post to download). Of course, to make it even more enjoyable for everyone involved, you can participate right along with your child!

Summer Reading Bucket List

Places to read:

  • On the beach
  • In a pillow fort
  • On the grass
  • In a tent
  • Under a tree
  • On a boat
  • In the car
  • At the library
  • In bed
  • At the park

Things to read:

  • A new book
  • An old favorite book
  • A silly book
  • A book about a place you have never been
  • A magazine article
  • A recipe
  • A poem
  • A pop-up book
  • A rhyming book
  • A chapter book

How to read:

  • Read aloud to your pet or stuffed animals
  • Read aloud in a goofy voice
  • Read aloud to a group
  • Listen to a book being read
  • Read upside down
  • Read and act out a book
  • Write your own story and then share it
  • Read by flashlight or firelight
  • Read while eating ice cream
  • Listen to a family member tell an original story

Can you help your child cross off all of these items on the list? Can you cross off all of these items for yourself? The most important item yet unwritten on the list is simply to make sure you read all summer long – happy summer reading!

SummerReadingBucketList2

SummerReadingBucketListBlank

* Photo and printables by Randi Edwards


Painting with Toddlers: Black and White

By Mariah Bruehl,

Painting with Toddlers: Black and White

“Before launching into the full spectrum of color, stand at its edge with white and black, the beginning and the end of color.   Black and white provide a frame through which we more clearly see and understand color. Side by side on paper, the contrast between black and white call each more fully to life.”

– Ann Pelo, author of The Language of Art

We just started our first parent/child toddler art group in the Playful Learning Studio. After doing a lot of research on how to develop a program where each experience builds on itself and opens new avenues for exploration and dialogue with toddlers, I found myself drawn back to an old favorite—the work of Ann Pelo and her book, The Language of Art: Inquiry-Based Studio Practices in Early Childhood Settings. Originally, I thought it best to start with an investigation of one color at a time, but Ann brings it back one step further with an exploration of black and white—brilliant!

So, as I was browsing the aisles of Michaels and stumbled upon these sweet little black canvasses, it all came together in my mind and I made the commitment to start our journey into toddler art with black and white painting.

Each child was given a white canvas, a black canvas, white paint, and black paint. This allowed them to fully explore the bold contrasting colors and how they interact with each other.

A couple aspects of this set-up that I really liked for younger artists were that each color had its own brush and that we left out the extra water jar, which was new for me. This allowed for a smoother exploration and less steps that needed to be explained and followed. Of course, as children become more comfortable with the medium, it’s important to establish clear routines for painting, but for our particular situation, a simpler set-up was perfect!

I also loved keeping the art work contained in a tray, it seemed to give the children a defined work space and made for an easy clean-up. This tray is also the perfect size for 11×15 size watercolor paper, which is what we will be using for our next project.

Of course, no art experience is complete without the lovely discussions that ensue. Below are some possible topics and questions that Ann Pelo recommends for enhancing this exploration:

  • What story is the black line telling? The white line?
  • Where does the line begin?
  • Where does it end?
  • Where is it going?
  • Can you see the difference between the paint and the canvas?
  • What does the black make you think of?
  • What does the white make you think of?
  • Notice the way that black and white dance with each other on the canvas (this one was a big hit).
  • What do you notice about the way the colors are moving with each other?

More to Inspire…

Book Love…

Playful Learning: Black and White Painting Playful Learning: Black and White Painting Playful Learning: Black and White Painting


 * This post contains affiliate links.


Crafts for Kids: Make a Collage Bookmark

By Mariah Bruehl,

Crafts for Kids:Make a Collage Bookmark

Our Summer Book Clubs are well under way and we thought it would be fun to build on the experience by making some inspiring bookmarks!

Here is a fun eco-activity that will enhance your summer reading experience! Make a collage bookmark with the following supplies:

  • rigid card stock paper
  • discarded magazines, brochures, junk mail, etc.
  • scissors
  • glue stick
  • hole punch
  • yarn
  • optional: punches to cut out shapes

Instructions

  • Step one:  Cut a bookmark out of cardstock (any dimensions you like)
  • Step two:  Cut out interesting images, words, and colour patterns from magazines, etc.
  • Step three:  Arrange the images and words on your bookmark.
  • Step four:  Glue all of your pieces down remembering to secure the edges so they don’t curl up.
  • Step five:  Punch a hole near the top for the tassel.
  • Step six:  Make a tassel.  Wrap a long piece of yarn around your fingers.  Thread a shorter piece of yarn around the bundle closer to one end, and tie to secure.   Cut the loops on the longer end to create the tassel.  Thread another piece of yarn through the smaller loop and tie to secure.  Tie the opposite end and thread through the bookmark.

Crafts for Kids:Make a Collage Bookmark


Bookmark3Crafts for Kids:Make a Collage Bookmark

The power of words

Do you have a favorite quote or line of a poem that you could add to your bookmark?  Do you want your bookmark to have a message or follow a theme (ie: Eric Carle)?  Vary the sizes and fonts of your lettering to emphasize certain words.  If you can’t find the word you are looking for, spell it out with individual letters.

Layout and using color

Layer your images and lettering.  This bookmark has also used two layers of cardstock to create a border.  Words can be positioned vertically or diagonally for interest.  This bookmark uses three shades of color- blues, yellows and pinks.  This keeps it from looking too busy.  Some white space is good for balancing the color.   Another idea is to just use rows of words in different colors and fonts.

Let your imagination and creativity run wild!  Happy reading!

Summer Reads Bingo

By Mariah Bruehl,

SummerReadsBingo
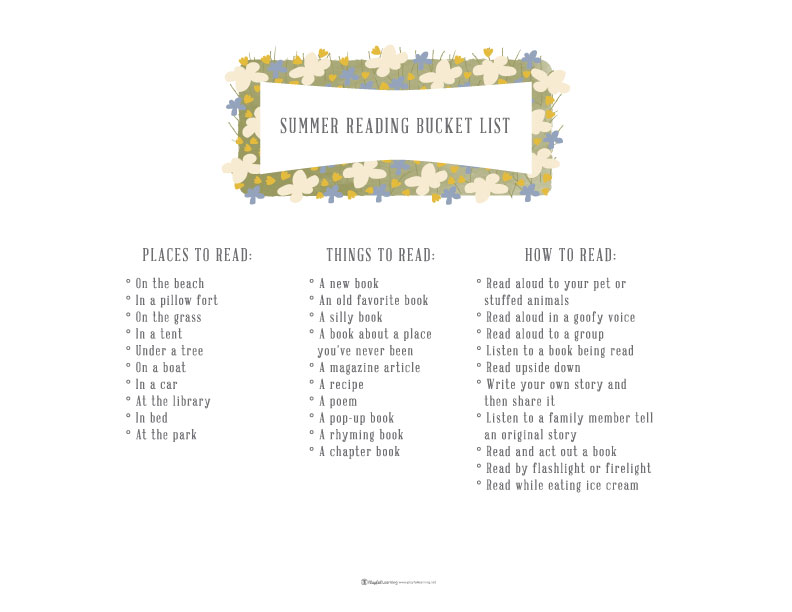
Summer is here and we all want our children to read for pleasure over the next few months… Although, over the years, I have found that the requirement schools often have for children to read for any given number of minutes backfires. They become preoccupied about watching the clock, are not truly engaged with their book, and far worse, see reading as something that needs to be completed as quickly as possible. The clock becomes the focal point rather than the book at hand and eventually for some children their innate desire to read disappears.

To nurture a love of reading, it’s far more beneficial to give children reading experiences—a variety of special, shared moments that highlight the joy of reading.

Many years ago, our 1st grade daughter came home with a great summer reading assignment–Summer Reads Bingo. When I saw this “playful” approach to encouraging summer reading I thought is was so good that we adapted a version of our own to share with you and your budding young reader.

Summer Reads Bingo


*Photo and printable by Randi Edwards

How To Create An Inspiring Writing Center

By Mariah Bruehl,

How to Create an Inspiring Writing Center

Create it and they will come… It’s almost like magic! If you would like to see your children writing for pleasure in their free time, then create an inviting space with engaging materials. Here are our tried and true favorites for creating a captivating writing center. What I love about these items is that they become household staples. We purchased many of the items on this list when the girls were young and we are still using and loving them!

1. Wall Organizer – This fabric magazine organizer is perfect for displaying a variety of interesting writing papers. We provide lots of interesting options in the workshop. You can also find a nice selection in the printables section of our book.

2. Acrylic Tote – I am a huge fan of creating caddies stocked with inviting supplies like pens, pencils, stamps, stickers, etc. They are easy to move from room to room and are great for taking your writing adventures outside.

3. Prismacolor Colored Pencils – Our all-time favorite colored pencils!

4. Highlighters – An inviting way to make writing fun.

5. Pencils – We are big fans of these triangular pencils, which help with encouraging proper pencil grip.

6. Alphabet Stickers – Fun no matter what age you are!

7. Sentiment Stamps – We love giving handmade cards for every occasion. Having these stamps handy has been very helpful throughout the years.

8. Paper Tray – Another wonderful way for organizing interesting writing papers.

9. Watercolors – It is wonderful to combine art and writing and we love these watercolor paints. These are also perfect for combing with the post cards below.

10. Watercolor Postcards – Embrace the handwritten tradition of corresponding with loved ones with these lovely blank watercolor postcards.

11. Blank Books – The more of these you leave in your writing center, the more books you will see popping up around your house. Try it!

SaveSave