Category: All posts


Estimation Magic with Greg Tang

By Mariah Bruehl,

lead-photo120115

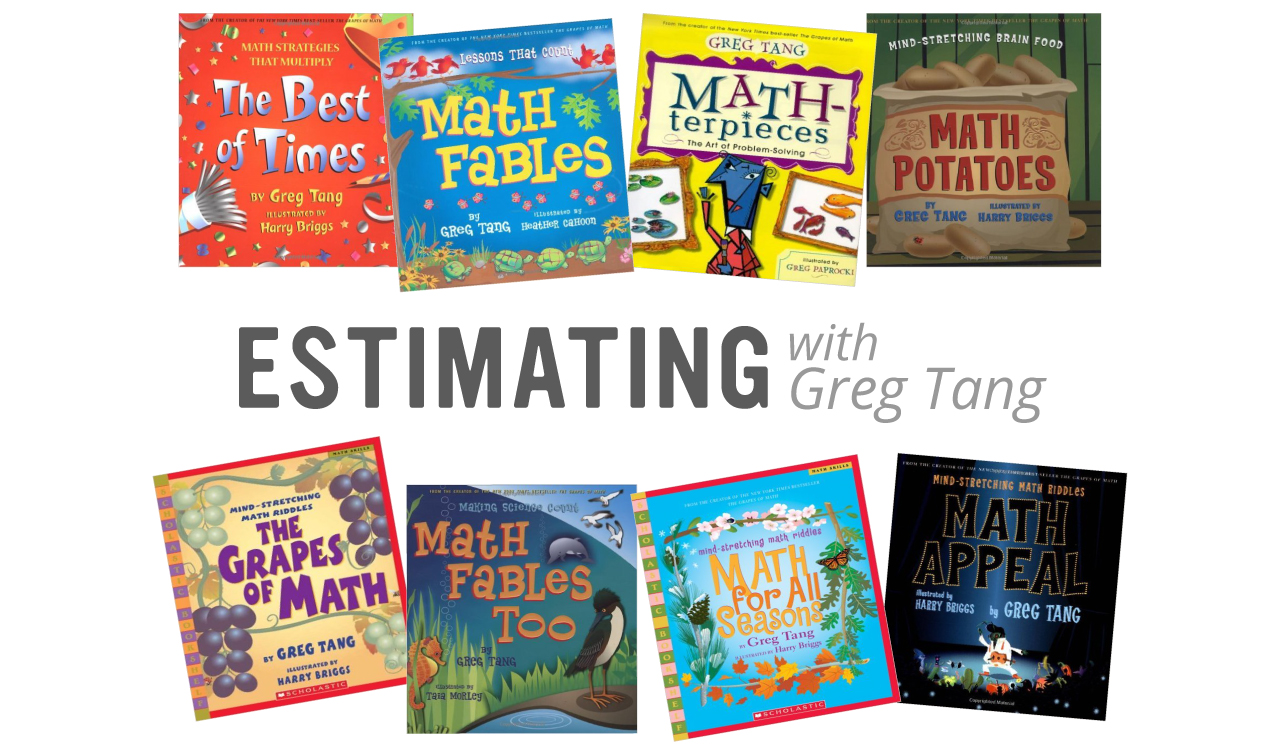
Greg Tang is a wonderful children’s book author who emphasizes number sense strategies for children. His books are colorful, poetic and encourage children to think through figuring out how many by using clever grouping strategies. Tang provides children with clues through poetry on how to group numbers. Children learn through these strategies that it is quicker to count by making groups than counting by ones with a larger group of objects.

Activity: Estimation Magic

This activity is best suited for children ranging in ages from five through eight.

Materials:

  • Math for All Seasons by Greg Tang
  • Or the e-book version of this book available on the gregtangmath.com website
  • Pencils
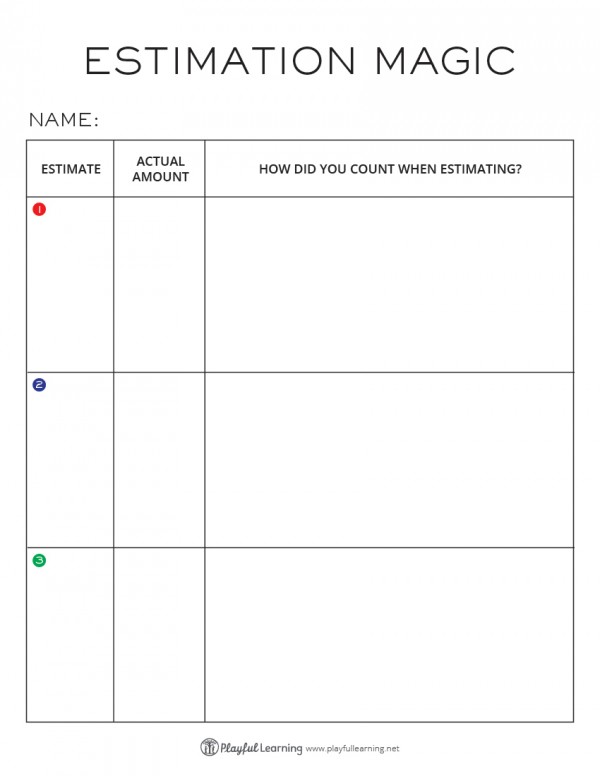
  • Printable: Estimation Magic

Playful Learning: Estimation Magic

  1. Share the cover and title of Greg Tang’s book Math for All Seasons. Discuss how Greg Tang wants children to learn how to count quickly by making groups of numbers instead of counting by ones.
  2. Explain that you will be sharing a picture with a poem for about ten seconds, will then close the book and ask for estimations of how many.
  3. Share with children how the poem provides clues to how Greg Tang would group the objects to count quicker.
  4. Take children through the first picture together as a group. Discuss estimations, clues provided in the poem and the actual number of objects.
  5. The routine for reading the book could progress like this: read aloud the poem while sharing the picture, children listen and try to figure out how many, close the page, ask for estimations, then figure out the actual answer together using the strategies suggested in the poem.
  6. Using clipboards, pencils and the Estimation Magic printable children record estimations, actual answers and explain how they grouped the objects.
  7. While reading, continually discuss strategies for children to practice. Later, this activity makes for a fun buddy reading activity where children can quiz one another.

Extension Ideas:

  1. Take photographs of everyday objects, placing them in groups, and use these pictures to have children estimate with.
  2. Have children create pictures for others to estimate with. This provides children with a chance think about grouping that make sense for quick counting. Children might create groups of twos and threes to make groups of five for example.

Greg Tang’s Books…

  • The Grapes of Math by Greg Tang
  • The Best of Times by Greg Tang
  • Math for all Seasons by Greg Tang
  • MATH-terpieces by Greg Tang
  • Math Fables by Greg Tang
  • Math Potatoes by Greg Tang
  • Math Fables Too by Greg Tang
  • Math Appeal by Greg Tang

Greg Tang’s website is full of interactive math games, resources for teachers and interactive e-books of his original paperback books.

*This post contains Amazon affiliate links.

5 Digital Art Resources for Older Kids

By Mariah Bruehl,

digitalartLEAD

In the early years of my children’s education art was a no brainer.  We crafted, painted, drew and molded.  We put googly eyes on everything we could find and used our body weight in glitter.  But as my eldest hit double figures, it became a bit trickier to fit art into our lives.  We were past the tempera stage, but what comes next?

My son is full of imagination and energy, but does not relish time spent laboring over a still life drawing, or perfecting a complex technique.  Yet we all still want art to be a regular part of our lives.  Luckily we live in the digital age, an age of opportunity and discovery that is beyond anything my younger self could imagine.  So I find myself more and more turning to digital tools to help him create and make without constraints. 

digitalart4

I’d like to share a few of the tools we are exploring right now.  There are of course more and this is just a starting place, but I hope this gets you started on your digital art journey!

Art for Kids Hub: This is a more ‘traditional’ resource in that it still involves the use of paper and pencil!  This online portal is full of video tutorials guiding kids step-by-step through the process.  There are a huge variety of videos from drawing Mine craft characters to spooky Halloween Mummies.  It may not be fine art, but it is fun, lively and encourages kids to see drawing as a series of steps rather than an overwhelming whole.  My son loves these tutorials and the drawings he makes are great!

Art Authority App: This app is phenomenal value and provides access to thousands of art works and artists.  You can use it as a traditional gallery, browsing artists and discussing their work, or you can use it to supplement other areas of study exploring the art of a given time period.  I love to explore a variety of artists with my boys and challenge them to tell me which one is ‘better’.  Of course they conclude that all the different types of art have value, helping them see their own work with a more charitable eye too.  I think there is great value in simply browsing and asking the question “What do you like?”  I’ve provided a printable Prompt sheet to give you some ideas about navigating art history with your child. 

Paper 53: This app is a digital sketchbook that provides access to all sorts of materials that would certainly not be usually portable!  You can paint, draw, create large sweeps of color or fine detailed lines.  I love the fact that this app provides a fine line option in a large range of colors, something we couldn’t afford to provide day to day. 

The open-ended nature of this app allows for exploration with no consequence, no paper wasted, no worries about materials.  While a stylus isn’t necessary, we do find it provides a lot more precision and detail.  It also helps develop the sense of making something ‘real’.  We’ve only scratched the surface of what this app can do, but I’m really looking forward to seeing the discoveries we make. 

digitalart1

MoMA Art Lab app: To me this is the perfect example of what the digital world can offer.  A world famous art museum invites you in to explore not only famous art pieces, but to make and develop your own works of art.  Though simple enough to be used by young children, there is plenty of scope to develop it for older children too.

Sketchpad Explorer – Similar to Paper 53, this app is a digital sketchbook.  The app is intended for exploring geometry, but we focus on using the ‘textures’, patterning that gives a multi media feel.  By alternating layers and colors pictures emerge, giving the work dimension.  These textures mimic the kind of art techniques used in 3D art and encourage a move away from seeing ‘line’ as king.  I love the textured but abstract work that evolved out of this app, a deceptively simple but effective process. 

Once you start exploring the possibilities with digital art tools you’ll soon be hooked.   You can make art at home or on the go, truly making art an experience you can have anywhere at any time.

artprompts

Mystery Bags for Older Children

By Mariah Bruehl,

Mystery Bag TitleMystery bags (bags in which you put items for a child to identify by sense of touch only) are commonly used with children in the three to eight year age range and are a fun, engaging way for children to sharpen their tactile perception.  It’s a classic activity that you perhaps have done many times with your child.  I certainly have with all three of mine and one thing I noticed is that no matter what their age, they can’t resist the intrigue of a mystery!  But how can you continue the fun while still providing a challenge for older children?

Here are some twists to give a try…


What’s in Common

(classification, problem-solving)

Choose items for the mystery bag that all have one thing in common.  It could be items with a similar purpose or that you might use for a particular activity (art, cooking, reading, getting reading for bed, swimming, etc), items that share the same beginning or ending sound, or anything else you can come up with.  Ask your child to visualize each item as he feels it and to say what it is.  Ask him to tell you as soon as he thinks he’s knows what each item has in common.

To make it a bit more challenging, choose items that can also be categorized into sub-sets.  For example, the objects might fall in the category of “toys” but can be further divided into animals, wooden toys, and vehicles.  This can be a fun way to introduce a new unit study or skill.


Inference

(critical thinking, reasoning)

Inference is the skill of reaching a conclusion using observation, prior knowledge, and reasoning.  It is considered a foundational skill that is used across the curriculum, especially in reading and science.
To prepare an inference mystery bag, gather items that tell a story about a person (interests, occupation, etc.), a place, or a situation.

For example, you might pretend that you are meeting your sister’s friend for the first time and, so that you can learn a little about her first, your sister has given you a bag of some of her belongings for clues.   What kinds of things might she do or like?  Does she have children or a pet?  Or maybe a neighbor was telling you about the great vacation he just got back from and he’s brought you a bag of souvenirs from the trip.   Where did he go and what types of things did he do?  You can really have fun getting creative with this version!

In this variation, the child pulls out the items one at a time and makes his inference as to what information the object gives.  Ask your child questions about what he’s basing his reasoning on and if there are any other conclusions that could be considered.

Mystery Bag for Older Children

Touch Drawing

(tactile perception, observation, visualization)

Choose one object with an interesting form and texture but not too complex (something from nature is our favorite type of object to use) and place it in a bag that your child cannot see through.  Ask your child to reach in and feel the object without peeking.  Prompt him to think about it’s texture, size, and shape.  Is it smooth or rough?  Ridged?  Scaly?  Do all sides have the same texture?  Is it thin, long, pointy?  Is it soft or hard?  Once your child has enough information to be able to visualize the object it’s time to put pencil to paper and try to capture the object’s image in a drawing.  Allow your child to feel the object as many times as he wants while he draws but still no peeking.  The level of details that your child notices will support the accuracy of the drawing.  Once the drawing is complete your child may take the object out and compare it to the drawing.  Discuss the similarities and differences.

Mystery Bags for Older Children

Have fun with these variations!  And if you have other clever mystery bags activities, please do share.


Fall Into Leaf Learning

By Mariah Bruehl,

Fall Into Leaf LearningFall is my favorite season of the year, the cooler temperatures, the tasty flavors, and the vibrant changing colors. Fall leaves lend themselves to hands on learning in so many ways that can be differentiated to any child’s age and ability easily:

To delve a little deeper, a fall leaf scrapbook is a perfect activity to engage in during autumn. As usual, I love to tie a little technology into my activities, so Leaf Snap is a very useful app for this project. Leaf Snap is so simple to use, and it is free! It has beautiful pictures of leaves, flowers, seeds, and bark. The app also includes detailed information such as scientific names, habitat, etc. After downloading the app, set out to collect a variety of fall leaves. Bring them inside and place each leaf on a piece of white paper, open the app, and click the “snap it” button. The app will proceed to give results of which type of tree each leaf fell from. After selecting the tree, and looking at the pictures, next click on the small book icon in the upper right hand corner, to open up further information. You can record the information about each leaf on the printable chart and then you are ready to make your scrapbook.

Leaf Information Chart

This is where the project can get creative and be differentiated. Record and use as much information as appropriate for your child on the chart, and use a variety of paper, markers, and other accents to make your scrapbook personal and unique. Simply glue each leaf to its own piece of paper, and then write information about the leaf on that page. Finally, staple all your pages together to make a scrapbook. If you are looking to make your leaves last longer, try placing them in contact paper, or laminating them before you place them in the scrapbook. This is a fun way to get outside and learn on a beautiful fall day.

For extending your knowledge on autumn leaves, try these titles for a little book love:


Me: In Poetry, Song, and Art

By Mariah Bruehl,

MichelleTitleWhen I was a classroom teacher, one of the most relaxing, yet beneficial professional development opportunities I attended was a “Picture Book Read In.” After various speakers, such as a local librarian who had been on the Caldecott committee, teachers had an opportunity to peruse new picture books at their leisure. I was always able to discover new books that sparked new ideas and new lessons.

It seems like there is always a steady stream of amazing books being produced, and this year is certainly no exception. There are many exciting new picture books and three of these that caught my eye are autobiographies or biographies.  Aside from the interesting life stories, these books are especially attractive because they feature outstanding artwork, and they also focus on unique and diverse individuals in the fields of poetry, music, and art.  Picture books easily engage children in non-fiction text, and these books can easily integrate reading, writing, and the arts. The more connections children can make across domains, the more effective learning opportunities become.

Enormous Smallness by Matthew Burgess is about the life of poet e.e. cummings. My favorite aspect of this book is the creative way the words themselves are incorporated into the illustrations. I love the use of the font style and the way the poems are presented throughout the book. Also, the book includes a nice chronology at the end.

Trombone Shorty by Troy “Trombone Shorty” Andrews is an autobiography. This book will resonate with children because it takes place in modern times. Troy is 29 years old, and the book covers his accomplishments and musical drive as a young child. The watercolors and collage by Bryan Collier are amazing.

Draw What You See by Kathleen Benson is a biography of Benny Andrews and features his actual paintings as the illustrations. What a better way to introduce his life and his art to students than by using his artwork. The book also ends with an nice timeline, and a listing of each artwork including the title, medium (mostly oil on canvas are featured in this book), and date created.

With each book covering an individual from a different artistic talent, there are so many possibilities for activities after reading and discussing these books, all of which can be adapted for different age levels and abilities.

  • Write an autobiographical poem
  • Compose an autobiographical song
  • Paint a picture of an important moment in your life
  • Create a timeline of your life so far
  • Create an autobiographical collage

I have created a printable booklet to inspire some of the ideas listed above (click on the photo below to download). A quote of e.e. cummings that speaks to me is, “It takes courage to grow up and become who you really are”.  Children thrive on expressing themselves and exploring what it means to be who they are. Poetry, song, and art are wonderful ways to delve into this. The booklet also has a chart to compare and contrast the individuals featured in these three books. An important comprehension skill with non-fiction reading is being able to locate and process factual information. Use of engaging texts, such as these picture books, is an excellent way to introduce and practice this skill in an interesting way for children.

Extending the reading of a book with supplemental experiences enhances children’s’ understanding as well, here are some links to use:

Me: In Poetry, Art, and Song

Art for Toddlers: Smooshy Blob Painting

By Mariah Bruehl,

Art for Toddlers: Smooshy Blob Painting

Give a toddler a paintbrush, and she’ll ask for more paint. Give her more paint, and she’ll probably make a mess. And with that mess comes all kinds of playful learning!

Toddlers don’t need much more invitation to create than an empty piece of paper and a cup of paint. Smooshy blob paintings is a great project that combines sensory play, fine motor skills, math, and color theory in a quick, accessible art-making experience. But all your toddler will care about is the chance to play with paint!

For the set-up, all you need is thick drawing or construction paper, tempera paint in squeeze bottles and something to protect your work area. Before your child begins, create a fold down the center of the paper—any direction will do!

Art for Toddlers: Smooshy Blob Painting

With the paper open flat on your work area, encourage your child to squeeze paint onto the paper. If this is your child’s first time painting with a squeeze bottle, she will probably be content simply to experiment with squeezing and moving the bottle around the paper. This is great fine motor practice and helps strengthen the pincer grip! Once that experience has lost its appeal, challenge your child to make different types of lines—straight, zigzag, squiggly—or different types of shapes. However you go about getting paint on the paper, the key is to leave some white space.

Now fold the paper again and show your child how to rub her hand across the surface, smooshing and squishing the paint around. She will be able to feel the paint move, but not see exactly what is happening. Paint will probably squish out the sides, which just adds to the fun.

Art for Toddlers: Smooshy Blob Painting

Open the paper up again and see what your smooshing has created—a colorful, symmetrical abstract painting! As you talk about the painting with your child, point out areas where colors have mixed together to create new colors for a quick color theory lesson. To talk about symmetry, point to a feature on one side of the paper and ask your child if she can find a match on the other side of the paper.

Try it again with your paper folded in the opposite direction. Now that your child has an idea of what will happen, predict together what you’ll see when you open the paper up again.

Art for Toddlers: Smooshy Blob Painting

If your child’s masterpiece has a good amount of paint on the surface, you can extend the experience by dabbling in a little printmaking as well. Place another piece of paper directly on top of the painting and press gently to make a second print. Peel the two pieces of paper apart and see what happens. More painting magic!

Art for Toddlers: Smooshy Blob Painting

Whether you are 2 or 20 (or 20 plus a few years!), this simple project is sure to bring oohs and ahs every time.

Art for Kids: Fun with Matisse

By Mariah Bruehl,

Art for Kids: Fun with Matisse

Using the work of a specific artist as inspiration can be a fun activity with budding young creatives. Recently, I’ve become quite involved with paper cutting as an art form and consequently have a large box full of colorful paper scraps, just waiting to be used.

We ran across two books covering the later works of Henri Matisse (Henri Matisse: Drawing with Scissors, by Jane O’Conner, and Adventures in Art: Cut-Out Fun with Matisse)  otherwise known as the “cut-outs,” at the local library. We learned all about how Henri spent the last years of his career “painting with scissors” instead of a brush, creating bright and colorful scenes constructed out of colorfully painted paper. We decided to use these books as inspiration and put our scissors to work. If you can’t get a hold of a book about Matisse, you can also do an image search of “Matisse cut-outs” and read more about his career and technique here. 

Art for Kids: Fun with Matisse

Art for Kids: Fun with Matisse

We spread out our paper, and opened our books. I was working with my toddler, who is not very skilled with scissors yet, so he helped me find the right shapes to recreate and I did the cutting. This turned into a fun open-ended activity as we imagined all the different things the shapes could be!

Art for Kids: Fun with Matisse

Next, spread all of your shapes out on your paper or workspace and have fun arranging them! A lot of our pieces unintentionally fit and moved together in a way. This is a great way for kids to evaluate how colors interact with each other and also to examine the use of white space and the form of the shape-all without realizing they are doing it! Play around and try different arrangements until you’re satisfied.

Art for Kids: Fun with Matisse

Now it’s time to glue your shapes down. This part is especially fun for toddlers and young children who enjoy gluing! Our design ended up changing and evolving as we secured the shapes down.

Art for Kids: Fun with Matisse


The impact of simple shapes and beautiful colors is amazing! Happy cutting…

Universal Lessons: The Solar System

By Mariah Bruehl,

Universal Lessons: The Solar System

Wow! What an amazing summer…

As many of you know we opened the Playful Learning Studio in June and I’m happy to report that our new space took on a life of its own… We spent the summer developing wonderful learning experiences and sharing them with local children in an inspiring learning environment.

And best of all for me, I was able to teach again, which felt like a homecoming in many ways…

So, as Playful Learning continues to evolve, you will hear more and more about what’s happening in our studio space. We like to think of it as a laboratory for learning. It’s an incredible opportunity to teach children in an optimal learning environment, using a highly personalized curriculum. Through this process, we are discovering new insights into the teaching and learning process as well as validating previous theories.

You can learn a lot about children when you put them in control of their own learning. The Playful Learning Studio offers enrichment programs where students can come and learn about anything they want. As we get to know each child, we create hands-on lessons in the areas they have expressed interest in exploring more deeply.

What’s most telling is that when you first invite a child to share some ideas of things they would like to learn about, they have a difficult time responding. It’s a new question for many of them and they often don’t know where to begin. Yet, with some thoughtful prompts (which I will share later) the ideas start to flow and authentic learning begins to take shape.

Through this process, one thing that struck me was the realization that certain topics seem to have a universal appeal to children of all ages. Learning about the Solar System was by far one of the topics children seemed most inspired by, so I thought it would be fun to share one of our most tried and true lessons of the summer.

Playful Learning: The Solar System
Click on image to print.

We start by reading the book, What’s Out There? A Book About Space  by Lynn Wilson. I love this book because it captures the attention of even the youngest readers, has interesting yet simple explanations, and prompts lots of good conversation.

After reading, comes the invitation to create the planets out of Sculpey modeling clay. This medium is perfect for strengthening little hands and comes in vibrant colors that can be blended together to create the perfect model of each planet. It’s fun to bake them afterwards and glue each one to the blank printout below.

Playful Learning: Solar System II
Click on image to print.

Of course, adding in online image searches for photos of each planet, as it is being created, adds to the magic of it all! It’s the perfect way to model creative and productive use of technology!


Playful Learning: The Solar System

This activity is the perfect springboard into other lessons on astronomy, phases of the moon, and more… Let your child lead the way.

*This post contains affiliate links.

Nature Study: Getting Up Close

By Mariah Bruehl,

Nature Study: Getting Up CloseNature is all around us, from the grass that grows between the paving stones near our house to a nearby wooded copse, ripe for exploring.  But how often do we really look closely at the nature that surrounds us, I mean really look.   

It can be easy to think of Nature Study as a thing separate from our lives, a subject like Maths or Spanish; but really nature is a part of us, and studying it should be a simple matter of taking a moment to really look and connect.

Though we love science in our house, I was having a hard time getting to grips with regular nature studies.  I felt that it had to be a beautiful journal slaved over for hours, or the study of field guides to an expert level.  Then I discovered a curriculum called Private Eye that encourages the simple study of the natural world that is all around us.   In order to see nature from a different angle (literally) the ‘student’ uses a 5x magnification jeweler’s loupe, giving them an entirely new perception of objects and organisms they have seen, but never appreciated.

Nature Study: Getting Up Close

While the book that describes the core concepts of the curriculum is wonderful, it really isn’t necessary to have it in order to benefit from this kind of nature study.  All you need is a loupe (available from the Private Eye website, or other science stores near you) and an ample supply of curiosity, something that most children definitely do not lack.  

We have used our loupes out in ‘the field’ (it was an actual field) as well as at home for all sorts of studies.  Mostly I just encourage my boys to stop for a moment when they have found a new treasure, and take a minute to look at it again but through their loupes.  It’s amazing how astonished they are when they see an object through this new, closer perspective.  When looking through the loupe the rest of the world is cut off, allowing them to focus completely upon the newly revealed details the loupe offers up.  From an orange segment they had for snack, to a new snake skin found under the woodpile, they are always fascinated by what they see.  

Nature Study: Getting Up Close

The point of the Private Eye method is to draw analogies between different objects and organisms so that children begin to make connections and patterns.  Asking a few simple questions can help them to draw quite profound connections and help them understand how many of the building blocks of life are present throughout nature.  Ask the child what do you see?  and then, what does it remind you of?   They may notice the way the segment of orange has interconnected smaller segments, just as you might find on a snake skin.  You can wonder together at why that might be, or begin researching to find out!

Once your child has experienced the object up close you may wish to encourage them to draw what they saw.   Older children can write down words that come to mind and begin shaping a poem out of them (this video has some teaching tips and there are beautiful samples of work here).  

It’s truly lovely to produce a piece of art inspired by nature, something to treasure and hold on to.  But most of the time, when we grab our loupes from our nature basket to look at an unusual rock or a piece of wax from our beehives, we just look.  We look, we marvel, we tell each other what we see; and that, really that simple thing, is enough.  


DIY Games for Kids: Word Mastermind

By Mariah Bruehl,

WordMastermindTitle
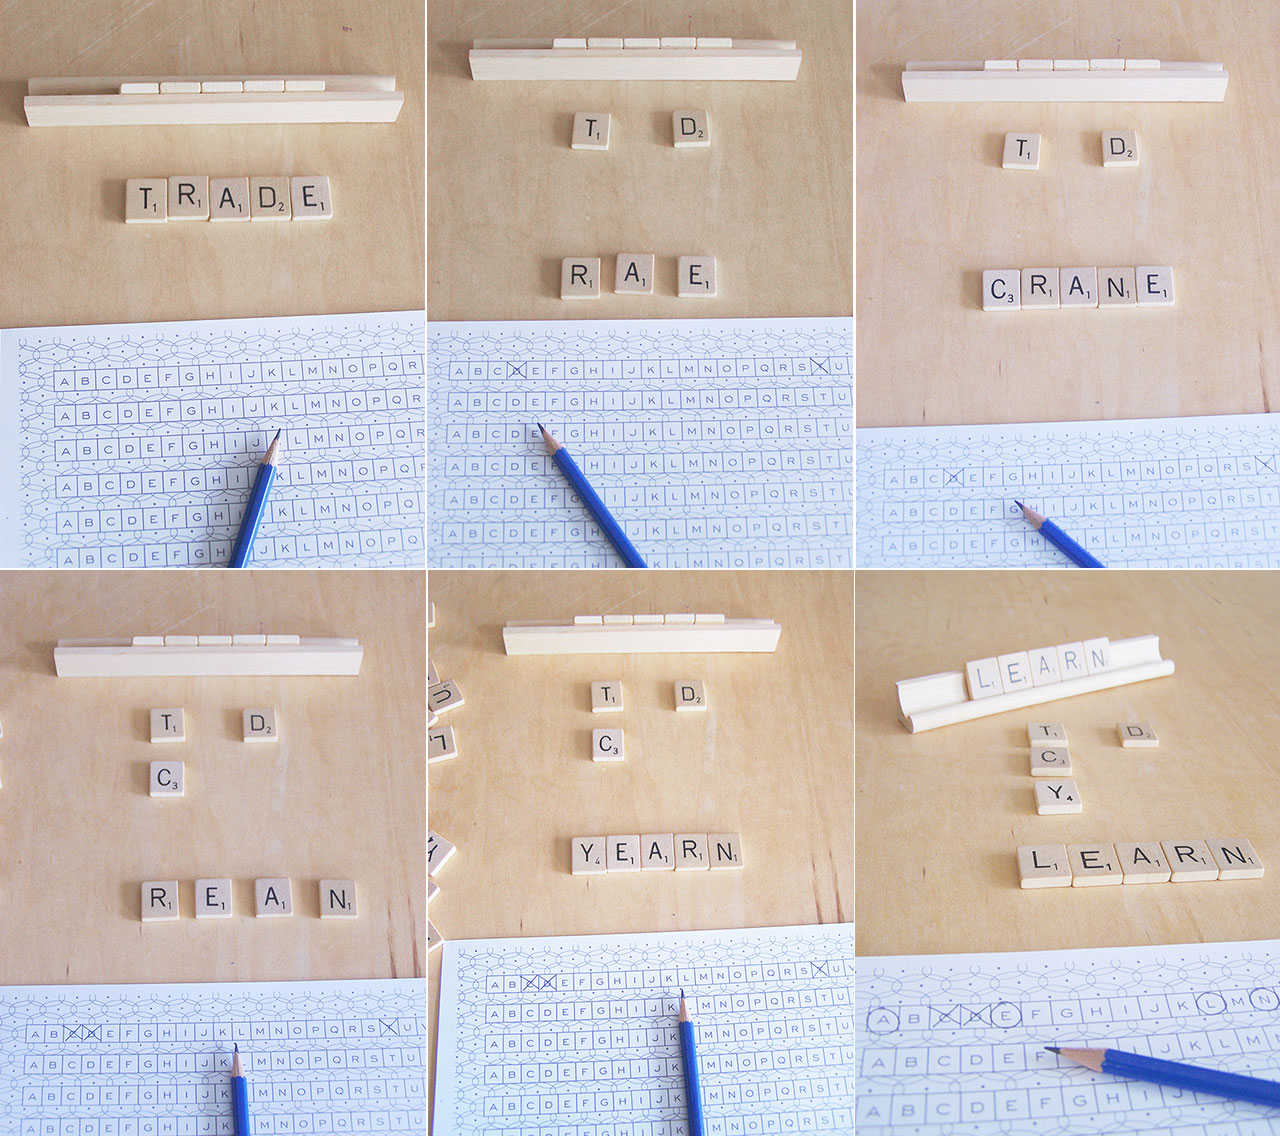
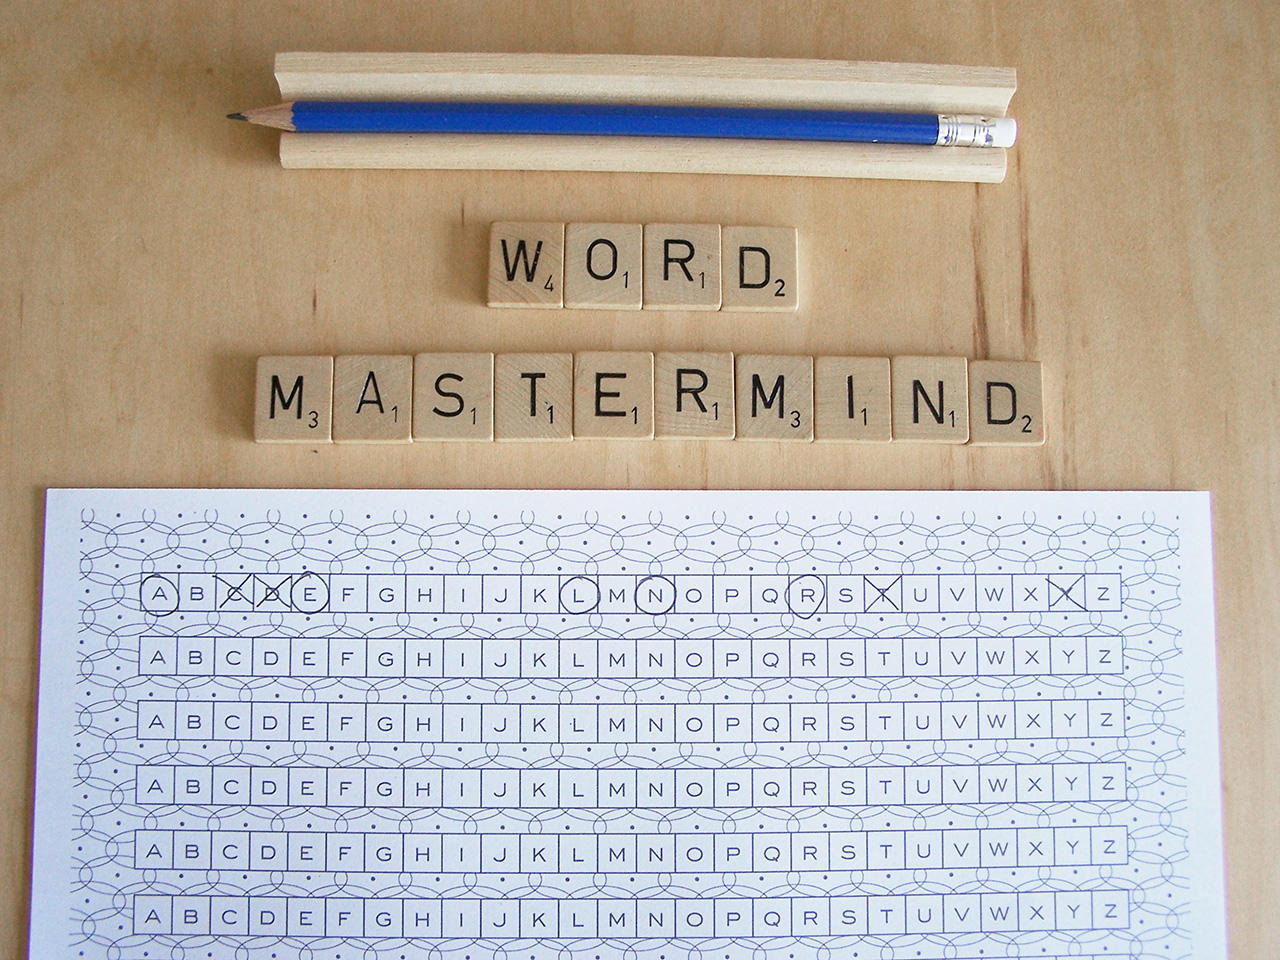
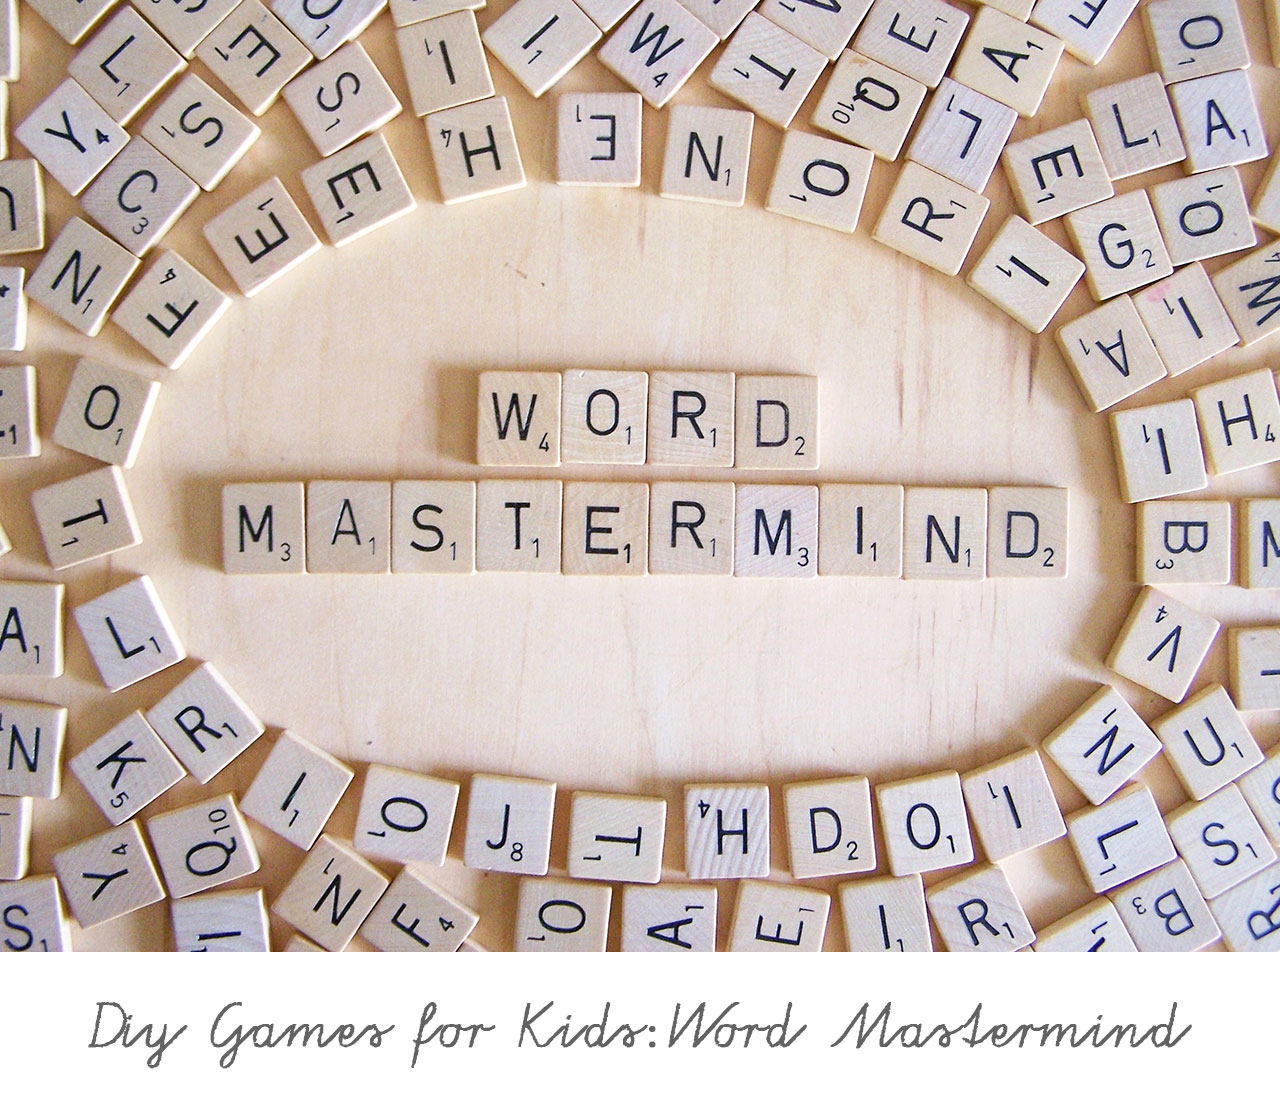
Do you have a Scrabble® game in your home? If so, put those letter tiles to use with this simple game.

You will need:

mastermind2

To Play:

A – player 1:  secretly writes a 5 letter word with no repeating letters on the blank piece of paper.  (for the photos, I have put the secret word on the wood tile tray.)

☑birds – one letter only

☒nests – two S’s.


B – player 2:  using the letter tiles, lays down their guess of a 5 letter word (with no repeating letters).


C – player 1:  if any of the letters are in the secret word, player 1 slides down the letter(s) to indicate that the letter is somewhere in their word, but not necessarily in that position.


D – player 2:  crosses out the letters NOT in the hidden word on the sheet.  Using the discovered  letter(s) as a clue, player 2 uses the tiles to make another guess being careful not to use the letters now marked on their sheet.


E – continue until player 2 guesses the hidden word!

Word Mastermind 2


This compact game is great to take traveling or to play on a quilt in the backyard!