Category: All posts


Stress Management for Children: And Breathe…

By Mariah Bruehl,

Stress Management for Children: And Breathe...
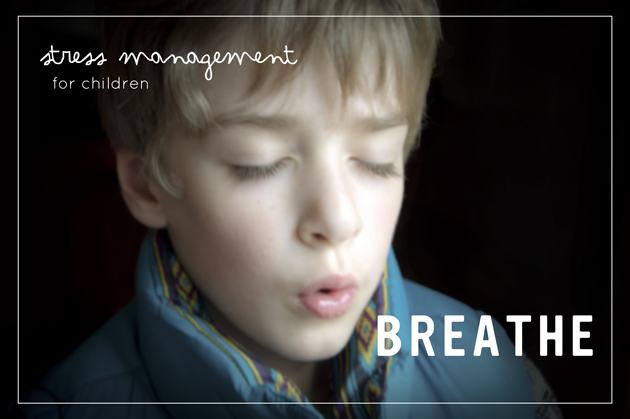
I’m sure we’re all familiar with the earth shattering silence that comes when a child draws in a hugely deep breath in order to emit the kind of scream that brings every parent within a 5 mile radius running.  And we’ve all watched our child caught in that suspended animation between breath and pain when they can’t seem to decide between crying and turning blue.  That’s usually the moment we crush them into our arms, breathing life back into them and anchoring them to us, a rock in the sea of life.

In many ways these early years are easier to navigate, their pain is evident and (hopefully) relatively easy to soothe.   We know what to do in this situation, we know how to give comfort.  But as children grow older it is harder and harder to determine what they are thinking and feeling, their emotions go more underground, their reasons become more complex.

Have you ever noticed how hard it can be to speak clearly and coherently when you are upset?   Your words are ragged, your voice wobbles and you feel like your legs have turned to jelly.  Breath comes in short ragged gasps as we lose control of our emotions, denying us the ability to remain rational or even explain how we feel.   Our body is responding to stress, shutting down non essential functions (such as thinking!) and getting us ready to run for it.

But in our modern world it is not so easy to identify what is triggering this feeling of helplessness and loss, a tiger attacking is a clear foe, the rejection of a friend or feelings of frustration at learning new skills are less obvious.  Each day brings different challenges and what can cause no trouble one day can be a disaster the next.  Just like adults, children have complex emotional landscapes that can be all blue skies one minute and thunder storms the next.

Culturally we generally don’t approve of displays of strong emotions and, as children become more aware of social expectations, they often suppress these feelings until the cork finally pops and feelings explode all over the place.  It can be pretty sticky.

I often explain to my eldest son life is like a tree, the longer you live the higher up you climb; my job, as his parent, is to look down the road of life and see what is coming up.   He may need to learn things that don’t seem important right now or be aware of pitfalls that could catch him out; he’s busy growing and living in the moment, it’s my job to give him a heads up when he needs it.

The same applies with feelings.  Children, once caught up in an emotion, can’t see beyond it.  Joy is complete and unending, they are a bird soaring the highest heights, but sadness is equally all consuming.  When in the throes of sadness it can be extremely hard for a child to ‘come out of it’, it can seem self perpetuating.  It’s rational for a parent to try and ‘shock’ a child out of it by being stern or even setting a punishment, but really that is just adding stress onto a bonfire that is burning pretty high.  Just to be clear I’m not talking about ‘sass’ here, but the genuine emotion that comes from deep seated feelings.

Some questions you might want to ask yourself when trying to determine the difference are:

  • Is this outside the norm for my child?

  • Does my child seem in control?

  • Does my child seem lost or afraid?

  • What is he really trying to tell me?

When a child is yelling he might really be saying he feels afraid/alone/criticized or out of control, it is our job to step in and help them step away from the precipice.

Like any skill in life, stress management requires training and this training is best done prior to the problem arising.  The more prepared we are, our ‘safety drills’ in place, the less likely we are to get caught up in the fire when it comes.

For the last couple of years I’ve been teaching my son a breathing strategy to cope with stress.  It is very simple but it really works and pulling him out of the swirling vortex of his emotion and back to a place where we can deal with what is happening.  We’ve practiced this strategy at times when he is calm so that it can be quickly deployed when he finds himself overwhelmed.

I asked him to imagine himself in a boat.  Right next to him the water begins to boil and bubble, I tell him to row himself away as hard as he can, he does this by pushing out his breath.  Each time he pushes out a breath, blowing as hard as he can, he moves further and further away from the boiling water and feels safer and safer.  When he feels safe he lets me know and his breathing will level out.

Stress Management for Children: And Breathe...

This exercise achieves two things, it gives his brain something else to focus on and draws oxygen into his body which calms his nervous system.  When we draw air deep into our lungs our  organs can all function properly and we can find calm, if we remain in a shallow breathing state we are denying our body the oxygen it needs to respond to the stressful stimuli, leading to increased panic and fear.

A simple breathing exercise may not seem like much, but it can be a life raft for a child who is overwhelmed.  When they realize they have an escape route, a way out of their negative state, they are empowered.  It also tells them that you, the loving adult in their life, take them seriously.  By removing judgment and responding only to your child’s need for comfort and support, you are showing them that what they feel is real, it is important and that they are not a victim.

If you think this is a strategy that might work for your family, think about the following ideas and pick the ones that resonate for you.

  • Practice your ‘life raft’ strategy at a calm moment.

  • Explain why you think a plan is useful for dealing with stress.

  • Give examples of when you felt overwhelmed and struggled with your feelings.

  • Create a story that resonates for your child and ties in with a particular interest of theirs (they might prefer flying or floating over water for example)

  • Practice the exercise alongside them.

  • Ask for their input on things that might help them when they are overwhelmed.

  • Create a code word that they can use to let you know they are feeling overwhelmed when in public.

  • Make sure you are taking time to talk/cuddle/spend time aside from talking about stress management, you want to avoid this being seen as a way of gaining your attention.

  • When a meltdown arrives, remember not to meet your child at their emotional level, remember you are the guide on this journey not the traveler.

  • If the exercise does not go well don’t see it as a failure

In my next post on stress management for children I’ll be talking about using stories to help children deal with their struggles, in the meantime please do let me know how you are getting along!


SaveSave

Fairy Garden in a Box

By Mariah Bruehl,

title3.jpg

Have you heard about the lovely little fairy gardens people are making lately? The concept is for children to make a little garden space where fairies would be comfortable, should they decide to show up. Since my children have recently fallen in love with the magic of gardens and all the living things within, I knew they would be enchanted with this idea.

There are a lot of talented people who have spent a lot of time making amazing, elaborate fairy gardens (you can see a few here and here). When you’re just getting started, the sheer amount of ideas out there can seem overwhelming. I’ve found, however, that you really only need a few simple things. I love the idea of placing the items in a box, tying it with string, and presenting it to a little one in your life. The rest is up to them!

Fairy Garden in a Box

Gather a simple box and fill it with:

1. A few plants and flowers. These can be store bought, or from your own garden.

2. Dried moss. This can be found at craft and garden stores. It makes for a pretty addition and the children will love the fact that they can move it around the garden as much as they would like. The moss won’t actually grow, but it will stay in good shape with regular watering.

3. A small bag of rocks. These can be used to build things, make paths, or as decoration in your garden.

4. A few embellishments. We stumbled upon a fairy section at the gardening store and decided to buy a few trinkets, but you probably have a lot of usable items around the house and outside. Spools, thimbles, and sticks all work great! You can also fashion your own shapes out of clay. Get your children involved in finding things, they will love it!

Fairy Garden in a Box

Pick a small container or corner of your yard and get started. I assisted with the planting in our garden, but the rest was up to my little designers. They enjoyed digging in the dirt and making rock paths. Watering the flowers was especially fun for them too. I anticipate our garden evolving and changing a little every time we visit it!

Here are a few books to get you started:

How to Find Flower Fairies (our favorite!)

The Complete Book of Flower Fairies

Fairy Houses

Fairy Gardens: A Guide to Growing an Enchanted Miniature World


Helpful Hints for Successful Birdwatching with Kids

By Mariah Bruehl,

Hints for birdwatching with kids...We have been dedicated bird watchers this winter! Needless to say I was thrilled to hear that Annie, from Alphabet Glue, and her daughter share the same pastime. Annie is with with us today to share some of her tried and true tips for successful birdwatching for the budding young ornithologists in our lives.

Here in Northern Vermont, we have famously long, cold winters. Which is one of the reasons why it was such a surprise to me, upon relocating here from temperate Northern California, to discover that we also have a colorful and interesting population of backyard birds who live here year round. Both my daughter and myself have always had great enthusiasm for birds, and our excitement over the prospect of sighting the brightly colored cardinals and goldfinches that live here has made us into proper armchair ornithologists. But birdwatching is an activity that requires some amount of patience; something that can be in shorter supply for people under a certain age. Here are a handful of tips that I have found useful for making birdwatching accessible, easy and yes, even entertaining, for the small set.

Be aware of your immediate surroundings (and feel free to fancy them up a bit).

You might be really surprised by just how many birds are in your very own yard or neighborhood if you take the time to see them. Make some predictions about how many birds you might find if you sit in the yard or look out the window for five minutes, or even less time if you have especially wiggly little ones. Want to stack the deck a bit? Hang a bird feeder near an accessible window in the house. This will bring birds to the house and easily allow kids to gather near the window to watch when they arrive- without scaring any flying friends off before getting the chance for a good look.

Have a field guide at the ready. Part of the excitement for bird spotting kiddos comes from being challenged to make an accurate identification.

Having a field guide handy allows your kids to immediately start flipping pages in hopes of finding a match for the bird that they have just seen- a fun activity that lets them be both naturalists and detectives. It can easily be turned into a whole family game of “find that bird” and you can even give yourselves points for great guesses. Keep a family “life list,” or list of all of the birds that you have seen, in a prominent location in the house (such as on the refrigerator) and update it with new birds as you find them.

birdwatching

Binoculars aren’t bad either.

My daughter is of the opinion that even if you don’t use them while you are in the field, having a pair of kid sized binoculars is awesome when it comes to making you feel official. She absolutely recommends having a sturdy, plastic encased pair at the ready, and I am inclined to agree. If you choose to leave the backyard and hit the trail to look for birds, you might also make sure to pack things like water and a really tasty snack. This may seem obvious, but remembering this detail can make a few minutes of patient trailside sitting go much more smoothly, increasing the odds that you’ll get the reward of a sighting.

Join the bigger birding community.

Although birding is a bit more old-fashioned as hobbies go, the advent of the internet has meant great things for birdwatchers. It is easier than ever to find out about local bird walks, talks and guided tours, many of them designed for kids. Taking part in one of these organized events can be a great way to get kids into the community spirit of birding. You might also think about having your family participate in events such as the Great Backyard Bird Count or other community counting events. You can read up on some of those here.

Get excited about birds by spying on some really amazing ones!

Part of getting kids excited about the idea of birdwatching is getting them excited about birds! Your local science or nature center may have birds that you can view up close, particularly if there is an aviary nearby that rehabilitates wild birds. You can also view some really interesting birds through the cameras run by the Cornell Lab of Ornithology. Watch herons build nests and hatch eggs, or view hawks feeding their chicks. Pretty cool stuff! You can find the cameras here.

For some more bird watching goodness make sure to check out…

Good birding luck to you and yours!


Crafts for Kids: Animal Mosaics

By Mariah Bruehl,

Animal Mosaics

Randi from Swoon is with us today and is sharing a wonderful mosaic project that is not only good for developing fine motor skills, but serves and a great invitation to learning about the world of animals.

Do your kids love to cut and paste paper as much as mine do? I remembered a paper mosaic project I did in a college art class the other day and decided to modify it a bit for little hands. According to Wikipedia mosaic is the art of creating images with an assemblage of small pieces of colored glass, stone, or other materials. 

You can modify this concept to be as easy or hard as you would like. I’ve included four simple animal shapes to fill in, but you could also use the same technique with a more complicated picture with several sections and colors.

You will need: Old magazines or pieces of colored paper, scissors, a template or a drawn shape to fill in, glue or glue stick, paint brush (optional)

Animal Mosaics

1. Choose your colors and cut! Use scissors or a paper trimmer to cut small squares of similar color out of paper.You can use pages ripped from magazines or colored paper of your choice. Searching through magazines is more time consuming, but I love the dimension the varied squares add to the final product. Plus it’s a good time to talk about colors as you search! We chose blue, yellow, pink, black, and orange.

Animal Mosaics Animal Mosaics

2. Glue your paper down. Working in small sections, apply glue to shape first and then carefully stick pieces of paper down, staying within the shape. A glue stick is easiest to work with for little hands. I used a bottle of glue and spread it with a paintbrush. Older children will be able to fill the shape with squares carefully enough to cover it completely and not go over the lines. You may need to trim a few pieces to fit within the shape. This process can be challenging for little ones, so it’s best to just let them have fun gluing squares wherever they want!

Animal Mosaics

Click on the pictures below to download the corresponding template. My children really enjoyed this rainy day craft and I hope yours do as well!

Bear TemplateDuck Template


Rabbit TemplateWhale Template


DIY Lego Puzzles

By Mariah Bruehl,

DIY Lego Puzzles

Rebecca from ThirteenRedShoes is with us today and is sharing a wonderful project she recently discovered, which is great for hand-eye coordination and for inspiring the young builders in our lives.

Last year, I ran across this pin on Pinterest. It led to the most adorable idea by Kids Activities Blog, to create your own puzzles using Duplo blocks and photography!  There are so many amazing ideas on blogs today. I pin so many of them, but this was one that I really wanted to create and it was very quick and easy. I would say less than 20 minutes and you are away!

Here’s the idea: Use photos of various Duplo/Lego configurations as puzzle cards that children can recreate with their blocks at a later date.

DIY Lego Puzzles

DIY Lego Puzzles

Here’s how we did it:

  • The Duplo pieces were set up on a board we had painted to use as a neutral and uncluttered background.  A simple blanket or sheet of white paper could also work well, simply use what you have available.
  • The next step was to take photos from above as an aerial image or bird’s eye view.  I like to take all of my photos in spaces that are filled with natural light, but not necessarily bright sunlight.  Close to a large window or door is often ideal.
  • I made sure to change the colors and shapes of the Duplo pieces around so that there was a varying degree of difficulty in order to cater and differentiate for the ages and abilities of my boys (aged five and two).
  • Once I had a lovely little collection of images on my camera (it is very hard to stop once you start, so set yourself a time limit!), I uploaded to my computer and printed them out on my home printer.  You could also laminate your prints, print them on photo paper,  or even create a book, whatever suits you and your budget.
  • Little R was at school while we created this little provocation, so Little F helped to design some of the interesting Duplo creations himself.  If you have a little person around while doing this, it makes it so much more enjoyable! They get so much out of creating the image, seeing it on the screen, and finally seeing it printed out.  I aim to involve my children in these creating times as much as possible.
  • Once printed, place the puzzle cards on a  clipboard. Place a basket of the blocks used next to it in a lovely sunny spot, sit back and allow the littles to find the provocation, and enjoy.

DIY Lego Puzzles

You could use anything really for this activity, Duplo blocks are just a starting point.

You could take photos of:

  1. natural materials found in the garden such as: seed pods, petals, or leaves
  2. wooden blocks
  3. mini figs
  4. toy dinosaurs
  5. animal figurines
  6. rocks and crystals
  7. shells and sea glass

The possibilities are only limited by your imagination.


From the Bin: DIY Recycled Vases & Flowers

By Mariah Bruehl,

DIY Recycled Vases & Flowers

Heather from Poppy Haus is back today with another creative craft project, where the materials can be gathered directly from your recycling bin. I love that these projects show children the value of reusing everyday items as well as how to think outside of the box when it comes to pursuing creative endeavors and making the ordinary extraordinary.

I have always been a sucker for well-designed packaging.  The teardrop shape of Method soap containers are one of my favorites. I’m particularly smitten with the look of their recycled ocean plastic bottle, and using that means you are up-cycling recycled ocean plastic. How’s that for being green?  Obviously the best thing to do with an empty Method container is to refill it, but if you have a few extra empties lying around, I have an easy project using their soap bottles, and some empty yogurt cups to pretty up your house for Springtime, or decorate the table for Easter brunch.  Try mixing your own paint colors to experiment with hues and tints, and be creative!  I stamped a leftover crepe paper sheet using a pencil eraser to make the polka dot runner, and used flowers from our yard to decorate our table.

DIY Recycled Vases & Flowers


DIY Recycled Vases & FlowersMaterials: Method soap bottles, or any other plastic container to be used as a vase

Yogurt cups

Acrylic paints (white plus colors)

Scissors

A heavy book (to press)

Fresh flowers

DIY Recycled Vases & Flowers

1. Wash and dry the plastic containers

2. Mix paints to desired color

3. Paint 2-3 coats on vases, allow to dry between coats

4. Cut vertically down the yogurt cups, dividing first into quarters to keep even

5. Gently open up the cup, and press with a book for about 10 minutes

6. Trim the cup into shorter petals

7. Paint the flower cups a contrasting color

8. Fill the vases with water and flowers

DIY Recycled Flowers & Vases

Books to Inspire…


Yoga for Kids: March is Like the Wind

By Mariah Bruehl,

Yoga for Kids: March is like the wind

Monique Barker is with us today sharing some great yoga poses that we can do with our children during this windy time of year. I love that Monique’s yoga series inspires us to tune into our bodies while at the same time honoring the changing seasons.

Hello.  Welcome back to our monthly Yoga series!  Given the weather we’ve been having lately here in the Northeast and looking at the busy March calendar, I’ve had the idiom “March comes in like a lion and goes out like a lamb” on my mind.  It struck me that this would be a good basis for a Yoga sequence but I just wasn’t sure how.  Then I came across this lovely little book at our library and it all came together.

The book tells a story about the many moods of the wind and a child that wants “to play like the wind.” We see that the wind can be mischievous…

Blowing hats off...

Blowing hats off

playful…

Making flags wave

Making flags wave

helpful…

Sailing a boat

Sailing a boat

and strong.

The accompanying Yoga sequence incorporates many of the wind’s moods and abilities (which are a lot like children’s).  It will bring your child from a gentle breeze to a strong, playful wind and back again.  Even without the book, I know you’ll have fun acting out all the characteristics of the wind with your child.  Just click the download to get started.  I hope you enjoy!
Download: March Yoga: Like the Wind


Reggio Activities for Toddlers

By Mariah Bruehl,

1

My little daughter Sarah is almost two. She is a mischievous little girl, but also oh so inquisitive and curious. She wants to explore everything. She is at such a great age; still exploring most everything with her senses, but also starting to ask questions and express what she sees and hears and feels. Every fortnight or so, sometimes monthly, I bring out some new materials for Sarah (and her almost 4 year old brother Jack) to play with and explore. Here’s what we have on our playroom shelves at the moment.

21

Natural gems & rocks: A tray of uniquely textured rocks and gems is very appealing to little people. My daughter enjoys the colors and smoothness of the agate as well as the sharp spikes of the amethyst.

The smaller gems, with their brilliant colors reflected in the small acrylic mirrors, instantly caught Sarah’s attention. Each one with a different weight, shape and color. She likes to run them through her fingers as well as use the small cups to drop the stones into as she listens to the sounds they make.

I try to use natural materials whenever possible. At almost two, Sarah still explores heavily through her senses. I bought these stones from a local science store. Although collecting stones and pebbles, or maybe sea glass if you are lucky enough, would be just as appealing.

3

Exploring color & light: This exploration is a favorite at our house. Careful experimenting is needed to make the crystal ball and the prism cast rainbows across the walls. While the color paddles make the world change color when placed up to a little one’s eye.

Playing with mirrors: Right from when Sarah was a newborn, she has had mirrors to gaze into. She never seems to tire of watching her face move. Mirrors can be used for a simple exploration like this one, or to add a different perspective to investigate, like in the gems exploration above. I like acrylic mirrors as a base as they won’t break, but when using the mirror to investigate her own reflection, I prefer glass as the image is clearer. These are shaving mirrors I picked up from the supermarket and a home ware store.

Sarah is still scribbling, she isn’t drawing figures yet, but she enjoys mimicking her older brother, who is a prolific drawer, and so this exploration has a small pencil and paper. The mirrors alone though are enough to engage her curiosity.

41

Magnets: This is another exploration which is continually on our shelves. At first I had some non-magnetic items on the tray but Sarah soon tired of these, not interested in distinguishing between the two, instead more fascinated by the way the magnets worked and how many magnetic items should could pick up at the one time.

Natural materials for imaginative play: Everyday, Sarah’s pretend stories become more intricate. She started creating little stories when she was about 18 months old; small wooden people started to say ‘hello’ to each other. As her interests grow, I like to have a range of materials on offer for small world play. Natural materials make wonderful additions to any play scene. These simple tree blocks were made from a fallen branch and the green bush is simply fluffy wool rolled into a ball. Rocks and shells, sticks and flowers all add extra appeal.

5

Playing with color: Do you remember when your child first understood that things could be different colours? For my son it was yellow. For Sarah it started with red, everything was red. These two activities help her to identify different colours. She enjoys matching the apples to the cup and the shooting stars to the colour swatch. I put the swatches on a keyring so Sarah can play with them when we are out. She likes to flip through them and say the colours, often incorrectly, but that doesn’t matter.

6

Using real musical instruments: Real percussion instruments are reasonably priced and are so much more pleasing than cheap plastic ones. Children are more likely to be attracted by the sounds of a genuine instrument and so will want to play. In our basket we have claves, finger cymbals, a cabasa, castanets, a triangle, guiro, harmonica, tambourine and a two tone block. Along with some small drums and bells. I like to keep them in a small basket next to some play silks for dancing.

Nuts & bolts: A simple and very engaging activity for toddlers. Considerable effort and persistence is needed for this activity. Although it’s quite challenging, my daughter finds it very rewarding. You can see I have one nut and bolt together, a subtle hint of how she might approach this activity.

Reggio Activities for Toddlers

Wind wand: Six lengths of long ribbon and one small cane hoop and you have a wonderfully whimsical toy just perfect for spinning and twirling. Sarah likes to dance with hers to music, run throughout the house with it trailing behind her. Quite often we’ll take them to the park on a sunny day. We have several, in all different colors. They take no time at all to make and cost only a few dollars.

Perfect pairs: Sarah was given this set of 12 matching pairs for Christmas. It is just right for her age. Each fabric square is unique enough so she can find the matching square. Again, another simple project you can make. Each square is 10cm x 10 cm (4″x4″). Start with matching one pair, then two and once they have understood the idea, introduce more pairs.

Reggio Activities for ToddlersAn evolving nature tray: A tray of interestingly textured natural materials is instantly appealing to little people. Sarah wants to investigate every item, holding it in her hands, pressing it to her face and crunching it between her fingers. This is one of the easiest explorations you can put together.

Colored window blocks: We love playing with these blocks in the morning light as they cast colorful shadows across the carpet.

An investigation is something that encourages your child to think, experiment and explore with their senses, and doesn’t have to be difficult to put together. It doesn’t have to be expensive either. I really enjoy thinking about new investigations to create for Sarah.

She is at such a wonderful age where almost anything engages her if presented in an appealing way. The best part for me is watching her play and explore, seeing the deep concentration she has when she is experimenting, and smiling when she sees something or feels something, for the very first time; that sense of wonder. That’s what it’s all about.


Times Table Fortune Tellers (with printable tally sheets)

By Mariah Bruehl,

Times Table Fortune Tellers. Printable Tally Sheet included!Joey from madebyjoey is with us today to share a fun way for children to master the multiplication facts. My girls love making these fortune tellers and I am sure that your children will too!

Practicing multiplication often seems repetitive to children, but it is beneficial to have these math facts mastered before entering the intermediate grades.

Paper fortune tellers have been around since the 1950’s and have been adapted in many ways for many different uses.  This game will help to determine which multiplication equations have been memorized and which still need review by using my printable tally sheets.

Here is how I made our multiplication fortune tellers (btw – kids can help make these too, coloring is optional):

Times Table Fortune Tellers. Printable Tally Sheet Included!

  1. Trim 12 sheets (8.5″x11″) of white paper into 8.5″ squares.
  2. Fold the square in half both ways to create 4 boxes.
  3. Lightly color each box a different color.
  4. Flip sheet over and fold each corner to the center.
  5. Flip sheet over again and fold corners to the center.

Now you have folded the paper into a fortune teller you can start writing the equations and hidden answers!

Times Table Fortune Tellers.

  • On the side with 4 colored squares write on each square one multiplication equation starting with (your number) x 1, up to (your number) x 4.  (in the example my number is 2)
  • Flip over and continue writing equations in the colored triangles from (your number) x 5 up to (your number) x 12.
  • Open each flap and write the answer.
  • Finally open up the fortune teller with the uncolored side facing up.  In each corner write the answer to the equation on each of the four colored squares.

Times Table Fortune Tellers.

Now it is ready to use!

Next print off my printable tally sheets.  I have trimmed and mounted ours onto extra water colour paintings. (a good way to reuse artwork!)  I then “laminated” the sheets by trimming a clear plastic page protector to create a sleeve for 2 tally sheets to slide in back to back.

Note:  If you know that your child has memorized some of the numbers then only make up the sheets that you need.

Times Table Fortune Tellers.

To play you will need:

  • fortune tellers
  • laminated tally sheets
  • non permanent felt pen
  • damp cloth to clean tally sheet

Game can be played with 1 or 2 players.  If playing with 2 players you may wish to make up 2 sets of tally sheets or have both players work together to complete all of the equations.

To play:

  • Teach child how to maneuver the fortune teller with their fingers.
  • Have Player A chose an equation from the closed fortune teller, Player A then answers the question and Player B verifies that they are correct by checking hidden answer.  If so, Player A writes the answer on the tally sheet next to the equation chosen and mark that it took 1 try to get the correct answer.  If they do not say the correct answer, they mark 1try but must try that equation again on another turn before they can fill in the correct answer.
  • Player B then maneuver the fortune teller with their fingers that number of times (ie:  2×2=4 times) which then reveals the inside of the fortune teller to Player 1.
  • Player A chooses another equation and answers the question.  Player B then lifts the flap to see if they have said the correct answer.  If so, Player A records the answer and the number of tries on the tally sheet.
  • Player A then passes the fortune teller to Player B and takes a turn.
  • Whether the Players are competing or working together the game is finished when all the answers have been filled in correctly.

When the tally sheet is complete it will be clear which equations need a bit more review if they required several tries to get the correct answer.  By concealing the answers on the fortune teller, it gives the child(ren) an opportunity to work independently and self correct their work.

Introduce one fortune teller at a time until the child feels confident that they are ready to try more.  They do not need to be introduced in any particular order although it is common to start with the 2’s, then the 3’s, 5’s,10’s, and 11’s as many find that they are the easiest to remember.

I hope that you and your child(ren) find this a helpful game that aids in learning the multiplication tables.  This project can also be revised to learn addition and subtraction equations.


From the Bin: DIY Art Caddy

By Mariah Bruehl,

From the Bin: DIY Art Caddy

I am so happy to welcome our newest contributor Heather Jennings, who is the creative force behind the inspiring blog Poppy Haus. She is sharing a great way to make an art caddy out of everyday items that you can find in your recycling bin.

Hi there, I’m Heather Jennings from the blog Poppy Haus. I’ll be doing a series called “From The Bin” featuring upcycled DIY’s for kids.

In our kitchen we have a little white recycling bin that has become the source for many an art project.  Egg cartons become dinosaurs, toilet paper rolls become binoculars, and other crafty play things, but sometimes we upcycle our containers into more permanent, well- designed objects for our home. As the mom of two little boys, I find myself back in college, age 35, studying interior design.  My homework involves a lot of graph paper and sketching, which peaked the interest of my 6 year old son.  I wanted to explain what I’m doing in a way that he could really understand, so I came up with this art caddy project for us to do together.  It’s example of how younger school-aged children can measure, draft patterns, build objects, and consider finishes, using materials found around the house.

Do you want to make an Art Caddy too?

DIY Art Caddy

DIY Art Caddy

Steps:

1.  Remove paper from cans, wash and dry completely

2.  Using a piece of string, measure the circumference of the can.  Mark length on graph paper.

3.  Using a popsicle stick, mark the height of the can.  Mark the height on graph paper.

4.  Count the squares to find the length and height, marking the corners, and draw the rectangle

pattern.

5.  Place the pattern over the craft foam and mark the cut lines.  If you are using smaller pieces

of foam you may need to cut multiple pieces.  Try to keep them even in size to hide the

seams when connecting in step 11.

6.  If using cork to line the interior base of the can, trace around the top of the can and cut out.

DIY Art Caddy

7.  Have a parent help spray paint the interior, rim and base of the cans, allow to dry completely.

8.  Heat the glue gun, carefully draw a line of glue on one end of the foam.  Younger children will

need help with this step.

9.  Attach the glue-lined side to the height of the can and wrap tightly around, marking a second

glue line and pressing to seal the cover.  Glue additional pieces if necessary.  Finish all the

cans.

10. If applying cork bottom, slip in and press to attach.

11. Arrange cans, make sure to face seam lines together.  Apply lines of hot glue along the

seams and press for about 10 seconds to seal.

12. Fill your caddy with your favorite art supplies. Way to upcycle