Category: All posts


Raising Helpers

By Mariah Bruehl,

Raising Helpers

We’ve spent a great deal of time trying to decide how to create a system of chores that works for us and our young family. Like many other parents, we started out using a rewards based chore chart when our oldest was a toddler. Prizes were a great motivation at first, but over time we could recognize that she was largely missing the point and I eventually grew tired of handing out prizes for the simplest of tasks. Now we’ve fallen into the trap many parents are in: besides asking our children to be generally neat and pick up their toys, we tend to do most of the chores ourselves.


The conclusion we’ve reached is that everyone who lives in the house with the family should be expected to contribute in some way. Rewards and allowances shouldn’t be given as a response to this contribution. Young children love to help, all they need is encouragement, consistency, and a loving parent or teacher to teach them how to help. For those of us applying this way of thinking to an existing family-where do we start? And, what can really be expected of young children?


Every family has their own way of operating, but hopefully the progress we’ve made in our journey can help you define your own approach. Our children are 6, 4, and 18 months. We’ve been allowing our youngest to help and teaching him new things when he seems interested, such as sweeping, throwing things in the garbage, and helping move clothes from the washer to the dryer. It’s fun to see him excited about helping, but there are no expectations or set chores for him yet at this time.


Here are a few suggestions for children from 2-6:


1. Define your everyday expectations. These are simple tasks that are attached to daily family life. Our 4 and 6 year old are expected to bring their dishes to the kitchen after meals, clean up spills, put their laundry in the basket, help put away clean clothes, pick up toys and games, make their beds, and throw garbage away. Speak of and enforce these tasks often and they will become a way of life. This is an area we are hoping to grow in! I believe my children are capable of more and I would love to see them become more independent and confident as their skills grow.

Raising Helpers


2. Rotating and Sporadic Tasks. These are tasks that don’t come up everyday, but on a weekly or sporadic basis. Examples would be: taking the garbage out to the curb, mopping floors, yard work, and watering plants. Look at your tasks for the week and ask your children to help you.  To make things fun, we’ve decided to add a “helping envelope” for both children to the wall. A slip of paper with a picture of their “job” for the week will be inside each envelope at the start of the week. You can get creative with these. Does your child really love to sort things? Does she love to help in the kitchen? Does he love to be outside? Put them to work doing something they love!


3. Have Patience.  As much as children love to learn a new skill, it can be difficult to learn a new task. Look at it as an opportunity to spend some extra time with your child. No, they’re not going to clean things exactly as you do. And yes, it will take them much longer. But, by teaching them to contribute and care for the things they own you are giving them an invaluable gift. Turn up the music and make it fun!


Here’s a helpful chart that’s been making the rounds on the web lately (source) :

Raising Helpers

How does your family handle household chores? I would love to hear about your experiences!

Olympic Inpsired Activities

By Mariah Bruehl,

Olympic Inspired Activities

Today Emma from 95 Acres of Sky is with us to share some great ideas for Olympic inspired activities to share with the children in our lives.

A year and a half ago, in the summer of 2012, I fell in love with the Olympics.  I think it may  the fact that it was being held in my home country that triggered in me the excitement and enthusiasm of my own childhood, but it took no time at all for my boys to become as enthralled as I had been at their age.  For once I was able to share a screen experience with my boys rather than restricting it, they could watch any of the coverage, any of the events, without my worrying about what they were being exposed to.  More than that, they were witnessing people who were in the spotlight for actually achieving something, rather than for behavior that is less than commendable.


At the core of it, this is what I adore about the Olympics.  These athletes are people I can point to and say “See!  Look at what is possible!”.  My boys are witnessing what hard work and dedication can achieve and I am overjoyed to expose them to those values, values that are often overshadowed by superficial glitz and glamor that ignores the need for simple hard work.


When I saw my eldest son, pelting along our bottom field and launching himself over a hay bale, I knew the message had taken hold.  He was inspired by what he’d seen and wanted to push himself to his own limit.  It was a lovely thing to witness and we’ve shared other moments together, watching videos of ice skaters as the boys learned to skate this winter, videos of ballet dancers launching themselves into the air when they are unsure if ballet can be ‘for boys’.  I’ve been able to show them wonderful examples of what endeavor can really look like.


Living as we do in the frozen north (that’s not a metaphor, it really is cold up here) the winter Olympics are even more relevant to us.  The sports are all cold climate ones, many of which are in the mainstream here in Canada.  We have easy access to skating rinks, ski hills and are literally surrounded by snow.  The winter Olympics shows us what is possible in a climate like ours, inspiring us to get outside and make the most of it when possible.

Activities Inspired By the Olympic Games


As homeschoolers we have the luxury of spending our school time exploring our subjects of interest, but I’m sure that all of the following activities and ideas would work just as well on a weekend or after school.  Even just a few books at bedtime can serve as a gentle and fun introduction to this great event.


  • This month we are using Amanda Bennet’s unit study on the Olympics as a spine for our work.  She really has done all the hard work for you!  The unit is broken up into days and weeks with lesson plans outlined and resources hyperlinked.  This is a great opportunity to explore the Olympics in more depth, researching different events, learning about the history of the Olympics and of the great athletes who’ve participated through the years.

  • The Magic Treehouse book Hour of the Olympics and the companion fact tracker book Ancient Greece and the Olympics, is a great way to explore the world of Ancient Greece and learn about the origins of the Olympics.  Brother and sister Jack and Annie magically travel through time to the ancient Greek Olympics and experience much magic and adventure.  The companion book allows you to explore the background to the story revealing even more historical details.

  • We are exploring what our library has to offer around the subject of the Olympics, each branch will have different offerings but look out for the Usborne book The Story of the Olympics for a good overview of the games.  We also enjoyed Look What Came From Russia, as an introduction to Russian culture, as well as Asterix at the Olympic Games, which was very popular with my 8 year old son!

  • If you are looking for some crafty fun I have a pinterest board where I’ve begun compiling crafts for different ages around the theme of the winter Olympics.  So far we’ve made our own Olympic torches as well as a miniature ice rink and our own ancient Greek Lego stadium.

  • The online world has plenty to offer too, there is an official Olympics app as well as apps from specific news outlets, we have the one from CBC for Canada specific information.

  • If you’re exhausted after all that Olympic related fun, why not enjoy a movie as a family?  One of my all time favorite films is Chariot’s of Fire, a truly inspiring story can be enjoyed by the whole family. This film really highlights the dedication and determination of athletes participating in the Olympic games 90 years ago.  Or for the slightly older crowd Cool Runnings tells the true story of the first Jamaican bobsled team, a great movie to enjoy over a big bowl of popcorn while the snow falls outside.


For me the true message of the Olympics is to celebrate excellence and to enjoy watching what is possible when determination, devotion and passion meets hard work.  I delight in sharing with my children the excitement of witnessing people who strive and strive again, to achieve something truly exceptional and worthy of our admiration.  We can’t all be Olympic medalists but we can all encapsulate, even in the very smallest of ways, the Olympic spirit in our own lives.

Growing Your Child’s Vocabulary

By Mariah Bruehl,

Growing Your Child's Vocabulary

Children’s imagination is powerful and surprising. It is able to create fantastic worlds and develop their abstract minds for hours. However, Charles Chaplin was right when he said “imagination means nothing without doing”. Imagination, per se, produces only dreams. If we want our dreams to turn into reality the first thing we need to do is to express them in an idea. And for that, we need words.

We often hear kids complaining that they are not able to express something they’re thinking, some dream they had or something they’ve learned. It is most frustrating for them (think about how hopeless you feel when you can’t make yourself understood in a foreign country), so increasing their vocabulary is important to improve their communication capacities and boost their self-esteem.

Also, a kid that can properly express himself will find it easier to understand his feelings and emotions. Those “something’s going on but I don’t know how to explain it” moments that all parents hear at least once start to decrease when their little brains are able to find the right words.

To help you with this, here you have three useful ideas:

1. Try to not scale down your language too much when you are talking to your kids: we don’t go by “vroom vroom”, we go by car. We don’t have a “woof woof”, we have a Bulldog. That is not “boo boo”, it “hurts”. Even if they sound adorable when they make mistakes or when they misplace words try to always correct them nicely.

2. When playing with them, try to broaden the stimuli you use instead of using “children only” material all the time. A good example is this website, for instance.

3. If your child can read don’t rush to explain to him the meaning of new words. Buy him a good dictionary and make him search for the definition. Forget the Internet. The slower process that comes with the physical search is more effective for remembering new word meanings.

Growing Your Child's Vocabulary

And finally, a tool for you to try, the word jar.

Find a jar; (you can also use a box) and label it “words”. Every time your child comes in contact with a new word, make him write it on a piece of paper and put it inside the jar. You could also do this with the second language they are learning at school. Carry the jar with you on those occasions where you have to sit for long hours (at the doctors, when traveling…), or save it for a rainy day.

Ask your child to take out one word and to try to form a sentence with it. With practice words become familiar, and we can throw the learned slips of papers away and substitute them with new ones. Easy, fun and really effective.

Growing Your Child's Vocabulary

SaveSave

SaveSave

In the Community: Experiential Learning

By Mariah Bruehl,

Experiential Learning

Monique of Green Acorns is with us today with to share the power that comes with introducing children to role models within our communities.

I educate my three children at home.  It is one of the most challenging roles I have taken on and also one of the most rewarding.  As my children get older and their interests broaden, I have had to accept that I cannot teach them all that they desire to know.  I can, however, continue to support their interests by providing them with the right tools.  One of our goals for this year has been to get out in our community more and take advantage of the wonderful resources it’s members have to offer.

Experiential Learning

As I walked down the “artist wing” of a local business complex one day, I noticed one particular studio with its doors wide open.  In speaking with my friend in that building I found out that this particular artist loves for people to pop their head in and see what he’s working on (and his dog LOVES making new friends).  Aha!  I had found an artist who was willing to talk to my children about painting techniques, give a demonstration, and answer their questions!  That small moment set me on a course of connecting with other community members who may be willing to give their time and talents to nurture my children’s interests and enhance their learning.  So far I have connected with someone to teach basket weaving, a pilot to demonstrate the physics of flight, an architect to discuss design principles, a neighbor to teach knitting, and some bird and wildlife biologists.

Experiential Learning

Some of these connections may be a one time meeting and some will be on-going but all will positively influence my children and will foster a deeper level of learning.  Children learn best when what they are learning is relevant to their interests and they are thoroughly engaged.  This type of experiential learning can also improve confidence and communication skills, develop a sense of citizenship, and allows children to see how skills apply in the broader world.

If this is something you would like to try for your child, whether you home-school or not, but you’re not sure where to begin or it seems overwhelming, try starting by reaching out to family and friends.  Think about your child’s interests and consider who you know with skills that match those interests.  Is your child fascinated with wood scraps and likes to fit things together?  Perhaps a grandparent has some building or woodworking skills.  Does your child love birds?  Perhaps there’s serious bird-watcher in your neighborhood.  Never be afraid to ask.  Start with one area of interest and be clear on what you hope, and your child hopes, to take away from the experience.  Let yourself be open to where the experience may lead and continue to provide your child with the right tools that will continue to foster his or her love of learning.

Now if I can find a local stunt-person for my son…


Designing Spaces for Children: Texture

By Mariah Bruehl,

Designing Spaces for Children: Texture

“Space speaks to us. Long corridors whisper ‘run’ to a child; picket fences invite us to trail our hands along the slats. Physical objects have emotional messages of warmth, pleasure, solemnity, fear; action messages of come close, touch me, or stay away.“       -Jim Greenman

Children explore their surroundings with all of their senses. From the moment of birth, touch is an essential component to communication. Texture is appreciated almost always by touch yet it can also have a strong visual presence. We each experience texture differently so it is important to include a variety of textures when creating spaces for children. The aim should be to create a multi-sensory setting with many different materials. Materials that are rough and smooth, warm and cold, wet and dry, hard and soft, and so on.

Designing Spaces for Children: Texture

Furnishings like pillows, rugs, and textiles are soft and promote a feeling of security and belonging. Including plants, wood, and other natural materials adds complexity and intrigue, especially when used in unconventional ways.

Baskets provide wonderful texture. Using them to store materials, such as books, is an attractive way to organize that adds both dimension and warmth to your space.

Designing Spaces for Children: Texture

Curious how to display the many treasures children find outside in nature? On this shelf, moss is placed on top of a mirror while bundles of pine needles lay on a large felt circle. When materials are displayed in an inviting way, children are encouraged to explore their properties. This supports the development of observational skills where children can begin to differentiate, categorize, and classify.

Designing Spaces for Children: Texture

There are also countless sensory experiences that encourage exploration of texture…

Designing Spaces for Children: Texture

What materials are you, or your children, most drawn to?  Where is texture visible in your space?


Weaving 101

By Mariah Bruehl,

Weaving 101

Heather of Poppy Haus is with us today to share a DIY on a wonderful weaving project for kids and grown-ups… I can’t wait to try it!

In addition to being a mom and a DIY blogger, I am also an Interior Design student.  Earlier this year I took a textiles class where I learned about fibers, fabrics, printing techniques, and weaves.  One of our final assignments had us building simple looms from  a piece of cardboard and string to create a wool tapestry using a variety of weaving techniques.  For this post, I sat down with a couple of crafty 10 year olds, Ella and Amelia, and following the same steps, they built their own looms and tapestries. This is my favorite kind of project; the kind where math and art combine, and composition and craftsmanship influence the end result.  I think they did a beautiful job!  Here’s the tutorial in full.  Follow along with the photos and it won’t feel all that complicated, I promise.

Weaving 101Weaving 101

Materials:


  • 1 piece of cardboard, at least 8 inches wide, and 15 inches long
  • Embroidery thread, or thin string, about 14 yards
  • 1 piece of construction paper or cardstock
  • Pencil
  • Ruler
  • Scissors
  • Yarn (multiple colors)
  • Wooden dowel or stick, cut to about 8”
  • Leather or twine for hanging

Weaving 101

Step 1: Making the loom


  • Using a ruler, mark the center point of the width, and mark ¼” segments 10 each side of center, a total of 21. Repeat on the other end.  Cut the segments ¼” deep with a pair of scissors.

  • Wrap the end of the thread around the outermost cut, winding in one or two spaces, then back to the outer cut to secure the thread.

  • Wind around, lengthwise, end to end, with decent tension (do not warp cardboard) until you reach the last cut on the other side, secure in the same way, by wrapping back in and out, and trim the end.  You have made the warp! And you are ready to weave in the yarn, crosswise, this is called the weft.

  • Fold a piece of construction paper in half lengthwise, then fold until it is about ½”x 8”, insert under the strings on one end. This lifts them for weaving.

Weaving 101

Step 2: Plain Weave (Tabby Weave)


  • To start weaving,  wrap a few feet of yarn around your pinky and thumb to form a skein.

  • Starting from the left side, with the loom in front of you, lengthwise, paper side closest to you, insert  the end of the skein in and out the first few warp strings, tuck the end down toward the paper.

  • Starting from left to right, weave over and under each warp thread, back and forth either side.  keep it really LOOSE, if you make it too tight, it’ll pull the warp threads together and the tapestry won’t be straight. Do about 10 rows to make a full inch.  Push it down to compact and make the weave tight.

Weaving 101

Step 3: Sloping


  • After an inch or so of tabby, starting 4 warp strings in, anchor your yarn as you did with the plain weave, and work back and forth, plain weave, to the other side, 4 places in.  Do this for 5 rows, the drop a warp thread each side, repeat for another 5 rows, drop another each side, repeat, until you get to just two warp threads, winding around 5 rows, cut off and tuck under. You now have a big triangle.

  • To fill in the sides of the triangle, tabby back and forth in different colors, varying the width of each row, to create a gradual sloping effect.

  • Follow with another inch (10 rows) of plain weave.

Weaving 101

Step 4: The Swedish Braid


  • Anchor your yarn, and go over 2 warp threads, looping under the 2nd thread, repeat all the way across.

  • Go back and forth at least 4 times to create an inch of braid.

  • Follow with another inch of  plain weave

Weaving 101

Step 5: Dovetail


  • Working with three different skeins of yarn, create color block by interlocking weaves as they meet on warp yarns.  To do this divide the loom into three sections, of 7 warp threads each. Tabby across, when, where they meet, twist the yarns around one another and turn back, the middle row will interlock on both sides, or one of the outer blocks can not connect, leaving a slot.

  • Follow with another inch of plain weave.

Weaving 101

Step 7: RYA Weave (the fringe weave)


  • This one is fun! Cut yarn several (40-60) 1 ½ inch pieces of yarn.

  • Center the yarn over two warp threads and pull ends up through the warp.  Go across one row.

  • On the return (right to left) drop the first warp thread so that your knot will offset from the first row. Repeat for 3-4 rows.

  • Follow with an inch of plain weave.

Weaving 101

Step 8:  Tie it Off


  • Pull the paper guide out of the loom, and compress the weave, it will be about 5”x5”.

  • Cut the warp threads (leaving 5 inches of thread on either side to tie off.

  • Use a square knot to tie 2 threads together at a time, trim flush with the tapestry.

Weaving 101

Step 9: Tassels!


  • I made pom-pom tassels for the girls to hang off their tapestries.  To do this just wrap yarn around the tines of a fork, about 50 revolutions.

  • Remove the looped yarn, tying around the middle with another piece of yarn.

  • Cut the loops and even out to make a perfect ball

  • Attach to the back side of the tapestry with a piece of yarn, just by knotting through some of the weave under the RYA tufting.

Weaving 101

Step 10: Hang and Enjoy!


  • I attached the tapestry to the dowel by looping pieces of yarn through the weave, tying it off, trimming and inserting the dowel.

  • Knot a piece of leather cord around either end of the dowel and you are finished!


Ideas + Resources for Collaborative Art

By Mariah Bruehl,

Ideas + Resources for Collaborative Art

Rebecca from Thirteen Red Shoes is with us today to share some inspiring resources for creating collaborative art with the budding young makers in our lives.

I just adore the concept of creating with your child.  There are so many different ways in which you can create with the littles in your life. It just takes a little planning and preparation in order for it to be successful.

Below are a few ideas to help you free your creative side and spend some time exploring the imaginative side with your favorite little people.

Online Resources:

1. Busy Mockingbird blog.  Particularly this most delightful post, which discusses the unexpected collaboration of the artist with her four year old. The line “ if you can’t share, we might have to take it away ” was spoken by her daughter one afternoon when Mica brought out her new sketchbook and made her change her mind about components of her art.  The final products between mother and daughter are so very inspiring. I want to begin collaborative art with my little ones tomorrow!  Keep an eye on the TED X talks as Mica Angela Hendricks is preparing for a talk at the moment.

2. Amag  This is an online architecture magazine for children and adults to engage in together.  It is part of the Open Educational Resources  hub, which enables family access to educational content from around the world.  This is such an intensive program.  There are endless ways in which this site can foster creative development.  The supportive education content that goes with each article is simply amazing.  This is a concept I hope to share with my boys.  An example of a learning experience can be found here.

3. Made By Joel Joel is an artist and designer who founded this wonderful site. He offers such an amazing range of activities which are often collaborative in nature and engaging.  If the concept of drawing and creating freehand is intimidating at first, why not start with coloring pages to sit down and enjoy while dinner cooks on the stove?  Some free coloring sheets can be found on Made By Joel’s site here, or you can purchase posters from other resources to color together. My personal favorites are these amazing Draw Me A Lion posters and the Giant Coloring Pages from OMY shop.

Hands on Ideas:

1. Projecteo  Gather a series of images captured by your little ones from a nature walk, number search, LEGO creations, cooking, books shared or of favorite people in your life.  Rather than have these image live in the digital world have them made into a mini projector at Prejecteo.  The following code will give you a discount!  FRIEND08ZT

2. Collaborative Weaving, which I shared about a few weeks ago.  This is such a delightful project that knows no boundaries.

Reading Resources:

1. The Artist’s Way for Parents: Raising Creative Children by Julia Cameron, published by Allen and Unwin.

There are three key tools that Julia encourages every parent to incorporate into their lives and the lives of their children:

A. Morning Pages – Three pages of longhand writing that the parent does alone.  A portable, private support kit for the parent, a safe place to process feelings, ultimately making you able to be more present in your day and with your child.

B. Creative Expedition – A once-weekly duel adventure that the parent and child plan, look forward to and take together.  A creative expedition doesn’t need to be large, but it does need to be festive.

C. Highlights – A daily bedtime ritual in which the parent and child each share their favorite moment from the day

 I believe so very much in Julia’s three guiding principles.  I just need to be able to put these into practice.  I can envisage Step 2 and 3, but Step one I am not so sure!

2. Big Kids Magazine BIG Kids Magazine is an Australian contemporary creative arts publication that features the work of children and artists side by side.  BIG stands for Bravery, Imagination and Generosity. The magazine accepts submissions for their magazine throughout the year in regards to specific themes.  This magazine is delightful in every way and truly values the relationship between artist and child.

Photo Credits: The Busy Mockingbird / Amag / Made by Joel / OMY Shop

Yoga For Kids: Animals in Winter

By Mariah Bruehl,

Yoga For Kids: Animals In Winter

Monique of Green Acorns is with us today with to share a wonderful winter yoga sequence to share with the little yogis in our lives.

Here in the northeastern U.S. the January thaw has come and gone and temperatures have dipped once again.  We bundle up in layers from head to toe to tolerate being outdoors and come in to warmed houses when we can bear it no longer.  But what do wild animals do?  How do they survive winter’s cold?  This is often a point of curiosity for children and a wonderful source for playful learning activities.

Why not encourage your children to put themselves in the animals’ skins?  Start by reading some books on the topic to help your child gain a better understanding of animals’ survival techniques.  These are a few of our favorites:

Yoga For Kids: Animals in Winter

After some exploration and discussion your child should be ready for some movement, imagination, and fun!  Just follow the “Animals in Winter” yoga sequence to support your child pretending to be various animals preparing for their winter survival.  As your child walks like a bear looking for a den, wraps up in a cocoon, and flies like a migrating bird, they will be having fun and doing their body good while reinforcing their learning.

Download Animals in Winter Yoga here.

The Benefits of Raising Bilingual Children

By Mariah Bruehl,

Raising Bilingual Children

Nuria from the The Adventures Archive is here today to share some helpful tips on raising bilingual children…

By now you’ve probably heard a lot about the benefits of bilingual education. From enhancing your kids cognitive capacity, to a better developed linguistic understanding, there are so many reasons why you should introduce more than one language in your home. Today I wanted to focus on a less known advantage, mental flexibility.

Kids don’t do grey. Their world is all black or white, things are “grrrreat” or “oooful”, they love something “so very much” or they “hate it forever”. And most of the times if you give them a task they’ll want to do it just one particular way.

Yet teaching kids mental flexibility is crucial. A child who is not mentally flexible has trouble adapting to unexpected changes in routine, finds it hard to self-evaluate and is less willing to embrace other people’s opinions. They can grow up to become rigid adults that lack the elasticity that is needed to find different solutions or to work inside a team.

While there are many ways to teach this mental agility, exposing children to different languages can deeply enhance this type of flexibility. Why is that? Let me show you this example. This is a drawing made by my daughter (she speaks Spanish, English and Italian):

Raising Bilingual Children

The left one is the Italian version of a spoon, “il cucchiaio”, a masculine word. On the right you can see “la cuchara”, the Spanish word, which is feminine.

Just like that, a simple word opens two possibilities. In her brain there isn’t only one way to consider a spoon, it can be seen in at least two different manners and both of them are equally right and valuable.

Raising Bilingual Children

Ready to create a bilingual environment in your home? Then follow these steps:

  • Take it easy: adding another language shouldn’t feel like an imposition but rather something natural. If your kids already speak one language, introduce the new one gradually.
  •  Make it fun: from iPad apps to interactive DVDs it’s never been easier to find cool multilingual tools for our kids. If Spanish is your choice you can show them these fun videos that my girls have recorded. Here are some of my favorite bilingual apps:
  • Ask for help: research suggests that a child needs to be exposed to a language 30% of his waking time to actively speak it, so if you are a working parent you may find this difficult to achieve. Find a bilingual school, hire a foreign nanny or ask a relative to help. Even if they live far away they can connect with your child via web cam and have regular chats.
  • Stick to it: consistency and perseverance are the key. If you choose to speak in one language to your kid try to do so always. Also, don’t succumb to peer pressure. Most bilingual kids have a slower start and it can be frustrating to watch them struggle but they always catch up eventually.

Raising Bilngual Children

Are your kids multilingual? Do you want them to become so? Either way, I’d love to hear your opinions about it.

Ready For Spring: Garden Planning with Kids

By Mariah Bruehl,

Garden Planning with Kids
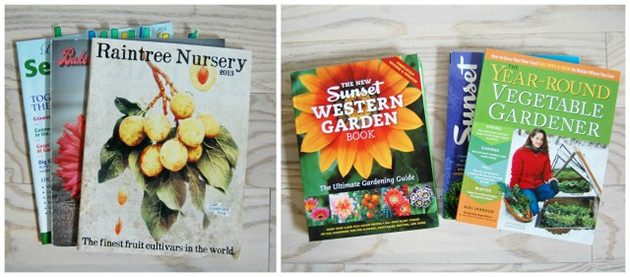
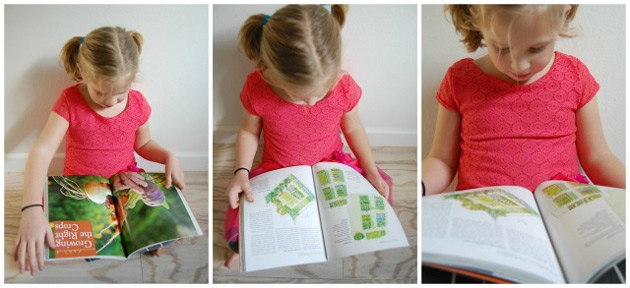
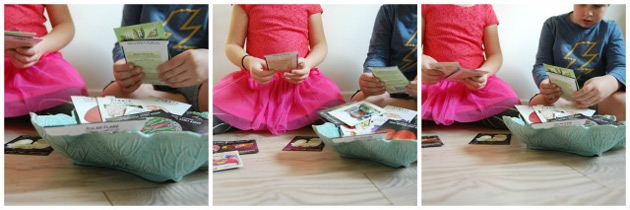
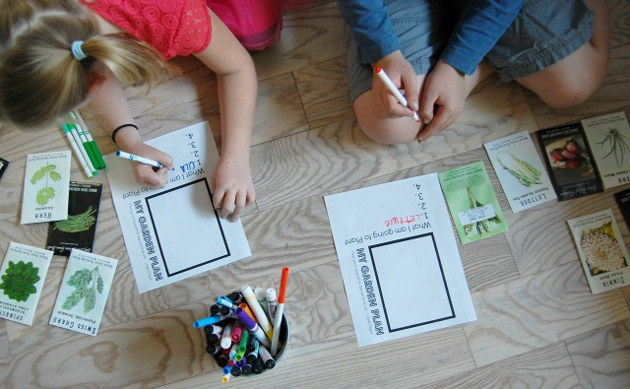
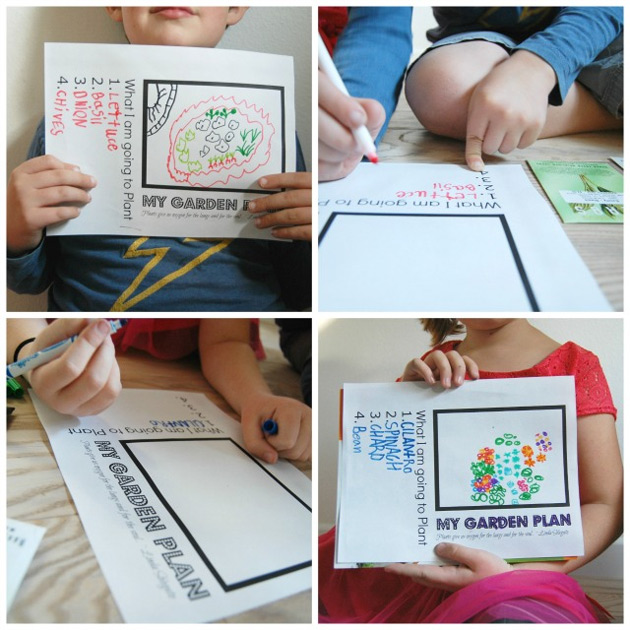
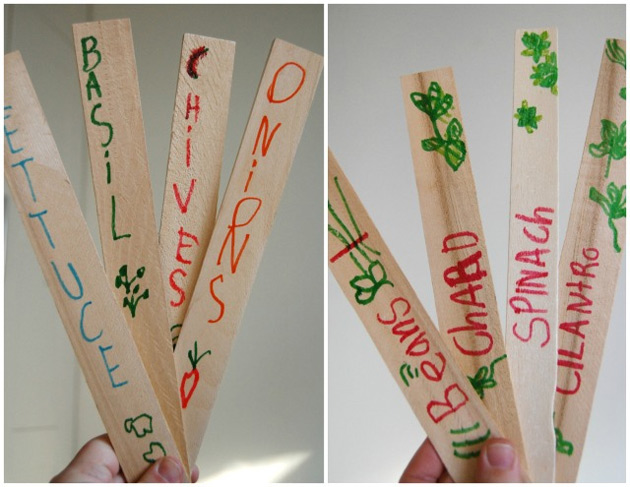
Here in Central California, we have an early grow season and the perfect time to set your summer seeds indoors, or in a greenhouse is January and February.  Knowing how desperately my children wanted their own garden beds to tend to this past summer, I made a real effort to include them in the planning process.

Here are some simple steps to creating a fun garden planning afternoon with your children.

1) Gather your resources.

Garden Planning with Kids

In our house we have an ever growing pile of gardening books, as well as piles of seed/nursery catalogs.  I found most of them at Library sales or online at Amazon (buy used for pennies and just pay for shipping).  Most seed and nursery companies will send you a free catalog if you subscribe to them online.

I had the kids sit and go through the books at their own pace over the course of our morning.  I loved seeing them sit side by side and point to the beautiful photographs and critique the delicately illustrated garden plans.  I realized my children were as intrigued by flowers as they were by edibles.  It made me realize I needed to plan a few more flower beds this spring.

Garden Planning with Kids

2) Seed Shopping

Garden Planning with Kids

Because of my penchant to seed hoard, I let the kids go through some of our seeds and choose four vegetables for their raised beds.  I then let them choose two companion flowers to plant alongside the veggies.  It was interesting to see which seeds were chosen by which child.  My daughter essentially wanted to know which plants made salsa and chose from there.  My son chose his favorite vegetable – lettuce.  And after that, it was just a matter picking a few plants that would complement his favorite tomato sauce.

Garden Planning with Kids

If you don’t already have a stash of seeds, this can be such a fun opportunity to go to your local garden center or nursery and seed shop.  Or you can do my favorite thing, and sit together and shop online.  Go here  for a wonderful list of seed companies.  We use Rare Seeds and LOVE all of their seeds and they have a very high germination rate.

And while we’re talking about trolling online and garden geekery, go to my gardening page on Pinterest.  My children love to just sit and scroll and exclaim and plan their fantasy gardens.  And if you really want to my your child’s day, go to Pinterest and search “fairy doors.”

3) Plan it out.

Garden Planning with Kids

In that children are impetuous and impatient, I like to make them sit and really plan out any activity they are going to do.  This year I created a form to let them draw out how and what they wanted to plant in their individual raised beds.

I was amused to see how dedicated they were to their plans.  My son planned to have a circle of marigolds protecting his vegetable plants in the middle, while my daughter was much more invested in all the pretty flowers sprinkled amongst her veggies.

Garden Planning with Kids

The reason we let the kids have their own beds is that they want ownership in the endeavor of gardening.  Sure, they love picking tomatoes and peppers with me in the summer, but this year they’ve consistently repeated that they want to pick THEIR own tomatoes and peppers.  And I am willing to make the effort in order for them to realize that this garden with live or die based on their efforts and their efforts alone.

4) Garden Markers; a fun little project.

Garden Planning with Kids

Because surface sowing boring old seeds in our milk jug greenhouses a couple of months before we start the garden can be a bit anti-climatic, I planned to have the kids make their very own garden markers for the four veggies they chose to grow.  I used what was on hand, markers, wedges and a few paint sticks and simply told.  Go here for a DIY garden marker inspiration.  There is a lot of potential for creative interpretation here and I would love to see what all of these amazing Playful Learning parents could come up with.

Garden Planning with Kids

While the years, the obligations and the general chaos of adulthood can seem to dull our senses and distract us, children are still fresh and open and drawn to nature.  They don’t see a beautiful sunset and sigh and talk about the beauty – they smile, their eyes flutter and they FEEL the beauty.  They feel this way about everything in nature, from ladybug to swiss chard.  Children also like to get dirty, really dirty.  Even the most hesitant child will eventually break through the fear of the unknown and relish the feel of the loose soil on their hands as they place their plants in the carefully dug holes.  Gardens grow food and beauty – and children love everything about them.  So, go and grow a pot of flowers together.  Grow a garden bed, plant an apple tree, grow a pot of flowers together, or go to a u-pick berry farm this summer…let your child participate in the miracle of growth.