Handmade Advent Calendar + 24 Holiday Activities

By Mariah Bruehl,

A few years back we started the holiday tradition of creating and keeping an advent calendar. I love that it encourages us to savor the holiday season, as well as keep us on track in terms of holiday preparations.

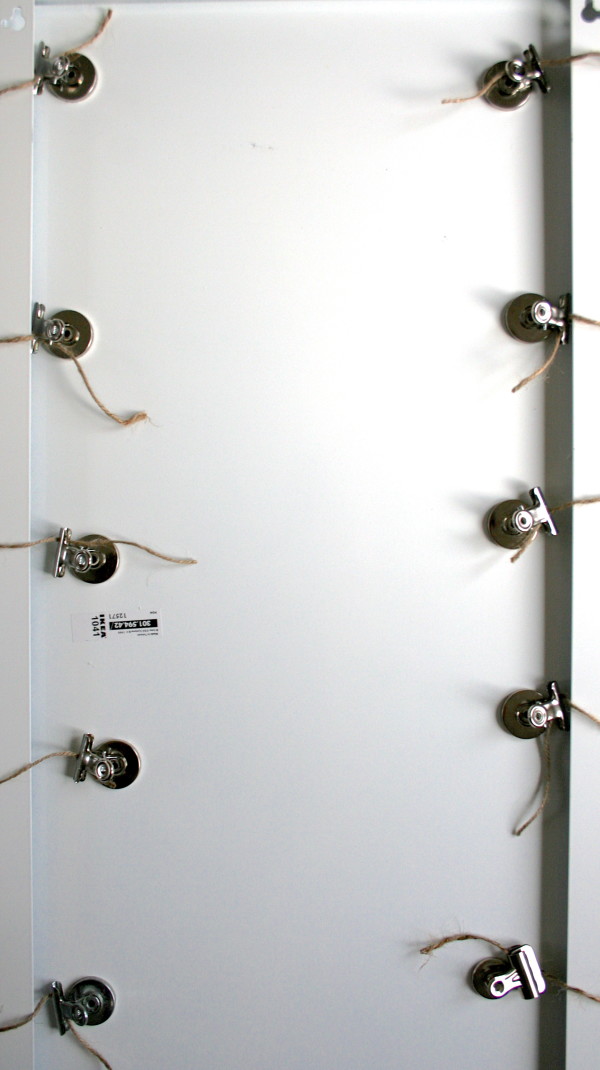
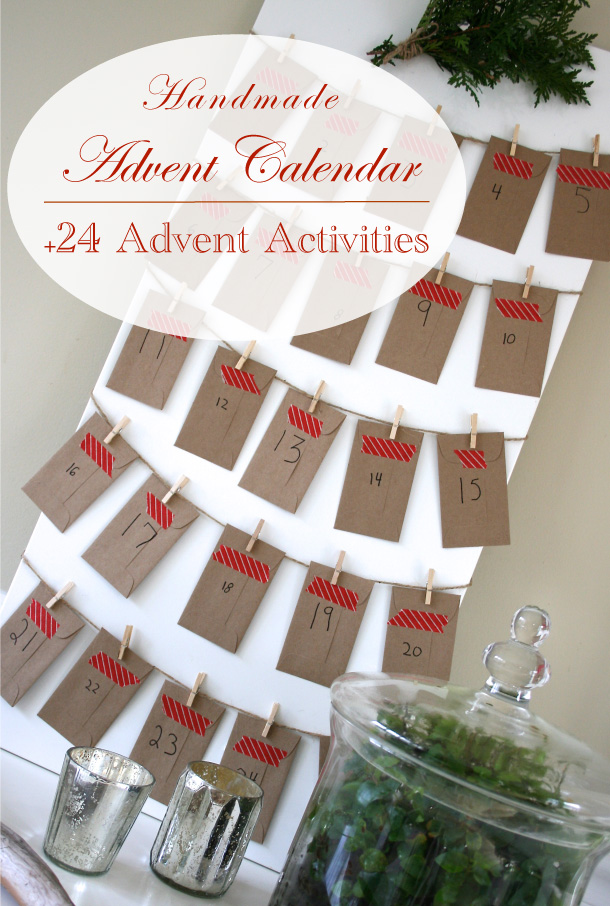
This year we decided to use a magnetic board that we had on hand. We attached rows of twine with magnetic clips on the back of the board (see above) and added 25 little envelopes to the twine using wooden clips. With a touch of colorful red washi tape and a list of advent activities (secretly inserted into the envelopes by me), we are set to go.

Here are the activities that we have lined up this year (in no particular order)…

  1. Decorate the tree.
  2. Research winter holiday traditions around the world.
  3. Make holiday cards for teachers.
  4. Make pomanders.
  5. Clean out closets and donate winter coats, sweaters, and gloves to families in need.
  6. Listen to holiday music & drink hot cocoa (love this hot chocolate station).
  7. Read favorite holiday books.
  8. Create holiday floating candle jars.
  9. Make twig stars.
  10. Make and hang evergreen wreaths.
  11. Create a fresh batch of holiday hang tags.
  12. Make Great Grandma Bettye’s candy cane cookies.
  13. Have a gingerbread men (via MPMK) baking playdate.
  14. Go for a hike and collect winter items for our nature area.
  15. Research the science, history, and traditions of the winter solstice.
  16. Have a paper snowflake making party.
  17. Purchase a gift for a family in need.
  18. Watch holiday movies.
  19. Make our annual family calendar.
  20. Add a new holiday book to our collection.
  21. Write and create our 2013 resolution ornaments.
  22. Donate food to the food pantry.
  23. Make these easy and beautiful snow globes.
  24. Make popcorn and share stories about Christmas memories

For more advent inspiration…

Educating the Senses: 5 Great Essential Oils for the Family

By Mariah Bruehl,

Educating the Senses... 5 Great Essential Oils for the Family

As the weather turns colder and the days shorter, it is a wonderful time to infuse your home with the sweet and comforting smells of pure essential oils. Today we have Emma with us from 95 Acres of Sky, sharing her favorite essential oils for the family…

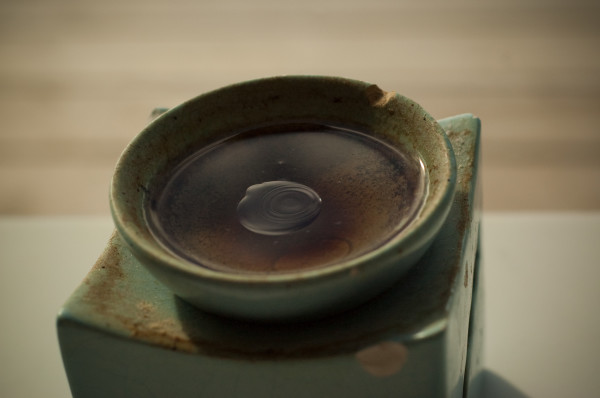
My Mum introduced me to aromatherapy almost two decades ago; she gifted me with my first burner and an oil called Bois de Rose. It turned my over crowed, cold and dreary student digs into a sweetly scented retreat. I was hooked. Since then I’ve largely avoided artificial scents, using essential oils in every capacity from personal scents to freshening my laundry. The vast array (and costs) of essential oils available can be confusing though… I’d like to suggest a simple list of five oils that are versatile, health supporting, and a treat for our noses and minds.
Educating the Senses... 5 Great Essential Oils for the Family

Chamomile: This yellow flower is frequently found in cupboards as a tea, known for its soothing, calming properties. There are two types of oil, Roman Chamomile (the less expensive version though very pleasing) and German Chamomile (the oil is blue, usually more costly but has a mellower scent). This is a lovely oil to use around young children and can be used instead of (or blended with) the ubiquitous lavender.

Uses: A drop or two in a bath or on a pillow has a soothing and relaxing effect. Wonderful for helping young children to relax and sleep deeply. For a child feeling stress or anxiety, a pocket handkerchief with a few drops added can be very comforting. It is also a really helpful decongestant for a child (or adult) with a stuffed up nose.

Tea Tree Lemon: I discovered this oil a couple of winters ago and have not been without it since. The citrus scent is less overpowering and medicinal than regular Tea Tree, making it more pleasant to use.

Uses: Great for cleaning and disinfecting. In the kitchen, in the water when mopping the floor or to disinfect washing cloths. I recommend using neat on a cloth to wipe down doorknobs and light switches during cold and flu season.

Orange: Either Sweet Orange or Blood/Bitter Orange are delicious additions to your collection. Less harsh than Lemon, it works well on it’s own or blended with other oils.

Uses: Orange is uplifting, refreshing, and cleansing. It lifts a heavy atmosphere and counters bad weather gloom. Orange is great to add to a cloth for a final wipe down in the kitchen or bathroom, though it lacks the disinfecting power of the Tea Tree Lemon. I really love adding a couple of drops to home made play dough in the middle of winter!

Geranium: This oil is summer in a bottle; the heady scent of rose-laced geranium is uplifting and supports health. Geranium is a great stress buster for both parents and kids, relieving tension and restoring good cheer.

Uses: It is particularly good for clearing headaches and is a wonderful scent for a burner or bath at the end of a long day. Added to base oil it is lovely rubbed onto pulse points to give little bursts of refreshment throughout the day.

Frankincense: This is a less familiar oil to many people but I really would not be without it. The rich yet light scent evokes the golden resin from which it is distilled. Traditionally used in meditation it’s calming and mentally uplifting properties improve mental clarity, calm the spirit, and help create a feeling of well being.

Uses: Add to a burner or simmering pan of water to create a calm and restful atmosphere in your home. Can also be added to sensory play items such as play dough and play sand, or even a sink of water with a whisk and bowls to wash. If you notice your children seem overly stimulated or argumentative, Frankincense will help to shift the mood. Add to a bowl of warm water used as a hand or foot soak and watch it work it’s magic.

Educating the Senses... 5 Great Essential Oils for the Family

When using oils with children my rule of thumb is no more than 2-3 drops in a bath or on a pillow, I stick to 2 drops in a palm full of base oil if it will be in contact with the skin. In a burner or pan of water 4-5 drops is usually sufficient, a little less with more potent oils such as the Frankincense.

As with all things you get what you pay for when it comes to essential oils, but that doesn’t mean you have to purchase the most expensive on the market. Aura Cacia is reasonably priced and a widely available brand that I’ve had good experience with. You can also source though specialists such as Mountain Rose Herbs. If you add one or two oils per season you’ll soon have a wonderful and fragrant collection that will enhance your health and home.

Here are some other posts that you might like…
 

Tabletop Puppet Theater

By Mariah Bruehl,

Our beloved puppet theater has been a source of hours of creative play for our family… Today Randi from Swoon is with us to share a lovely handmade puppet theater that she created from a simple cardboard box.

We went to a theme park last summer where my daughter saw her very first puppet show. She was enchanted, to say the least, and has been asking to play puppets at home lately. There are a few darling puppet stages for sale, but I wasn’t sure I wanted to foot the bill for something she may not be interested in a few months down the road. I’m always a huge fan of using what we have on hand, so I decided to break the moving boxes out of the garage and make a stage!

A simple and fun tabletop puppet theater...

I designed some simple stick puppets (you can download them at the bottom of this post), but my kids have been using regular stuffed animals and dolls too!

A simple and fun tabletop puppet theater...

To make the theater:

You’ll need: a large cardboard box, white paint/paintbrush, a ruler, pen, and sharp scissors.

  1. Draw a rectangle on the wrong side of cardboard (side with any words, etc.) 23″ wide by 15″ tall. Measure 10″ up each side and make a mark. Draw the roof by making a diagonal line at each mark.
  2. Measure 7″ down one side of the roof and draw a 2″ line coming out of the roof. Draw a 3″ line perpendicular to your first line, and then another line down to the roof to form a chimney. Cut the whole house shape out with your scissors.
  3. Measure and mark 2.5″ in from all edges/sides of your house. Cut out to form the inside window of theater.
  4. Cut two pieces of cardboard that are 9″ wide by 2.5″ tall. Make a1″ cut through the top middle of each piece. Measure 1.25″ in from the bottom sides of your house and make a 1″ cut on each side. Insert your 9″ pieces of cardboard into the cuts in your house to form the legs of your stage.
  5. Paint the whole thing white and let dry.

A simple and fun tabletop puppet theater...

For the puppets:

You’ll need: one fawn template, one fox template, two popsicle sticks, tape, scissors, a hole punch, and four brads.

  1. Print templates on to thick paper and cut out shapes. Punch holes where indicated.
  2. Grab a pair of legs (they are grouped together on templates), insert brad through the front of leg with a centered hole punch, then through the animal, then through coordinating leg with off-centered hole punch. Repeat for each set of legs.
  3. Tape a popsicle stick to the back of each animal and enjoy!

Making Mini Storybooks

By Mariah Bruehl,

Playful Learning: Making Mini Storybooks

For those of you who have followed Playful Learning over the years, you know that I am a huge fan of having a variety of attractive blank books at the ready for the developing writers in our lives. Randi from Swoon! is with us today to share a great tutorial for making lovely, handmade, mini storybooks…

This past summer my sister came home after living abroad for a year. She brought my oldest daughter (Ellie, age 4) a book she had made while away. She had written a story about my daughter and drawn little pictures on each page. Ellie has been dragging that little book around with her ever since! When I saw how fascinated she was with stories, I decided it would be fun to make up some of our own. Can you imagine how great it would be to come home from school and see a stack of these little books waiting for you?

Playful Learning: Making Mini Storybooks

My daughter doesn’t write words yet, but I can see how this activity encourages her to make connections. The first time we made one of these together I asked her what she wanted to write on each page and went through the words with her as I wrote them. She was thrilled to be in control of the story, and wrote it about herself (of course!). I’m looking forward to the day she can write stories of her own. My younger daughter (Addie, age 2) wasn’t really into writing a complete story, but told me to write a description of each of her drawings on the tops of the pages. I love to hear what they’re thinking and what they want to write about. I suspect I’ll be keeping these little books for a long time!

Would you like a make a few of these yourself?

Gather one piece of white card stock, a paper trimmer (or scissors), glue, a ruler, and some pretty paper for the cover (I downloaded mine from here and here).Playful Learning: Making Mini Storybooks

1.  Cut your piece of card stock in half lengthwise, then fold each piece in half.

2.  Open one of the pieces of card stock and apply glue to the right side of paper.

Playful Learning: Making Mini Storybooks

3.  Turn second piece of card stock over and stick left side of fold to the glue you just applied in step 2 (see photo) to form an accordion style book.

4.  Cut your piece of pretty paper down to 4.25″x5.5″ and glue to the cover of your book.

Playful Learning: Making Mini Storybooks

5. Use a ruler to add a few lines at the top of all five pages.

Hopefully your older children will enjoy writing and illustrating their own storybooks as much as my little ones did. These books include five small pages, but you can add as many pages as you need by repeating steps 1-3. Happy story writing!


Creating Playful Spaces: Start with a Nook

By Mariah Bruehl,

Creating Playful Spaces: Start with a Nook

Participants in the Playful Learning Spaces Workshop will often ask about the best way to get started creating engaging spaces for their children. I think it is most practical to start with something simple. When we start out by wanting to tackle the big areas in our home, it can become overwhelming and often lead to analysis paralysis—and not much being accomplished.

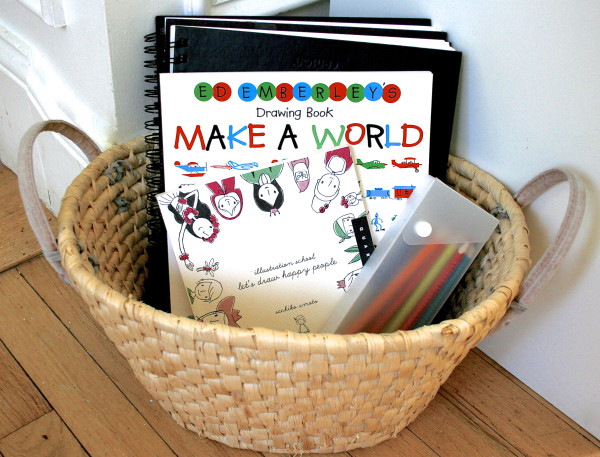
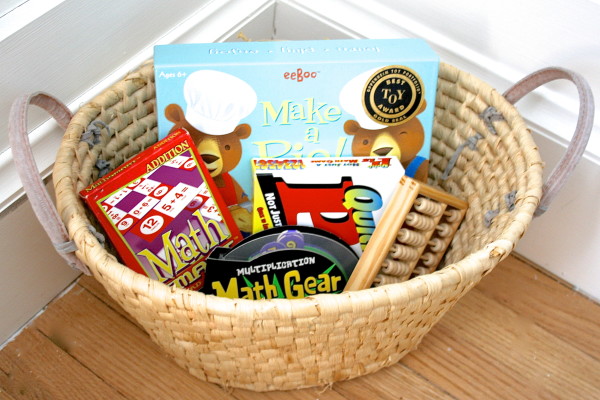
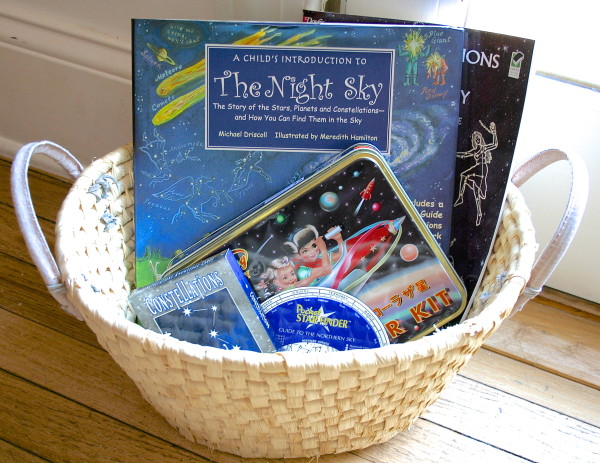
I have seen that little changes can make a big difference and are a great way to build your confidence and create a positive momentum. It is for this reason that I often recommend that people start by finding a little nook or corner in their home where they can leave out a theme-based basket of materials for their children to discover. When you start looking through your children’s toys and materials with the idea of sorting them by themes, you will often find that you already have everything you need to create an inviting nook. You will be amazed to find that old toys presented in new ways can spark a fresh interest in your child.

Sketching

Creating Playful Spaces: Start with a Nook

Math Games

Creating Playful Spaces: Start with a Nook

Astronomy

Creating Playful Spaces: Start with a Nook


Simple Terrariums

By Mariah Bruehl,

Playful Learning: Simple Terrariums

Randi from Swoon! is here with us today to share a simple and beautiful way to introduce children to the concept of caring for the environment—and much more!

If your kids are anything like mine, they’re fascinated by all things that grow. My middle child is known for picking handfuls of flowers in all the wrong places! We’re hoping to plant a vegetable garden this spring, but for now we’ve decided to bring the outdoors in by making a few terrariums to enjoy in our home. I’ve seen some beautiful and elaborately designed terrariums, but decided to keep things simple so the kids could be involved. Planting and caring for living things encourages discovery and a love for nature. It also teaches children responsibility, self-confidence, and promotes an understanding of cause and effect, as well as the life cycle. It can also utilize your child’s creativity if they are involved in the planning and designing process of planting.

Playful Learning: Simple Terrariums

To make a simple terrarium you will need a clear container, soil, and a variety of hearty plants. I love succulents because they don’t require a lot of light or water to survive and they’re not easily broken by little hands during the planting process! I put out the plants and containers of soil and invited my two and four year old to join me outside. I showed them how to put the soil in the bottom of their containers and let them have at it. You will definitely want to do this activity outside so you can give your kids the freedom to get messy and experiment with the planting process. Next we talked about how we wanted our plants to be arranged. The girls chose which ones they liked and I showed them how to put the roots down into the soil, letting them choose the placement of their plants.

Playful Learning: Simple Terrariums

We had quite a few plants left when we were done, and the girls spent at least an hour planting them over and over in the containers of left over soil. We kept this activity set up outside for a few days and they returned to it again and again. They enjoyed the structured nature of the terrariums, but they really enjoyed the messiness and fun of playing with the plants and soil however they wanted. I will be sure to leave a patch of soil for digging and “planting” in our future garden!

Playful Learning: Simple Terrariums


9 Apps for Young Scientists

By Mariah Bruehl,

Playful Learning: 9 Apps for Young Scientists

I am thrilled to have Rebecca from ThirteenRedShoes back with us today. She has a great list of app recommendations for the young scientists in our lives.

Mariah asked me to put together a post on science apps available for children. Here are some great new apps that I have encountered recently. Please do leave the links to new applications in the area of science that you have found, as I would love to see more.  This is an area that Master R loves and therefore we are always on the look out for new and engaging applications.

Here are my top science finds for little ones ages four and above:

  1. Planets – This application, which is universal, therefore available for both iPhone and iPad, is very clever. You can manipulate the globe and see where different parts of the world are in sunlight or darkness in real time. Very engaging as a hands on application, which has so many different levels. You can set location by latitude and longitude to see what the night sky is like and also see the visibility of the planets in the night sky.
  2. Smithsonian – This is company creates so many great story book apps, which contain fiction stories filled with factual information. The Smithsonian apps cover a large number of animals such as polar bears, penguins and dinosaurs. The apps are also supported with an educators guide which can be downloaded on the website.
  3. Britannica Kids Solar System – Britannica has an entire series of scientific applications. Earlier in the year we downloaded a few different apps on the planets and space, as it was a huge area of interest for Master R. This application in particular was too advanced for him at age 5 but would suit an older more mature audience. The immigration however was amazing for discussion points and plain visual enjoyment and awe.
  4. Wilderquest – Although this application is developed in Australia and specifically for the state of New South Wales it can easily be incorporated in any location. This app requires headphones and space as you need to walk around listening to the sounds, using the iPad as a large interactive display panel in which creatures in the bush land are hiding. You need to listen and try to find them by moving the iPad around. A wonderful way to learn at Australian wildlife.
  5. Cosmic by the American Museum of Natural History – A beautiful application full of amazing images and information about the universe.
  6. ABC wildlife and ABC Go – Peapod labs create some really engaging application based and the alphabet and different scientific ideas such as animals and transportation. Each letter of the alphabet is linked to a topic in which safe you tube links may be available to watch as well as facts and images.
  7. Brain Pop Jr. Movie of the Week – This free app has some amazing movies. A new movie is available everyday covering a wide range of topics. There are additional levels, which can be purchased, but the daily science videos app is free.
  8. Bobo Explores Light – This app is delightful. It is based on the concept of light and how it has developed over the passage of time. It covers conecpets such as lightening, electricity, photosynthesis and sunlight. I would love to see an audio version in future updates. There is a lot of amazing information included in this app, however it would require an adult read it to Master R, who is a non reader (aged 5).
  9. Ansel and Clair with Cretaceous Dinosaurs – Master R adores this application. It is full of interesting facts about dinosaurs and has been developed with intensive reviews of books, scientific publications, and articles about the Cretaceous period. I think it is the sense of adventure hat really is really engaging about this app, while interesting facts are gathered along the way! There is also an African application based with the same characters. The Cretaceous period is the first in a trilogy to be released.

Make sure to check out Rebecca’s other app recommendations in the posts below (click on the photo)…

Playful Learning: 8 Literacy Apps for the Little Ones

Playful Learning: 10 Math Apps for the Litttle Ones


SaveSave

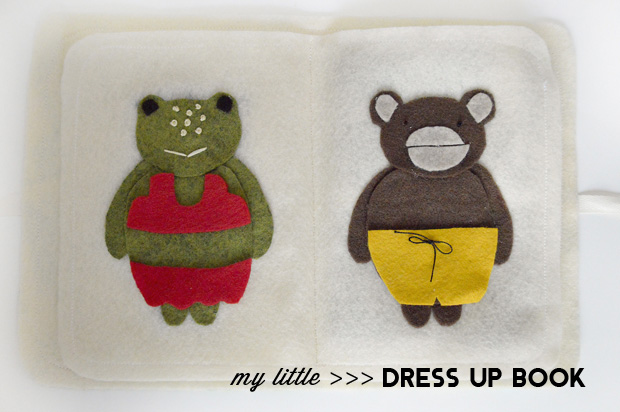
My Little Dress Up Book

By Mariah Bruehl,

Playful Learning: My Little Dress Up Book Randi from Swoon! is with us today to share the lovely little dress up book that she created for her daughters. I can see that this little book could lend itself to hours of creative play…

Hello! It’s Randi again with a new handmade project for your little ones. I find myself looking for ways to occupy my kids when we’re on the go quite often, We recently took our children on a series of adventures that included a plane ride and long trips in the car. I love technology and the luxury it affords-my iPhone is full of kid-friendly apps-but it’s nice to have other options on hand as well. To prepare for our trips, I recently made a little felt dress-up book for my girls inspired by one of their favorite apps, Paper Town Friends.

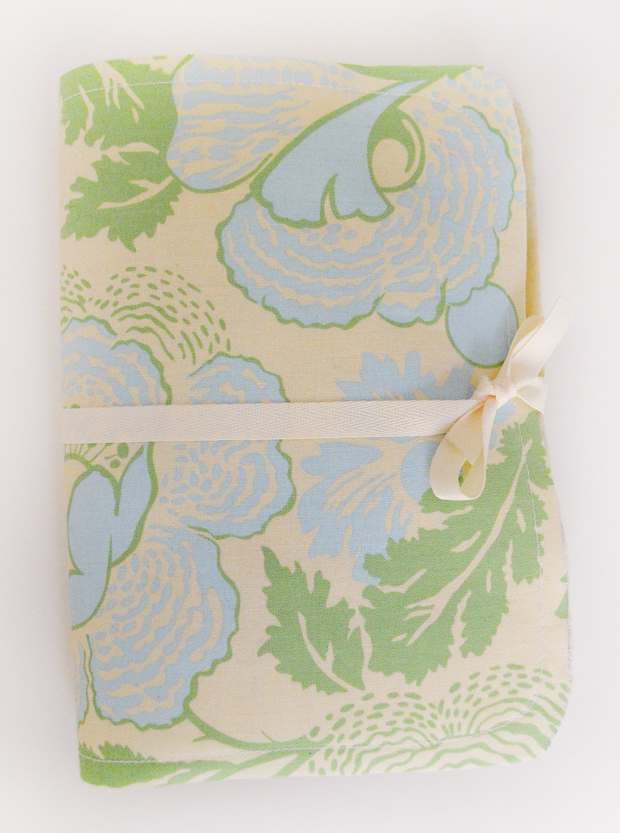
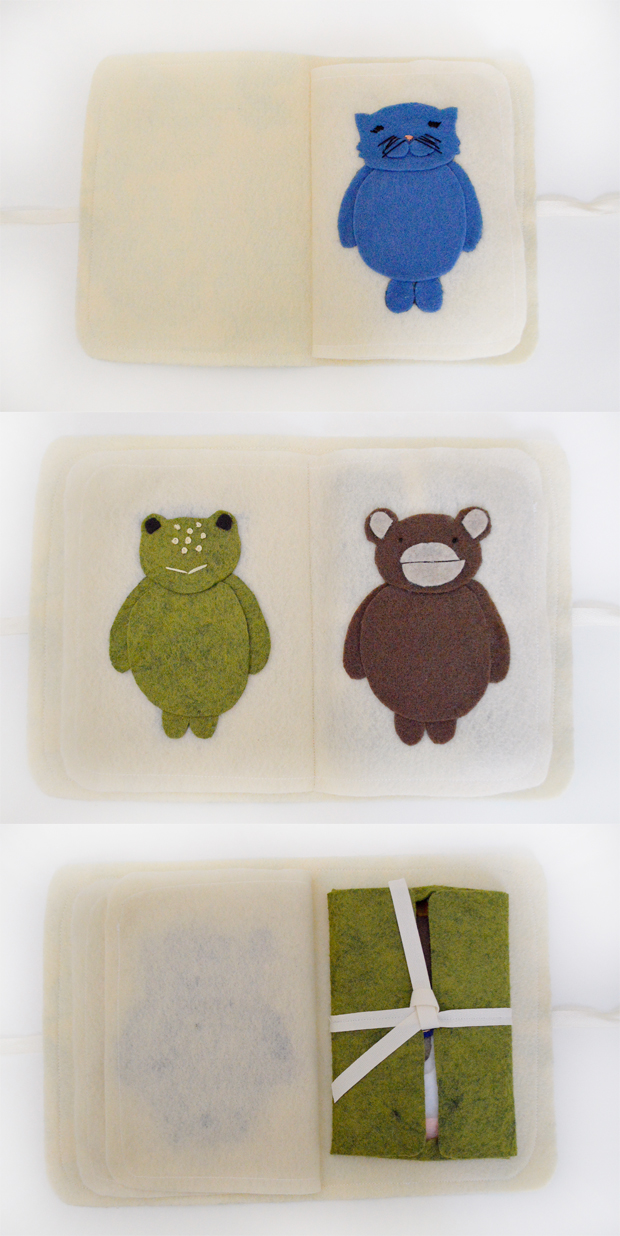
Playful Learning: My Little Dress Up Book Playful Learning: My Little Dress Up BookThe book has a soft fabric cover and features three different animals. My daughters have spent a lot of time playing with the book and can’t believe it was made just for them!
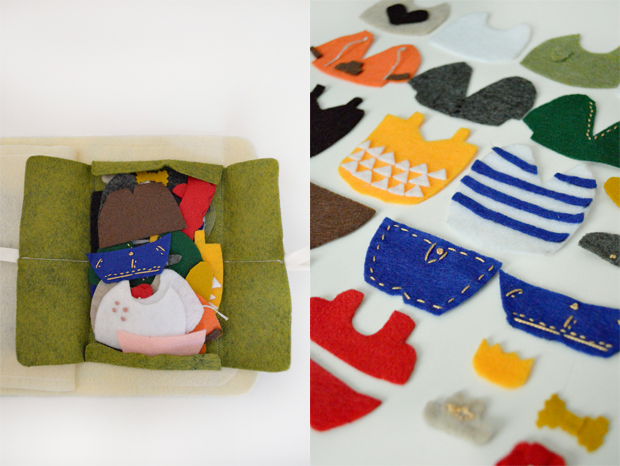
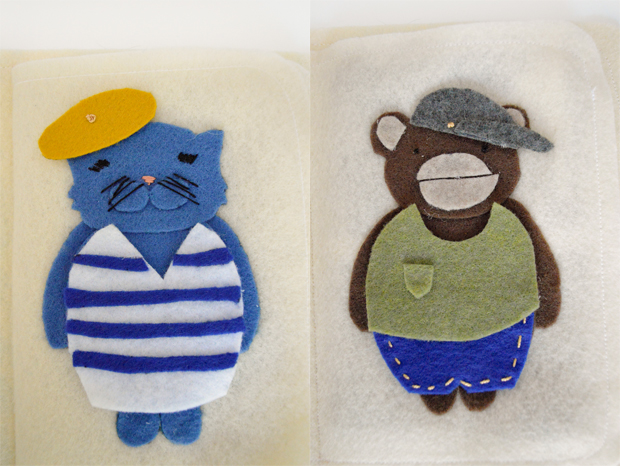
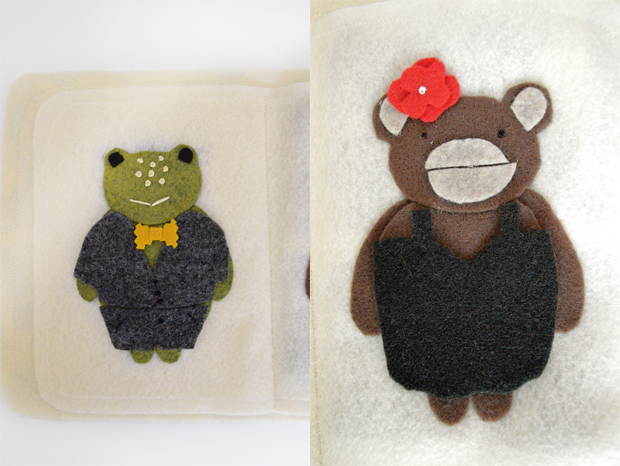
Want to make a book of your own? I put together a step-by-step tutorial for making the book and assembling the three animals, complete with templates. You can download and print the instructions here. If you’re a novice at sewing or crafting, no need to worry! While the book takes some time to make, the steps are simple and easy to follow.

Playful Learning: My Little Dress Up Book

Playful Learning: My Little Dress Up Book

Playful Learning: My Little Dress Up Book

Once you’ve made your book, the real fun begins. Use one of the animal’s body templates to create simple clothing shapes and accessories out of felt. I embellished my clothing with embroidery floss, but there’s no need to get carried away, kids will love putting even the simplest of clothes on their animals!

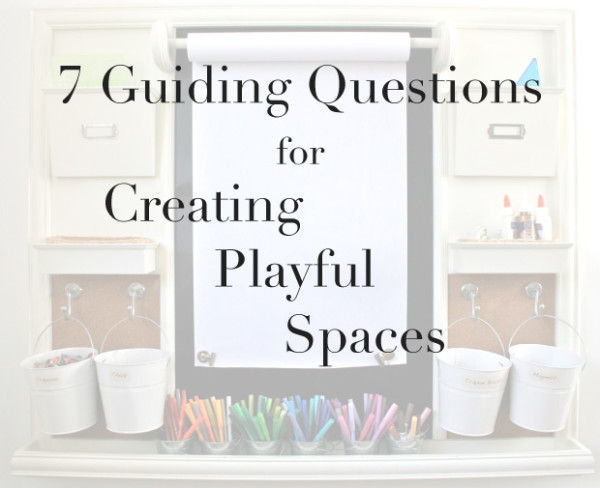
Seven Guiding Questions for Creating Playful Spaces

By Mariah Bruehl,

Some questions that offer food for thought when creating playful spaces...

At times it can feel daunting to tackle the spaces in our homes that need our attention—especially when they are the places that our children inhabit most. We want to create playful spaces that encourage creativity and open-ended explorations, yet it seems like we have so much stuff to contend with.

I often find it helpful, before I get started, to step back and get a clear view of the big picture. Below are some guided questions that will help you to visualize and clarify your intentions and goals for the spaces you create for your children.


  1. Can your child access materials in the play space independently? Are they organized in baskets or bins that are clearly labeled so your child knows how and where to put things away when finished with them?Guided questions for creating playful spaces...
  2. Are the materials presented in an attractive manner that invites your child to use them?
  3. Do the materials, toys, and games represent a balance between your child’s and your own preferences? Do they represent what you value and thus encourage your child to engage in activities that you feel good about? While it is important to keep your child’s most loved toys available and accessible, it is essential that you strike a balance and expose them to new things.Guiding questions for creating playful spaces...
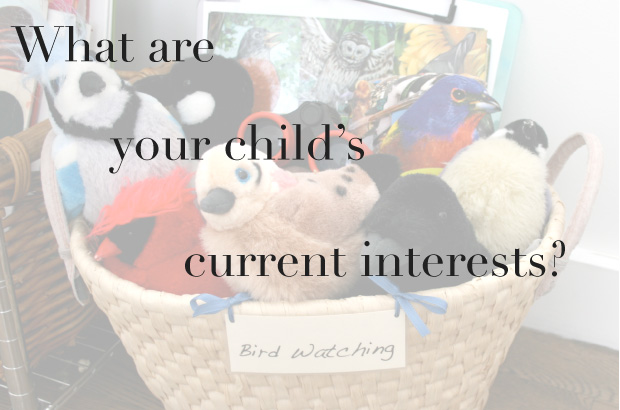
  4. What is your child currently interested in? If your child no longer plays with dinosaurs, but has been talking a lot about birds, make sure that the play space reflects this current passion. Rotating toys is a great way to keep your child interested in play space activities and ultimately prolongs the life of her playthings. It never ceases to amaze me how excited my girls get about a toy that comes back into rotation. The nostalgia they feel toward a toy they have not seen in a while is almost more than their delight over a brand-new toy.
  5. Is the play space a calming environment that allows one to focus on the task at hand without distracting colors, decorations, or objects?
  6. Are you seeing things from your child’s perspective? Put yourself in your child’s shoes to determine the right height for displaying and storing materials and hanging art.Guided questions for creating playful spaces...
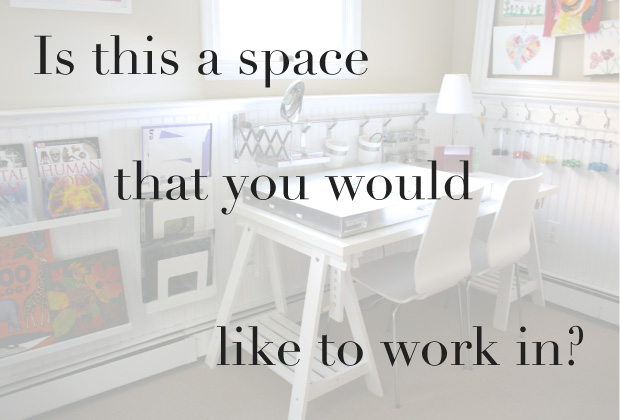
  7. Is this a space that makes you want to make art, explore science, write stories, and more? If so, would you have everything you need to do what you want to do? What else could you add to deepen or enrich your child’s experience in this space?


Creating Playful Spaces: Inspiration & Implementation

By Mariah Bruehl,

Creating Playful Spaces: Inspiration & Implementation

Whenever I am in need of a new storage solution or simply a dose of inspiration, I love to peruse the many places around the web that offer creative and beautiful ideas. There are so many amazing blogs, created by extraordinary women… And then there is Pinterest—where we can share in what our friends and role models fancy. What I love about taking all of this in is that the images are planted like little seeds in my mind. Then when I am out and about and spy that special piece, I know to seize the moment. Below are some examples of inspiration that I have found around the web and how we implemented these ideas in our home.


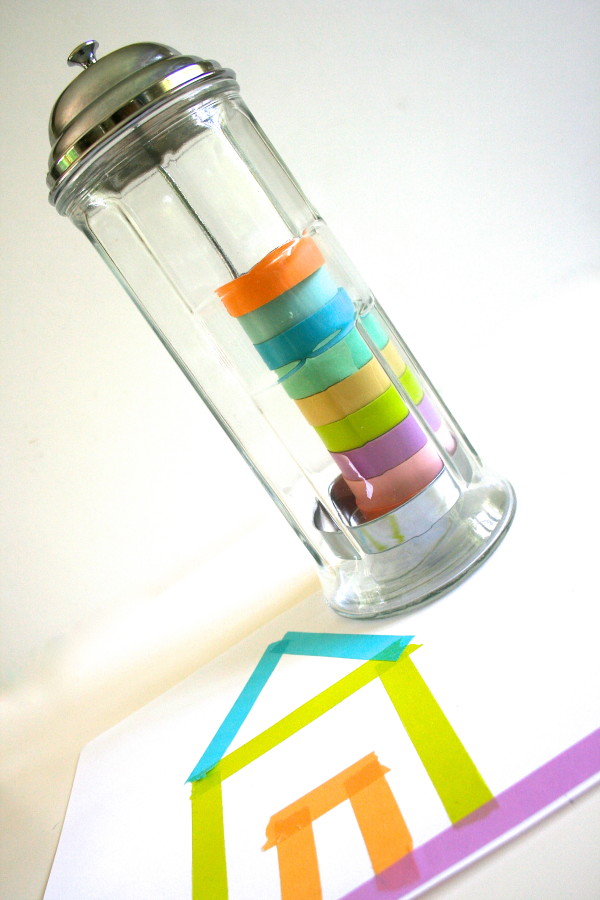
Straw Holder for Washi Tape

Inspiration: Ribbon Storage Idea by How About Orange

Implementation:

Creating Playful Spaces: Inspiration & Implementation


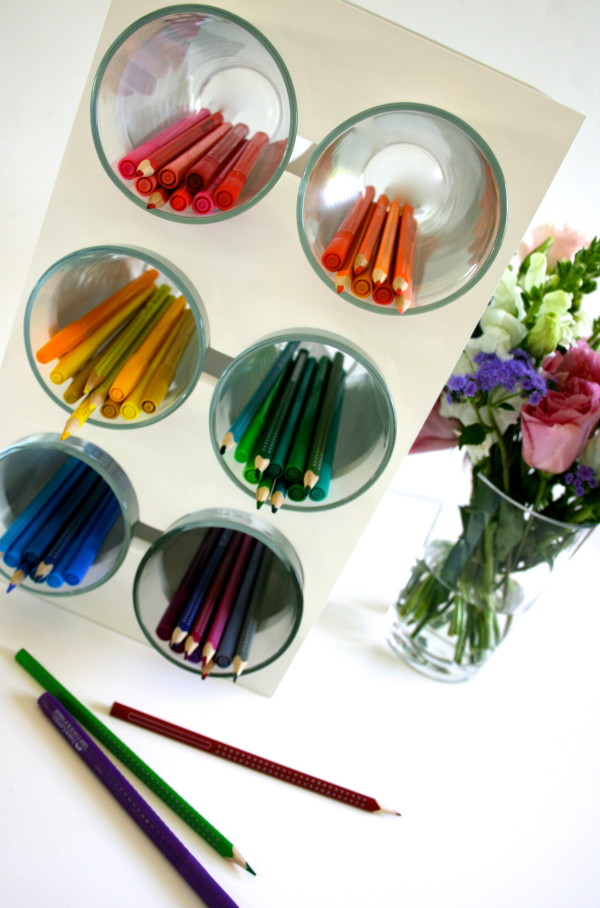
Wine Rack with Glasses

Inspiration: Copic Stuff by My C.A.S.E. Studies

Implementation:

Creating Playful Spaces: Inspiration & Implementation


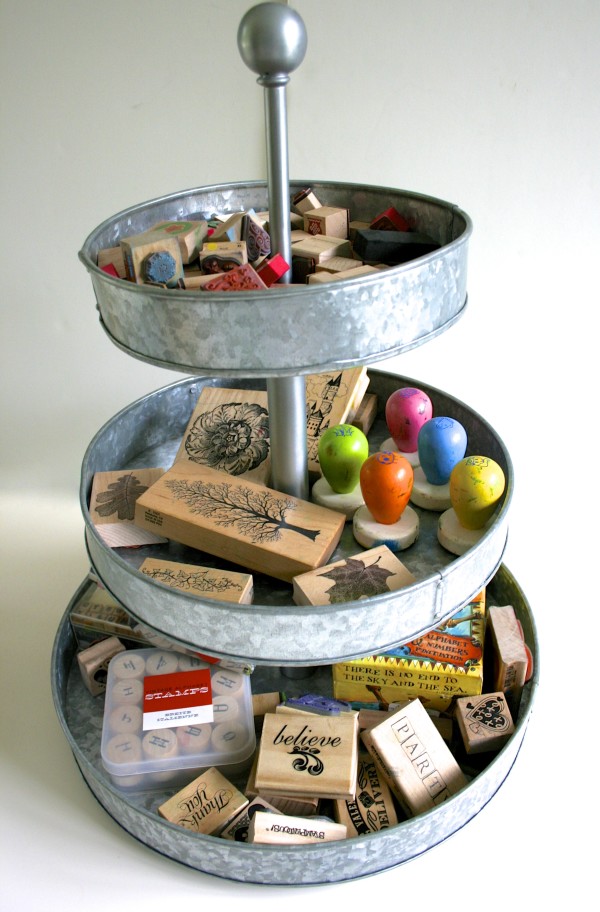
Multi-Tiered Organization

Inspiration: Products to Organize Your Scrapbook Supplies by The Creating Keepsakes Blog

Implementation:

Creating Playful Spaces: Inspiration & Implementation

Where do you find your inspiration?


If you are interested in discovering more practical tips for creating inviting spaces for the children in your life, check out our Playful Learning Spaces online class…

Hz468x60-SPACES