From the Pinboards: Five Reading Nooks
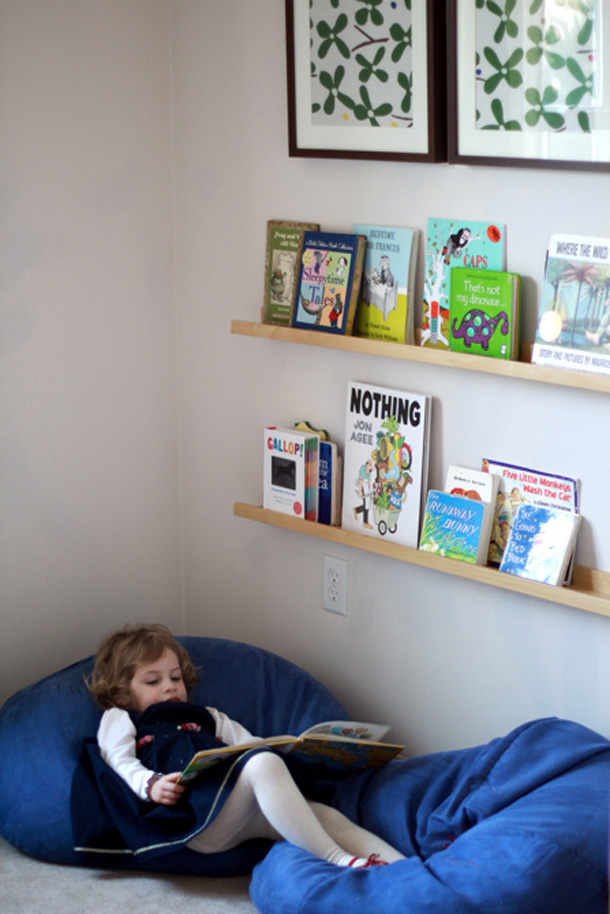
Here’s a little inspiration to kick off the weekend! Five cozy, orderly, reading nooks designed for kids: … Continue reading
| Get our best resources as a monthly subscriber! Learn More |
Here’s a little inspiration to kick off the weekend! Five cozy, orderly, reading nooks designed for kids: … Continue reading
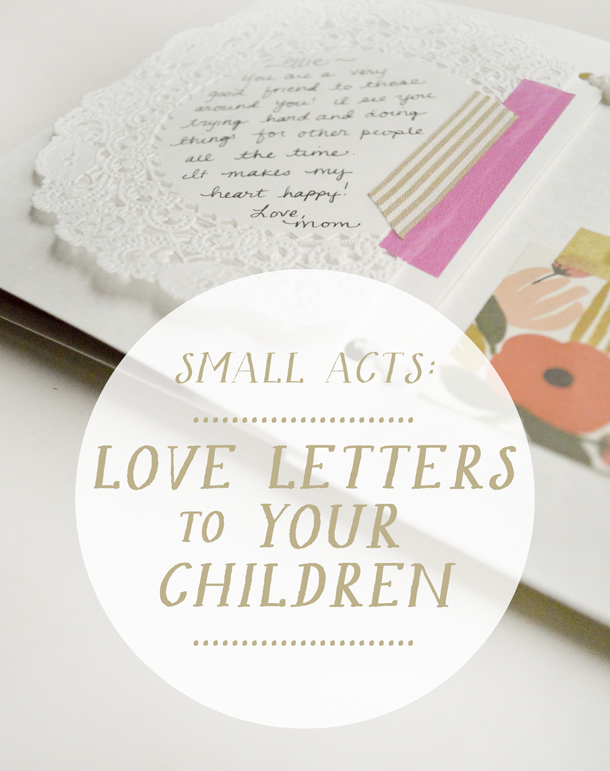
We can all look back on a time in our lives when an encouraging note or “love letter” had a huge impact on us. Letters are a great way to put our feelings into words and express our love in a thoughtful way. Whether your children can read on their own or not, I’m sure they would love to receive a love letter from you this season!
This idea can be taken in any direction, whatever suits you best. Perhaps you prefer a simple letter, drafted on pretty stationary and tucked into a place your child will be sure to find it. You could even mail a love letter to your child and have them discover it in the mailbox. The possibilities are endless! The important thing is to find a way to express your love through written words.
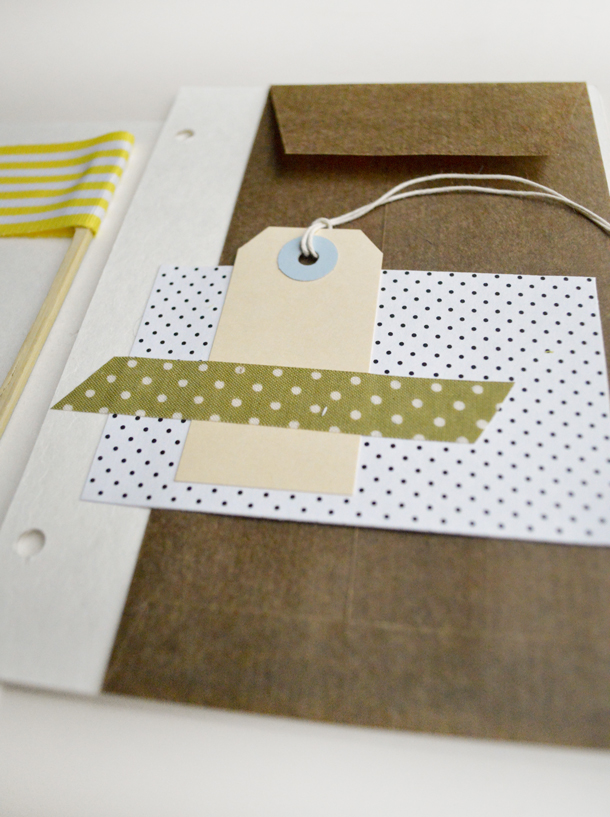
I love to make things, and have an abundance of paper products on hand at all times, so I decided to make a little “book of notes” to give to each of my children sometime during this season.
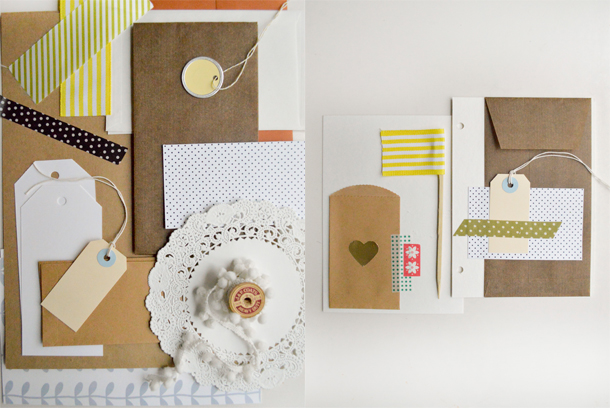
The idea came from the many books that Danni has made, and is basically an encouragement overload for the recipient. Pages filled with personal touches and envelopes of all sizes containing little notes and words of love. Wouldn’t you love to receive a book like this?
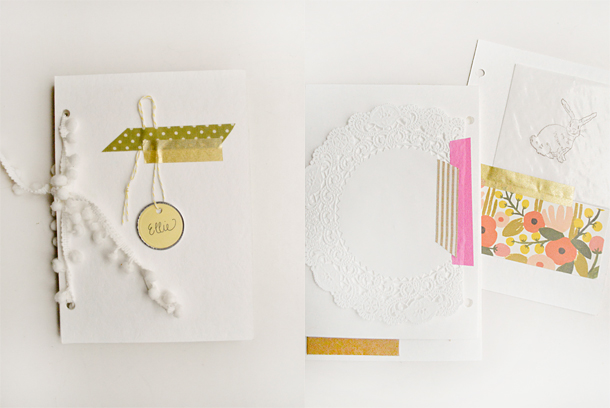
Obviously, this project could become very involved and complicated, but I decided to keep it simple. Each small book contains four pages, all tied up with pretty string. Just a few envelopes, paper scraps, and pieces of printed tape to decorate each page. An hour’s work for something special.
I’m still busy writing notes, but I can’t wait to sit down and give these to my children. The experience of focusing on the positive things I want to say to them has been refreshing, and I would love to make this a regular thing in our home. Who knows, maybe we will make some together to give to others?

I have been pondering the approaching Valentine’s Day season. This year I thought it would be fun to focus on simple, small acts that remind the people in our lives how much we love them.
When I came across this DIY on origami hearts, I know it would be an activity that we could share in as a family and that would lend itself nicely to this notion of leaving sweet little surprises for the ones we love in places where they will least suspect them.
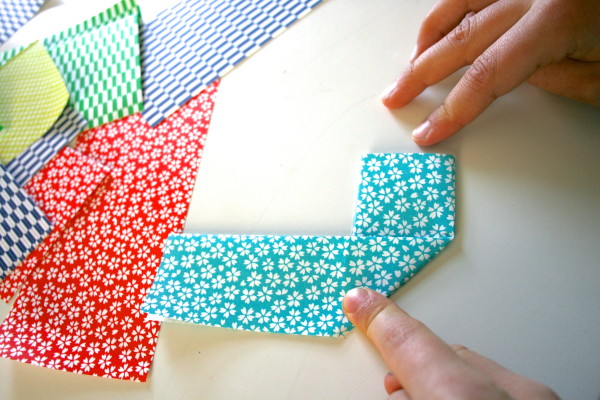
Because of this simple tutorial, the girls picked up the steps quickly. We had a lovely time chatting and making a plethora of sweet, colorful origami hearts.
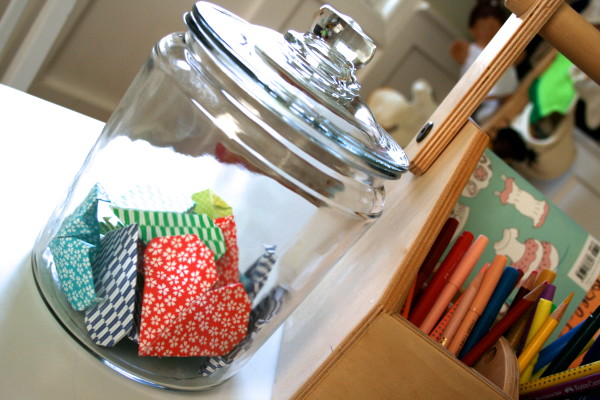
We found a jar to house our new abundance of hearts, so they are at the ready when someone could use a dose of love.

They have been popping up all over the house… In lunchboxes.
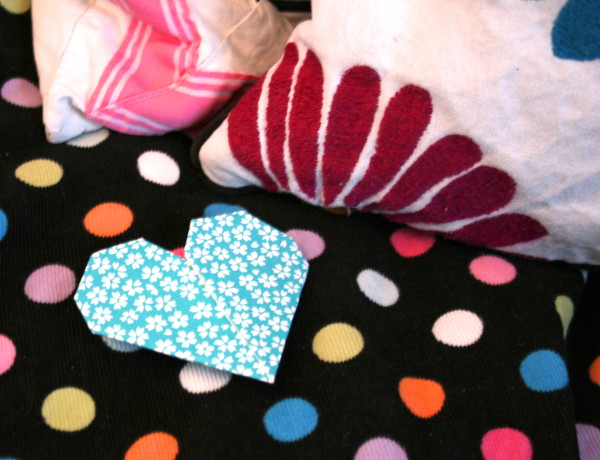
Tucked into beds.
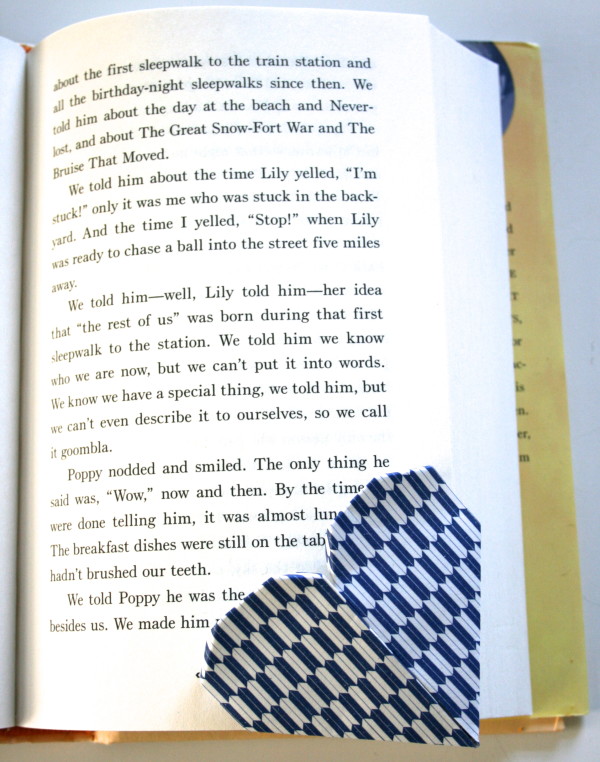
And in favorite books!
Stay tuned for more ideas on small acts of love to share with the special people in your life this Valentine’s (and every) season…

It’s that time of year again, when we get to start fresh and tackle some of those organizational projects that have been lingering on our lists for a while. Last week we talked about getting a handle on our toy collections, and I wanted to follow up with a bit of visual inspiration to get in there and make a well-organized, accessible place for your kids to play and create!


I especially love this studio, featured on Martha Stewart, which is filled to the brim with beautifully arranged art supplies. The studio is actually the at home work space of Editorial Director Darcy Miller, but she has created a way to involve her children by inviting them to create with her in the space. Isn’t that lovely? You can see more of her studio here.
Looking for more visual inspiration? Find more ideas for getting organized and creating functional spaces over on the Playful Learning Pinterest boards, we’d love to have you follow along!
Do you have any tips for creating organized spaces? If so, please share!
photo 1, photo 2, photos 3 & 4
If you are interested in discovering more practical tips for creating inviting spaces for the children in your life, check out our Playful Learning Spaces online class…


We have Randi from Swoon with us today to share another fun project that families can enjoy together during the holiday season. We can’t wait to make some dioramas of our own!
There’s something magical about miniature scenes, isn’t there? A tiny world created from the imagination. I recently revived a long lost love of miniatures and dioramas by making some festive winter scenes with my kids. There are so many ideas for making these little displays out there from simple trees in jars, to elaborate paper creations. I love the versatility of a diorama project and the amount of creativity involved. The best part is that you can make a little scene with whatever you have on hand, even if that means paper, markers and a few (little) willing hands! All you really need to start is a box. Any size will do. This is less of a “how to” post and more of an inspiration to get creative with what you have and make something!

For our winter scene we gathered: a small box, glitter, glue, oven bake clay, and some moss and sticks from our yard. We also ended up adding some fake snow and a little deer friend from our animal collection.
To start I cut and glued some black felt to the inside of our box. Paper would also work great, whatever you have on hand! I squeezed some dots of glue randomly over the back of our scene and then had the girls sprinkle glitter all over to make falling snow.We also lined our sticks with glue and sprinkled with more glitter “snow” to mimic the look of winter trees.

Next, we made some shapes with oven bake clay and baked them according to the instructions on the package. Once they were done baking and cooling, I added some black dots to our mushrooms with a toothpick and a bit of acrylic paint.


Then we starting setting up our scene by putting all of our elements together in the box. The only thing we actually glued down were our stick trees. The rest is moveable and can be arranged and played with as desired. We sprinkled fake snow (found at craft stores) and glitter over everything. Sugar or course salt would also work great as snow and probably look more realistic too!
If you’re looking for more inspiration, click on the links below to see other great examples of winter scenes and dioramas from around the web:
1. Easy winter scenes created in mason jars
2. A glittery Christmas tree diorama

We have Randi from Swoon with us today to share a fun project that families can enjoy together during the holiday season.
You may have heard of projects that involve creating your own crystals, but this amazing concept is new to me! While researching winter projects for kids, I came across several recipes for making “frost” crystals on your windows. The recipes I found were all different, but the basic concept is to create salt crystals on glass that look a lot like icy winter frost. My kids had SO much fun with this one! I think this would be especially fun if you live in an area that doesn’t get very much snow or frost-just create your own!


I love it when a fun project turns out to be easy too! All you need to make your own frost is: a small saucepan, 1 1/2 cups water, 1 cup Epsom salt, a wooden spoon, 3 Tbs. dish soap, a heat proof bowl or dish, and paintbrushes.
1. Bring water to a boil in your saucepan. 2. Slowly add the salt to the water in small increments, stirring vigorously with wooden spoon to dissolve completely. 3. Remove pan from stove and let water cool for a few minutes. Stir in dish soap. 4. Transfer mixture to a heat safe bowl and use paintbrushes to paint designs on your windows! 5. Salt crystals will begin to form on your designs as mixture begins to dry.

A few tips:
1. This project is fun, but messy! The solution is a little runny, so you will want to protect the floor with a towel. It’s also handy to have a few paper towels ready in case your designs drip a bit.
2. The liquid cools off fairly quickly, but it might be wise to put a portion of it in a small cup and cool it off a bit before giving it to little ones.
3. Once you’ve made a design, let it dry completely. Once it begins to set, don’t go over it again with your paintbrush as it will lose its crystalline appearance and start to look cloudy.
4. To remove crystals, wash windows with soap and water.


We have Randi from Swoon with us today to share a sweet holiday craft that families can create and enjoy together during the holiday season.
During the Holidays children get so excited to help with anything they can, from decorating the house, to wrapping gifts. It can sometimes be hard to find ways to include them in tasks that might be too challenging for them, or when delicate materials are involved, like your favorite glass ornaments. When kids want to help with projects around the house though, I try to always say “yes.” This little project is the first in a series of Holiday projects I’ve come up with this month for my kids to do. I hope your little ones will enjoy them too!

For your trees you will need: A small flower pot, a foam ball (we found some that were covered in pretty moss at the craft store), a floral pick or skewer, and a few pieces of plain copy paper.
First, you need to cut your squares. If you have older children, they can help with this process. You might do a little experimenting to see how many different sizes of squares you would like to use to make your tree. I cut six different sizes of squares (pictured above), but ended up adding four more sizes in between to make our trees a bit fuller. We ended up using ten different sized squares, the biggest being 3″x3″, with each size getting progressively smaller by 1/4 of an inch, down to the smallest size, which was 3/4 of an inch. We cut four to five pieces of each size.


Next, place your foam ball into your pot and stick the flat end of your pick into the center. Ask your children to poke the pick through the center of each square, from the biggest size to the smallest. When you’re finished stacking, you will probably need to spin the pieces a bit so the corners of the squares are fanned in different directions.
My girls were surprised when the stacked paper started to take the shape of a tree! They’re so proud of the decorations they made, and I’m happy to see them participating in the festive spirit of the season (glass ornaments still intact).


Annie Riechmann from Alphabet Glue and Bird and Little Bird is with us today to share a lovely activity that will bring a new level of excitement to story writing in your home.
There are times when kids write stories just for the sake of writing and wanting to share their ideas and imagination. Then, there are times when they write them because they have a clever idea for displaying their writing, which creates a bit of extra motivation to get busy with paper and pencil. Such is the case with these foldable paper story machines. Once my daughter caught hold of the idea to make and decorate a “machine” that produced her writing for friends and family to read, she was hooked. The result is a fun and whimsical bit of three-dimensional artwork that contains a bonus surprise for the person who picks it up and discovers that they can pull a story out of the side!
Interested in making a few story machines or your own? You can download complete instructions and templates here. I’ve also included a robot book list for some extra fun! This story machine activity can be found in Vol. 9 of my magazine Alphabet Glue and is just one example of the type of project you will find in every issue.


If you’re anything like me, you’re always looking for rainy day activities to do with your children. I love it when we can find new things to do with what we already have around the house (especially if it really is raining outside!).
All you need to make these pretty post-it patterns are post-it notes (I recommend the “super sticky” kind) and a pattern key to follow. You can download the two we used here and here. Or, grab a sheet of graph paper and make your own picture! You could even make letters and numbers. I love how this activity seems like art, but secretly involves so many different areas of learning: color, counting, following a pattern, and hand-eye coordination skills.

To make your post-it pattern, simply follow your pattern key. We made ours on the wall (for the purpose of photographing it), but it might be easier to make your shape on a hard floor surface, especially for younger kids. Start in the middle of your picture, each square represents one post-it note. My kids are fairly young (2 and 4), so I placed the post-it notes as we went, but they told me where they should go, according to our key. Even though they could see the final shape on the key, they were still amazed when the project was finished on the wall!

If you’re worried about wasting paper, we were able to re-use the post-its after taking them off the wall. The girls played with them all afternoon, mostly making roads and trails on the floor leading to “treasure.”


I am thrilled to have Rebecca from ThirteenRedShoes back with us today. She has a great list of creative app recommendations for the budding young artists in our lives.
Although at first glance there seems to be an endless supply of creative applications, both artistic and musical, for children, I have really struggled in this area. I have found many applications that allow for creativity in design and making sounds, but real music lessons or even stories about famous artists or composers are hard to find. I set out to discover creative applications based on educational theory while being delivered in a joyous manner—here is a list of our favorites…
01. Toca Band
02. A Jazzy Day
03. Little Fox Music
The above applications allow a focus on tempo and creating your own individual sound (Toca Band), to joining in and singing well known songs (Little Fox Music), and learning about instruments by counting and exploring different stories ( A Jazzy Day). Toca Band also has an adorable app related learning experience, which can occur away from the screen. Their blog features some creative Toca Band goodies such as character cards, posters and coloring pages, which can all be downloaded here .
04. MoMA Art Lab is an amazing app. This is one of my favorites so far. Recently my Mum and sister spent some time in NYC and I urged them to visit MoMA, as I love this museum. The application has amazing links to videos of artists at work, as well as wonderful components that foster learning about some of the famous pieces of work on display in the museum. You can create sound compositions, draw with scissors, make line drawings (which was little R’s favorite, he really enjoyed watching Jim Lambie create his vinyl tape ZOBOP lines on the museum floor), create shape poems, and collaborate on a group piece of art. Almost the next best thing to visiting MoMA itself! Click here, to see some of little R’s creations!
05. Theater by the very clever people at Appracadabra is also very engaging. I love the idea of the little ones taking photos of themselves and creating a new character such as little R the muscle man and little F the mermaid!!
06. Plic Ploc Wiz is a very engaging application in which you can create your own images or work from a set template based on shape and color. The final products are adorable. This was actually one of the first applications that I downloaded last Christmas when we received our iPad and I still enjoy it for me. This application is free in app purchases, so just be aware that little ones may be able to click and purchase if you do not have your itunes account with the security setting of a password, or at least using an itunes account rather than direct to credit card!
07. The Faces I Make is the funniest app. You can make faces out of everyday objects such as light bulbs and bananas. Very quirky and very cool.
08. Pirate Scribble Kidoodle is adorable. Click on this link to see it is action.
09. We found Van Gogh and the Sunflowers when I wanted to expose the little ones to Van Gogh. We have been reading Camille and the Sunflowers by Laurence Anhot ,which is what the application is based upon. I have also put on hold a few Van Gogh books from the library. The makers of the app, Auryn, have not done any other books from this series, but I wish they had. I think i will introduce the boys to Picasso, Monet, da Vinci and Degas over the coming months and with crossed fingers some applications relating to these masters will emerge.
10. After a little app store searching, I found this free app, KaleidoDraw that little F can use to create adorable and colorful images. It is lovely to find this creative tool as an application. The Kaleidograph toy also has an online version however, on a desktop rather than as an iPad application. You can save the image to Facebook and Pinterest, however, I like having the option to save to your photo roll or email to family members, which you can do with the KaleidoDraw app only. Both are free, so see which option you prefer the most!
11. Phoster by Bucket Labs is also another great app that allows you to create text overlays to images you create. You can select your own image and then choose a text/poster layout and alter the text to your own liking. The colors and styles can all be tweaked. The final image can be shared and/or saved to your camera roll. This app is not really for little R, aged 5, at the moment, but in the future as he becomes a more confident writer, this would be an excellent provocation to encourage writing for others.
12. I love Arthur and Charles Create and Play almost more than Little R. We love making the little faces and emailing them to all the family! I also adore the graphics, very clever indeed. Don’t you just love our little creations?
More great app recommendations for children…