Yoga for Kids: Gardening and Guided Imagery

By Mariah Bruehl,

Yoga for Kids: Gardening + Guided Imagery

Monique is here today with another inspiring addition to her Yoga for Kids series. This month we move our minds and our bodies to empowering visualizations of planting and caring for a garden.

This month, I have gardening on my mind. It’s early yet to get the gardens ready in this neck of the woods but not too early to start some seeds and never too early to imagine!

Enjoy this gardening Yoga sequence with the children in your life as you talk about and imagine working the land, preparing your gardens, and watching them grow.

Yoga for Kids: Gardening + Guided Imagery

If you would like recommendations for children’s books to read before doing the sequence, give these a try:

Gardening Yoga Download

Garden Yoga Sequence from Playful Learning

One more thing…

In recognition of Stress Awareness Month, I wanted to offer a little extra. As Emma from 95 Acres of Sky reminded us last month in this post, even the children in our lives can experience stress. Yoga is a terrific tool for alleviating stress, no matter what your age. Guided imagery and visualization are other powerful tools.

Here is an example of a guided imagery that I learned years ago and my modified version to use with children:

Healing Rainbow

Whether you and your child use it to relieve stress or to help fall asleep, I hope you’ll find it as effective as my children and I do.


SaveSave

From the Bin: Paper Bag Lantern

By Mariah Bruehl,

From the Bin: Paper Bag Lanterns

Heather from Poppy Haus is with us today with another inspiring DIY project using re-purposed products from the the recycling bin. I don’t know about you, but I have been eyeing these lovely textured lantern lights for sometime. I love that we could make one together as a family…

Hi there! I’m back with another project using materials that usually make it into my recycling bin. This one involves the paper grocery bag stash that I accumulate when I forget to bring reusable bags to the store. Today’s project is both decorative, and if you drop a light inside, quite functional. Kids get to operate a punch, and learn about layering and proportion. My six year old got in on the action with this one.

From the Bin: Paper Bag Lanterns

From the Bin: Paper Bag Lanterns

Step One: Gather Materials:

  • Rice paper lantern*
  • 6-8 paper grocery bags
  • scissors
  • school glue
  • circle punch*
  • a wide bowl
  • wine for hanging

From the Bin: Paper Bag Lanterns

Step 2: Punch circles from paper bags.


From the Bin: Paper Bag Lanterns

Step 3. Assemble lantern and place in the bowl (to act as a pedestal).


From the Bin: Paper Bag Lanterns

Step 4. Starting at the base of the lantern (the non-hook end) layer the first row of circles using a little school glue to secure, keeping the overlap to about 1/3 of the circle.


Step 5. Continue up the lantern, beginning each row slightly off center from the previous row.

From the Bin: Paper Bag Lanterns

Step 6. Once you’ve reached the top layer, fold the top of the circle over into the lantern to create a clean finish.


Step 7. Hang using twine, or drop a light cord in to use as a pendant!

From the Bin: Paper Bag Lanterns

Another idea: Use left-over wrapping paper, colored on construction paper, anything with a clean side. Use different punch shapes like inverted hearts, just keep to the simple layering technique.

*Sources:

Readers of my blog, Poppy Haus know that I love to make things with paper lanterns. These rice paper spheres are inexpensive and readily available at stores like Cost Plus, IKEA, and Pier One. You can also hang using a colored cord (fun!) which I’ve seen at Cost Plus and West Elm (online). For this project I used a 16” lantern, and a 2 1/2 inch punch found at Michaels craft store.


Authentic Art Materials for Toddlers: Introducing Clay

By Mariah Bruehl,

Authentic Art Materials for Toddlers: Introducing Clay

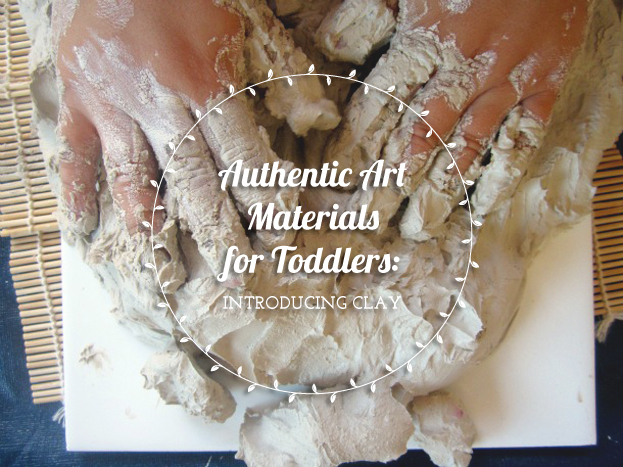
Kate from An Everyday Story is here to share the first in a series of posts about introducing authentic art materials to toddlers. Today she is exploring clay as a medium and I am sure that by the time you are finished reading you will want to get your hands “dirty” right along with the young artists in your life.

What’s so special about clay? Why not just use play dough? They serve similar purposes, don’t they? Sensory exploration, sculpting, working fine-motor skills, developing hand and wrist muscles; play dough can do all that. And, play dough doesn’t get all over your hands…and everything else.

Clay is natural, it comes from the earth. It is cool to the touch and soft on our skin. It has a deep earthy smell which invites you in. Clay can be sculpted far more intricately than play dough. Just by covering it over, clay can be returned to day-after-day, added to, sculpted, encouraging sustained inquiry and creativity.

Clay is strong, it can be sculpted higher and higher, on a much larger scale, encouraging problem-solving and critical thinking as your child tries to negotiate how to build a roof, or determine why their bridge keeps collapsing.

Authentic Art Materials for Toddlers: Introducing Clay

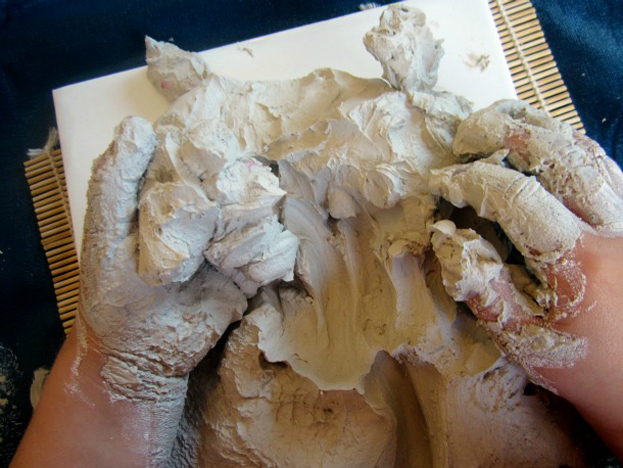
But clay isn’t just for children to sculpt into visual representations (an elephant or a rocket…) The relationship with clay can start much younger. What does clay feel like? How can you manipulate it? What happens when you poke it, squeeze it? What happens when you add a little water? What sound does it make between your fingers? Is it cool to the touch? What does it smell like? It starts with the senses.

The wider the range of possibilities we offer children, the more intense will be their motivations and the richer their experiences.

~ Loris Malaguzzi, founder Reggio Emilia Approach

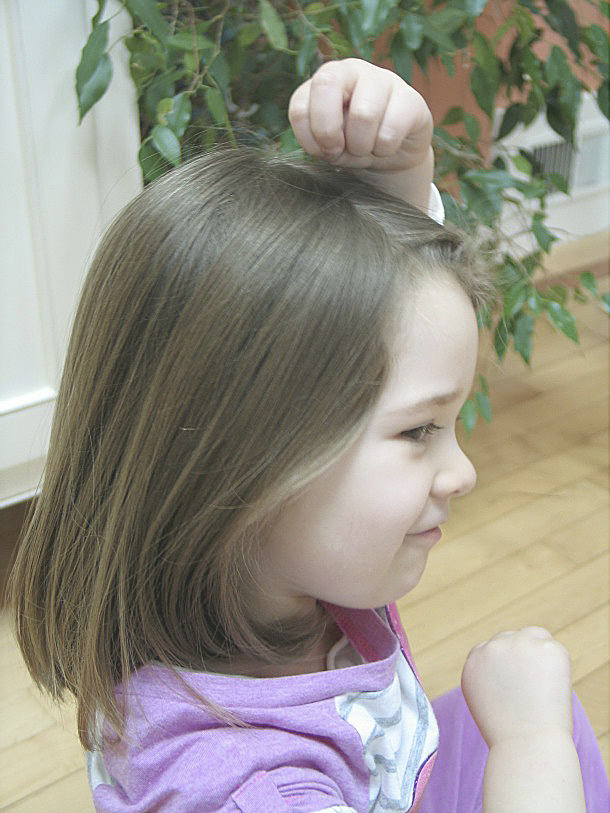
So grab yourself some clay. I bought ours from a local Potters’ Society (much cheaper than an art supply store). For my daughter Sarah (23 months) her first experience with clay was purely sensory. Have a bucket of water and a towel ready for clean up and then let your little one explore. No tools, no creating figures, just explore.

During the exploration you can encourage your toddler to…

  • Poke the clay
  • Lift the clay
  • Feel its weight
  • Scrape the clay with their fingers
  • Pinch it
  • Press their whole hand into it
  • Watch it change shape

Authentic Art Materials for Toddlers: Introducing Clay

After a few initial explorations, why not introduce a few simple provocations such as…

  • Putting a mirror underneath
  • Presenting the clay differently (maybe a flat slab or several small balls) to see how this influences their interaction with the clay.
  • Adding a little water. How does water change things?

Authentic Art Materials for Toddlers: Introducing Clay

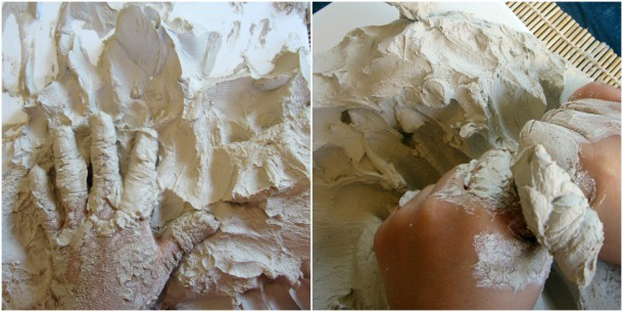
It will probably be another year or more before Sarah starts to create visual representations with the clay. That doesn’t mean it’s not worthwhile her using clay; quite the contrary I think. Through exploring clay freely with her senses she is developing ideas and discovering possibilities as she shapes the clay in her hands, stacks pieces on top of each other, squeezes it through her fingers and rolls it with her palm.

Each one of these important steps is building towards a gradual mastery of skills as she learns how to form clay, roll coils and balls and eventually, joining pieces together to create a model or a sculpture.

Toddlers enjoy using authentic art mediums and clay is a wonderfully sensory medium to explore.


DIY Hand Rolled Beeswax Candles

By Mariah Bruehl,

DIY Hand Rolled Beeswax Candles

Joey is here today with a wonderful tutorial on making beeswax candles with your children. Not only can children feel successful in creating beautiful candles, but there is nothing better than burning beeswax candles in your home…

Getting ready for the Easter weekend?  Here is a fun craft that you can make with your children for your Easter table!

Melting hot beeswax to make candles can be a bit tricky with young children, so this craft allows them to safely experience the magical properties of beeswax.

Natural beeswax is a sensory delight!  It pleases the senses and calms the mind the minute you pick it up and roll a bit in your hands. Breathe in the wonderful aroma of honey as the wax begins to soften from the warmth of your palms.  The movement of rolling and molding the soft wax is therapeutic, relaxing and a perfect activity for children of all ages to try.

Children under 5 will need an adult to supervise.

DIY Hand Rolled Beeswax Candles

You will need the following supplies to make two 4″ taper candles:

  • 1 sheet of natural beeswax (8″W x 16.5″L)
  • 2 pieces of candle wick (metal free) (1/8″D x 4  1/2″L) Note:  regular string cannot be substituted for candle wick.
  • self healing cutting mat, ruler and cutter (or scissors will work as well)

A beeswax sheet measures approximately 8″W x 16.5″L and is often made in a mold that gives it a raised honeycomb pattern.  The natural coloring can vary from pale yellow to medium brown.  Sheets can also be dyed in a variety of colors.  Beeswax can be bought at a craft or candle making shop.   You can also find it at a store that carries bee keeping supplies.  It is often called drone wax and is used in new beehives.

DIY Hand Rolled Beeswax Candles

Prepare and cut the materials before inviting your child to roll the candles.  With your cutter cut beeswax sheet in half creating 2 strips 4″W x 16 1/2″L.

DIY Hand Rolled Beeswax Candles

To start, place the wick along the end of one of the strips of wax.  Fold the wax over the wick and start rolling away from you.

DIY Hand Rolled Beeswax Candles

Gently press the wax onto the layer underneath as you roll to form a tight cylindrical candle.

DIY Hand Rolled Beeswax Candles

Periodically check to make sure that your child is rolling evenly so that it has a flat bottom.

DIY Hand Rolled Beeswax Candles

If the bottom is not flat, gently press the candle down onto the table to flatten and continue rolling.

DIY Hand Rolled Beeswax Candles

Place in a candle safe holder, have an adult light the candle and put it in a safe spot for all to enjoy!

Happy Easter!

SaveSave

Fairy Garden in a Box

By Mariah Bruehl,

title3.jpg

Have you heard about the lovely little fairy gardens people are making lately? The concept is for children to make a little garden space where fairies would be comfortable, should they decide to show up. Since my children have recently fallen in love with the magic of gardens and all the living things within, I knew they would be enchanted with this idea.

There are a lot of talented people who have spent a lot of time making amazing, elaborate fairy gardens (you can see a few here and here). When you’re just getting started, the sheer amount of ideas out there can seem overwhelming. I’ve found, however, that you really only need a few simple things. I love the idea of placing the items in a box, tying it with string, and presenting it to a little one in your life. The rest is up to them!

Fairy Garden in a Box

Gather a simple box and fill it with:

1. A few plants and flowers. These can be store bought, or from your own garden.

2. Dried moss. This can be found at craft and garden stores. It makes for a pretty addition and the children will love the fact that they can move it around the garden as much as they would like. The moss won’t actually grow, but it will stay in good shape with regular watering.

3. A small bag of rocks. These can be used to build things, make paths, or as decoration in your garden.

4. A few embellishments. We stumbled upon a fairy section at the gardening store and decided to buy a few trinkets, but you probably have a lot of usable items around the house and outside. Spools, thimbles, and sticks all work great! You can also fashion your own shapes out of clay. Get your children involved in finding things, they will love it!

Fairy Garden in a Box

Pick a small container or corner of your yard and get started. I assisted with the planting in our garden, but the rest was up to my little designers. They enjoyed digging in the dirt and making rock paths. Watering the flowers was especially fun for them too. I anticipate our garden evolving and changing a little every time we visit it!

Here are a few books to get you started:

How to Find Flower Fairies (our favorite!)

The Complete Book of Flower Fairies

Fairy Houses

Fairy Gardens: A Guide to Growing an Enchanted Miniature World


Helpful Hints for Successful Birdwatching with Kids

By Mariah Bruehl,

Hints for birdwatching with kids...
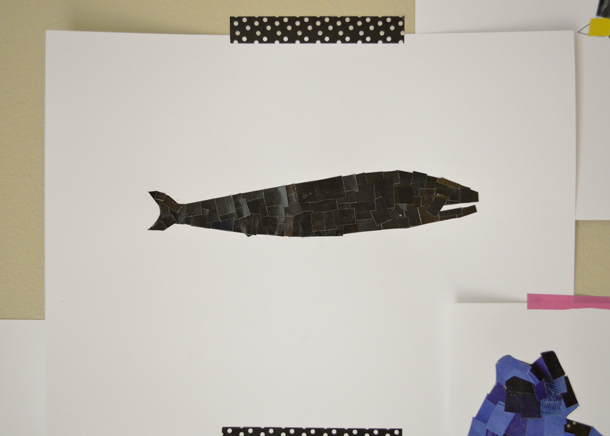
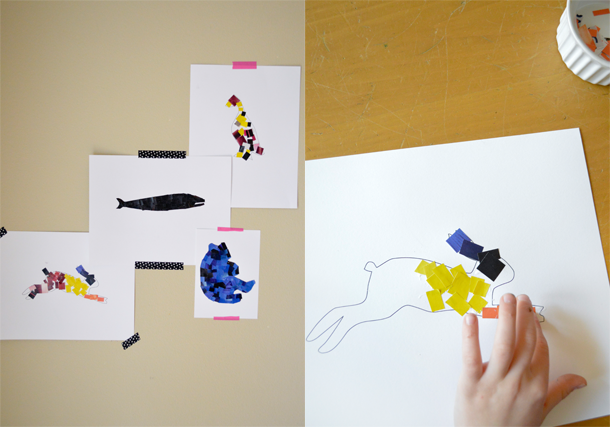
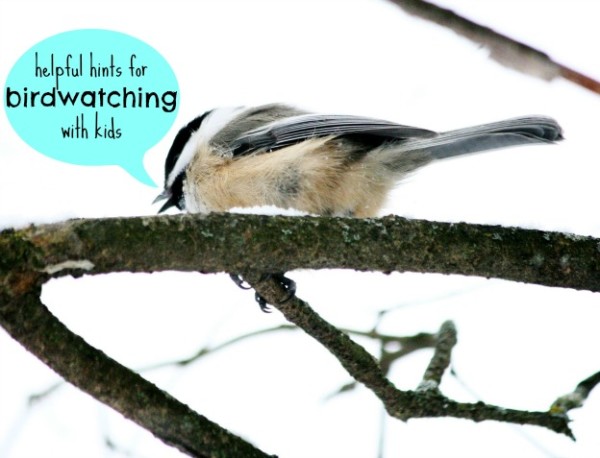
We have been dedicated bird watchers this winter! Needless to say I was thrilled to hear that Annie, from Alphabet Glue, and her daughter share the same pastime. Annie is with with us today to share some of her tried and true tips for successful birdwatching for the budding young ornithologists in our lives.

Here in Northern Vermont, we have famously long, cold winters. Which is one of the reasons why it was such a surprise to me, upon relocating here from temperate Northern California, to discover that we also have a colorful and interesting population of backyard birds who live here year round. Both my daughter and myself have always had great enthusiasm for birds, and our excitement over the prospect of sighting the brightly colored cardinals and goldfinches that live here has made us into proper armchair ornithologists. But birdwatching is an activity that requires some amount of patience; something that can be in shorter supply for people under a certain age. Here are a handful of tips that I have found useful for making birdwatching accessible, easy and yes, even entertaining, for the small set.

Be aware of your immediate surroundings (and feel free to fancy them up a bit).

You might be really surprised by just how many birds are in your very own yard or neighborhood if you take the time to see them. Make some predictions about how many birds you might find if you sit in the yard or look out the window for five minutes, or even less time if you have especially wiggly little ones. Want to stack the deck a bit? Hang a bird feeder near an accessible window in the house. This will bring birds to the house and easily allow kids to gather near the window to watch when they arrive- without scaring any flying friends off before getting the chance for a good look.

Have a field guide at the ready. Part of the excitement for bird spotting kiddos comes from being challenged to make an accurate identification.

Having a field guide handy allows your kids to immediately start flipping pages in hopes of finding a match for the bird that they have just seen- a fun activity that lets them be both naturalists and detectives. It can easily be turned into a whole family game of “find that bird” and you can even give yourselves points for great guesses. Keep a family “life list,” or list of all of the birds that you have seen, in a prominent location in the house (such as on the refrigerator) and update it with new birds as you find them.

birdwatching

Binoculars aren’t bad either.

My daughter is of the opinion that even if you don’t use them while you are in the field, having a pair of kid sized binoculars is awesome when it comes to making you feel official. She absolutely recommends having a sturdy, plastic encased pair at the ready, and I am inclined to agree. If you choose to leave the backyard and hit the trail to look for birds, you might also make sure to pack things like water and a really tasty snack. This may seem obvious, but remembering this detail can make a few minutes of patient trailside sitting go much more smoothly, increasing the odds that you’ll get the reward of a sighting.

Join the bigger birding community.

Although birding is a bit more old-fashioned as hobbies go, the advent of the internet has meant great things for birdwatchers. It is easier than ever to find out about local bird walks, talks and guided tours, many of them designed for kids. Taking part in one of these organized events can be a great way to get kids into the community spirit of birding. You might also think about having your family participate in events such as the Great Backyard Bird Count or other community counting events. You can read up on some of those here.

Get excited about birds by spying on some really amazing ones!

Part of getting kids excited about the idea of birdwatching is getting them excited about birds! Your local science or nature center may have birds that you can view up close, particularly if there is an aviary nearby that rehabilitates wild birds. You can also view some really interesting birds through the cameras run by the Cornell Lab of Ornithology. Watch herons build nests and hatch eggs, or view hawks feeding their chicks. Pretty cool stuff! You can find the cameras here.

For some more bird watching goodness make sure to check out…

Good birding luck to you and yours!


Crafts for Kids: Animal Mosaics

By Mariah Bruehl,

Animal Mosaics

Randi from Swoon is with us today and is sharing a wonderful mosaic project that is not only good for developing fine motor skills, but serves and a great invitation to learning about the world of animals.

Do your kids love to cut and paste paper as much as mine do? I remembered a paper mosaic project I did in a college art class the other day and decided to modify it a bit for little hands. According to Wikipedia mosaic is the art of creating images with an assemblage of small pieces of colored glass, stone, or other materials. 

You can modify this concept to be as easy or hard as you would like. I’ve included four simple animal shapes to fill in, but you could also use the same technique with a more complicated picture with several sections and colors.

You will need: Old magazines or pieces of colored paper, scissors, a template or a drawn shape to fill in, glue or glue stick, paint brush (optional)

Animal Mosaics

1. Choose your colors and cut! Use scissors or a paper trimmer to cut small squares of similar color out of paper.You can use pages ripped from magazines or colored paper of your choice. Searching through magazines is more time consuming, but I love the dimension the varied squares add to the final product. Plus it’s a good time to talk about colors as you search! We chose blue, yellow, pink, black, and orange.

Animal Mosaics Animal Mosaics

2. Glue your paper down. Working in small sections, apply glue to shape first and then carefully stick pieces of paper down, staying within the shape. A glue stick is easiest to work with for little hands. I used a bottle of glue and spread it with a paintbrush. Older children will be able to fill the shape with squares carefully enough to cover it completely and not go over the lines. You may need to trim a few pieces to fit within the shape. This process can be challenging for little ones, so it’s best to just let them have fun gluing squares wherever they want!

Animal Mosaics

Click on the pictures below to download the corresponding template. My children really enjoyed this rainy day craft and I hope yours do as well!

Bear TemplateDuck Template


Rabbit TemplateWhale Template


DIY Lego Puzzles

By Mariah Bruehl,

DIY Lego Puzzles

Rebecca from ThirteenRedShoes is with us today and is sharing a wonderful project she recently discovered, which is great for hand-eye coordination and for inspiring the young builders in our lives.

Last year, I ran across this pin on Pinterest. It led to the most adorable idea by Kids Activities Blog, to create your own puzzles using Duplo blocks and photography!  There are so many amazing ideas on blogs today. I pin so many of them, but this was one that I really wanted to create and it was very quick and easy. I would say less than 20 minutes and you are away!

Here’s the idea: Use photos of various Duplo/Lego configurations as puzzle cards that children can recreate with their blocks at a later date.

DIY Lego Puzzles

DIY Lego Puzzles

Here’s how we did it:

  • The Duplo pieces were set up on a board we had painted to use as a neutral and uncluttered background.  A simple blanket or sheet of white paper could also work well, simply use what you have available.
  • The next step was to take photos from above as an aerial image or bird’s eye view.  I like to take all of my photos in spaces that are filled with natural light, but not necessarily bright sunlight.  Close to a large window or door is often ideal.
  • I made sure to change the colors and shapes of the Duplo pieces around so that there was a varying degree of difficulty in order to cater and differentiate for the ages and abilities of my boys (aged five and two).
  • Once I had a lovely little collection of images on my camera (it is very hard to stop once you start, so set yourself a time limit!), I uploaded to my computer and printed them out on my home printer.  You could also laminate your prints, print them on photo paper,  or even create a book, whatever suits you and your budget.
  • Little R was at school while we created this little provocation, so Little F helped to design some of the interesting Duplo creations himself.  If you have a little person around while doing this, it makes it so much more enjoyable! They get so much out of creating the image, seeing it on the screen, and finally seeing it printed out.  I aim to involve my children in these creating times as much as possible.
  • Once printed, place the puzzle cards on a  clipboard. Place a basket of the blocks used next to it in a lovely sunny spot, sit back and allow the littles to find the provocation, and enjoy.

DIY Lego Puzzles

You could use anything really for this activity, Duplo blocks are just a starting point.

You could take photos of:

  1. natural materials found in the garden such as: seed pods, petals, or leaves
  2. wooden blocks
  3. mini figs
  4. toy dinosaurs
  5. animal figurines
  6. rocks and crystals
  7. shells and sea glass

The possibilities are only limited by your imagination.


From the Bin: DIY Recycled Vases & Flowers

By Mariah Bruehl,

DIY Recycled Vases & Flowers

Heather from Poppy Haus is back today with another creative craft project, where the materials can be gathered directly from your recycling bin. I love that these projects show children the value of reusing everyday items as well as how to think outside of the box when it comes to pursuing creative endeavors and making the ordinary extraordinary.

I have always been a sucker for well-designed packaging.  The teardrop shape of Method soap containers are one of my favorites. I’m particularly smitten with the look of their recycled ocean plastic bottle, and using that means you are up-cycling recycled ocean plastic. How’s that for being green?  Obviously the best thing to do with an empty Method container is to refill it, but if you have a few extra empties lying around, I have an easy project using their soap bottles, and some empty yogurt cups to pretty up your house for Springtime, or decorate the table for Easter brunch.  Try mixing your own paint colors to experiment with hues and tints, and be creative!  I stamped a leftover crepe paper sheet using a pencil eraser to make the polka dot runner, and used flowers from our yard to decorate our table.

DIY Recycled Vases & Flowers


DIY Recycled Vases & FlowersMaterials: Method soap bottles, or any other plastic container to be used as a vase

Yogurt cups

Acrylic paints (white plus colors)

Scissors

A heavy book (to press)

Fresh flowers

DIY Recycled Vases & Flowers

1. Wash and dry the plastic containers

2. Mix paints to desired color

3. Paint 2-3 coats on vases, allow to dry between coats

4. Cut vertically down the yogurt cups, dividing first into quarters to keep even

5. Gently open up the cup, and press with a book for about 10 minutes

6. Trim the cup into shorter petals

7. Paint the flower cups a contrasting color

8. Fill the vases with water and flowers

DIY Recycled Flowers & Vases

Books to Inspire…


Yoga for Kids: March is Like the Wind

By Mariah Bruehl,

Yoga for Kids: March is like the wind

Monique Barker is with us today sharing some great yoga poses that we can do with our children during this windy time of year. I love that Monique’s yoga series inspires us to tune into our bodies while at the same time honoring the changing seasons.

Hello.  Welcome back to our monthly Yoga series!  Given the weather we’ve been having lately here in the Northeast and looking at the busy March calendar, I’ve had the idiom “March comes in like a lion and goes out like a lamb” on my mind.  It struck me that this would be a good basis for a Yoga sequence but I just wasn’t sure how.  Then I came across this lovely little book at our library and it all came together.

The book tells a story about the many moods of the wind and a child that wants “to play like the wind.” We see that the wind can be mischievous…

Blowing hats off...

Blowing hats off

playful…

Making flags wave

Making flags wave

helpful…

Sailing a boat

Sailing a boat

and strong.

The accompanying Yoga sequence incorporates many of the wind’s moods and abilities (which are a lot like children’s).  It will bring your child from a gentle breeze to a strong, playful wind and back again.  Even without the book, I know you’ll have fun acting out all the characteristics of the wind with your child.  Just click the download to get started.  I hope you enjoy!
Download: March Yoga: Like the Wind