Crafts for Kids: Kite Paper Stars

By Mariah Bruehl,

Kite paper stars are a fun way to brighten up your window any time of year.   Commonly made in waldorf schools, this is an excellent activity that children can do to practice hand eye coordination.  The star I am showing you how to make today is a very basic star to start with.  This project can also be done with regular tissue paper, however, the kite paper is far easier for little ones to work with.  For ages 6+.

Crafts for Kids: Kite Paper Stars

Supply List:

(to make four 8.75″ stars)

1 sheet of 6″ square kite paper in 8 rainbow shades (you can also find it here)

tombow glue (or any liquid glue that dries clear)

paper cutter (or scissors)

Crafts for Kids: Kite Paper Stars

1.  trim each 6″ sheet in half both ways to create four 3″ squares.

Crafts for Kids: Kite Paper Stars Crafts for Kids: Kite Paper Stars

2.  Fold each square in half to make a triangle.  then fold in the sides to the center line to form a diamond shape.

Crafts for Kids: Kite Paper Stars

To Assemble the Star:

3.  On the “front” of the diamond, put a teeny tiny dab (using a toothpick works well) on the spots shown above.

Crafts for Kids: Kite Paper Stars

4.  Attach the next color in the rainbow to the two points as shown in the photograph.

Crafts for Kids: Kite Paper Stars

5. Continue gluing on the points until you come to the last one.

Crafts for Kids: Kite Paper Stars

6. Tuck the last color under the first color so that it overlaps, and glue as you have done for the other points.

7.  Add another dot of glue on each flap so that it lays flat.

Crafts for Kids: Kite Paper Stars

Stars can be hung from a strand of fishing line or…

Crafts for Kids: Kite Paper Stars

…attach them to your window using a tiny piece of tape behind one of the dark colors so it is less noticeable when the sun shines through!

Experiment with other color combinations or make “snowflakes” using white kite paper!

More patterns can be found in the following books:

Magical Window Stars

 The Christmas Craft Book

The Children’s Year

All Year Round

Crafts Through the Year


SaveSave

Child’s Play: Organizing One Toy at a Time (Part 3)

By Mariah Bruehl,

Child's Play: Organizing One Toy at a Time (Part 3)

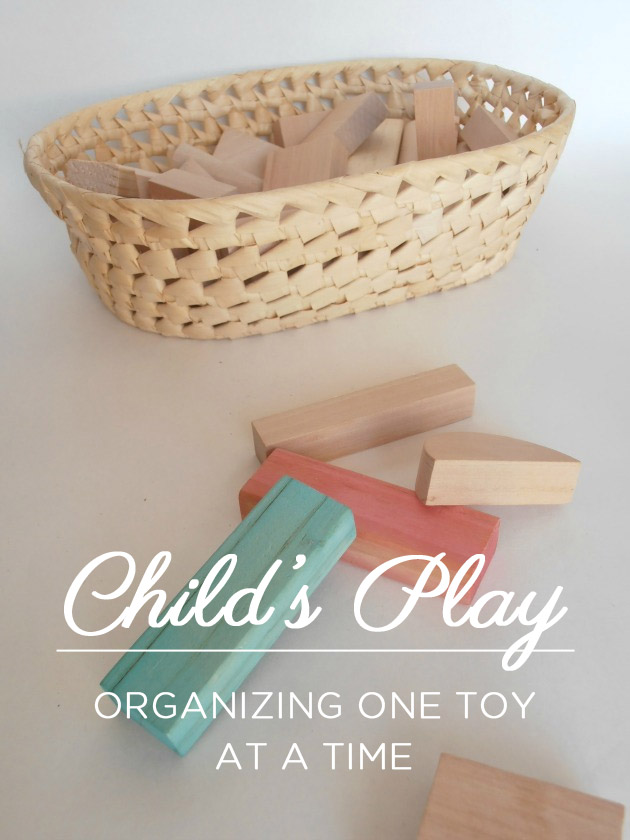
Adrienn is with us today to share some more simple tips for keeping toys organized and engaging for the little ones in our lives…

“Organizing is a skill, in fact a remarkably simple skill that anyone can learn. It is sustainable if your system is build around the way you think and designed to grow and adapt with you as your life and work change.”

– Julie Morgenstern

In today’s post I invite you to take a closer look at the organizational systems you have created. I truly believe that in our fast paced world this is one of the most significant lesson sto be learned. Wouldn’t  it be wonderful if we could pass this skill on to our kids? Teaching them not only how to get and stay organized but also how the whole process works? I understand that it can sound a tad complicated or even daunting.

But fear not, is is simple as 1-2-3. All we need to do is show/ learn along side them how to organize their belongings.

This 3 step method will guide you confidently through the process of  providing unique solutions for your child’s individual organizing style.

Child's Play: Organizing One Toy at a Time (Part 3)

1. Set up customized systems that suits you both…

 A. Examine how they are using their play area and storage spaces during the day and ask yourself these questions:

Time management:Where do they spend the majority of their time? How long does getting a certain toy out take? How long does clean up time last?

Feelings: Are they happy with it? Where do they show frustration? Where do they need your assistance? Does it speak to their interests? Does it inspire them to touch, use and eventually put back everything?

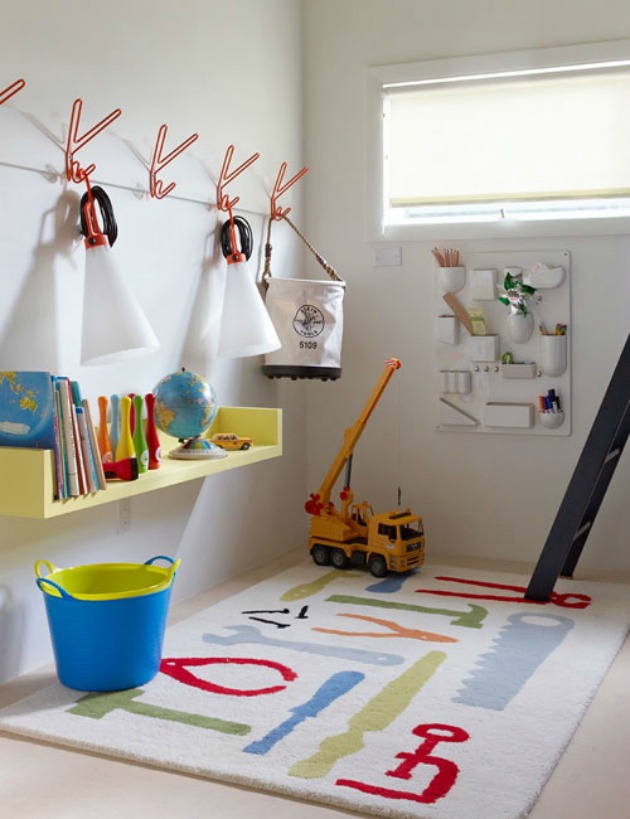
Functionality: Which toys are left out or not played with at all? Is it convenient to use? Is it placed too high or too low?

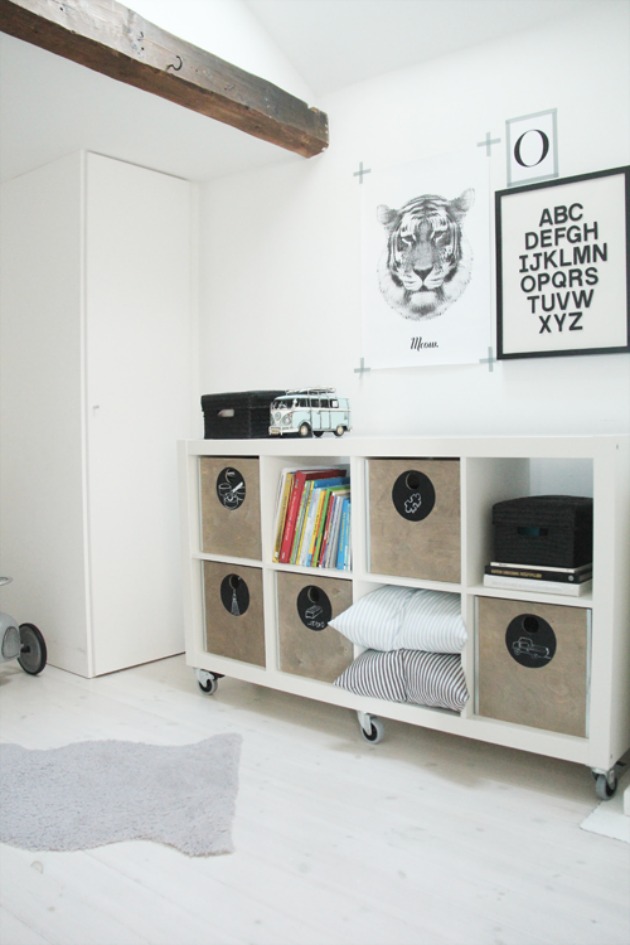
Jot down your remarks. For instance, I noticed a couple of days ago that the way we store our books (by color) is maybe not suitable for all of them. My son likes one of my  big nature books and loves to flick through the pages, but it is huge compared to his other books and he has difficulties with taking it from the low shelves. It got stuck and the other ones were in the way.

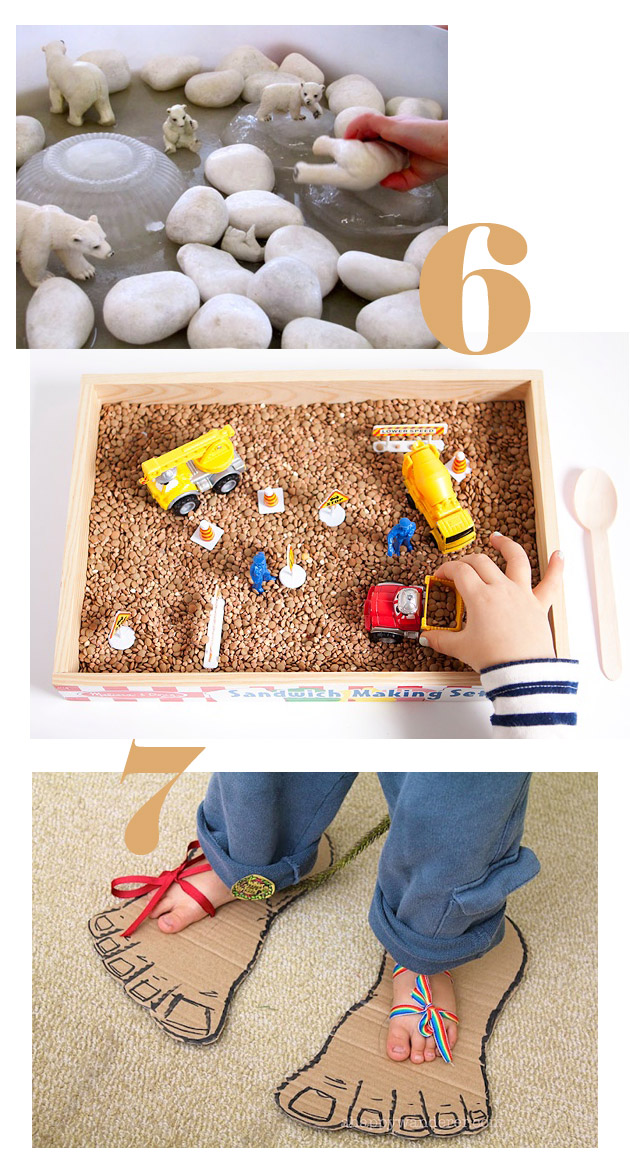
B. Plan how you can change the problem areas with some simple solutions. For example, putting the nature book in a basket with some stones and other objects found outside, along with a toy camera provided my son with a fun play experience in the afternoon.

C. Execute Imperfectly (at first) Don’t go for the impeccable solution. I could have looked for a wooden tray or a smaller basket, instead I just grabbed one from under my desk, quickly tossed in the materials and I was ready in 3 minutes. You will have plenty of time to fine tune it in case  it becomes child approved.  For now taking action is all that matters.

Child's Play: Organizing One Toy at a Time (Part 3)

2 . Describe and demonstrate…

Make a mental shift. Instead of clean up time name it construction time. Explain that you are setting it up for the next play session. As it becomes not the end, but the beginning of each activity, the joy factor will grow significantly. Don’t forget to explain from the start where to put each toy and why it is important to clear them away. They should understand from early on the basic principles of organizing: everything has a home and to put like with like.

Child's Play: Organizing One Toy at a Time (Part 3)

3. Encourage Participation…

 Start by instilling responsibility and name your child  “The Chief of Toy Management.” Communicate clearly that you are helping them, not the other way around.

 A. Step back As soon as they are capable, let your child put the toys back on his own before naps and each night. Skip bribing, punishments, and treats. A simple :”You worked really hard to get all the toys in the toy box” is more than enough. If he can’t handle it on his own, try to take some toys out of the rotation so the sheer quantity doesn’t overwhelm him.

Keep in mind that even if we find the best systems or the cutest basket, if our children are not on board, sooner or later the chaos will seep back in. Let your child’s true nature be at the forefront when organizing  and you will be able to teach them one of life’s most important lessons while creating a tidy environment where they can relax, play and learn.

Image Credits: 1 / 2 / 3

If you are interested in discovering more practical tips for creating inviting spaces for the children in your life, check out our Playful Learning Spaces online class…

Hz468x60-SPACES

DIY Chalkboard Shadowboxes

By Mariah Bruehl,

Crafts for Kids: Chalkboard Shadowboxes

Randi from Swoon is with us today with a lovely DIY for making Chalkboard Shadowboxes! They look like just the thing for a fun afternoon of open-ended, imaginary play…

When it comes to dramatic play, I’ve learned that my children are drawn to activities which allow them to use their creative minds as much as possible. Toys that “do it all”  and leave nothing to the imagination tend to get left behind quickly. They jump at the chance to express themselves and define the materials they are playing with in some way. These chalkboard shadowboxes have been a fun addition to our play space and have been used often.

Would you like to make a few of your own?

Crafts for Kids: Chalkboard Shadowboxes

Here’s what you need:

Small wooden boxes (found at the craft store), chalkboard paint, painter’s tape, a sponge applicator or paint brush, chalk, and a little bit of patience.

1. Tape off the edges of your box to protect it from paint.

2. Paint the inside of the box. Here’s where the patience comes in handy…we ended up painting three coats, waiting about 45 minutes between each coat.

3. Let the paint cure. Chalkboard paint is unique and works best when it’s allowed to “cure” overnight (insert more patience).

4. Prep the chalkboard surface by rubbing a bit of chalk all around it and then wiping with a paper towel.

Crafts for Kids: Chalkboard Shadowboxes

5. Set up an invitation. Lay your newly made boxes out with a handful of chalk and a small amount of your child’s favorite toys or figurines and let them have at it! When you’re done playing,  wipe the shadowboxes with a damp paper towel or cloth so they’ll be ready when you want to start all over again.

Crafts for Kids: Chalkboard Shadowboxes


Crafts for Kids: Recycled Bird Feeder

By Mariah Bruehl,

Recycled Bird Feeder

Bird Feeders are a constant source of inspiration for our family. Kate from An Everyday Story is here to share a lovely DIY on how to create one from recycled items.

“He who can no longer pause to wonder and stand rapt in awe, is as good as dead; his eyes are closed.” ~ Albert Einstein

A few months ago we moved house into our first family home. It is a lovely little home, needs a little work, but it was mostly the yard which sold us. Our yard has several tall native trees; beautiful eucalyptus and wattle, as well as blossoming deciduous trees.

All the trees has meant that our garden is alive with bird calls, as rosellas, galahs, budgies, cockatoos, magpies and currawongs sit perched on the branches, while brown and blue wrens hop along the ground amongst the bushes.

Recycled Bird Feeder

We are so very fortunate to have such exquisite native birds here in our part of Australia. The colors are so vibrant and their songs are so distinct. For the past few weeks, Jack (4yrs) and Sarah (2yrs) and I have been learning more about these magnificent birds.

We made them a simple rustic bird feeder out of an old pot saucer and this one, to hang up in the trees, from an old plastic bottle.

Recylced Bird Feeder

Here’s what we did:

  • grab yourself an old plastic bottle
  • carefully cut a hole in the side of the bottle – how big and how high up the bottle will depend on your bird – if your bottle is strong enough you can cut a hole in each side
  • carefully cut a small hole on either side of the bottle for your perch
  • find a nice study stick and slide it through the two holes
  • add your wild bird seed
  • twist on the cap tightly and tie a loop of string
  • hang it from a branch and wait for the birds to feast

Recycled Bird Feeder

Recycled Bird Feeder

My children get such joy from watching these birds; a true sense of wonder as the birds fly in and out of our yard. Beyond learning to recognize the birds by name, observing their feeding patterns and learning their songs, Jack and Sarah are connecting with the birds, building an appreciation I guess for them, an understanding that we share this environment with the birds; a sense of connectedness.

Recycled Bird Feeder

‘Mummy I love these birds so much. They are so beautiful. Look! Another rosella! I wonder which birds will come and visit us tomorrow… we’ll just have to wait and see.’ ~ Jack (4 yrs)


10 Pop-Up Books Your Kids will Love

By Mariah Bruehl,

10 Pop-Up Books Your Kids will Love

Rebecca from Thirteen Red Shoes is with us today to share a fun list of lovely pop-up books. I can still remember my childhood favorites. They are a great way to engage young readers and to nurture an appreciation for the written word.

I just adore pop up books and over the years we have developed a lovely little collection.  I find them engaging and believe they create an entirely new way to view a story, even one which you may have read over and over again.  I find pop up books  interactive and bold, perfect for encouraging little ones to think outside the square.

Here are some of my favorites that sit on our shelves.

1.  The Sarah McMenemy city series.  Just delightful and informative.

2.  Popville | Anouck Boissrobert When this book first came out, it was everywhere and I put it on the list for our advent calendar straight away.  We love it.  There are no words, but the story of a small town changing over the passage of time is very moving.

3.  Hansel and Gretel | Louise Rowe I adore the classic tale of Hansel and Gretel.  The messages are at conflict with how we would talk to our children today, however the story of love and support between siblings is usually my focus.  This edition is beautiful. Louise has paper engineered a few other classic fairy tales such as Little Red Riding Hood and Sleeping Beauty.

4.  My Pop Up Body Book | Jennie Mezzles and Will Petty This is our second copy of this book.  The first came to a rather sad end and we just had to replace it.  Informative and ever so perfect for littles interested in how our bodies work.  My five year old adores this book.

5. Yellow Square | David A Carter Yellow Square is the fourth installment from the creative David A. Carter.  This book makes you think and explore as you navigate through the pages to find a hidden yellow square.  There are a few pages where we simply cannot find it!

6.  Out of Sight | Pittau and Gervais Over 50 animals are hidden on the pages of this book.  It is filled with facts about the animals that we share this planet with. Using footprints, silhouettes, tails and noses to give you a clue as to who is hiding behind the paper flap.

7.  Pop Up London | Jennie Maizels We have had this book since the lead up to the Summer Olympics hosted by London. Even though the Olympics have come and gone, this book still spends a lot of time on our kitchen table as we flip through the pages and talk about this amazing city.  Perfect for any little with a love for travel and history. You can see an inside preview here.

8.  We’re Going On A Bear Hunt | Michael Roson We have multiple copies of this book—as a book with audio, a board book, and as a pop up. This is magical and an absolute favorite.  Again, another copy which we have had to purchase twice due to little fingers being too excited, but well worth it.

9.  Lift the Flap Picture Atlas | Jane Chisholm A beautiful collection of maps of the world, illustrated with beautiful details and filled with facts that most littles would find interesting.  I have used this book both with little R (aged 5) and at work with older children.  A lovely addition to any home or school library.  The illustrations by Alex Frith and Kate Leake are bold and bright and are what make this book so adorable.

10.  Lost and Found | Oiver Jeffers This has been my favorite of the pop up book collection over and over again.  I adore Oliver Jeffers and the paper engineering in this edition is refined, yet delightful.  A little inside preview can be seen here.

10 Pop-Up Books Your Kids will Love

Look what we now have for the littles bedrooms… these beautiful acrylic booksee bookshelves from Ubabub. I cannot wait to get them up on the wall!


Healthy Frozen Treats: Probiotic Popsicles

By Mariah Bruehl,

Peaceable Home....Healthy Frozen Treats: Probiotic PopsiclesEmma from 95 Acres of Sky is with us today with a delicious recipe for probiotic popsicles—a wonderful way to give your children a special treat that we as parents can feel good about.

During the busy, sometimes hectic and overheated, days of summer getting motivated to cook can be hard.  I often find my food mojo goes on vacation as the temperatures rise (and rise).  As my creativity and enthusiasm take a dip so does the family appetite, the children don’t want to sit for large meals when they could be running, swimming or playing with friends.

Rather than fight this phenomenon I prefer to go with a few ‘light days’, providing healthy snack type meals that are packed full of goodness but light on the stomach.  These often revolve around tapas type meals with little bits of meat, cheese, salad, hummus, crackers and fruits that are easy to assemble and are handily portable if we find ourselves heading out for yet another round of summer fun.

But when the temperatures really soar I turn to a summer staple, fruit popsicles and homemade energy bars.  These frozen treats are a hit with my boys, cooling them down and giving them a good dose of energy without the table time struggles of a full meal. They can function as a snack or a summer ‘mini meal’, just before we head out to the pool or a play date.

Peaceable Home....Healthy Frozen Treats: Probiotic Popsicles

This year I’ve been more conscious than ever of trying to pack as much nutrition into every bite as possible.  My growing lads are so full of energy, but liable to crash hard when their tummies feel suddenly empty.  With increasingly busy schedules it is even more important for them to be eating nutritionally dense foods that support their growth and development.

Of course that doesn’t mean boring!  The more delicious a food is the more likely they are to want to eat it, so good flavor is key. I’m also conscious of taking any opportunity I can to introduce probiotics and key nutrients into their systems; despite the massive range of foods available to us in these modern times, we are often consuming empty calories filled with sugar and additives, those foods marketed to children are particularly guilty.

So instead of reaching for the freezer section at my local store I reach for my blender and whip up a batch of probiotic popsicles, chased down with an energy bar packed with natural sweetness and a good dose of omegas.  If making popsicles is a bit of a fuss these recipes make delicious smoothies too.

Probiotic Strawberry Popsicles

  •  2 cups of chopped strawberries (a great way to use some softer or imperfect fruits)
  • ½ cup of milk kefir (a probiotic drink thinner than yogurt)
  • 1 tablespoon of raw honey

Blend all of the ingredients together and pour into molds or straight into a glass.  The kefir helps build gut flora which builds immunity and health in the body.  It has a tart taste so a little raw honey (which helps protect against seasonal allergies) is a great addition.

Peaceable Home: Healthy Frozen Treats

Fruits of the Forest Popsicles with  Vanilla Yogurt

  • 2 cups of mixed berries (blackberries, blueberries, raspberries etc)
  • ½ cup of spinach
  • 1 tablespoon of raw honey or 2 medjool dates

For yogurt topping:

  • ½ cup of plain yogurt
  • ½ – 1 teaspoon of pure vanilla extract

Blend the popsicle ingredients together and set aside.  Mix the yoghurt and vanilla in a bowl and then add in layers with the fruit smoothie to your popsicle molds.  This gives a visual interest as well as a delicious layer of probiotics to soothe and cool hot tummies.  Alternatively serve as a smoothie with a delicious yogurt dollop on top.

I hope that you give these recipes a try, enjoy and stay cool!


Summer Science: Alka-Seltzer Rockets

By Mariah Bruehl,

Alka-Seltzer Rockets

Originally published as a part of the first annual Alphabet Glue Summer Science Special, this project has gotten great feedback from families looking for some simple and science-centric summer fun. Alka-Seltzer rockets might very well be the classic science experiment.  Incredibly easy to put together and launch, these diminutive rockets are good entertainment with tons of potential for the type of trial and error experimentation that makes an excellent first foray into the field of physics.

This link will take you to a downloadable PDF file with experiment instructions, printable templates for rocket decorations, and a leveled book list filled with great titles for reading up on all things rockets.

Alka-Seltzer Rockets

A quick note about materials:
In the era of digital everything, film canisters like the type used here are increasingly difficult to find. For this reason, science supply and teacher supply shops will often sell canisters just for this type of experiment.  We got ours from Steve Spangler Science (www.stevespangler.com).


Making Quick Pickles: A Summertime Adventure

By Mariah Bruehl,

Making Quick Pickles

We are a family that loves pickles and there is nothing like having them homemade and  fresh from the garden! Heather of Poppy Haus is with us today to share a lovely recipe for making a quick batch…

We are lucky to live in a part of California where the farmlands meet the ocean, and you can lose yourself in the rolling hills peppered with wild dill.  On a recent  sunny summer day, we took a drive down a winding back road near the town of Tomales, and found a little creek with blackberry bushes and a wild dill grove.  My boys worked together to clip some blooms to bring back home for a day of pickling cucumbers.

Making Quick Pickles

I have the apparatus to do home canning, but with young kids, I prefer refrigerator pickling, which takes little time or skill, and yields a nice, crunchy pickle slice.  You just have to make small batches, and eat them within a few weeks, which is is no problem for my family.  If you can’t find wild dill growing in your area, it’s in season now and readily available at most grocery stores and farmer’s markets. Here’s the recipe:

Making Quick Pickles

 Quick Dill Sandwich Pickles

  • 3 pounds small pickler cucumbers (Kirby or Liberty)
  • 3 cups white distilled vinegar
  • 3 cups water
  • ¼ cup pickling salt (fine)
  • 3 tablespoons pickling spice (a blend of bay leaf, allspice, mustard seed)
  • 4 fresh dill heads
  • 4 garlic cloves, peeled (1 per jar)
  • 1 teaspoon dill seed per jar (4 teaspoons total)

1. Hot wash and dry 4 pint sized wide mouth jars and lids

(I use Ball’s plastic storage caps for refrigerator pickles)

Making Quick Pickles

 2. Wash and slice the cucumbers to about .5cm thick.

3. Put the pickling spice in a layer of cheese cloth, and tie into a pouch with bakers twine.

 4. In a large pot, combine vinegar, water, salt, and spice pouch. Bring to a simmer.

Making Quick Pickles

 5. Arrange jars on counter and place dill heads, garlic, and dill seeds to each.

 6. Pack the cucumber slices firmly into the jars.

Making Quick Pickles

 7. Pour the brine into the jar, leaving approximately ½ inch head space.

 8. Tap jars gently on countertop to dislodge any trapped air bubbles.

 9. Apply caps and let jars cool.

 10. When they’ve returned to room temperature, place jars in refrigerator. Let them sit for a day before eating.

Making Quick Pickles

10 Ways to Beat Summer Boredom

By Mariah Bruehl,

Ten Ways to Beat Summer Boredom

Randi from Swoon is with us today with a lovely list of activities that we can share with our children during these precious summer months…

Having the children at home during the summer is a special treat, but I think we can all admit that certain days are more challenging than others. When boredom hits and the children start to complain, or worse yet, begin to get into trouble, it’s a great idea to have a list of new activities up your sleeve. We’ve been out of school for about a month now here and I’m starting the hear the familiar proclamations of “there’s nothing to do!” and “can I just watch more TV?” I came up with a list of new to us activities recently that I can’t wait to try. I thought I would share them here, because chances are you’ve hit the same point in your house. All of these activities can be done by toddlers and involve things you probably have in your house right now. Super easy, right?

10 Ways to Beat Summer Boredom

1. Paint with Water. Yes, you read that right. Send them outside with containers of water and an assortment of brushes and let them have at it!  Paint on the porch, the sidewalk, and the outdoor toys.This can also be done on a chalkboard. {Photo credit}

2. Pencil Eraser Stamping. Press the bottom of a pencil eraser into a stamp pad and use to make all sorts of art. You can make animals shapes, greeting cards or your own wrapping paper. {Photo credit}

3. Play with your food. Make lunch or snack time fun by making faces, animals, or shapes out of your food. {Photo credit}

4. Mr. Printables. Got a printer and some paper? Visit the Mr. Printables website and browse all of the amazing and free printable projects, like these clever bird finger puppets.

5. Make some Land Art. Gather natural materials from your yard or on a family walk. Use them to make fun designs on the ground. Find this photo and more inspiration here.

10 Ways to Beat Summer Boredom

6. Set up a Miniature Scene. Grab a box or container and a few of your child’s favorite animals or small toys and set up a little scene. Make icebergs by freezing bowls of water and adding rocks for a North Pole scene. Or, use dried beans to make an interactive Construction Site scene.

7. Raid the Recycling Bin. A quick internet search will yield hundreds of ideas for cardboard and other things in your recycle bin. I love the simplicity of these hilarious monster feet-such a genius idea!

10 Ways to Beat Summer Boredom

8. Grape and Toothpick Sculptures. How fun! You could also try using wooden skewers instead of toothpicks to make larger structures. The perfect just-before-snack activity.

9. Paint Rocks. Set up a workstation with newspaper, a pile of rocks, and some acrylic paint and painting supplies.

10. Practice Your Letters. Make your own simple letter activity using a shallow tray or box and salt. Find the instructions here.

Scissor Practice for Preschoolers

By Mariah Bruehl,

Scissor Practice for Preschoolers

If an activity is a good developmental fit for a child it becomes evident in the amount of time he spends on it. Often a child will want to repeat the activity over and over again until it is fully mastered. There is something magical about finding the just right activity for a child that is a perfect match for her intrinsic desire to master developmental milestones.

Scissor practice activities for preschoolers provides a glimpse into what this magic can look like… For many preschoolers, practice with scissors is the perfect activity at the perfect time in their development, as they have an internal drive to master the skill.

The good news about scissor cutting activities is that they are easy to prepare and children often spend a long period of time focused on developing and perfecting their new found skill.

For a special three-year-old in my life, I simply cut colorful strips of paper and drew lines for cutting. It is also nice to include a small, bucket, basket, or bowl for the cuttings. You will be amazed at how careful your preschooler will be about putting her cuttings all in one place. They take great pride in seeing their accomplishment!

Scissor Practice for Preschoolers

Scissor Recommendations…

More Scissor Practice Inspiration…