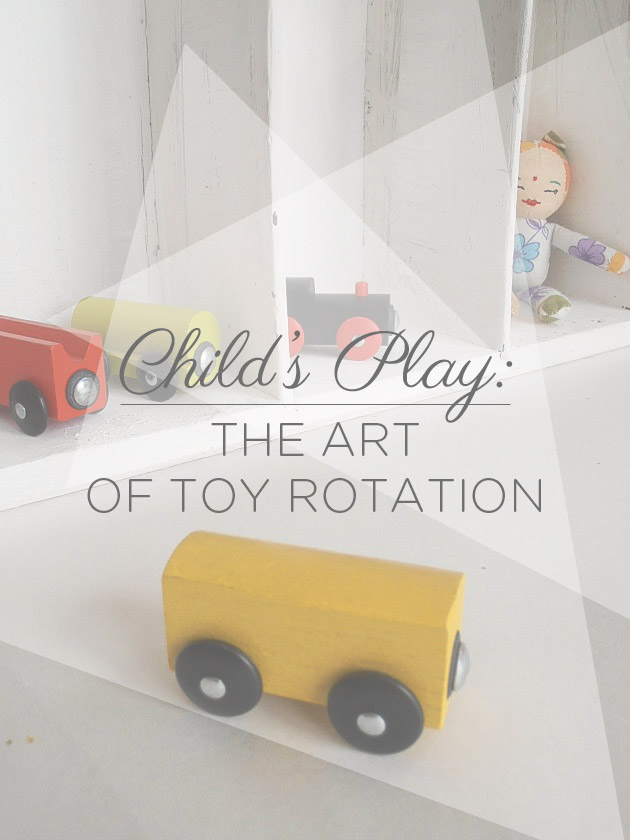
Child’s Play: The Art of Toy Rotation

By Mariah Bruehl,

Child's Play: The Art of Toy Rotation

An avalanche of toys invites emotional disconnect and a sense of overwhelm.

– Dr. Kim John Payne

To rotate: to replace, usually according to a schedule or plan.

Rotating is one of the easiest ways to deal with toy overload and is hands down my favorite. In my previous posts I mentioned it already, but today let’s take a closer look. You will see it’s no rocket science as we go through 8 easy steps.

Foremost, let me give you a list of the main reasons you will love it:

  1. Inventiveness and fantasy blooms
  2. Clean up time becomes a breeze
  3. Less toys out equals more and deeper engagement
  4. Siblings fight less
  5. Everyday objects are reinvented and turned into toys
  6. Overstimulation is easier to avoid
  7. Children learn to play on their own
  8. Toys are used in new ways
  9. Teaches independence
  10. You are better prepared for birthdays and holidays
Child's Play: The Art of Toy Rotation

One evening after my son’s second birthday I looked around the living room and felt slightly uncomfortable. The room is our main play area where he has a long shelf and two drawers for his toys. Nonetheless, trucks and trains were scattered everywhere, taking up more and more floor space. On opening a drawer, heaps of toys, untouched for weeks jumped up at me. I took a deep breath and instead of some well deserved “me time,” I immediately transported some of it to the basement.

Months passed and although we were still happy with this basic approach I realized that in order to fully enjoy all the amazing benefits I could take this to the next level.

Let me explain how it is both simple and effective:

To make it easier to understand, we will prepare 4 boxes of toys which you can rotate every 2 weeks. I encourage you to customize this method until it suits you and your family’s lifestyle. You can try with only 3 boxes, or you can rotate more frequently. If you have more children you can do mixed or different boxes per child.

Child's Play: The Art of Toy Rotation


The steps are as follows:


Step 1: Corral

Put all of the toys in one room If this sounds too overwhelming, go room by room through all the steps


Step 2: Decide

Decide what to keep and what to get rid of? No need to rotate that 3 legged horse or incomplete puzzle

What can be left out permanently (Lego, certain fave toys)?


Step 3: Divide

Divide all the “rotating” toys into 3 main categories:

  1. Thinking toys: they target cognitive development and fine motor development (puzzles, board games)
  2. Moving toys: they target gross motor movements (balls, cars)
  3. Pretending toys: they target social/emotional development and language development (dolls, Lego)

*You can find more great info on these categories here.


Step 4: Record

Record the name of each toy/or set by category. Preferably each category on a different piece of paper, leaving plenty of space for notes and ideas. As you wrap up a 2 week period you can jot down your remarks, which toys they played with and what they are into at the moment. Taking stock will not only provide you with valuable information for when you go shopping for presents, you will also have a wonderful notebook full of memories at the end of the year.


Step 5: Form

Form four groups in each category. Try to make each group equally engaging. This step will show you were there is lack or excess so don’t forget to jot down your insights.

Hint: you can even show it to grandparents/aunts to help them decide what is needed and what not. Xmas is not that far away…


Step 6: Prepare

Prepare four boxes and put one group of every category in them. This way you will have in each rotation some thinking toys, some moving toys and some pretending toys.


Step 7: Store

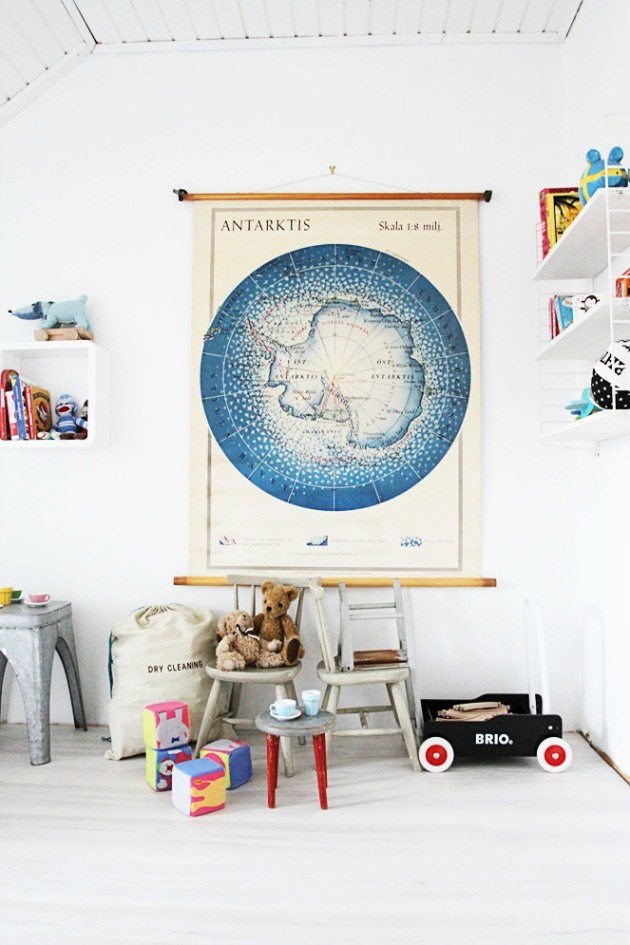
Store the three out of sight boxes. Be aware that easy access is key if you want to keep up the good habit—garage, playroom or under your bed doesn’t really matter as long as your little ones can’t reach them.
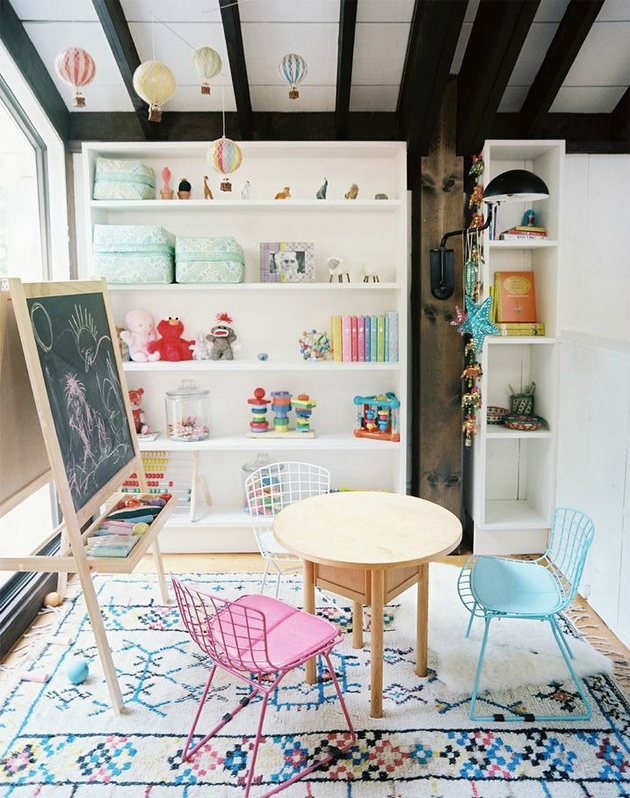
 

Step 7: Display

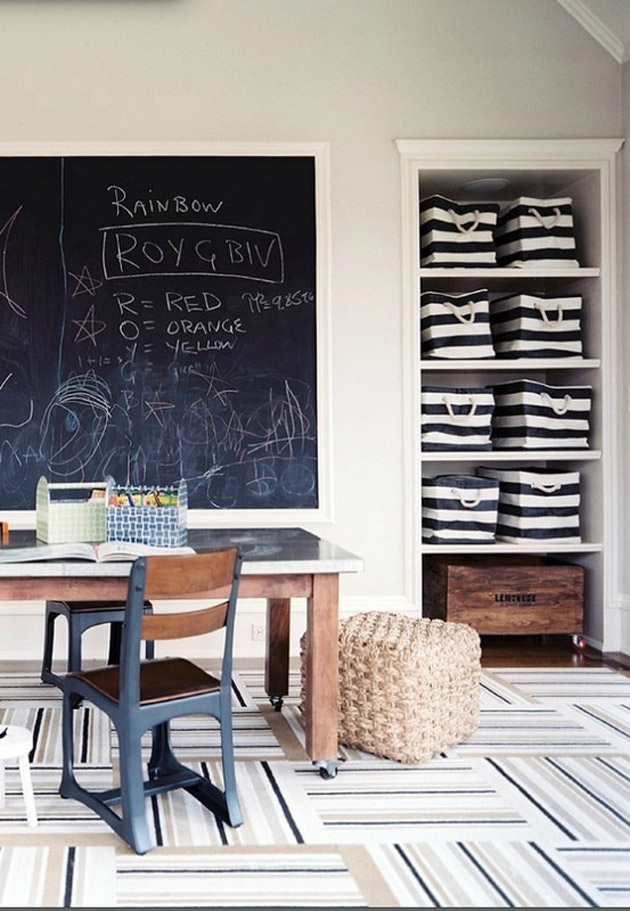
Display the toys from the left out box as welcoming and exciting as you can in baskets and on their shelves. Spice it up with their artwork and books and tad-ah(!) you are set for 2 weeks!


Step 8: Rotate

Change out toys every two weeks.

Child's Play: The Art of Toy Organization


If you’d like you can write down 5 toys that you noticed your children haven’t played with for a while in the comments below. Promise me, this evening when you clear away the toys, to put those five toys neatly out of reach. Remember this is exactly how I started!

Also, here are a few helpful links about toy rotation from around the web:


Try One of Our Workshops…

[ubergrid id=24468]

Peaceable Home: Aromatherapy Pillow Spray

By Mariah Bruehl,

Aromatherapy Pillow Spray

After the expansion of summer, with it’s busyness, activity and action, it seems as natural as breathing that Fall should bring us to a state of looking inward once more.  As I begin to contemplate darker nights and shorter days I naturally seek comfort in routines and familiar rhythms that harmonize our days and nights.

The first shift that I notice, as we transition from our free wheeling summer to a more structured back-to-school rhythm, is the return of our bedtime routine.  As the nights draw in it feels natural to linger a little, take more time over our bedtime rituals and take pleasure in the snuggles and stories that we all crave and love.

I fell in love with essential oils a decade before we began our family, so it has been very natural for me to incorporate them into our hearth and home.  Even when my boys were babies I noticed the benefits a drop of chamomile or lavender could bring, a seemingly tiny alternation that could have profound affects.  Something I began to incorporate into our night time routine some years ago was an aromatherapy pillow spray, also known at our house as a ‘fairy spray’.

Being a lover of the magical wee folk my son was excited to spray his room and pillow each night with a scented mist that let the little people know he wanted them to visit his dreams.  Of course it didn’t hurt that the oil combinations were those designed to help him nod gently off to sleep and, hopefully, stay that way all night.

Aromatherapy Pillow Spray


Though essential oils are no magic bullet for any issue, they certainly can help to support health and well being.  Our olfactory system is the greatest trigger for memory, so a scent can have a profound affect on our emotional state.  I’m sure we’ve all experienced that intense pull back to the past, as a waft of perfume or even a cleaning product triggers vivid recollections of childhood.

My hope is that for my children the scent of chamomile and lavender, orange and frankincense or sweet rose tinted geranium, will conjure cozy nights of warm blankets, loving snuggles and magical tales that weave into their dreams.  A simple spray, a scent that builds up a sense of place over time, can help to support a child in knowing they are truly safe and can rest peacefully.

Different combinations of oils will have different outcomes so choose a recipe that you think will be a good match for your child.  If in doubt, allow them to smell two or three oils and choose the one they prefer, after all it’s their pillow!  Here are a few recipes you might wish to try.

Aromatherapy Pillow Spray

For each of these I use a 100ml (about 3.5 oz) spray bottle and I aim to use about 5-6 drops of essential oil in each mix.  This gives a fragrance without it being pungent or distracting.  As the oils sit in the water the scent will continue to build so you don’t need to worry about adding more oils as you go along.

Relaxation and Sleep Aid

  • Geranium 3 drops
  • Lavender 3 drops

Bad Dream Banisher

  • Lavender 2 drops
  • Chamomile 2 drops
  • Orange 1 drop

Anxiety Support

  • Bergamot 2 drops
  • Lavender 2 drops
  • Geranium 2 drops

Pillow sprays (or magical fairy sprays!) are a great way to introduce the benefits of aromatherapy to your child, bringing a sweet scent to bedtime and gentle support as they rest their heads each night.

If you are looking for more information on the benefits of aromatherapy for your child Aromatherapy for the Healthy Child, is a wonderful resource packed with information and ideas.


SaveSave

Gardening for Kids: Germinating Seeds

By Mariah Bruehl,

Gardening with Kids: Germinating Seeds

I love seeing all of the signs of spring popping up around the web from our friends in Australia! Kate from An Everyday Story is here to share some great tips on germinating seeds with the little gardeners in our lives.

It’s spring here in Australia. All around us the plants and trees are awakening from their winter slumber. The yellow wattle trees are in full bloom and the neighborhood is bursting with blossom trees in all shades of pink, white and brilliant red.

We’ve been spending a lot of time in the garden this last week; tending to our neglected little vegetable plot. Not much beats turning over soil, pulling weeds and spending time in the warm sun.

Gardening with Kids: Germinating Seeds germination3

My son Jack (4yrs) has been curious about how plants grow, he wanted to germinate some seeds.

So with a tiny greenhouse from the hardware store and mix of seeds left over from last season, Jack and Sarah (2yrs) planted their seeds. We planted corn, snow peas and sunflowers.

Gardening with Kids: Germinating Seeds

We talked about what seeds need to grow, why the roots grow down and the plant grows up. We also planted one snow pea seed in a glass jar with some wet cotton wool and placed them on the windowsill.

Everyday Jack checks his seed to see how it is growing. Having the seed in the glass jar means Jack and Sarah can see what is happening underneath the soil in their tiny greenhouse.

Gardening with Kids: Germinating Seeds

First we noticed the seed swelling, then a small dot appeared on the seed. The following day a tiny root appeared. Soon a little green plant emerged from the seed.

If you’re heading out into the garden to plant some seeds with your little ones, I really recommend germinating a couple of seeds in a glass jar. While the seeds sit hidden in the soil, the glass jar gives the child a little window into what is happening, maintaining their interest in the project for longer.

Gardening with Kids: Germinating Seeds

We are looking forward to when our seedlings pop through the soil and transplanting them into the vegetable garden. I do really love gardening with children; plants, especially vegetables, require long term care while providing wonderful hands-on learning experiences along the way.

And at the end of all that hard work and care, they will have some delicious vegetables to harvest and eat. That is always the most exciting part.


10 Books That Inspire Kids to Write (+ writing paper printables)

By Mariah Bruehl,

10 Books That Inspire Kids to Write (+ writing paper printables)

Writing is one of the most important skills for children to learn and feel confident about. Whatever passions, interests, or career paths they may choose, the ability to communicate through the written word will be at the center of all they do.

It is for this reason that our children should have plenty of positive experiences with writing outside of school. It should be a medium that they dabble in, experiment with, try on for size, and utilize as a creative outlet.

I love to use picture books as inspiration for writing activities. As children read they become so involved in the characters and the story that it creates a great entry point for introducing different types of writing.

Here are some of my favorite children’s books to use prompts for writing activities…

  • My Five Senses by Aliki – A great way to encourage children to use descriptive language, incorporating how objects and people in their writing look, smell, feel, sound, and taste.
  • Zoom by Itsvan Banyai – An amazing wordless book that exemplifies that there is always more to things than meets the eye. This book can be used to demonstrate to children that the more descriptive language they use in their writing the more vivid it becomes. Encourage the budding writers in your life to “Zoom-In” on their writing by adding, even the smallest, details.
  • Wallace’s Lists by Barbara Bottner & Gerald Kruglik – A wonderful book that inspires list writing of all kinds. Print out this list paper printable and have it handy after finishing the story. You will be amazed by the lists you see popping up around the house.
  • My Map Book by Sara Fanelli – A lovely book full of creative maps. Making a heart map is a great way to generate lots of ideas for topics to write about. The best writing comes when we write about the things we love most.
  • Wilfred Gordon McDonald Partridge by Mem Fox – A heartwarming book that captures the importance of storytelling from one generation to the next. Encourage your child to collect a box of mementos and use each item as a story-starter.
  • The Boy Who Loved Words by Roni Schotter – Words are powerful, lyrical, and can make magic. The Boy Who Loved Words brings this notion to life for children in a fun and playful way. Make a list of you favorite words and incorporate them into your writing.
  • Nothing Ever Happens on 90th Street by Roni Schotter – Inspires children to remember that every day is filled with small moments that can be captured through writing and transformed into great stories.
  • The Best Story by Eileen Spinelli – A great reminder to children that their writing should come from the heart and be a medium for self-expression.


* This post contains affiliate links.


SaveSave

Backyard Science: The Colors of Nature (video activity + printable)

By Mariah Bruehl,

When we slow down and and take the time to focus on simply noticing, the natural world comes alive with inspiration. The Colors Of Nature activity encourages us to slow down with the children in our lives and take in all of beautiful color variations and subtle nuances that nature has to offer.

Simply print out the Color Wheel printable, enjoy the video below with your child, and spend time outdoors with the budding young scientist in your life!


Printables…

Books to Inspire…

Patterns in Nature Scavenger Hunt (+ printable)

By Mariah Bruehl,

“Come forth into the light of things, let nature be your teacher.”
– William Wordsworth

As humans, we tend to look for similarities amongst the things in our world.  Perhaps it is a way to help us make sense of such diversity.  Helps us understand how everything is connected and where we fit in.  We love to find patterns, don’t we?  Children are no different.

Playful Learning’s family workshop, Backyard Science Investigations, beautifully explains the stages of engaging with nature that children experience and how important it is for children to be able to make connections between the things in their world.   Patterns are everywhere in nature.  They inspire curiosity and lead to scientific, mathematical and artistic investigations from the very basic to the advanced.  A variety of patterns can be found in the nature right in your own backyard, waiting to be explored.

Finding Patterns in Nature

If you would like to explore nature’s patterns with your child, reading some books together is a great place to start.  Here are some of my favorites:

Once your child has had an introduction to different types of patterns, head outside with this scavenger hunt (see below) and see what you can find.  Note: I have provided two different types of spirals here.  For young children who will just want to explore spirals in general.


You may also like to bring your camera along to capture the specific examples you and your child find.  Your photos can then serve as inspiration for further exploration, art projects, or an entry in a nature journal.

Finding Patterns in Nature

Just be warned, once you start noticing patterns it’s hard to stop!


Making Mandala Art with Kids

By Mariah Bruehl,

Over the last few months I have been exploring creating art with a circle formation or mandala art. Creating mandalas is a delightful, beautiful and easy activity which you can do almost anywhere and at anytime. All you need is a small collection of materials – I prefer natural found objects such as shells, pine cones, driftwood and sea glass. You can use any collection you have be it coins, sticky notes, hair clips, or cutlery!

How to Make Mandala Art

How to make Mandala Art:

  1. Start your circle in an area which will allow your art work to grow, such as a beach, a field, a grassy knoll or a space of floor at home.
  2. Once you have determined your area, gather your materials nearby so you have them in an easily assessable space.
  3. Choose the central piece for your art work and sit this in the center of your working area.  For all of our creations we  tried to select a large item or an item we only had one of to be the central piece, such as a large price of sea sponge or drift wood.
  4. Choose another collection and form a ring around the central piece much like a tree ring.  This may be a circle of shells surrounding the central coral piece, or pine cones surrounding the large flower.  The main focus here is to make sure you make a complete ring around the first piece, therefore the inner piece is completely contained inside the outer circle.
  5. Continue this pattern adding new circles made out of different items until you believe your piece is complete.  A minimum of 5 rings is usually required for visual impact.
  6. Take a photo so that you remember your mandala and you can share it with family and friends through email or Instagram. If sharing on Instagram, you can join many others who create and share their mandala art on Mondays by using the hashtag  #mandalamonday .

How to Make Mandala Art

For little ones who enjoy creating Mandalas here are a few additional things we’ve tried (or would like to try!)…

  • After creating a few Mandalas, we created one using fine liners and water color paints.
  • We read stories from books we had gathered at the library.  The Mandala Book was the first book I shared with my littles before we began creating.
  • There are some adorable coloring in books available such as Everyone’s Mandala Colouring Book , World Mandalas, and the soon to be released Mandala Colouring Book (this one is on my wish list).
  • Create a mandala to be a permanent piece of art and glue to a canvas.
  • Use man-made collections to create mandalas such as toy cars, marbles, or buttons. The possibilities are limited only by your imagination.

Enjoy!


Raising a Boy Who Loves to Write

By Mariah Bruehl,

How to Raise Boys Who Love to Write

Becky from a Sweet Hot Mess is with us today to share invaluable tips for inspiring boys (+girls) to develop a love of writing.

As discussed in my previous post, How to Raise a Boy who Loves to Read, one of our greatest challenges as parents is to create an environment that fosters literacy and a love of learning.  More recently, I have struggled with how to create a love of writing in my children when the whole world around them is so geared towards technology – from their keyboard skills, to apps, to video games.

The first thing I had to do was wrap my head around the idea that reading and especially writing are not fundamental skill sets. Centuries upon centuries of cultures have survived and even thrived with minimal literacy, if any at all.  Once I wrapped my brain around the idea that while language is a skill rendered effective through the immersion process, writing is not.  Writing is a learned skill and how we approach our children as we teach this skill will vary greatly depending on their gender and/or personal temperament.

How to Raise Boys Who Love to Write

Our boys won’t want to write if writing hurts.  So the first thing you need to consider is the comfort of your son, which means you need to find the right tools.  My basic rule is this – buy what works and don’t stop buying until you find what works.  I first tried every little pencil grip we could get our hands on, from the rubber triangle to the weird ergonomic blob.  This may work for your son but did not work for mine.  So I looked further and finally turned to the idea that there might be better pencils.  We had nominal success with the short pencils from Handwriting Without Tears, the main idea behind them being that they are smaller and easier to handle (I highly recommend these for most children).

How to Raise Boys Who Love to Write

Strangely enough, our next choice was the opposite of the small pencils and when I found the long, chubby triangle grip of the Ticonderoga pencils (found HERE on Amazon),  we had instant success.  They’re huge, but don’t hurt.

How to Raise Boys Who Love to Write

Our second was to try to find writing aids or programs that would interest him.  Fair warning, these aids only worked for so long and then my son quickly got bored.  But they are a good jumping off point.  I would highly recommend Handwriting Without Tears for the basics.  And for a little bit of change of pace, I would also recommend Draw Write Now, which allows for the kids to practice basic drawing and writing skills.  We even just use the workbooks without the themed instruction books and let the kids choose their own stories to write and what pictures they will draw to go with them.

How to Raise Boys Who Love to Write

So now that your son is comfortable holding a pencil, has mastered the basics of handwriting and has good line control – what next?  HE WILL GET BORED.  This is where you have to get creative as a parent.  Here are some of the ideas that we have used that help my son write more freely without getting overwhelmed with the chore of it all:

  • Create a Letter Writing Station.  I borrowed this idea from Randi over at Swoon (click HERE to see the original post on Playful Learning) and it has been a great success in our home.  My son likes to sit down and write notes to his grandparents, cousins and friends.  Sometimes he emails them, sometimes he sends them snail mail.  I recently added Thank You notes, so that as soon as he needed to, Luke could go to his kit and write a quick thank you to his friends and family.  To help streamline this process in the beginning, I created a form letter that lets the kids fill in the blanks as they go and does not overwhelm them with the idea of creating the format from scratch.

How to Raise Boys Who Love to Write

  • We also like to create Family Newspapers, Movie Posters and screenplays.  My kids are very interested in the behind the scenes efforts of filmmakers and my son loves to sit down and start writing his own scenes.  He will follow this up by creating the poster and the taglines for the film he dreams about in his head.  Family Newspapers are fun as they allow the kids to journal a bit more and to draw lots of pictures and captions to go along with the short paragraphs.

  • Allot a certain amount of computer time and even start a blog for your son (or daughter).  My son loves to write long, complicated stories with many small chapters.  I let him type them out and print them, illustrating them at will.  When he blogs, I allow him to upload his favorite pictures and write his descriptions – which basically turns into a great journal we can print for him someday.  This step is important.  Not only are most state’s standards focusing less on handwriting and more on keyboard skills, this also allows our sons to type and forgo the uncomfortable and sometimes anxiety producing process of handwriting.  With a keyboard, they will be more apt to focus on the story, spelling and sentence structure and less on whether their hand hurts or how many eraser crumbs are crowding the page in front of them.

  • Last, but not the least, I created comic books strips for my son after I realized he adored Calvin and Hobbes.  Sometimes I will just give him a stack of templates and let him figure it out on his own and other times I will direct more and ask him to draw our road trip or a scene from his favorite movie or book.  And since I take away all of our normal rules of grammar and capitalization, these little comic books can become a liberating space to create and grow our children’s imaginations.  And if your child needs a little extra inspiration to get used to the format, get them a paper and let them read the comic strips and see what strikes their fancy – imitation can be the highest form of flattery.

My comic strip templates are the most popular download on my blog…and because Playful Learning is such a wonderful resource for so many passionate and wonderful parents, I designed a few more templates just for you.  I even added a few extra add-on pages, which are great for the kids to color and cut out and glue on for themselves.  Click on the photo below to download and print comic strips and letter forms of your own!

How to Raise Boys Who Love to Write

Learning to succinctly articulate one’s thoughts and arguments is one of the greatest skills we can develop in this life.  To do so in writing and to love to do so – is an even greater skill set.  As parents, our goal is to create an environment rich with opportunity and variety.  Consider sometimes stepping back and releasing the anxiety of this task – for you and for your child – as you learn to focus on the love of the story and less on the skills of holding a pen to paper.  And for the more serious moments, where learning has to be done, just make sure you sprinkle enough variety and fun into your routine, and writing will soon become a one of your child’s favorite pastimes.

How to Raise Boys Who Love to Write

The best part of my week are those quiet afternoons when I am walking down the hall and glimpse into my son’s room and notice he is immersed in a journal, his pictures and words and imagination covering the pages.  I try to walk on unnoticed, to allow the moment to continue, a deep sigh of relief escapes me as I know my love of the written language has been handed down, the baton has been passed on and is now grasped tightly in my son’s now adept hands.  I hope you have many of those moments yourself.


Peaceable Home: Herbal Oat Bath

By Mariah Bruehl,

Peaceable Home: Herbal Oat Bath

Emma from 95 Acres of Sky is with us today to share a lovely way for families to transition in to a new season—nurturing ourselves and loved ones inside and out.

After a fun (and sometimes frenetic) summer I’m beginning to notice the subtle shift that indicates the season is changing. Perhaps it is a cool morning with a mist hanging over the pasture, or reaching for a blanket when I’m snuggled on the sofa for an hour of quiet after chores are done.  I’m beginning to acknowledge that summer is shifting slowly into something else and making preparations for a new season.

Part of that preparation is to repair some of the neglect my body has undergone during the busy rush of summer!  I notice that my skin and hair are feeling the effects of a season of sun, swimming and sweating, I’m ready for a little TLC and can’t help thinking the little people in my life would benefit too.

As the nights are drawing in we are beginning to trade brisk showers as the sun sets for more relaxing baths and a return to our bedtime routine.  Though it will be a few weeks yet before we really notice the sun dipping low before bedtime, we can begin to enjoy some of the relaxing rituals that we are too busy for when the heat beats down.  One of those is a soothing oat bath with scented herbs to uplift and relax.

Peaceable Home: Herbal Oat Bath

Oats, though ubiquitous in the kitchen cupboards of the land,  are a powerhouse of nutrition inside the body and out.  As well as being a filling (and gluten free) food, they have equal power to soften and soothe the skin.  I’ve used them for years as a replacement for bath products that invariably set my skin to itching, drying it out regardless of the promises on the bottle.  Instead I mix oats and herbs together to make a milky ‘tea’ in my bath that replenishes and feeds my skin leaving it soft and supple without the need for a moisturizer.

Since I had my children I became even more concerned with what goes on their skin, after it is our largest organ and the one most likely to come in for abuse!  Even products that purport to be for children can be filled with a host of chemicals that you’d worry about putting down your drain let alone on your child’s skin.  Leave it to nature to have the perfect solution.

The joy of these oat bags is that they use something that you are likely to have already in your cupboard and with the addition of your favorite herb you are done!

Peaceable Home: Herbal Oat Bath

 Recipe

  • 1 cup of rolled oats (not instant!)
  • 1-2 tablespoons of dried herb
  • 4 x 6 inch square of cheese cloth

Add the herbs to your oats and pop about 2 tablespoons in the middle of your cheesecloth spare, tie it up and that’s it!  A cup of oats will make about 4 bags and I usually put two in each bath.  For a baby or child under 2 just one bag will be enough.   I like to pop it in as the bath is running then encourage the boys to squeeze out the ‘milk’ as the oats warm and soak.   Rubbing the bag across the skin adds extra moisture and even helps to exfoliate dead cells.

Peaceable Home: Herbal Oat Bath

Here are some of my favorite herbal bath additions:

  • Lavender & Chamomile – for soothing and relaxing, great before bedtime.
  • Rose buds/petals – to feel pampered and soothed, wonderful for relieving headaches.
  • Nettle (dried) – a great addition for anyone suffering from eczema or skin allergies.
  • Rosemary – but only if you don’t want to sleep for a few hours!
  • Lemon Balm – the perfect mood lifter after a tough day.

All of these herbs are readily available, you may even have some of them in your own garden.  I hope you enjoy a gentle transition as we move into fall, remember to look after yourself!


Making Math Fun: The Nifty Nines Trick

By Mariah Bruehl,

The Nifty Nines Trick

Annie from Alphabet Glue is with us to share a fun and easy trick for mastering those hard to memorize nines timetables…

Back in my days as an elementary school teacher, this was one of my favorite math tricks with which to wow the kiddos. It still kind of is. And it isn’t just a party trick; there is some actual math involved here, and for a kid needing to multiply a number by nine and feeling a little bit stuck, it can be a real confidence booster.

Here’s how it works:

Hold up both hands in front of you with your palms facing away, and pick an equation to solve that involves multiplying by nine. For example, 9 x 4. Starting from the pinky on your left hand, count up to the number that you are multiplying by (in this case, 4). Fold down the finger for the number you are multiplying by nine. Now look at your hands again. The fingers to the left of the finger that is folded down represent the tens place. The fingers to the right represent the ones. So, when multiplying 9 times 4, and folding down the fourth finger from the left, you will end up with three fingers to the left, and six to the right. The answer is 36.

The Nifty Nines Trick

Try this trick with any single digit number that you want to multiply by nine. Works like a charm every time!

Note about the photo: photos are a mirror image, so when you look at the picture, try to remember that the tens number will be equivalent to the fingers on your left in real life!